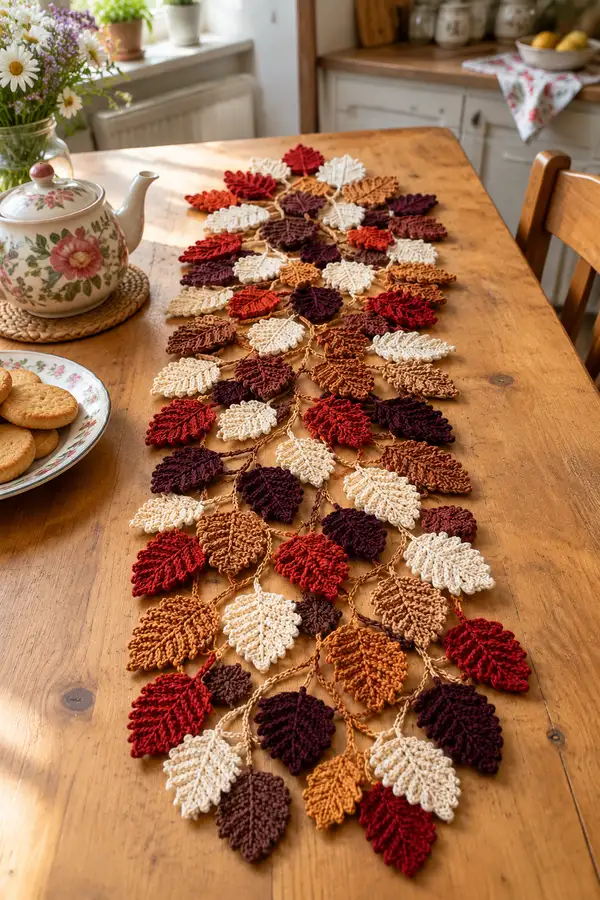
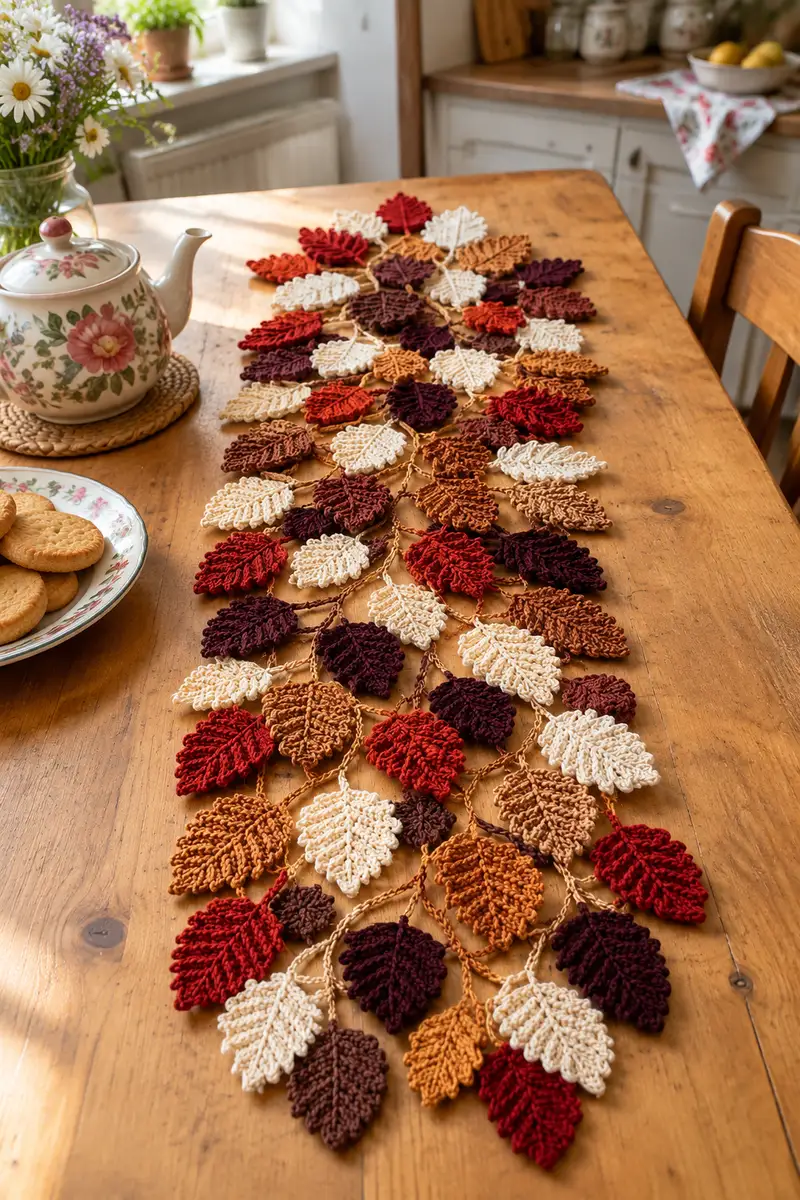
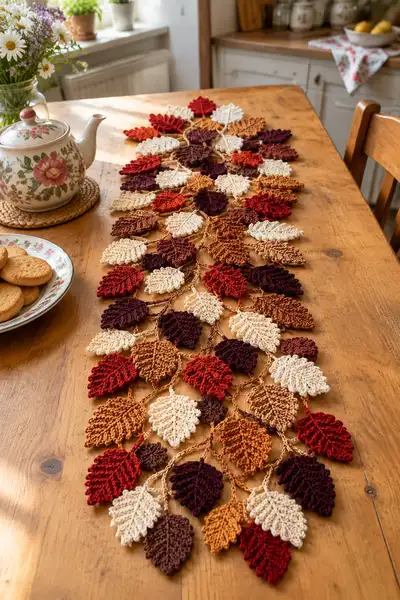
Create a warm, rustic table runner made from joined crochet leaves in autumn tones. This pattern teaches you how to crochet four sizes of textured leaves, make braided connector chains and assemble a long runner that drapes beautifully down a table. The finished piece showcases cream, rust, deep burgundy, mustard and brown leaves linked by slender stems, perfect as a seasonal centerpiece or gift.
Progress Tracker
0% Complete
— Overview :
Info :
This pattern is modular: you will crochet leaves in four sizes and join them with chained stems to create a runner. All leaves are worked flat (a turning chain counts as required), produced using textured stitches and post stitches for a central vein. Stitch counts are given for each row (listed as 'Round' for consistency with the pattern style). Make as many leaves as needed to reach your desired runner length—the sample runner uses 56 leaves in mixed sizes. Gauge is not critical but using the recommended hook and yarn will produce leaves roughly 8-9cm long for large leaves, 6-7cm for medium, 4.5-5.5cm for small and 3-4cm for tiny leaves.
— Notes on technique :
Info :
Work leaves flat on a longer chain foundation, then work back along the opposite side to close the leaf in one continuous piece. The 'central vein' is built with post stitches and raised half-double crochet ribs. For neat edges, use a consistent turning chain and try to maintain even tension. Place stitch markers at the start of each row where instructed.
— Colour Planning :
Info :
Select colours in warm autumn tones. Alternate shades to create depth—place lighter leaves near darker ones for contrast. The runner in the photo alternates cream, rust, burgundy, mustard and brown in a loosely repeating scheme.
— Large Leaf (make multiple) :
Round 1 :
Ch 15. Sc in 2nd ch from hook and in each ch across to last ch (14 sc), 3 sc in last ch; continue working down opposite side of foundation chain, sc in each ch back to first ch (14 sc). Total (31)
Round 2 :
Ch 1, turn. Sc in next 4 sts, inc in next st, sc in next 4 sts, inc in next st, sc in next 4 sts, inc in next st, sc in next 4 sts, inc in next st, sc in remaining sts. Total increases 4 -> New total (35)
Round 3 :
Ch 1, turn. Sc in each st across, placing 1 sc in each inc stitch (35)
Round 4 :
Ch 2 (counts as hdc), turn. Hdc in next 3 sts, (hdc, inc hdc in next st) repeat across to widen the body evenly, ending hdc in final st. Total (43)
Round 5 :
Ch 1, turn. Sc in next 6 sts, (sc, inc) x 6, sc in remaining sts. Total increases 6 -> (49)
Round 6 :
Ch 1, turn. Sc in each st across (49)
Round 7 :
Ch 2, turn. Work fpdc around next 2 sts, then bpdc around next 2 sts, creating a mild rib; continue alternating fpdc and bpdc across the row to establish textured ribs (49)
Info :
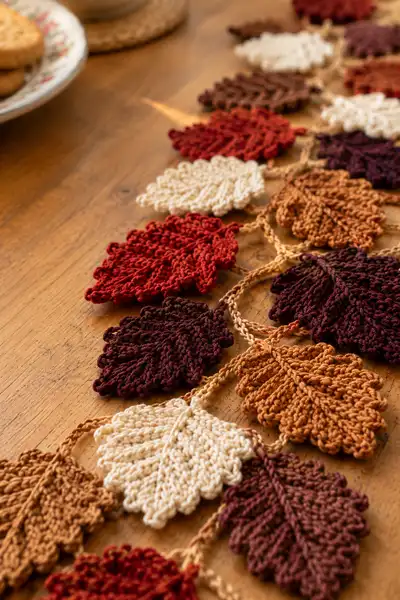
The first 7 rounds build width and create the start of the central vein. The fpdc and bpdc rows should be worked with consistent tension; these create the raised ribs seen in the leaf photo.
Round 8 :
Ch 1, turn. Sc in each st across (49)
Round 9 :
Ch 2, turn. Hdc in next 3 sts, inc hdc, hdc across center, inc hdc, hdc in last 3 sts (adds 2 increases) Total (51)
Round 10 :
Ch 1, turn. Sc in each st across (51)
Round 11 :
Ch 1, turn. (Sc 4, dec) x 8, sc remaining to shape toward tip (reduces 8) Total (43)
Info :
Begin shaping the point here by decreasing along the tip area while maintaining rib texture on the wider sections. Stuffing is not used for leaves—they remain flat. If you prefer slightly padded leaves, insert a very thin layer of batting and keep decreases slow so the leaf lays flat.
Round 12 :
Ch 2, turn. Hdc across (43)
Round 13 :
Ch 1, turn. Sc across (43)
Round 14 :
Ch 1, turn. (Sc 3, dec) x 8, sc remaining (reduces 8) Total (35)
Round 15 :
Ch 2, turn. Hdc across (35)
Round 16 :
Ch 1, turn. Sc across (35)
Round 17 :
Ch 1, turn. (Sc 2, dec) x 6, sc remaining (reduces 6) Total (29)
Round 18 :
Ch 2, turn. Hdc across (29)
Round 19 :
Ch 1, turn. Sc across (29)
Round 20 :
Ch 1, turn. (Sc 1, dec) x 6, sc remaining (reduces 6) Total (23)
Round 21 :
Ch 2, turn. Hdc across (23)
Round 22 :
Ch 1, turn. Sc across (23)
Round 23 :
Ch 1, turn. Dec across evenly: (dec x 5) and sc remaining (reduces 5) Total (18)
Round 24 :
Ch 1, turn. Sc across (18)
Round 25 :
Start final shaping: (dec x 4) then sc remaining to create a neat point Total (14)
Round 26 :
Sl st in next 2 sts across to create a tapered tip, fasten off leaving long tail for sewing. (12)
Info :
Weave the tail through the last 12 sts and pull tight to close the tip neatly, then weave the tail to the center back and secure. Use matching yarn to reduce visibility. At the base of the leaf (the wide end), leave a 15-20 cm tail to use as a stem when joining.
— Medium Leaf (make multiple) :
Round 1 :
Ch 13. Sc in 2nd ch from hook and each ch across to last ch (12 sc), 3 sc in last ch; sc along opposite side back to first ch (12 sc). Total (27)
Round 2 :
Ch 1, turn. Sc in next 3 sts, inc, sc in next 3 sts, inc, sc in next 3 sts, inc, sc in remaining sts. Total increases 3 -> (30)
Round 3 :
Ch 2, turn. Hdc across (30)
Round 4 :
Ch 1, turn. Sc in each st across (30)
Round 5 :
Ch 1, turn. Work a row of fpdc across 2 sts, bpdc across next 2 sts, alternating to create a small central rib (30)
Round 6 :
Ch 1, turn. Sc across (30)
Round 7 :
Ch 1, turn. (Sc 3, dec) x 6, sc remaining (reduces 6) Total (24)
Round 8 :
Ch 2, turn. Hdc across (24)
Round 9 :
Ch 1, turn. Sc across (24)
Round 10 :
Ch 1, turn. (Sc 2, dec) x 5, sc remaining (reduces 5) Total (19)
Info :
Medium leaves require fewer rows of texturing; keep fpdc and bpdc rows shallow so the rib remains proportional. Leave a 12-15 cm tail at the wide end for stem joining.
Round 11 :
Ch 1, turn. Sc across (19)
Round 12 :
Ch 1, turn. (Sc 1, dec) x 5, sc remaining (reduces 5) Total (14)
Round 13 :
Ch 2, turn. Hdc across (14)
Round 14 :
Sl st across next 4 sts to create a tapered point, fasten off leaving long tail to sew and for stem. (10)
Info :
Weave the tip tail through the final row and pull gently to close. For a slightly curled leaf, block with a small curve or steam lightly.
— Small Leaf (make several) :
Round 1 :
Ch 11. Sc in 2nd ch from hook and each ch across to last ch (10 sc), 3 sc in last ch; sc back along opposite side (10 sc). Total (23)
Round 2 :
Ch 1, turn. Sc in next 3 sts, inc, sc in next 3 sts, inc, sc remaining. Total increases 2 -> (25)
Round 3 :
Ch 1, turn. Sc across (25)
Round 4 :
Ch 1, turn. Work a short row of fpdc for a tiny raised rib across center (25)
Round 5 :
Ch 1, turn. (Sc 3, dec) x 5, sc remaining (reduces 5) Total (20)
Round 6 :
Ch 1, turn. Sc across (20)
Round 7 :
Ch 1, turn. (Sc 2, dec) x 4, sc remaining (reduces 4) Total (16)
Round 8 :
Sl st across next 4 sts, fasten off leaving tail for stem (12)
Info :
Small leaves are great fillers. Keep edges tidy and leave long tails on the wide end to create connected stems when joining.
— Tiny Leaf (make many) :
Round 1 :
Ch 9. Sc in 2nd ch from hook and across to last ch (8 sc), 3 sc in last ch; sc back along opposite side (8 sc). Total (19)
Round 2 :
Ch 1, turn. Sc in next 2 sts, inc, sc in next 2 sts, inc, sc remaining. Total increases 2 -> (21)
Round 3 :
Ch 1, turn. Sc across (21)
Round 4 :
Ch 1, turn. (Sc 2, dec) x 3, sc remaining (reduces 3) Total (18)
Round 5 :
Sl st across 4 sts, fasten off leaving short tail for joining (14)
Info :
Tiny leaves are quick and used in clusters. Use contrasting colours sparingly to avoid visual clutter. Leave tails long enough to stitch onto stems.
— Stem Chain and Connector (make many lengths) :
Round 1 :
Ch 40 (or desired length for a single connector). This will be the basic stem length between two leaf attachment points. (40)
Round 2 :
Ch 1, turn. Sc in 2nd ch from hook and across to end (39 sc). Fasten off leaving long tail for sewing to leaves. (39)
Info :
If you prefer a rope-like stem, make a 3-strand chain braid: create three long ch 40 strands, knot one end and braid loosely, then secure the end with a sl st and weave in ends. Braided stems give more weight and natural drape.
Round 4 :
For decorative twisted stems instead of straight chains, work a 'chain twist': ch 40, then sc in 3rd ch to create a spiralled cord—this requires practice and is optional. (40)
Info :
Always leave long tails on leaf bases; use those tails to tie or sew onto the stem chain. You can knot leaf tails around the chain and then secure with sew stitches for a rustic look.
— Joining Leaves to Stems (connectivity rounds) :
Info :
Layout your leaves on a flat surface following the photo pattern or your own arrangement. Place stems between leaves and pin in place with straight pins to preview spacing. Typical spacing in the sample is one stem link per 6-8 cm of runner length, grouping leaves in clusters of 2-4 along alternating sides.
Round 2 :
To attach a large leaf to a stem chain, thread the leaf's base tail through the chain loop and tie a half knot, then with a tapestry needle sew around the chain with the tail, working 6-8 stitches through the leaf base and chain to secure. Repeat for the opposite side leaf if symmetrical. Fasten off and weave tail inside leaf.
Round 3 :
Attach medium and small leaves in the same manner, staggering sides so the runner flows organically. For tiny leaves, sew with two small stitches to mimic twig attachments.
Info :
For a neater finish, pick up a strand of the stem colour and use small whip stitches around the leaf base to hide joins. If you want a more rustic look, leave the knots visible and trim tails short after securing.
— Assembly Pattern (overall runner layout) :
Info :
The sample runner alternates leaf sizes in a loosely repeating grid: L - M - S - T - M - L across the width and staggered along the length. Plan an overall length (e.g., table runner 120cm) and calculate how many leaf sets you need. The sample uses approximately 56 leaves and 28 connector stems for a 120cm runner.
Round 2 :
Lay out stems first, then position large leaves at focal points, medium and small between them, and finally tiny leaves to fill gaps and softens edges. Pin everything, then sew sequentially starting from one end so you can adjust tension as you go.
Info :
Join stems to stems by sewing chain ends together with matching yarn, or by sl st joining and knotting inside a leaf base if you prefer concealed joins. Keep joins flexible to allow the runner to drape naturally.
— Edge Finishing and Decorative Picots :
Round 1 :
Once leaves are joined, refine edges: work a lightweight picot border along any exposed leaf edges if desired. Using working colour, sl st into an edge st, ch 3, sl st in same st to form a picot, skip 2 sts, sl st in next st and repeat around any exposed edges to add a delicate scallop. Picot count varies by leaf size.
Info :
Picots are optional—use them sparingly on larger leaves to enhance dimensionality. For smaller leaves, a simple tidy sl st finish is sufficient.
Round 3 :
For an all-over joining border, make a final connecting chain along each side of the runner: ch 3, sc into next exposed leaf join, repeat to create a subtle border that helps the runner keep a straight edge. Fasten off and weave ends securely.
— Blocking & Final Touches :
Info :
Gently steam-block leaves to flatten and open rib details: pin leaves to a blocking mat in the desired shape and apply steam from a distance—do not press the iron down. Allow to dry completely. For a stiffened runner, brush a small amount of diluted fabric stiffener on the underside only.
Round 2 :
Final inspection: secure any loose joins with extra stitches. Trim stray fibres. Lay the runner on the table and smooth it into place—adjust the spacing of leaves slightly to create a natural, asymmetric flow.
Info :
Congratulations — your runner is complete! Take photos in natural light to show off the texture and warm colours.
This autumn leaf runner brings warmth and texture to any table—each leaf is a tiny work of art! The modular approach makes it a relaxing, creative weekend project where color planning and assembly are as rewarding as the stitching. Arrange leaves however you like, and enjoy the tactile ridges and delicate picots that make this runner feel handmade and special. 🧶🍂✨