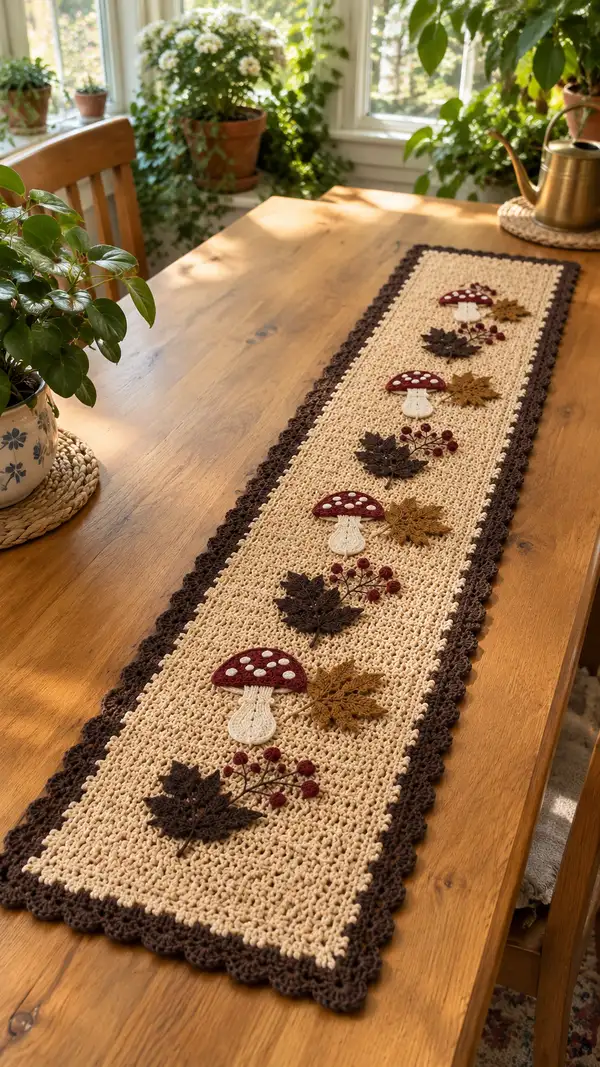
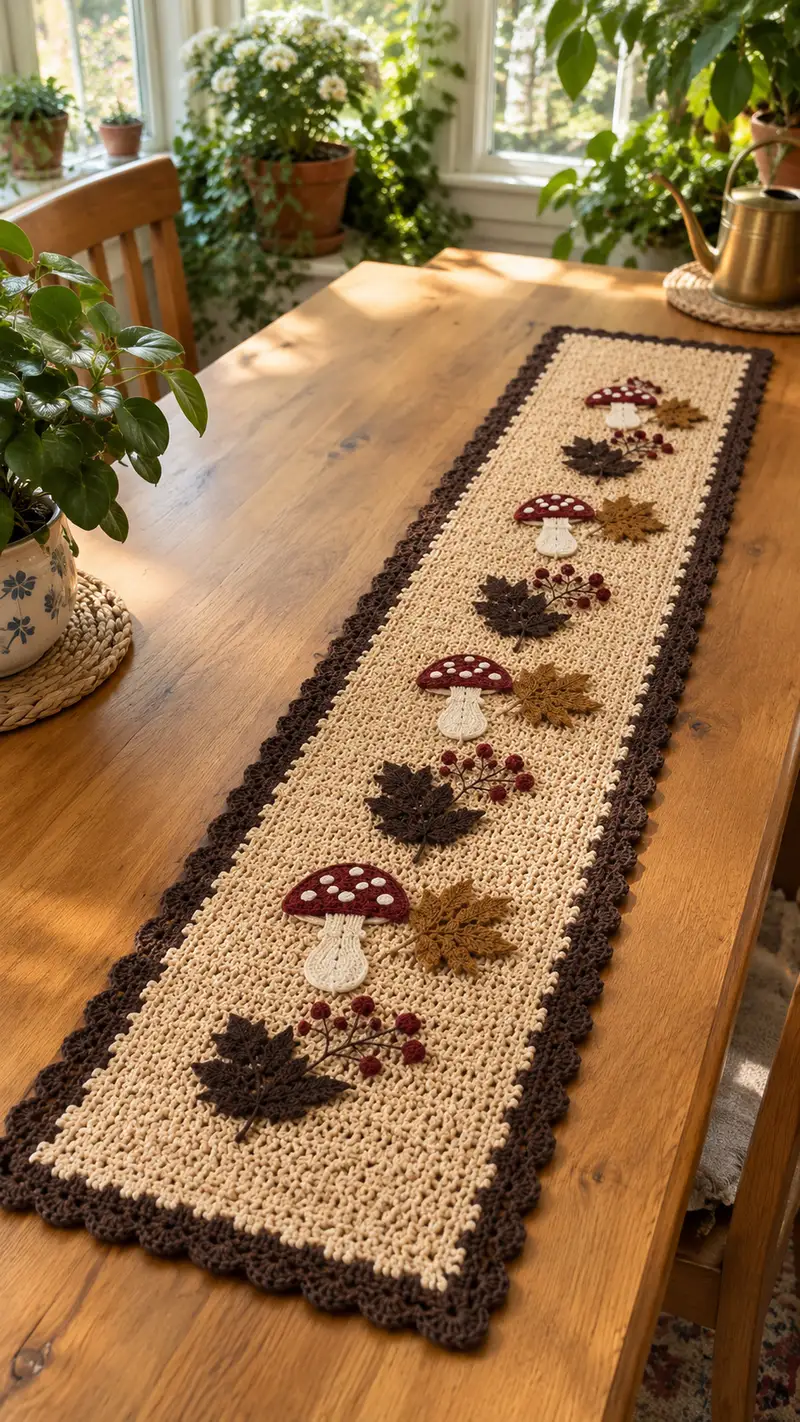
A warm, rustic table runner inspired by autumn woods, featuring textured linen-stitch center, scalloped chocolate border, and charming appliques: burgundy mushrooms, layered maple leaves and tiny berry clusters. Perfect for a fall table centerpiece or seasonal gift. The neutral beige background pairs beautifully with deep brown and rich reds for an inviting homemade touch.
Progress Tracker
0% Complete
— Center Panel :
Round 1 :
Chain 82 (foundation). This is your base row width; chain can be adjusted in multiples of 2 for a slightly wider or narrower runner (82 ch gives 41 repeat spaces across).
Round 2 :
Row 1 (RS): Sc in 2nd ch from hook, *ch 1, skip next ch, sc in next ch*; repeat across to end, turn. (41 sc, 40 ch-1 spaces) Count: 41 sc.
Round 3 :
Row 2 (WS): Ch 1 (does not count as stitch), sc in first sc, *ch 1, sc in next sc* across to end, turn. (41 sc)
Round 4-10 :
Continue linen/moss stitch: Ch 1, sc in first st, *ch 1, sc in next st* across, turn. Maintain 41 sc each row. Work rows carefully to keep edge neat. (Rows 3-9 maintain 41 sc)
Info :
Maintain consistent tension; place a marker in the first sc of each row to mark the right side. The linen stitch creates a woven look that suits the rustic theme.
Round 11-20 :
Work 10 more rows in linen stitch as established (Rows 10-19). Keep edges consistent and count at least every 10 rows to ensure 41 sc across. (41 sc)
Info :
Measure runner width now to ensure it fits your table. If you want it slightly wider, add 2 or 4 chains to the foundation chain before you begin. Adjust number of rows later to change length.
Round 21-40 :
Continue working in linen stitch for 20 rows (Rows 20-39). Place markers at the 10-row interval to track progress. (41 sc)
Info :
At approximately one quarter of your intended total length, pin the piece to a flat surface to check edge straightness. Blocking after finishing will help even out the texture.
Round 41-60 :
Work 20 more rows in linen stitch (Rows 40-59). This central zone will become the long field where appliques are placed. (41 sc)
Info :
Plan your applique placement now: mark positions with removable stitch markers or safety pins. In the photographed runner there are four vertical motif groups spaced evenly — measure and mark equal distances between centers before continuing.
Round 61-80 :
Work another 20 rows in linen stitch (Rows 60-79). Keep the count consistent and smooth out any slight ripples by adjusting tension. (41 sc)
Info :
If you plan to lengthen your runner, repeat blocks of 20 rows until desired length is reached. For the photographed size work approximately 100-110 total rows; here we will work to 110 rows for a long narrow runner.
Round 81-100 :
Work rows 80-99 in linen stitch. At this stage you should be able to place all four motif centers evenly spaced along the panel. (41 sc)
Info :
Count placement rows from one short end so motifs align symmetrically. For the shown runner, motifs are centered approximately every 22-24 rows vertically — mark Row 18, Row 40, Row 62, Row 84 as centers before finishing the panel.
Round 101-110 :
Work final 10 rows in linen stitch (Rows 100-109) to finish the center panel length, ending on the WS. Fasten off and weave in ends, leaving long tails for border join if you prefer to join border with same yarn. (41 sc)
Info :
Blocking tip: gently wet-block the panel to even out the linen stitch. Pin straight edges and allow to dry completely before adding border and appliques.
— Border :
Round 1 :
Join deep chocolate color to any corner with sl st. Ch 1, evenly sc around the entire panel working 3 sc in each corner stitch to maintain square corners. Work sc evenly across edges placing one sc into each row end. (Count varies; maintain even spacing approx 1 sc per row end, total edge stitches ~ (panel perimeter/row gauge) )
Info :
When working the first border round, you are converting the rectangular rows into edge stitches. Keep a consistent count and avoid pulling too tightly at corners. Pin if needed.
Round 2 :
Ch 3 (counts as dc), *skip 1 sc, shell in next sc: (5 dc in same st), skip 1 sc, sl st in next sc*; repeat along long edges. For short ends work the same repeat but place 3 dc shells in corner sc to turn neatly. This creates the scalloped shell texture. Fasten off after completing rounds and weave ends. (Shells placed every 2 sc approximately)
Round 3 :
Optional second scallop round: Join yarn into the center dc of each shell and work (sc, hdc, 3 dc, hdc, sc) to deepen scallop and create layered edging. Work evenly along all sides and finish with sl st to join. Fasten off and weave in ends. (Edge looks like deeper scallops)
Info :
The photographed runner has a double scallop effect achieved by two rounds: first creates the base scallop, the second gives a raised, decorative scallop. Use the second round for extra definition.
— Mushroom Applique (Make 4) :
Round 1 :
Cap - Using burgundy yarn, MR, ch 1, 6 sc in MR. Pull ring closed. (6)
Round 2 :
6 inc around (12)
Round 3 :
(1 sc, inc) x 6 (18)
Round 4 :
(2 sc, inc) x 6 (24)
Round 5 :
(3 sc, inc) x 6 (30)
Info :
The cap remains flat and slightly domed; you can stop increases earlier for a shallower cap. We will form the lower edge to be sewn flat onto the runner surface.
Round 6 :
1 sc in each st around (30)
Round 7 :
1 sc in each st BLO (30) — this creates a defined edge to fold or sew down when attaching.
Round 8 :
Switch to cream or ivory for spots if you prefer crocheted spots: Using small amount of cream, make small circles (see Spots below) or embroider spots after sewing cap in place. Fasten off burgundy leaving a tail for sewing. (30)
Round 9 :
Spots (Make 6 or more): Using cream yarn and smaller hook, MR, 6 sc in MR, sl st into next st, fasten off leaving tail; flatten into tiny discs and attach to cap surface with mattress stitch or embroidery.
Info :
Alternatively embroider round or elongated dots with cream yarn through the cap to mimic the natural dotted appearance; secure ends on backside.
Round 10 :
Stem - Using cream yarn, MR, ch 1, 6 sc in MR (6)
Round 12 :
1 sc in each st around (12)
Round 13 :
(2 sc, inc) x 4 (16)
Round 14 :
1 sc in each st around for 2 rounds (16)
Round 15 :
Shape the base of the stem: (2 sc, dec) x 4 (12)
Round 16 :
(1 sc, dec) x 4 (8)
Round 17 :
Fasten off leaving a long tail for sewing. Lightly stuff the stem with a small amount of fiberfill if you want a low-relief applique, or leave flat for sewn, unstuffed applique.
Info :
For the realistic look in the image, the stem is narrow and flat with minimal stuffing. Flatten and sew the stem's back to the runner so the cap sits above it.
Round 18 :
Assembly of mushroom: Pin cap in chosen position, then place stem underneath so it peeks from beneath the cap center. Sew with matching yarn using small whip stitches around the base of the cap and the sides of the stem. Sew spots onto the cap using small stitches or embroider after sewing cap to reduce shifting.
Info :
Repeat mushroom sequence to make four identical mushrooms. Keep one cap as a template for size and spot placement to ensure consistency across motifs.
— Leaf Applique (Make 8 total - mix colors) :
Round 1 :
Using dark brown or mustard yarn, ch 10. Work along foundation to create a lace leaf: sc in 2nd ch from hook, hdc in next ch, dc in next 2 ch, tr in next 2 ch (center spine), dc in next 2 ch, hdc in next ch, sc in last ch. Turn to work along opposite side into unused loops of foundation chain.
Round 2 :
Working down the opposite side of foundation chain: sc in first st, hdc in next st, dc in next 2 sts, tr in next 2 sts, dc in next 2 sts, hdc in next st, sc in last st. (Leaf outline complete)
Round 3 :
Edging: Sl st into first sc, *ch 3, sl st into next dc (a picot-like edge), repeat around leaf; work sl st into last sc to finish. Fasten off and weave in ends. This creates a decorative textured maple-like leaf shape.
Info :
The pictured leaves are slightly three-dimensional with veins and a raised center. After making the base leaf, add surface crochet veins: with contrasting yarn, embroider three radial veins from the stem end using backstitch.
Round 4 :
Optional extra textured leaf: After the base leaf is made, insert a line of chain stitches along the center and secure with slip stitches to create a raised central vein. Pin leaf flat and steam-block lightly to hold shape.
Info :
Make 8 leaves: 4 in dark brown and 4 in mustard. Vary orientation when attaching to give a natural scattered look.
— Berry Clusters (Make 4 clusters) :
Round 1 :
Using cranberry yarn, MR, 6 sc in MR, pull closed, sl st to join (6). Fasten off leaving tail to sew to panel. Make 5-7 small berries per cluster depending on desired fullness.
Round 2 :
To create a raised berry: After MR 6 sc, insert needle through the center and pull the ring tight, then add small stuffing if you want a puffed berry. Stitch through to secure and leave tail for sewing.
Info :
Group berries on small branches of fine yarn or embroidery thread; sew the group to the runner slightly overlapping a leaf and near a mushroom for a cohesive motif.
— Additional Decorative Stitches :
Round 1 :
To add accent stems: Use brown yarn and embroider gently curved stems connecting leaf to berry cluster. Use a blunt embroidery needle and long running stitches for a natural look.
Info :
Experiment with small french knot-like textures using tiny crochet bullion knots or multiple sl st wraps to mimic tiny seed pods if desired.
— Placement & Layout Guide :
Round 1 :
Mark motif centers on the center panel: For the shown runner of about 110 rows, place centers near Rows 18, 40, 62 and 84 measured from one short end. These rows are approximate; reposition to taste.
Round 2 :
For each motif center: place a mushroom cap slightly towards the left of the centerline, a cluster of dark leaf and berries to its right, and a mustard leaf layered slightly under the cap. Pin everything securely before sewing to check proportions.
Info :
Spacing tip: leave approx 6-8 rows of linen stitch vertical space between the top of one motif and the bottom of the next to allow breathing room and avoid crowding.
— Attachment Instructions :
Round 1 :
Sew appliques down using matching yarn and small whip stitch or mattress stitch. For a nearly invisible seam, use a yarn needle with a doubled strand of matching color and take small stitches through the applique back and the linen-panel loops.
Round 2 :
Sew mushroom caps first: secure around the base and a few small stitches across the dome to flatten slightly and prevent flipping. Attach stems beneath cap and stitch sides to the panel to anchor.
Round 3 :
Attach leaves next, tucking a few leaf edge stitches beneath the cap where they overlap so the join is hidden. Use small, discreet stitches and avoid pulling fabric taut; leave a little curve to leaves for a natural 3D effect.
Round 4 :
Sew berry clusters last. Use the yarn tails from each berry to stitch them in place and hide tails on the inside/back of the panel. Add extra small stitches to hold clusters close to leaves and stems.
Info :
Work on the right side of the runner, pinning and re-checking symmetry after each applique is attached. When satisfied, weave and trim all tails on the WS for a tidy finish.
— Finishing :
Round 1 :
Weave in all ends securely on the WS. Use a small amount of diluted craft glue sparingly to secure any loose embroidery threads if needed (test on scrap first).
Round 2 :
Block the finished runner gently: pin flat on a blocking board, spray lightly with water, shape scallops and appliques with pins. Allow to dry overnight to set shape.
Round 3 :
Optional: Hand-sew a lightweight fabric backing to the runner for extra stability and to conceal weave-in tails if desired. Use ladder stitch to join backing neatly to the scallop border.
Info :
Final check: Ensure all appliques are secure and that no loose ends show. The runner can be spot-cleaned; hand wash gently if necessary and reblock while damp.
This cozy autumn table runner combines a textured linen center, rich scalloped edging, and charming woodland appliques for a beautiful seasonal centerpiece. Each applique is made separately and sewn on to create a handcrafted, dimensional look you can be proud of. The runner lays flat and elegant across a wooden table, inviting warm dinners and seasonal gatherings. 🧶🍂 Add it to your home or gift it to a friend for a heartfelt handmade touch. 🌾