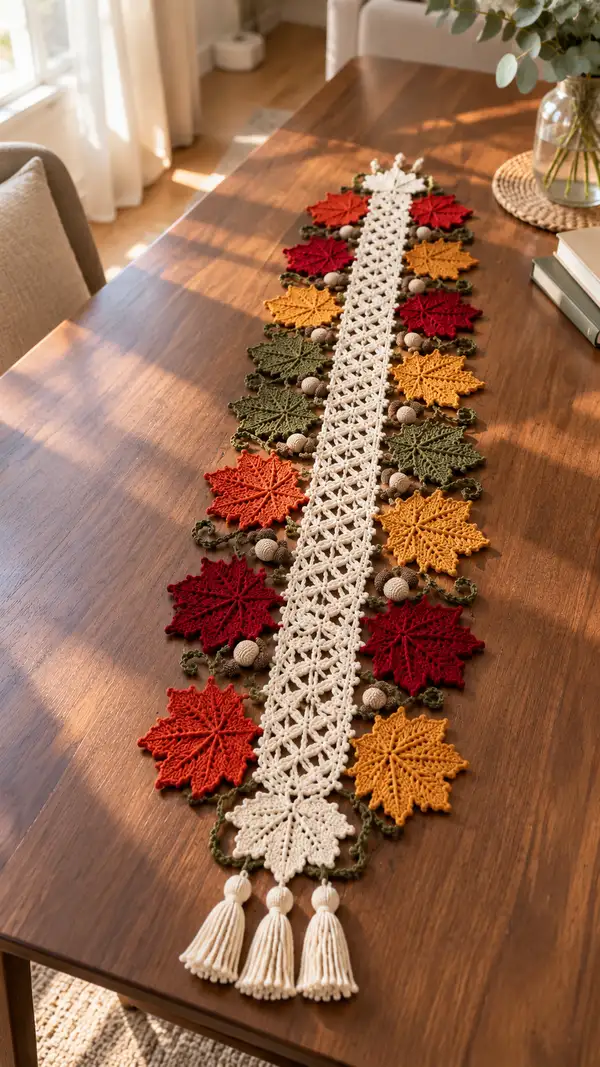
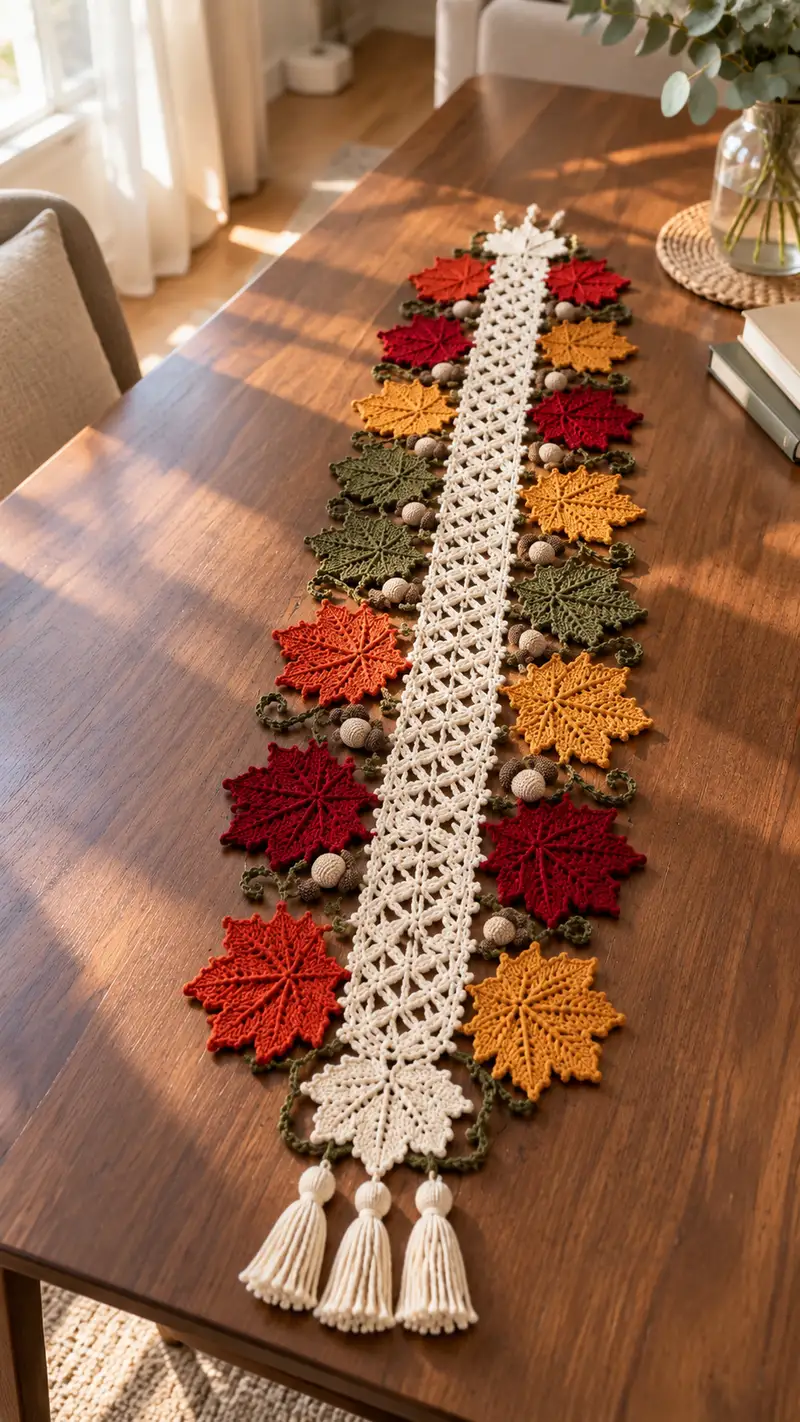
Bring warm fall vibes to your table with this textured crochet table runner. A central cream lattice strip is framed by intricately worked maple leaves in deep red, rust, mustard and olive, connected by leafy green vines and wooden bead acorns. Finished with three cream tassels at each end, this runner is both decorative and durable—perfect for seasonal tables or cozy everyday style.
Progress Tracker
0% Complete
— Notes & Overview :
Info :
This runner is constructed from separate components: one long central lattice strip, multiple maple leaf motifs (full leaves and smaller fill leaves), vine connectors, crocheted acorn beads (worked around wooden beads optionally) and tassels. Work pieces flat where noted. You can lengthen the runner by adding extra lattice rows or repeating an extra pair of leaves on each side.
Info :
Tension: work fairly tightly for leaf detail so points are crisp. Use a 3.5mm hook for the lattice and a 3.25mm hook for leaf and vine details if you prefer a tighter edge. Block leaves before assembly for best shaping results.
— Center Lattice Panel :
Info :
Make one long lattice panel in cream yarn. This panel is worked in rows; we label them as Rounds for consistency in pattern numbering. Foundation chain shown creates 26 working stitches (adjustable in multiples of 4 + 2 for a longer or shorter center). Finished width approx. 8cm/3in with worsted weight and 3.5mm hook.
Round 1 :
Ch 50 (or multiple length you desire for table length: 4n + 2). Sc in 2nd ch from hook and in each ch across. Turn. (49 sc)
Round 2 :
Ch 3 (counts as dc), sk first st, *ch1, sk1, dc in next st; rep from * across ending with dc in last st. Turn. (24 dc clusters across, spaces between)
Round 3 :
Ch 1, sc in each dc and ch1-sp across, working 1 sc in each stitch/space. Turn. (49 sc)
Round 4 :
Ch 4 (counts as tr), sk next st, *ch2, sk2, tr in next st; rep across ending with tr in turning ch. Turn. (16 tr across depending on foundation length)
Info :
These alternating mesh rows form the lattice. Maintain the same stitch profile across all rows to get a regular X-like lattice. For a narrower or wider lattice adjust starting chain in multiples of 4.
Round 5 :
Ch1, sc across in each stitch and space to the end. Turn.
Round 6 :
Ch 3, *ch1, sk1, dc in next st; rep across. Turn.
Round 7 :
Ch1, sc in each st and space across. Turn.
Info :
Continue repeating Rounds 4-7 to build center lattice length. Each four-row repeat creates one open lattice set. Work until the center panel reaches desired length to accommodate leaves on both sides; in the pictured runner the center panel measures approx. 80-90cm long and uses 36 such repeats. We'll provide a guide to reach that length as Rounds 8-50 below.
Round 8-50 :
Repeat Rounds 4-7 for 11 more full repeats (44 rows) or until center panel length matches your table minus allowances for leaves and tassels. Maintain neat turning chains and consistent tension. (Repeat pattern maintains same stitch count each row)
Info :
Finish off with a sc row (as Round 5) to create a firm edge for sewing leaves. Fasten off and weave in ends. Block the panel gently on a flat surface so lattice squares sit uniform and flat.
— Full Maple Leaf (Make 10–12) :
Info :
Make full leaves in alternating colors: deep red, rust orange, golden mustard. This leaf uses short rounds worked from the center outward to create lobes and pointed tips. Use 3.25mm hook for crisp points. Each leaf finished approx. 9–10cm across point-to-point.
Round 1 :
With chosen leaf color, MR, 6 sc into MR. (6)
Round 2 :
Inc in each st around. (12)
Round 3 :
(1 sc, inc) x6 (18)
Round 4 :
(2 sc, inc) x6 (24)
Info :
The rounds above form a small disk as the base of the leaf; subsequent shaping pulls the disk into a pointed maple silhouette by working elongated stitches and chains to form lobes and veins.
Round 5 :
Ch1, sc in first 6 sts, ch5, sk 6 sts, sc in next 6 sts, ch5, sk remaining, join with sl st to first sc. (This creates two long ch spaces that will form leaf lobes)
Round 6 :
Working into the first ch5: sl st in next 2 ch, hdc in next ch, dc in next ch, tr in last ch; sl st to base sc. Continue around making symmetrical lobes into each ch5. (4 lobes completed)
Round 7 :
Ch3, work 2 dc, ch2, 3 dc into tip of each lobe to create pointed edges, sc between lobes to anchor. Repeat for all lobes. (Creates 4 pointed lobes)
Info :
Now we will add side serrations and the central notch typical of a maple leaf by working short picot-style points and sc decreases—this gives the ragged edge that makes the leaf feel realistic.
Round 8 :
Working around the edge, *sc in next 2 sts, (ch2, sl st in 2nd ch from hook) picot, sc in next st; rep around. Finish with sl st to join. (Edge picots create serrations)
Round 9 :
FLO, ch1, sc in each st around including picot bases to flatten edge; sl st to join. (Even stitching gives uniform edge)
Round 10 :
Switch to working short vein lines: attach yarn at the center top of leaf, ch1, sc, ch3, sc into small gaps across the leaf to mimic veins; anchor each vein with a sl st at the edge. Repeat symmetrical veins on both sides. (This is decorative; count of stitches varies by leaf shape)
Round 11 :
Using surface slip stitch technique, outline each lobe with sl st to emphasize edges. Start and end ends on the reverse to hide tails. Fasten off leaving long tail for sewing. (No fixed stitch count; edging uses sl st along perimeter)
Info :
Block leaf flat, pinning each point and vein to shape as desired. For consistent leaf size, lightly steam-block or spray-block and let dry completely before assembly.
Round 12-20 :
Optional: Repeat extra decorative rounds to add a double-edge or deeper vein work: ch3, 1 dc along veins, or work a scallop edge (ch3, sl st back into same st) to create deeper ridges. If you add rounds, account for extra length when sewing to the center panel. Fasten off after completing decorative rounds and weave in ends.
— Smaller Accent Leaf (Make 6–8) :
Info :
Small leaves fill gaps and soften the line between larger leaves. Use olive green or a contrasting color for these. Work slightly smaller and with fewer rounds for a compact shape.
Round 1 :
MR, 6 sc in ring. (6)
Round 2 :
Inc in each st around. (12)
Round 3 :
(1 sc, inc) x6 (18)
Round 4 :
Ch4, work 3 sc across opposite side to make a tiny lobe, ch4, join with sl st to start. Fasten off. (Simple three-lobed accent)
Info :
Accent leaves take minimal stuffing or none at all. Shape with fingers and a small spritz of water if needed. These will sit under and between full leaves to create layered depth.
— Vine Connectors & Leaf Edging (Make continuous vines to join leaves) :
Info :
Vines are worked in olive green. They are flexible chain-and-loop motifs that sew between leaves, and also create small curled tendrils at leaf bases. Work vines long enough to reach between the centers of adjacent leaves; typical vine segment between leaves is 8–12 cm.
Round 1 :
With olive, ch 30 (or longer for spacing), sl st in 3rd ch from hook, *ch3, sk2, sl st in next ch to create 3-loop chain; rep across to end. (Creates looped vine)
Round 2 :
Attach yarn to each ch3 loop and work 3 sc into each loop to form small puffed knots along the vine. Fasten off at end. (Number of sc depends on length)
Round 3 :
Optional: to create curled tendrils at leaf bases, ch12, working 3 sc in each ch across to curl, fasten off. Make 2 tendrils per leaf base and leave long tails for sewing.
Info :
Work vines slightly slack so they can be shaped during assembly. If you prefer a flatter look, work only chains and attach with sl st to front of leaves and panel rather than sewing through.
— Crocheted Acorn Bead Cover (Make 12–18) :
Info :
These small covers slip over wooden beads to give a crocheted texture. Use light and dark brown yarn to suggest a cap and nut. Alternatively, you can omit covering and simply sew wooden beads into place. Covers are worked in continuous rounds and then cinched around the bead.
Round 1 :
With light brown, MR, 6 sc into ring. (6)
Round 2 :
Inc around. (12)
Round 3 :
(1 sc, inc) x6 (18)
Round 4 :
1 sc in each st around for 3 rounds to create a short cylinder that will cover bead side. (18)
Round 5 :
Switch to dark brown, join, *sc2tog, sc in next 2 sts; rep around (approx. 14). (This creates the cap flare)
Round 6 :
(sc in each st) around for 1 round to firm cap. (14)
Round 7 :
Place wooden bead inside cylinder, cinch opening by working sc2tog evenly until hole is small, fasten off leaving long tail. Thread tail through bead and knot securely, leaving enough to sew bead to runner. Weave in end. (Final stitch count depends on cinching)
Info :
If you prefer not to cover beads, simply sew them to vine positions using yarn looped through bead holes and knotted on the underside for security.
— Tassels (Make 6: 3 per end) :
Info :
Tassels are made from cream yarn to match the center lattice. Each tassel has an optional wrapped bead top for a professional finish. Each tassel approx. 8–9 cm long.
Round 1 :
Cut 40 strands of cream yarn, fold in half and use a small sl st loop to attach to a short length of yarn for a head. Wrap a 10cm piece of yarn tightly around top to create the tassel head; knot and secure. Trim ends evenly.
Round 2 :
Optional: For bead head, thread a wooden bead onto a small loop of yarn, tie beneath bead and then attach tassel strands below the bead, wrapping the top as above to create a neat finish. Fasten off and weave in ends.
Info :
Make three identical tassels for each end of the runner. Space tassels evenly across the width of the runner; secure with sewing through lattice panel and tying an internal knot for extra hold.
— Edging & Assembly Preparation :
Info :
Before assembly, block all leaf motifs flat and arrange them along both sides of the center lattice panel to match the photo layout: large leaves alternate sides along the length, with smaller accent leaves filling the gaps and beetle/bead acorns clustered at leaf junctions. Leave about 1–2 cm gap between leaf tips and lattice edge so vines can sit naturally.
Info :
Lay the center panel flat. Pin leaves in position, pairing a left and right leaf opposite each lattice repeat. Use stitch markers or sewing pins through blocked leaves to hold positions for sewing. Place vine connectors across the top of layout, and arrange acorn beads where vine junctions occur.
— Sewing & Final Joins :
Round 1 :
Sew one leaf at a time to the lattice panel using a matching yarn tail and mattress stitch: thread yarn needle, insert needle from wrong side of lattice and come up through base of leaf (center disk area). Sew along base with evenly spaced whip stitches through both layers until leaf base is secure. Tie off on back and weave end at least 5 cm inside lattice to hide. (No fixed stitch count)
Round 2 :
Attach vine connectors by sewing through the vine chain stitches and the lattice edge and anchor under leaf bases to hide knots. Use small backstitches and secure ends with a knot and weaving.
Round 3 :
Sew acorn beads along vine clusters by stitching through the bead hole or the crocheted cover base. For covers, sew the long tail used to cinch the cover through both bead and lattice and knot on the underside.
Info :
Pin everything before sewing so you can adjust spacing. If the runner will be used on a busy table often, consider adding a small dab of fabric glue on the underside of each sewn bead and leaf to strengthen the bond.
— Finishing Touches :
Round 1 :
Sew tassels to each end through the lattice base using a doubled yarn tail, securing with multiple passes and a tight knot. Hide knots inside the tassel head by threading through and trimming tails close.
Round 2 :
Weave in all remaining ends at least 5 cm into the wrong side of work, trimming flush. Give the entire runner a light steam-block to set shapes and remove any remaining curl or irregularities.
Info :
Check every sewn join for security, especially beads and tassels. Reinforce with an extra stitch or knot if the runner will be handled often. Gently hand wash with cool water if needed and reshape while damp.
— Extra Pattern Variations & Tips :
Info :
To make a longer runner, add more repeats to the center lattice panel (add 4-row repeats) and add two leaf pairs per added panel repeat. For a table centerpiece rather than full runner, make a shorter center panel and arrange fewer leaves symmetrically.
Info :
For a more pronounced raised leaf, add a second leaf layer by making leaf backs in cream and sewing slightly offset beneath each colored leaf. This creates an inset look and adds softness to the silhouette.
Info :
If you want an even more secure acorn, glue the wooden bead to the crocheted cover interior before cinching, then sew closed over top. Use a strong craft glue for wood and yarn bonding.
This autumn table runner is an elegant combination of texture, color and tactile details that instantly elevates your dining space. Each carefully made leaf, vine and bead adds playful charm and handcrafted warmth. Whether for holiday gatherings or everyday cozy meals, this runner brings a seasonal mood and handmade style to your table. 🧶🍁 Happy stitching — enjoy the meditative rhythm of making and the soft glow your finished runner will bring to your home!