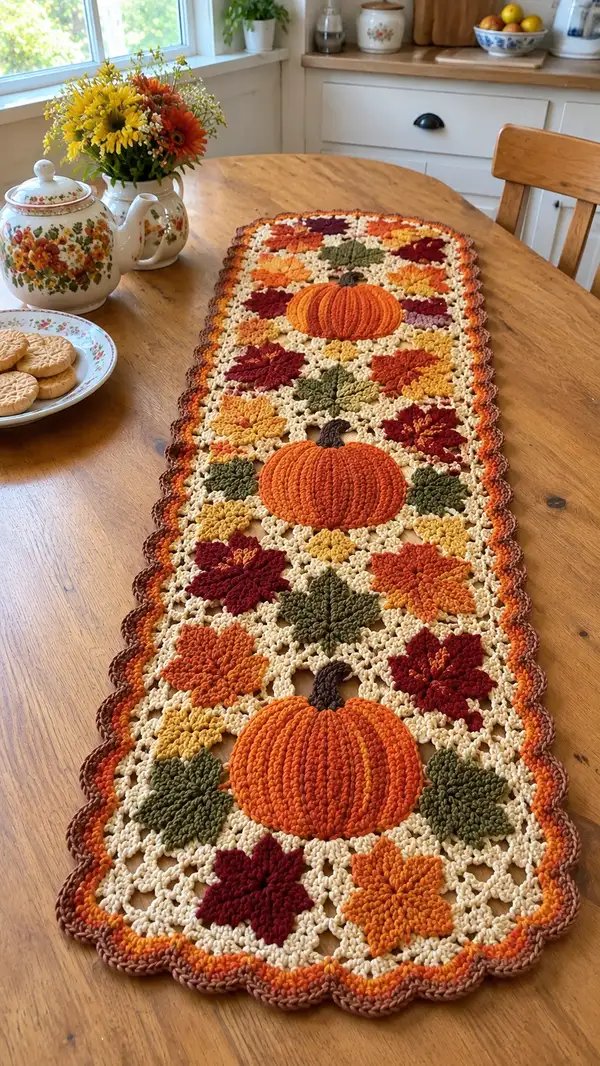
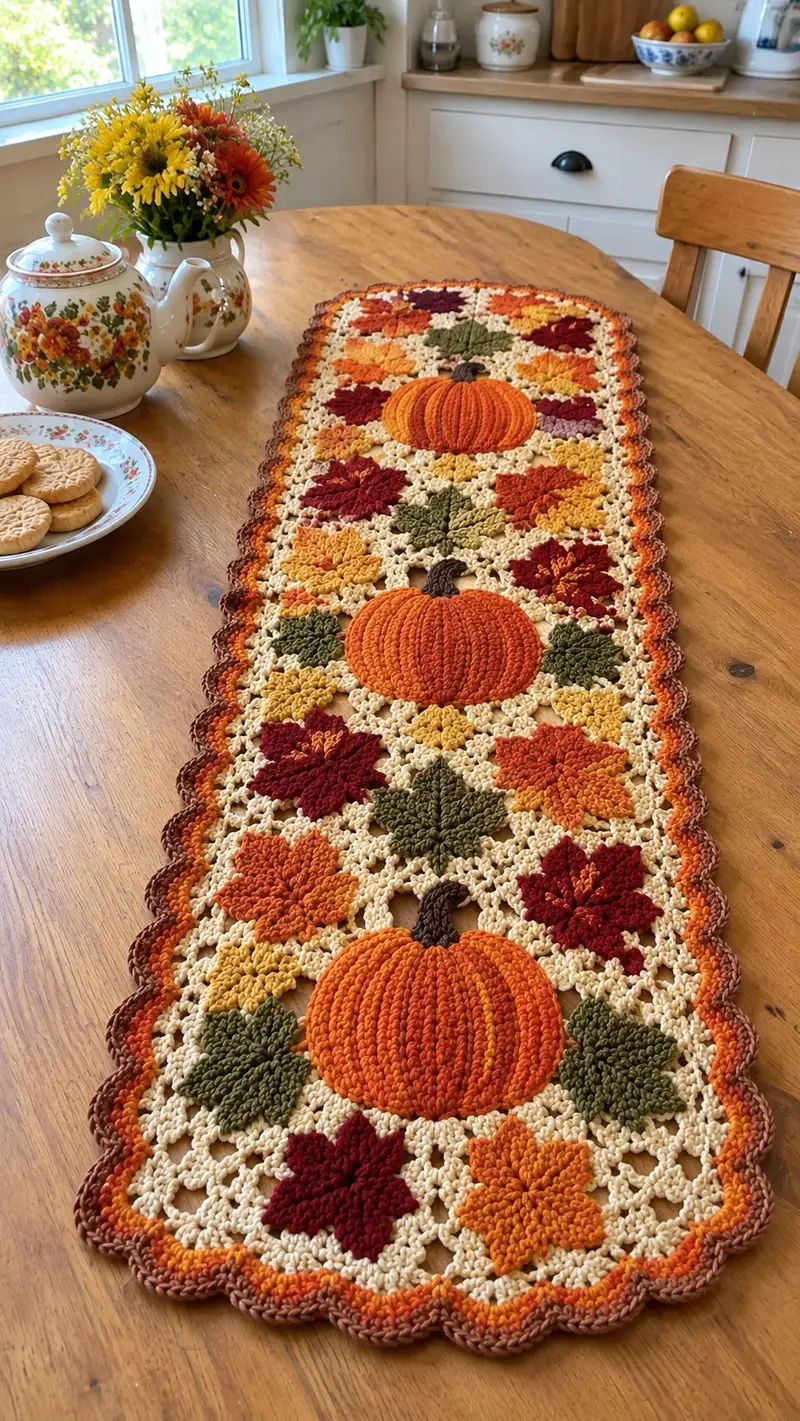
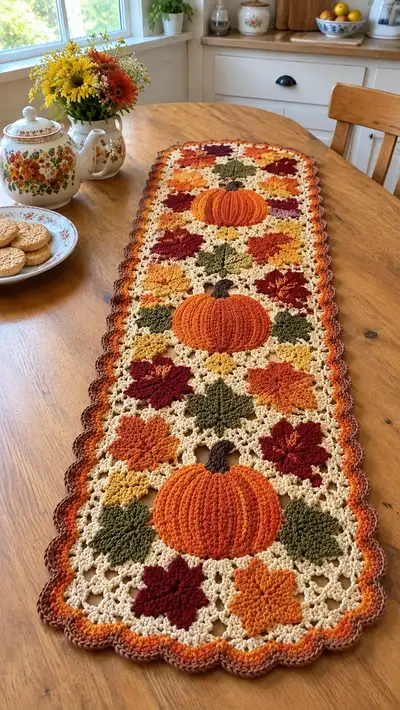
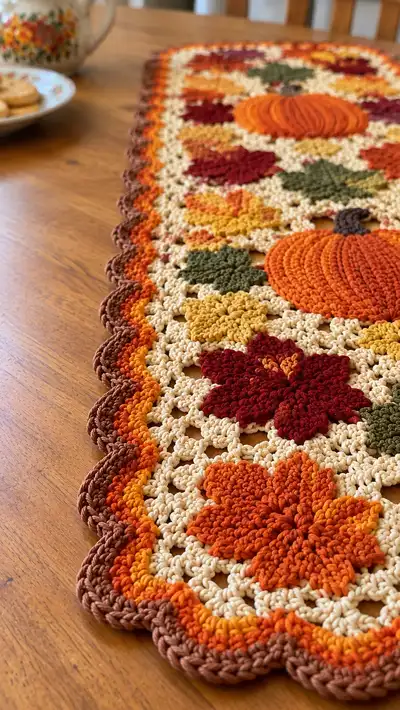
Create a warm, cozy fall table runner featuring textured pumpkins and layered maple leaves set on a delicate lattice background. This pattern uses rich autumn tones — burnt orange pumpkins, deep red and gold leaves, olive greens, and a soft cream lattice — with a scalloped multi-row border that frames the runner. The finished piece lays beautifully on a wooden table and makes a charming seasonal centerpiece or gift.
Progress Tracker
0% Complete
— Overview :
Info :
This pattern is a modular runner made of granny-lattice squares arranged in rows with textured pumpkin appliques and layered maple leaf motifs inserted regularly. The instructions below break the project into four main components: Pumpkin Applique, Maple Leaf Motif, Granny Lattice Square (background), and Scalloped Multi-Round Border. Follow the motif counts and join instructions to assemble the runner into a long rectangular layout. Color suggestions are included but feel free to customize.
— Gauge & Finished Size :
Info :
Using worsted cotton yarn and a 4.0mm hook, one finished lattice square measures approximately 9cm (3.5 inches) square. The sample runner pictured is 3 squares wide and 12 squares long (approx 31cm x 100cm / 12.2in x 39.4in) before blocking. Adjust squares to make runner longer or shorter.
— Pumpkin Applique :
Round 1 :
6 sc in magic ring (6)
Round 3 :
(1 sc, 1 inc) x 6 (18)
Round 4 :
(2 sc, 1 inc) x 6 (24)
Round 5 :
(3 sc, 1 inc) x 6 (30)
Round 6 :
(4 sc, 1 inc) x 6 (36)
Info :
At this stage you have built a circular base. The pumpkin will be flattened into a slightly oval shape. Use a smaller hook (3.5mm) from round 7 for tighter ribbed texture if desired.
Round 7 :
1 sc in next 10 sts, inc, 1 sc in next 14 sts, inc, 1 sc in next 10 sts (38) - shaping a subtle oval
Round 8 :
1 sc in next 11 sts, inc, 1 sc in next 16 sts, inc, 1 sc in next 11 sts (40)
Round 9 :
1 sc in each st around (40)
Round 10 :
1 sc in next 5 sts, (hdc in next st, dc in next st, hdc in next st) across center 20 sts to build a raised middle texture, 1 sc in remaining sts (40)
Info :
To create pumpkin ribs, we will work alternating rows of BLO and FLO with post stitches. Switch to BLO rounds to form visible ridges. If you want a firmer pumpkin, add a small bit of stuffing after round 12; use polyester fiberfill sparingly (just enough to raise the applique slightly).
Round 11 :
1 sc in each st BLO around (40)
Round 12 :
1 sc in each st FLO around (40)
Round 13 :
(1 fpdc around next st, 2 sc) repeat around to create visible ribs (40)
Round 14 :
1 sc in each st BLO (40)
Round 15 :
Work 20 evenly spaced front post dc ribs across the width: *skip 1 st, fpdc in next st*, rep around (40)
Round 16 :
1 sc in each st around (40)
Info :
If you want a more bulbous pumpkin, fold lightly and add a teaspoon of polyester fiberfill under the center at this point and press closed with additional stitches later. This is optional; pumpkins in the photo are lightly padded to maintain a sculpted ribbed look without being fully stuffed.
Round 17 :
Work (2 sc, dec) x 10 (30) - beginning to shape back to flatter applique edge
Round 18 :
(1 sc, 1 dec) x 10 (20)
Round 19 :
10 dec across to close slightly but leave an oval opening if you will tuck under into a lattice square (10)
Round 20 :
Fasten off leaving 25cm tail for sewing. Weave a running stitch around the opening and pull to flatten the back; use tail to attach to lattice square.
Info :
For the stem: using brown yarn and 3.5mm hook, ch 4, sl st into 2nd ch from hook, sc in next ch, hdc in last ch, turn; 3 sc across the opposite side to create a short curved stem. Fasten off leaving tail for sewing. Sew stem to the top center of pumpkin applique.
— Pumpkin Rib Detail (Optional extra depth) :
Round 1 :
Join contrasting burnt orange or shading color into top loop of a chosen rib, ch 1, sc evenly along the rib to emphasize seam (approx 20 sc across main ribs)
Round 2 :
Working backwards along rib, work hdc in each stitch to build a rounded ridge (20)
Info :
Use these accent ribs sparingly to create shadow lines on pumpkin surface. Add 3-6 accent ribs spaced evenly for a natural look.
— Maple Leaf Motif :
Round 1 :
6 sc in magic ring (6)
Round 3 :
(1 sc, 1 inc) x 6 (18)
Round 4 :
sc 2, ch 2, (dc, tr, dc) in next st to start first point, sc 3 to next point, rep around to make 5 small points (18)
Round 5 :
Create leaf lobes: at each point work (sl st into space, ch 2, 3 dc, ch 2, sl st) to form a fuller petal shape. Repeat at each of 5 points. Fasten off, weave tail.
Info :
For layered maple leaves (as in photo), make a second set using a slightly smaller hook and alternate color; stack and sew the smaller leaf on top of the larger one offset slightly to create multi-color depth.
Round 6 :
Optional: Use puff stitches on each petal tip: *(yarn over twice, insert hook into designated stitch, yo and pull up loop 6 times, yo and pull through all loops), sl st to secure* - create 5 puff accents for texture.
Info :
Maple leaves in the sample are worked in deep red, mustard, rust orange, and olive green. Make leaf clusters to populate lattice spaces between pumpkins. Leaves are flat and sewn to the lattice surface; no stuffing required.
— Granny Lattice Square (Base Unit) :
Round 1 :
Ch 4, join to form ring. Ch 3 (counts as dc), 2 dc in ring, ch 2, *(3 dc in ring, ch 2)* rep twice more, join with sl st to top of ch-3 (12 dc, 4 ch-2 corners)
Round 2 :
Sl st into corner ch-2 sp, ch 3 (counts as dc), 2 dc in same sp, ch 1, *(3 dc, ch 1) in next ch-2 sp*, rep around, ending with ch 1 before final join (24 dc, 4 ch-1 spaces)
Round 3 :
Sl st to next ch-1 sp, ch 3, 2 dc in same sp, ch 1, *(3 dc, ch 1) in each ch-1 sp across side, in corner (3 dc, ch 2, 3 dc), rep around to form square (36 dc total approx, 4 corner ch-2 spaces)
Round 4 :
Work shell clusters to open lattice: *(ch 2, skip 1 dc, sc in next dc, ch 2)* across each side, in each corner work (sc, ch 2, sc) to maintain square shape. Join. (maintain 4 corners)
Round 5 :
Switch to cream background if not already; ch 3, dc clusters in each ch-2 corner and cluster groups of 3 dc with ch 2 between clusters across sides. This builds the open lattice used throughout the runner.
Info :
Each square is intentionally slightly open to allow pumpkin appliques to be sewn on top so their backs are hidden by lattice. Make as many squares as needed for desired runner length. The pictured runner used a 3x12 layout (3 squares wide by 12 rows long).
Round 6 :
Even round: 1 dc in each st and 3 dc groups in corners to square up the piece. Count should be consistent across squares; stitch counts per side will be about 12 dc depending on tension.
Round 7 :
1 sc in each st around to create a neat edge (this round will be used for join-as-you-go later). Fasten off and weave ends.
Info :
Make a sample square and block lightly to ensure your squares match in shape. Use the same hook and yarn for all squares for consistent sizing.
— Motif Counts for Sample Runner :
Info :
Sample pictured: 3 squares wide x 12 squares long = 36 granny-lattice squares. Pumpkin appliques placed on rows 3, 7, and 11 (centered in squares) totaling 3 pumpkins. Leaves placed in alternating squares to create a balanced layout (approx 24 leaf motifs). Adjust count for your preferred length.
— Join-As-You-Go Rows :
Info :
We join squares into rows using a join-as-you-go (JAYGO) single crochet seam along one edge, then seam rows together using slip-stitch join or whip stitch for a flatter back. Pin and align squares carefully so pumpkin/leaf motifs are positioned where you like.
Round 1 :
To join first two squares: with right sides facing out, join yarn to first square corner, ch 1, sc evenly across edge to be joined, when reaching join point, sc through both loops of current square and corresponding st of adjoining square (sc join), continue to end, sl st to finish. Repeat for each adjacent square.
Round 2 :
When joining rows together, align blocks so seams fall under pumpkin appliques where possible to hide bulk. After each row is joined into a long strip, press gently and pin before making the next row join.
Info :
Alternate method: sew squares together using a whip stitch with yarn tail from each square. This creates a slightly more invisible seam on the front side but takes a bit longer.
— Attaching Pumpkin & Leaf Motifs :
Info :
Position pumpkin appliques centered in chosen squares. Use the long tail left when finishing pumpkins (and leave a long tail on stems) to sew through the lattice from the underside, catching each edge stitch of the applique to secure. Sew pumpkin around perimeter with a mattress or whip stitch, pulling the tail through the lattice to the back and securing with a few tidy knots and weaving the tail inside the seam.
Round 1 :
Sew each leaf motif on top of lattice squares in the designated positions using small, evenly spaced stitches around leaf base so leaves sit flat and secure.
Info :
For layered leaves, sew the smaller leaf to the larger leaf first, then attach assembled leaf to lattice. Be mindful of color placement to create a balanced repeat pattern across the runner.
— Scalloped Multi-Round Border (Edge Finishing) :
Info :
The scalloped border pictured is worked in three colors to create a warm gradient around the runner. We'll work multiple rounds of single crochet to firm the edge, then several rounds of increasing shell scallops to create the final ripple. Border rounds are worked continuously around the joined rectangle; count stitches along each side and corners and adjust spacing of shells to keep them even.
Round 1 :
With cream yarn, join at any corner, work 1 sc evenly along each outer edge stitch of entire runner to create a uniform edge. When turning corners, work 3 sc into each corner space to keep square corners rounded slightly. Count total sc around and record for scallop spacing (expected 420-480 sc depending on layout).
Round 2 :
Switch to pumpkin orange (first border color). Work 1 sc in each st around; when coming to corners, work 3 sc in same corner sp to keep alignment (same stitch count as previous round). Join with sl st, fasten off if changing color.
Round 3 :
Switch to rust orange (second border color). Ch 3 (counts as dc), *sk 2 sc, work 5 dc in next st (shell), sk 2 sc, sl st in next st*, repeat around spacing shells evenly across sides and work (sl st, ch 3, 5 dc, ch 3, sl st) into corners to keep scalloped corner shells. Adjust spacing to maintain equal number of shells on each long side and short side. Join and fasten off.
Round 4 :
Work a smaller scallop overlay using brown: join yarn to top of each shell center, *(sl st to top of shell, ch 1, 3 sc in same place, ch 1, sl st in next shell center)* across all shell centers to create layered scallop edge. Fasten off and weave ends. This creates the warm multi-tone scalloped perimeter seen in the photo.
Info :
For a deep scallop look, you may add one more overlay round using contrasting burnt orange: join to each brown scallop base and work (sl st, ch 2, 7 dc, ch 2, sl st) to enlarge shells. Keep shell counts equal across long sides (expected 14-18 shells per long side depending on runner length).
— Finishing Touches & Blocking :
Round 1 :
Weave in all tails using tapestry needle. For seams at joins, weave tails through the inner seams to hide them. Trim excess tails close to the fabric but do not cut too close as that may cause unraveling.
Round 2 :
Lightly steam-block the entire runner on a flat surface (use pressing cloth if using steam iron), or wet-block by pinning to measurements and allowing to dry to even out lattice gaps and slightly shape scalloped edging. Blocking will give a professionally finished look and helps motifs sit flat.
Info :
If you used cotton yarn, wet-blocking is recommended: spray evenly or dampen cloth and lay flat to dry for best shape retention. For acrylic blends, only use steam or light pressing at safe temperature to avoid melting fibers.
— Notes on Color Changes & Carrying Yarn :
Info :
When changing colors on border rounds, leave a 6-8cm tail and weave in as you go or carry the yarn along the wrong side of the work and catch occasionally to avoid long loose floats. For appliques, clip and weave ends under the applique to secure; do not carry inside appliques.
— Full Round Summary (count reference for maker) :
Info :
In the pattern above you have many rounds across motifs: Pumpkin Applique (approx 20 rounds of shaping and ribbing), Leaf Motif (5-6 rounds), Granny Lattice (7 rounds), Join & Border (approx 6-10 rounds depending on scallop layers). Combined, the entire project involves 80+ individual rounds/mini-rows across motifs and border work; counts will vary by customization. Maintain a notebook to track which round you are on for each motif and row while assembling.
Info :
Remember to label your motif batches by type and color and to make notes about exact stitch counts when you finish a motif so you can consistently duplicate it for the rest of the runner.
This autumn runner brings cozy fall warmth straight to your table with sculpted pumpkins, layered leaves, and a warm scalloped border. Each motif is a little piece of seasonal charm that comes together to create a beautiful heirloom-quality centerpiece. Enjoy the meditative rhythm of making repeat motifs and the instant satisfaction of seeing the runner grow. 🧶🍂✨