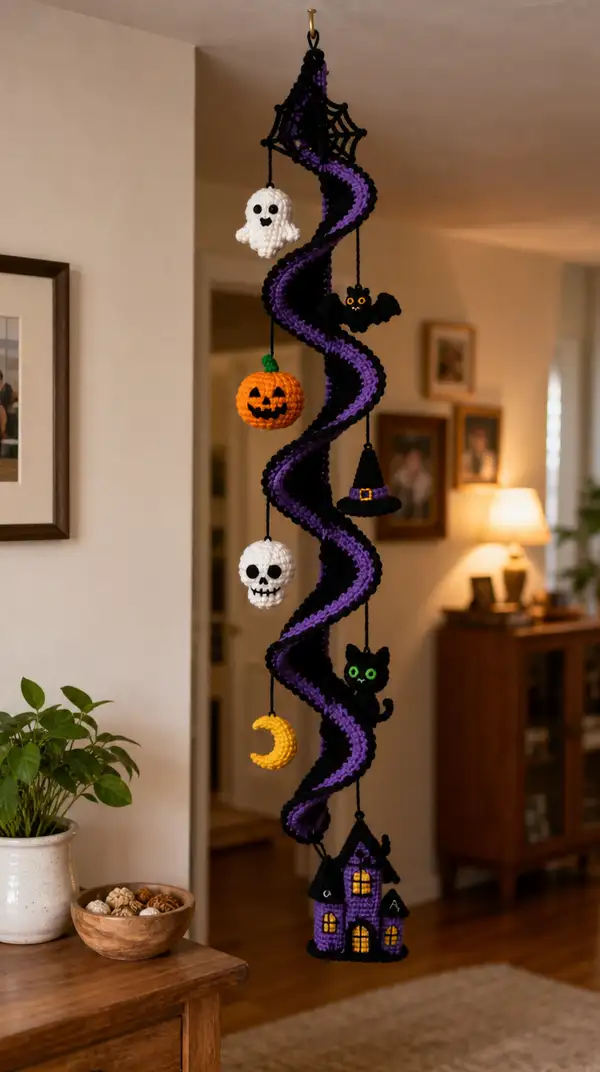
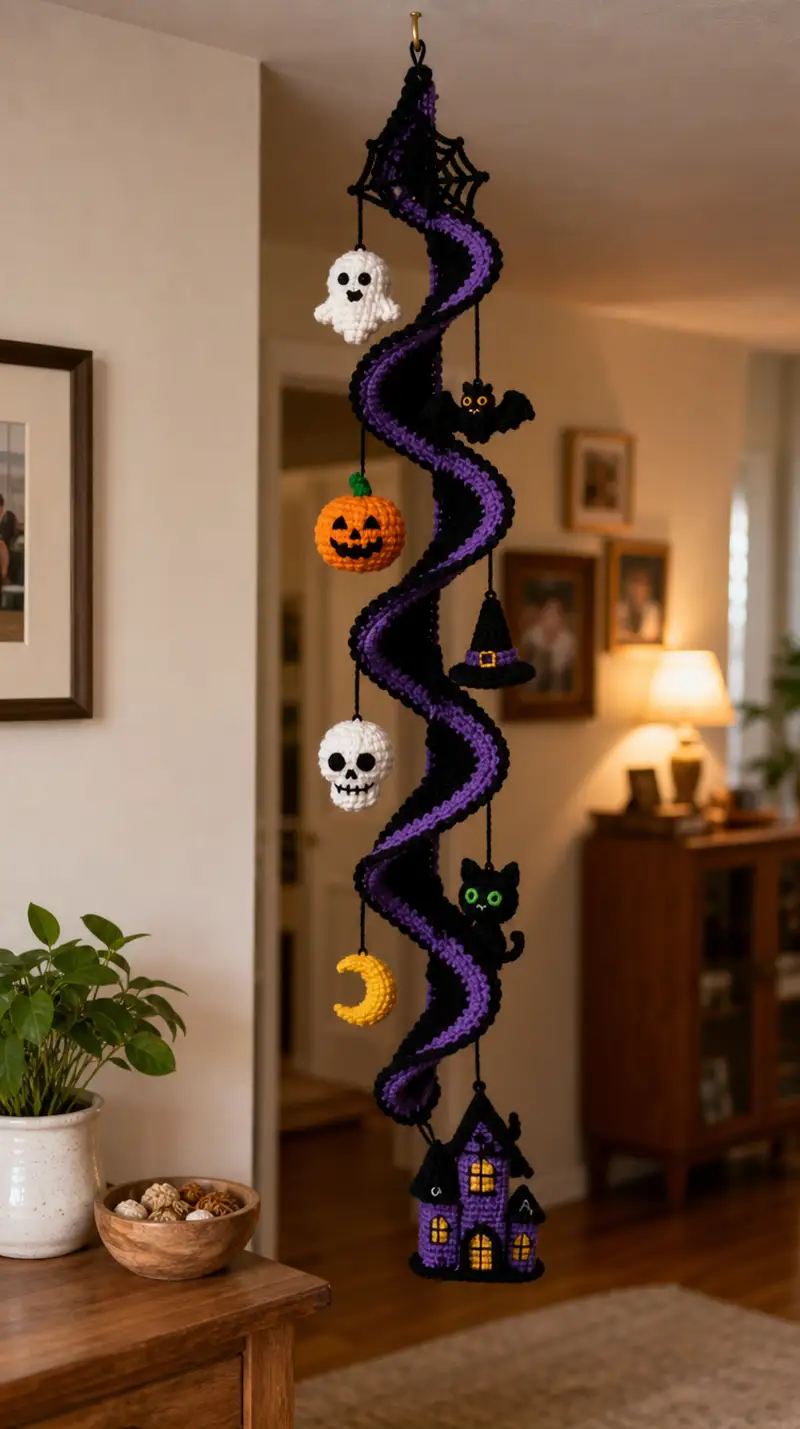
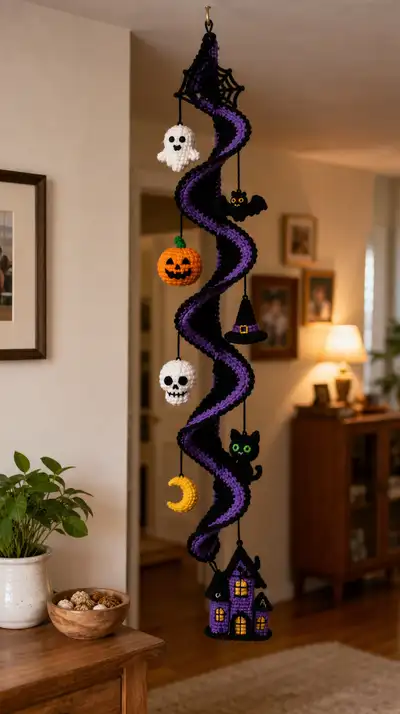
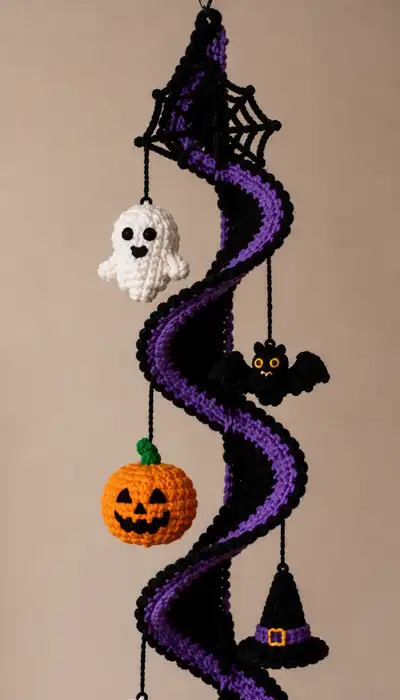
Create a striking hanging Halloween spiral mobile with adorable amigurumi ornaments — a twisted black-and-purple spiral adorned with a pumpkin, ghost, skull, bat, cat, witch hat, moon and haunted house. This pattern includes full step-by-step instructions for the spiral core, scalloped edge, spider web topper, and every small hanging figure. Perfect for a spooky mantle or a seasonal gift, the pieces are stuffed, sturdy and pose beautifully when suspended.
Progress Tracker
0% Complete
— Spiral Core (make 2 long panels to join) :
Round 1 :
6 sc in magic ring (6)
Round 3 :
(1 sc, inc) x 6 (18)
Round 4 :
(2 sc, inc) x 6 (24)
Round 5 :
(3 sc, inc) x 6 (30)
Info :
This first section forms a stable tubular start. Keep stitches tidy; this will become the inner end of the spiral panel
Round 6 :
(4 sc, inc) x 6 (36)
Round 7 :
(5 sc, inc) x 6 (42)
Round 8 :
(6 sc, inc) x 6 (48)
Round 9-12 :
1 sc in each st (48)
Info :
Switch to a 3.5 mm hook if you prefer a tighter fabric for the core panels; maintain even tension for long runs
Round 13-24 :
1 sc in each st (48) (repeat for 12 rounds to create length)
Info :
These rounds determine panel length. For the sample mobile, the designer worked approx. 60 rounds total per panel which creates a spiral about 60-70 cm long after twisting. Adjust length to taste.
Round 25-35 :
1 sc in each st (48)
Info :
If you want a wider panel, add 6 sc evenly spaced by working (7 sc, inc) x 6 to reach 54 sts; recalc subsequent rounds accordingly
Round 36-48 :
1 sc in each st (48) — continue until panel reaches desired length (sample used 48-60 rounds per panel)
Info :
Make two identical panels in Purple for the inner stripe and Black for the outer panel. Keep one panel in purple and one in black; you will layer and join them later to form the twist.
Round 49 :
(6 sc, dec) x 6 (42) — begin taper for outer join if desired
Round 50 :
(5 sc, dec) x 6 (36)
Info :
Optional slight taper at both ends helps conceal the wire core and makes sewing into the spider web top and haunted house base neater
Round 51 :
(4 sc, dec) x 6 (30)
Round 52 :
(3 sc, dec) x 6 (24)
Round 53 :
(2 sc, dec) x 6 (18)
Round 54 :
(1 sc, dec) x 6 (12)
Round 55 :
6 dec (6) — fasten off leaving long tail for joining
Info :
Make sure both panels are identical in length and taper. Blocking panels lightly with pins will help them hold their shape before joining.
— Joining Panels and Creating the Spiral :
Info :
Lay the purple inner panel on top of the black panel offset by 1-2 stitches so purple is visible as a central stripe once twisted. Use a long tapestry needle and matching black yarn to whip-stitch along one long edge to attach panels together for half the length leaving spaces every 6-8 stitches so the panels can flex for twisting.
Round 1 :
With panels stacked, single crochet around both layers for a joined tube: attach yarn to starting stitch and sc evenly around through both layers (approx. 96 sc if panels are 48 sts each stacked) (96)
Round 2-6 :
1 sc in each st (96) — work 5 rounds to stabilize the seam
Info :
Now that panels are joined together into a wide tube, insert the flexible wire into the tube core. Center wire so ends will be hidden in spider web top and haunted-house base. If desired, add a small length of chain stitch at the top as the hanging loop before closing the top.
Round 7-20 :
1 sc in each st (96) — continue working around until the joined tube is smooth and the seam is even. For sample length work until tube measures desired hanging length (typically 45-60 cm before twist)
Info :
To create the spiraled look, gently twist the tube around itself in a single continuous helix. The panels will show purple inner stripe and black outer scallop. Secure twist at both ends temporarily with pins or yarn. The tube will be flattered with scalloped edging to hold the twist in place.
— Outer Scallop Edge (Black, work while tube is in twisted position) :
Round 1 :
Attach black yarn to outer edge of twisted tube. *sc in next 3 sts, 5 dc in next st (shell), sc in next 3 sts, sl st in next st* — repeat along edge to create spaced scallops. Count shells to match circumference and spacing (sample: 16 shells along each long curve)
Info :
Work shells on the outermost ridge only; these scallops are decorative and help define the spiral silhouette. If your tube is very long, work scallops evenly spaced every 6-8 stitches to avoid bunching.
Round 2 :
Into each shell: sl st, ch1, (sc, hdc, 3 dc, hdc, sc) in same shell for a fuller scallop. Sl st to join and continue shell to shell.
Info :
If scallops add too much weight, reduce dc count to 3 per shell. Keep one edge scalloped and leave the inner edge smooth to maintain crisp spiral contrast.
— Spider Web Top (work flat circle then web spokes) :
Round 1 :
6 sc in magic ring (6)
Round 3 :
(1 sc, inc) x 6 (18)
Round 4 :
(2 sc, inc) x 6 (24)
Round 5 :
(3 sc, inc) x 6 (30)
Info :
Fasten off leaving long tail to sew top to tube. Using black yarn and a tapestry needle, create 6-8 radial loops by sewing from center to outer circle and back to center creating web spokes. Tie a small knot at each outer spoke point and create connecting arcs with sl st chains to form the web.
Round 6 :
Create 6 evenly spaced outer knots: ch 10 from outer ring and secure at points around web. Create connecting loops: start at center ch 12 and attach to next spoke with sl st, repeat to create concentric arcs (3-4 arcs). Fasten off and weave in ends.
Info :
Sew spider web neatly over the top end of the tube, tucking the tapered end of the tube into the base of the web. Secure with several reinforced stitches to support weight.
— Haunted House (bottom weight/base) :
Round 1 :
6 sc in magic ring (6)
Round 3 :
(1 sc, inc) x 6 (18)
Round 4 :
(2 sc, inc) x 6 (24)
Round 5 :
(3 sc, inc) x 6 (30) — base for house body
Round 6-12 :
1 sc in each st (30) — work 7 rounds to build height of the house body
Info :
Embroider or applique square window shapes by leaving small openings. For each window, use yellow yarn to embroider a small rectangle on rounds 8-10 and outline in black or purple after embroidery to make panes.
Round 13 :
(3 sc, dec) x 6 (24) — begin slight taper toward roof join
Round 14 :
1 sc in each st (24)
Info :
Make two small side towers (optional) by crocheting 2 small cones and sewing them to the house sides for a whimsical haunted silhouette.
Round 15 :
Switch to black yarn for roof. Attach at top edge and sc evenly around (24)
Round 16 :
(1 sc, inc) x 8 (32) — increase to create eaves
Round 17-20 :
1 sc in each st (32) — build roof height
Round 21 :
(2 sc, dec) x 8 (24)
Round 22 :
(1 sc, dec) x 8 (16)
Round 23 :
8 dec (8) — stuff lightly and add a small washer or bead for weight if desired. Fasten off leaving long tail for sewing to tube
Info :
Sew haunted house to bottom tapered end of spiral tube. Make sure the house is centered and balanced so the mobile hangs straight. Stitch firmly around base opening and weave in ends.
— Pumpkin Ornament (make 1) :
Round 1 :
6 sc in magic ring (6)
Round 3 :
(1 sc, inc) x 6 (18)
Round 4 :
(2 sc, inc) x 6 (24)
Round 5 :
(3 sc, inc) x 6 (30)
Round 6-9 :
1 sc in each st (30) — work 4 rounds to form the pumpkin body
Info :
Use stitch markers to mark 6 equidistant vertical ridges (every 5 stitches) that will be used to create pumpkin ribbing later via surface slip stitches.
Round 10 :
(3 sc, dec) x 6 (24)
Round 11 :
(2 sc, dec) x 6 (18)
Round 12 :
1 sc in each st (18)
Round 13 :
(1 sc, dec) x 6 (12)
Round 14 :
6 dec (6) — leave a long tail and fasten off; stuff firmly before last round and close opening
Info :
Use black yarn to embroider a classic jack-o-lantern grin and triangle eyes on the front. For ribbing, use a yarn tail and surface slip stitch vertically along the 6 marked ridges and pull gently to create segment definition. Add a small green stem made from ch 6, sl st to form a tube, stuff slightly and sew to top.
— Ghost Ornament (make 1) :
Round 1 :
6 sc in magic ring (6)
Round 3 :
(1 sc, inc) x 6 (18)
Round 4 :
(2 sc, inc) x 6 (24)
Round 5-7 :
1 sc in each st (24) — build head width
Info :
Mark the front center for eye placement. Safety eyes or embroidered eyes should be attached between rounds 6-7 about 6-8 stitches apart depending on your desired expression.
Round 8 :
(2 sc, dec) x 6 (18)
Round 9 :
(1 sc, dec) x 6 (12)
Round 10 :
6 dec (6) — fasten off leaving long tail; stuff lightly and close
Round 11 :
Attach white yarn at base of ghost and ch 1. Working around the base, create the ghost skirt: *sc in next stitch, (hdc, 2 dc, hdc) in next stitch, sc in next stitch* — repeat around to produce scalloped skirt (approx. 12 scallops)
Info :
Sew on small black felt circles or 6 mm black safety eyes and embroider a small smiling mouth using black yarn. For hanging, leave a 25-30 cm length of black yarn ch 30, fasten off, and use that as the hanging cord attached to top of head.
— Skull Ornament (make 1) :
Round 1 :
6 sc in magic ring (6)
Round 3 :
(1 sc, inc) x 6 (18)
Round 4 :
(2 sc, inc) x 6 (24)
Round 5-7 :
1 sc in each st (24)
Round 8 :
(2 sc, dec) x 6 (18)
Round 9 :
(1 sc, dec) x 6 (12)
Round 10 :
6 dec (6) — stuff, fasten off and close opening
Info :
Use black yarn to embroider eye sockets, nose and a stitched mouth. For deeper sockets, sew in 6 mm black discs or attach safety eyes (but be careful as skulls for children should have embroidered faces). Leave a 20-25 cm hanging cord of black yarn anchored at the crown.
— Bat Ornament (make 1) :
Round 1 :
6 sc in magic ring (6)
Round 3 :
(1 sc, inc) x 6 (18)
Round 4-6 :
1 sc in each st (18) — body of bat
Round 7 :
(1 sc, dec) x 6 (12)
Round 8 :
6 dec (6) — fasten off and leave tail for sewing
Info :
Make two small wings separately (work flat in rows or small semicircles): Ch 6, sc across, then increase at row edges to form scalloped wing. Sew wings symmetrically onto body. Add two small ears (sc 6 in mr, stuff lightly, close) and sew them above the eyes. Use yellow or orange embroidery for round eyes or small safety eyes.
— Cat Ornament (make 1) :
Round 1 :
6 sc in magic ring (6)
Round 3 :
(1 sc, inc) x 6 (18)
Round 4-7 :
1 sc in each st (18)
Round 8 :
(1 sc, dec) x 6 (12)
Round 9 :
6 dec (6) — fasten off and leave tail for attaching ears and tail
Info :
Create cat ears: 3 sc in mr, (sc, inc) in next round to form triangle ear. Make 2 and sew on. Create a small curled tail by chaining 12 and slip stitching back to make a spiral, then sew to body. Embroider eyes with bright green yarn or attach tiny sew-on buttons and add a little nose with pink yarn.
— Witch Hat Ornament (make 1) :
Round 1 :
6 sc in magic ring (6)
Round 3 :
(1 sc, inc) x 6 (18)
Round 4-6 :
1 sc in each st (18) — form cone
Round 7 :
(2 sc, dec) x 6 (12)
Round 8 :
1 sc in each st (12)
Round 9 :
Switch to larger hook or increase to create brim: Attach yarn at base and ch 1, work 2 sc in each st around (24) — forms flat brim edge
Round 10 :
Work decorative band: join purple yarn and sc around brim, then small buckle: ch 4, sl st a 2x3 rectangle on band and embroider with yellow yarn for buckle
Info :
Sew a short hanging cord to top of hat and stuff lightly so hat keeps its point. Sew hat to spiral at desired location.
— Crescent Moon (make 1) :
Round 1 :
6 sc in magic ring (6)
Round 3 :
(1 sc, inc) x 6 (18)
Round 4-6 :
1 sc in each st (18)
Round 7 :
Switch to shaping: *sc 3, dec* around (15)
Round 8 :
Continue shaping to make crescent curve: sc in each st adjusting decreases to create tapered points. Stuff lightly and shape with fingers. Fasten off and leave a hanging cord attached at top curve.
Info :
Curve the crescent by slightly flattening and sewing a small tuck at each tip if you want a more dramatic crescent silhouette.
— Assembly & Hanging Cords :
Info :
Decide ornament spacing visually before attaching. Typical spacing: top-most ghost at ~10–12 cm from top, pumpkin at ~22–24 cm, skull at ~34–36 cm, cat around ~46–48 cm, moon at ~56–58 cm and haunted house attached at bottom end. Measure and pin cords before final sewing.
Step 1 :
Prepare hanging cords by chaining 30-50 stitches in black yarn (depending on how far you want ornaments to hang). Fold chain in half and knot at top to form a loop or attach directly through spiral with sturdy slip stitch.
Step 2 :
Sew each ornament to the end of a prepared cord using the long tail left from each ornament. Insert cord securely into crown/top of the ornament and stitch through several times into the tube wall of the spiral so each ornament hangs firmly in the fold of the spiral.
Step 3 :
For even balancing, hang the spiral temporarily and observe how it rotates. Adjust cord lengths by retying or re-stitching until ornaments are spaced evenly and the mobile hangs straight.
Info :
To make the mobile more secure, stitch the top hanging loop to the spider web with several reinforced stitches. At the bottom, sew haunted house firmly to tube end and add extra stitches so weight is distributed evenly.
Step 4 :
Weave in all ends and trim. If any ornaments need extra firmness, add a small dab of fabric glue on internal knots (optional). For final finish, steam-block lightly from a distance if your yarn tolerates it to relax curves and stitch tension.
Info :
Check every seam and reinforce with extra whip stitches in high-stress spots (where ornaments attach and where spider web meets tube). This will keep the mobile durable for repeated hanging and storage.
This Halloween spiral mobile is such a joyful project — each step brings the decoration to life, from twisting the purple stripe to stitching on tiny jack-o-lantern smiles. The finished piece is dramatic and playful, perfect for a doorway or mantle. I love how the ornaments bob and the haunted house anchors the whole design. 🕸️🎃🖤