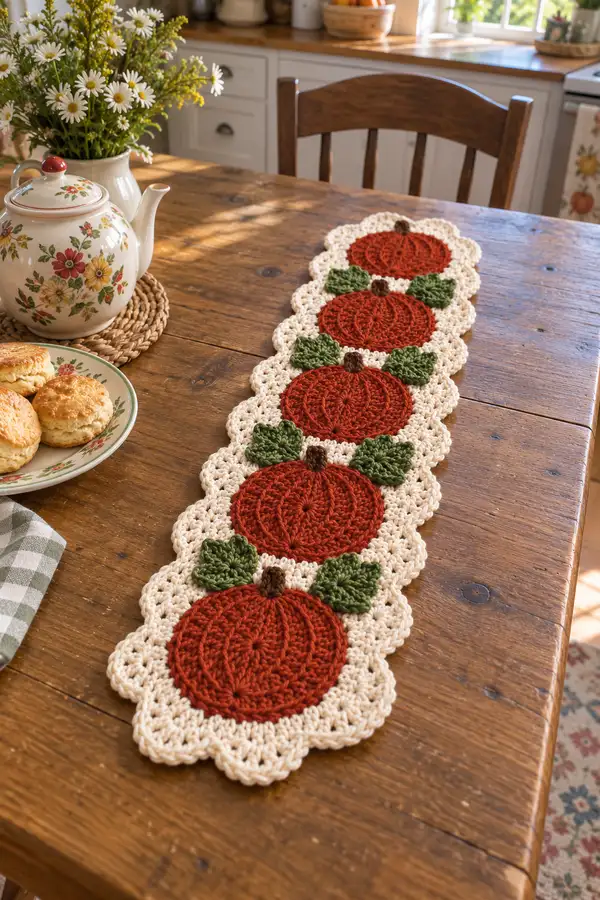
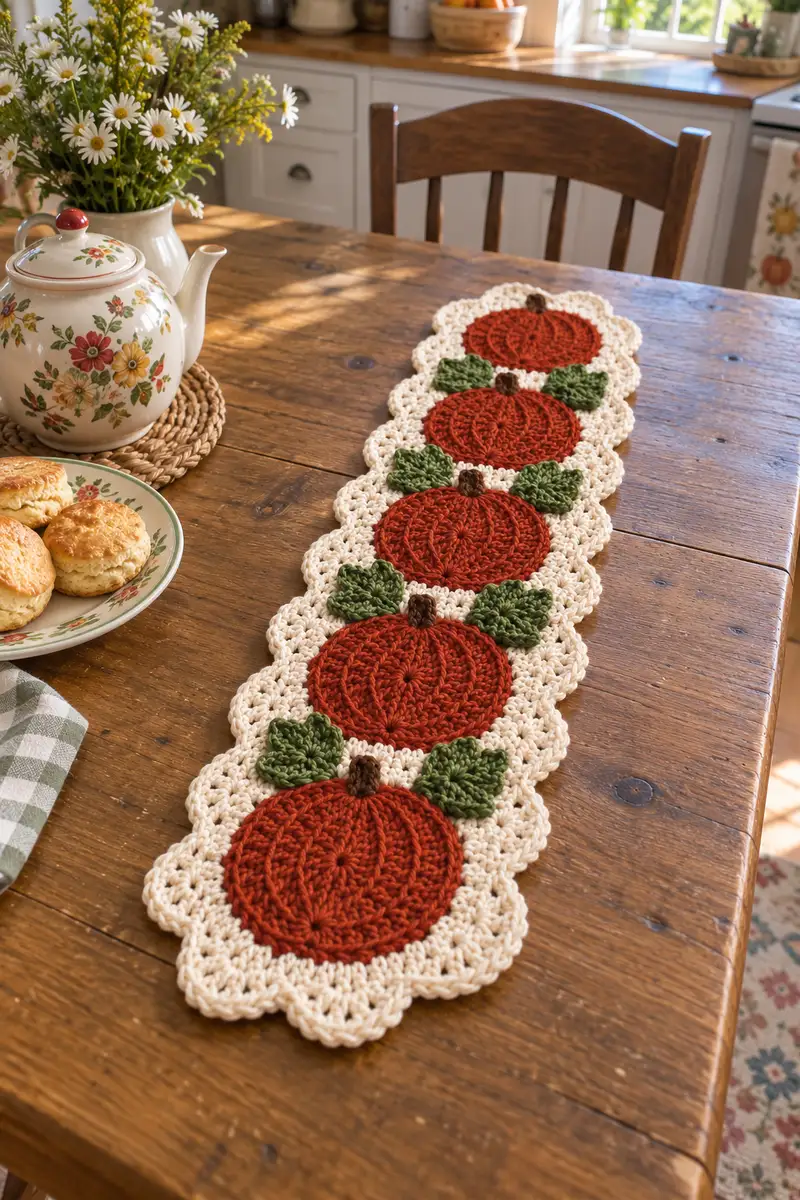
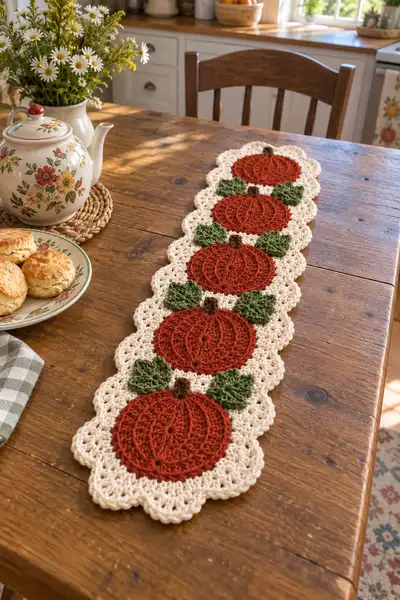
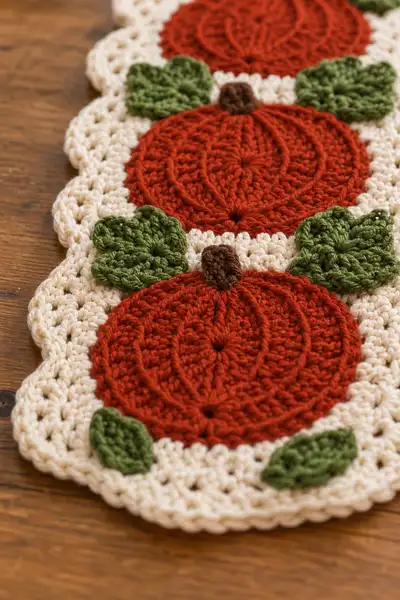
A warm, rustic table runner featuring five crocheted pumpkins linked down the center with scalloped cream edging and leafy green accents. This pattern uses textured pumpkin ribs, layered leaves, and a cozy scallop border to create a farmhouse-ready seasonal centerpiece. Worked in worsted weight cotton or cotton-blend yarn, it lays flat and is perfect for a Thanksgiving table or autumn decor. Detailed stitch-by-stitch instructions and assembly guidance included.
Progress Tracker
0% Complete
— Overview & Gauge :
Info :
This pattern builds a runner from 5 pumpkin motifs joined into a continuous runner with a scalloped cream border. Gauge is not critical but for consistent size use worsted weight yarn with 5.0mm hook. Each pumpkin motif measures approximately 5.5-6 inches (14-15 cm) across when worked in worsted cotton and blocked lightly. Keep tension consistent for flat motifs.
Info :
Abbreviations used: sc, hdc, dc, fpdc, sl st, mr, inc, dec. Work in continuous rounds unless otherwise stated; use stitch marker to mark round start.
— Pumpkin Motif (Make 5) :
Round 1 :
Make a magic ring. 8 dc in magic ring. Join with sl st to first dc. (8)
Info :
We begin with a small dc circle to make a flatter, more drapable pumpkin. Use dc in the round to create a fuller disc. You may substitute 8 sc if you prefer denser fabric but counts below assume dc base.
Round 2 :
Ch2 (counts as dc), 1 dc in same st, 2 dc in each st around. Join with sl st to top of ch2. (16)
Round 3 :
Ch2, (1 dc in next st, 2 dc in next st) rep 8 times. Join. (24)
Round 4 :
Ch2, (1 dc in next 2 sts, 2 dc in next st) rep 8 times. Join. (32)
Round 5 :
Ch2, (1 dc in next 3 sts, 2 dc in next st) rep 8 times. Join. (40)
Round 6 :
Ch2, (1 dc in next 4 sts, 2 dc in next st) rep 8 times. Join. (48)
Info :
At this point your pumpkin disc should be 48 dc around. This yields a good width for the pumpkin. Do not fasten off; we'll add a stabilizing round and then texture ribs. Place marker at first stitch of next round.
Round 7 :
Ch1, 1 sc in each st around working in BLO. Join with sl st to first sc. (48)
Round 8 :
Ch2 (does not count as st), *3 sc, fpdc around the next st (wrap yarn around post of the dc from R6), rep from * around 12 times total to create 12 evenly spaced ribs. Slip stitch to first fpdc to close round. (48)
Info :
We are creating 12 vertical ribs. Each repeat uses 4 base stitches: 3 sc + 1 fpdc. Spacing is critical: if you have 48 sts, 48/12 = 4 stitches per rib repeat. The fpdc works around a post from two rounds below for a raised ridge.
Round 9 :
Ch1, 1 sc in each st around, sl st to join. (48)
Round 10 :
Ch1, 1 sc in next 2 sts, (2 sc in next st) across to add a subtle bulge for pumpkin curvature; repeat pattern so increases are evenly distributed: (2 sc, 3 sc, 2 sc, inc) pattern group when necessary to remain at 48-52 counts depending on layout. For the sample maintain 48 by doing 1 sc in each st (48).
Info :
Round 10 is optional shaping. If you prefer a slightly puffier pumpkin keep 52 sts by adding 4 increases evenly spaced - we will keep the sample at 48 for even joins to the background.
Round 11 :
Ch1, 1 hdc in each st around working in FLO to soften the edge where the motif will meet the background. Sl st to join. (48)
Round 12 :
Ch1, 1 sc in each st around. Do not fasten off; leave long tail (~18-24 in / 45-60 cm) for sewing to background. (48)
Info :
Optionally block this disc lightly to flatten and set ribs. Make five identical pumpkin discs. When making additional pumpkins maintain stitch placement so ribs line up top-to-bottom when arranged along the runner.
— Pumpkin Rib Detail (Surface Stitching) :
Info :
To emphasize pumpkin segments, we'll add surface slip stitch lines from center to edge for each rib. This is done after motifs are assembled but can be completed before joining for cleaner work.
Step :
Using the working yarn tail or a contrasting strand, insert hook at center hole and pull a loop to surface. Work a surface sl st along the ridge of each fpdc line outward to the edge, anchoring at the hdc round. Repeat for all 12 ribs. Each surface line should be evenly spaced; count base stitches if needed to find rib centers (every 4th stitch).
Info :
Work surface stitching lightly — the goal is texture not heavy cord lines. For a deeper channel use a strand of same color and make raised chain-less slip stitch ridges.
— Stem (Make 5) :
Round 1 :
With espresso brown, mr, 6 sc in mr. (6)
Round 2 :
Inc in each st around (12). (12)
Round 3 :
1 sc in each st around (12)
Round 4 :
Ch1, *sc2tog, sc in next 2 sts, rep from * around (9). (9)
Round 5 :
1 sc in each st around (9)
Round 6 :
Fasten off leaving 12-18 in tail for sewing. Stuff lightly with a tiny bit of fiberfill or leave unstuffed for flat stem. (9)
Info :
Sew stems to the pumpkin centers: place stem at top center, anchor with 6-8 whip stitches, and secured with knots and woven tail. Stems are intentionally short and stout for a realistic look.
— Leaf (Make 10, two per pumpkin) :
Round 1 :
With leaf green, ch8. In 2nd ch from hook: 1 sc, 1 hdc, 1 dc, 2 tr (in next 2 chs as space allows), 1 dc, 1 hdc, 1 sc in last ch. Turn to work along the opposite side of foundation chain: 1 sc in base of last ch, 1 hdc, 1 dc, 2 tr, 1 dc, 1 hdc, 1 sc in original first ch. Sl st to first sc to finish leaf. (This is worked as one symmetrical flat leaf.)
Info :
Create a distinct center vein by stitching a line of surface slip stitches from base to tip with the same green or a slightly darker green. For a fuller look add a second row: sc around edge as a border: ch1, sc around the entire leaf joining with sl st to first sc.
Round 2 :
Ch1, sc in each st around the leaf edge if you want a defined edge. Join and fasten off leaving a long tail for sewing ~12-18 in. (Approximately 18-24 edge sts depending on your leaf shaping.)
Info :
Make 2 leaves per pumpkin. One leaf sits slightly behind the other to create overlapping, dimensional foliage. Vary leaf orientation slightly for naturalism.
— Background Panel & Joins (Cream Color):
Round 1 :
With cream color attached to the outer hdc round of a pumpkin disc, ch1 and work 24 sc across lower half arc to create a small flat section that will become the join surface. Fasten off. Repeat for each pumpkin, working a consistent arc so pumpkins will sit evenly when joined. (This action creates small tabs for joining.)
Info :
Rather than making separate background discs for each pumpkin, we're going to connect pumpkins with straight chain-and-shell joins that form the continuous runner. Make matching tabs for all pumpkins so spacing between pumpkins is consistent: measure spacing between centers as 2.5-3 inches (6-8 cm) depending on sample.
Joining Rows :
Lay the five pumpkin discs in a straight line with equal spacing. Using cream color, with right sides up, join round to round by slip stitching through the back loop of tab stitches created on each pumpkin to the matching tab of the next pumpkin, leaving a 1-2 stitch gap between pumpkins for leaf placement. Work a single continuous chain connection between pumpkins using sc and chain spaces to create a flat neutral background. Example: join R1: attach cream at starting tab on Pumpkin 1, ch12, sl st to tab on Pumpkin 2; continue along runner across all pumpkins. Ensure the chain length between pumpkins matches across each pair so the runner stays straight and even.
Info :
Pin pumpkins to a blocking board or flat surface before permanently joining to maintain spacing. The sample has roughly 3 inches center-to-center spacing between pumpkins (edge-to-edge approx 1.25-1.5 inches), which leaves room for two leaves between each pumpkin pair.
— Join Round to Cover Connections (Cream) :
Round 1 :
With cream attached at any tab join, ch1, 1 sc in each tab stitch and in each connecting chain across the runner, creating a full-width cream strip across back of pumpkins. Continue around both sides of runner to build a flat background. Work evenly to create an even rectangular corridor across the runner. (Stitch count will vary depending on your spacing; check that both sides are symmetrical.)
Info :
Work this round in a continuous crocheted strip that spans the runner width; you will return later to add scallops on both long edges. Keep counts mirrored on both edges so the scallop edge works perfectly.
Round 2 :
Ch2 (counts as hdc), hdc in each st across, ch2, turn and repeat on the other side to build up a 3-round background strip. Work 3 rounds of hdc evenly to create a sturdy base. Fasten off. (Stitch counts depend on measured width; aim for approximately 12-18 hdc across to form a 1-inch strip on each side if your pumpkins are spaced as sample.)
Info :
At this step you have a continuous runner made of pumpkin discs linked with a cream background strip. Leaves and stems will be sewn in place next. Use pins to mark leaf positions: two leaves between pumpkins sitting in the little gaps created by the joining chains. Each pumpkin also has a small top gap where a stem will attach.
— Leaf Placement & Sewing :
Step :
Position two leaves per pumpkin: one slightly left and forward of the pumpkin center and one slightly right and back to create layered look. The leaves will sit on the cream strip between pumpkins and on the outer edge next to the pumpkin body. Use pins to secure leaves in the arrangement you like before sewing.
Info :
Sew leaves on using the leaf tails and mattress or whip stitch. Make small invisible stitches into the cream background and the pumpkin edge to anchor. Leave the tips loose if you want a less flat look; otherwise stitch the full perimeter for a secure flat runner.
— Stem Attachment :
Step :
Place the small brown stem at the top center of each pumpkin, anchored to the central hole or adjoining rounds. Secure by sewing through the stem base and into the pumpkin center with 6-8 tight stitches, knot and weave tail to the back. Fasten off securely.
Info :
If stems are a little tall, trim to desired height before sewing to prevent tipping. For a curlier rustic stem, twist yarn and secure with an overhand knot before anchoring.
— Scalloped Border (Cream) :
Round 1 :
Attach cream to any outer edge stitch of runner. Ch1, sc evenly around the entire long edge and short ends of the runner, placing 1 sc for every hdc or sc on the edge. Join with sl st. (Stitch count depends on your runner length; ensure even counts on both long edges.)
Info :
Mark the midpoint of each short end and long edge so scallops will be symmetrical. Work in continuous rounds to avoid seams showing; use stitch markers at corners to keep alignment.
Round 2 :
Ch3 (counts as dc), skip 2 sts, 5 dc in next st (shell), skip 2 sts, dc in next st; repeat shell pattern along the entire edge to create scallops: [dc, *(5 dc in same st, skip 2, dc in next st)*] along. Join with sl st to top of first ch3. Shell spacing should create rounded scallops aligned with pumpkins below. (Count: number of shells = edge length divided by 3-4 depending on spacing.)
Info :
If shells overlap pumpkin edges, reduce shell size to 3 dc to maintain proportion. For the sample, shells of 5 dc give prominent scallops that echo the pumpkin round shape.
Round 3 :
Ch1, sc in each dc and shell stitch across to neaten scallops. Place 3 sc in the center dc of each shell to give a neat scallop tip. Join and fasten off. Weave in ends. (Stitch count varies.)
Info :
Repeat scalloped rounds for both long edges and both short ends. Blocking the runner lightly with pins at scallop edges helps shells sit rounded and even.
— Finishing Surface Details :
Step 1 :
Using a strand of the pumpkin color or a slightly darker shade, accentuate the ribs by making a thin surface embroidery line down each fpdc rib from the center to edge, anchoring carefully to avoid pulling. Use a blunt yarn needle and small even stitches. Repeat for each pumpkin.
Info :
Small decorative knots or French knot-style seed stitches in center of pumpkin add a finished look. Make two small stitches at center and a couple of back stitches along stem base to secure look.
Step 2 :
Weave in all tails on wrong side using yarn needle. Trim ends and tidy any extra loops. Optionally steam-block lightly to set shape and flatten joins, being careful with cotton yarn and textured ribs.
Info :
Lay the runner flat to dry completely if you used blocking. If the runner will see food or spills, consider a light fabric-safe spray stiffener to help keep shape, or use a clear table runner protector over it.
— Tips for Custom Sizing and Variation :
Info :
To make a shorter runner, reduce the number of pumpkin motifs (e.g., 3 pumpkins). To make a longer runner, add more pumpkins and increase the number of connecting chain stitches between pumpkins proportionally. Use thicker yarn and a larger hook to create a bigger motif, but be mindful that stitch counts will change and you may need to increase the motif rounds accordingly to maintain balance.
Info :
For a stitched-in-place accent, change leaf color variations: try two shades of green or use variegated yarn for a rustic, multi-tonal leaf effect. A metallic thread used sparingly can also give a subtle shimmer to holiday tables.
You've created a charming farmhouse-style pumpkin runner that brings seasonal warmth to any table. The layered pumpkins, textured ribs, and scalloped edges combine for a handcrafted centerpiece that's both practical and decorative. Each stitch contributes to a cozy autumn mood—perfect for family gatherings or a festive touch every day. Celebrate your handiwork and share a photo—this runner is sure to inspire smiles! 🍂🧶