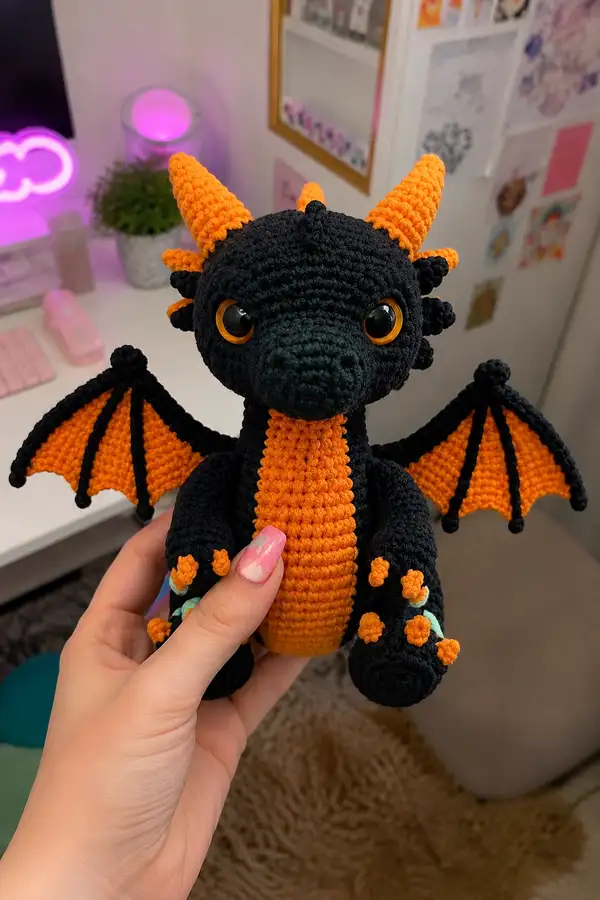
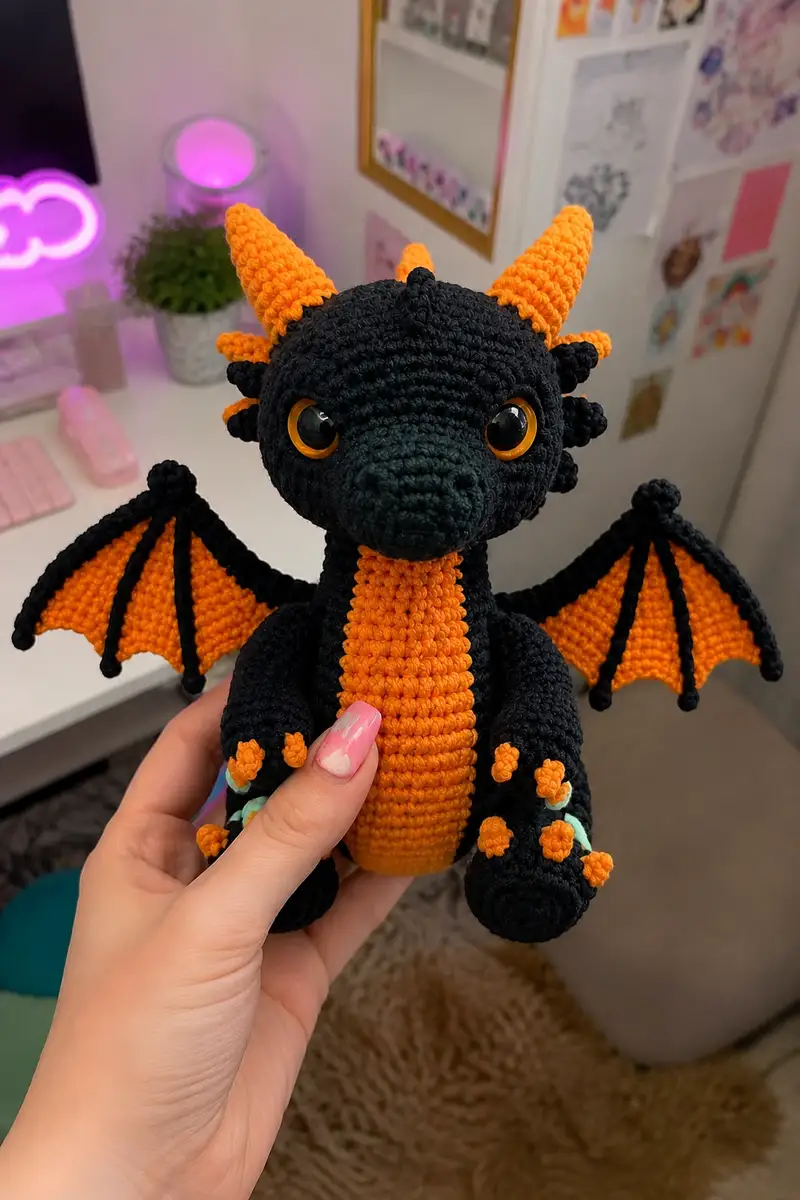
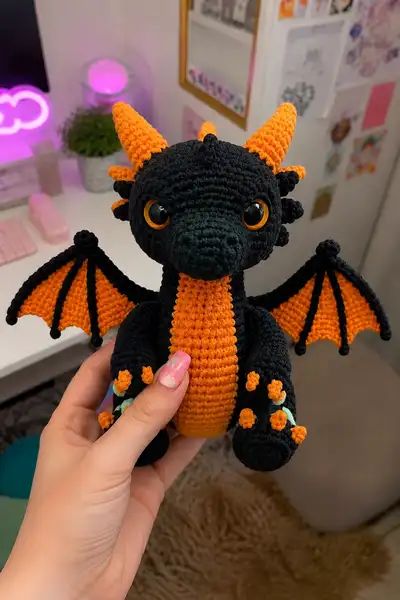
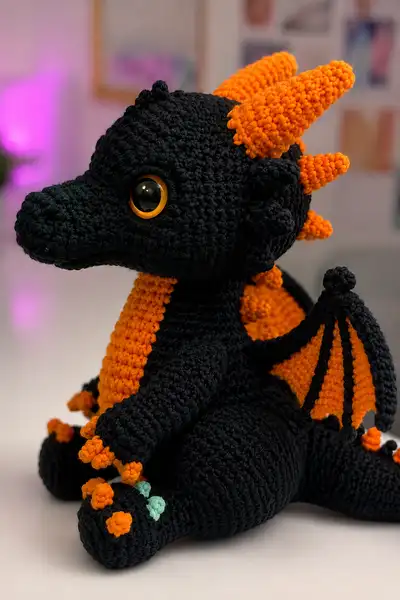
Create an irresistibly spooky yet adorable black-and-orange dragon amigurumi perfect for Halloween displays or year-round cuddles. This pattern recreates the plush dragon pictured — large golden safety eyes, a long orange belly panel, curving orange horns and matching orange wing membranes with black ribs. Detailed shaping for a rounded head, elongated snout, chubby body, articulated wings and clustered claw details make this an advanced, highly detailed project you will love to stitch.
Progress Tracker
0% Complete
— Head :
Round 1 :
6 sc in magic ring (6)
Round 3 :
(1 sc, inc) x 6 (18)
Round 4 :
(2 sc, inc) x 6 (24)
Round 5 :
(3 sc, inc) x 6 (30)
Round 6 :
(4 sc, inc) x 6 (36)
Round 7 :
(5 sc, inc) x 6 (42)
Round 8 :
(6 sc, inc) x 6 (48)
Round 9-20 :
1 sc in each st (48)
Info :
Place safety eyes between rounds 13 and 14 — approximately 10-12 stitches apart depending on how wide-eyed you want the dragon. For the pictured effect use 18mm amber safety eyes and mark placement with pins before locking in place.
Round 21 :
(6 sc, dec) x 6 (42)
Round 22 :
(5 sc, dec) x 6 (36)
Info :
Begin stuffing head firmly now — push fill into the front to define the snout area gently. Put less stuffing near the back so the head joins smoothly to the neck.
Round 23 :
(4 sc, dec) x 6 (30)
Round 24 :
(3 sc, dec) x 6 (24)
Round 25 :
(2 sc, dec) x 6 (18)
Round 26 :
(1 sc, dec) x 6 (12)
Info :
Fasten off and leave a long tail for sewing. At this stage the head is closed but you will attach the snout (worked separately) to the front to build out the muzzle. If you prefer a seamless front, do not close fully — instead leave an opening and continue after snout attachment.
— Snout / Muzzle :
Round 1 :
6 sc in magic ring (6)
Round 3 :
(1 sc, inc) x 6 (18)
Round 4 :
(2 sc, inc) x 6 (24)
Round 5-7 :
1 sc in each st (24)
Info :
This piece sculpts the long muzzle seen in the photos. Work even until desired muzzle length (3 rounds even in the example), then decrease to taper the nose tip slightly. Keep the front slightly flattened by gentle stuffing.
Round 8 :
(2 sc, dec) x 6 (18)
Round 9 :
(1 sc, dec) x 6 (12)
Info :
Fasten off leaving a long tail for sewing. Stuff the snout fairly firmly to hold shape and sew onto the head's front between rounds 11-16 of the head (centered under the eyes). Use small whip stitches and match stitch count to keep a clean join.
— Neck (Tube to join head and body) :
Round 1 :
6 sc in magic ring (6)
Round 3-8 :
1 sc in each st (12)
Info :
Work neck length to visually match reference: 6 rounds of 12 sts creates a short neck. Leave top tail for sewing to inside of head and bottom tail for sewing to body opening. Stuff lightly — neck should be slightly firm but flexible for attachment.
— Body :
Round 1 :
6 sc in magic ring (6)
Round 3 :
(1 sc, inc) x 6 (18)
Round 4 :
(2 sc, inc) x 6 (24)
Round 5 :
(3 sc, inc) x 6 (30)
Round 6 :
(4 sc, inc) x 6 (36)
Round 7-14 :
1 sc in each st (36)
Info :
Change to orange yarn now if you plan to crochet the belly panel separately and sew it on. For an integrated belly, switch to orange on the first st of the next round. Work next rounds in BLO to create a small ridge for the belly seam if desired.
Round 15 :
(4 sc, inc) x 6 (42)
Round 16-18 :
1 sc in each st (42)
Info :
Begin moderate stuffing at round 16-18 to build the plump midsection. Do not overstuff - leave room for head and neck to be joined comfortably and for leg seams.
Round 19 :
(5 sc, dec) x 6 (36)
Round 20 :
(4 sc, dec) x 6 (30)
Round 21 :
(3 sc, dec) x 6 (24)
Round 22 :
(2 sc, dec) x 6 (18)
Round 23 :
(1 sc, dec) x 6 (12)
Round 25-30 :
1 sc in each st (6) — optional short tube to shape base or to create an opening for a tail attachment
Info :
For this pattern the body remains open at the top to accept the neck — sew neck tail to inner top stitches of body so the seam sits inside the torso. Leave the lower base (rounds 25-30) if you want a little tubular foot base or to anchor tail. Stuff body firmly but not rock-hard.
— Belly Panel (Make 1) :
Round 1 :
6 sc in magic ring with orange (6)
Round 3 :
(1 sc, inc) x 6 (18)
Round 4 :
(2 sc, inc) x 6 (24)
Round 5-16 :
1 sc in each st (24) — continue until panel reaches desired length to match front of body from neck to base (about 12 rounds worked here in sample)
Info :
Flatten panel and pin to front center of body. Sew using ladder stitch to hide seam. If you want visible orange spine, crochet the panel slightly wider and sew centered to make the orange strip emphasized.
— Front Legs / Arms (Make 2) :
Round 1 :
6 sc in magic ring (6)
Round 3 :
(1 sc, inc) x 6 (18)
Round 4-6 :
1 sc in each st (18)
Info :
These are the arms (front legs). In the photo the arms are slightly shorter than the legs and have small orange clustered claws. Crochet them so the opening at top aligns with the body side seam around rounds 12-16 of the body. Stuff hands firmly but arms lightly so they bend.
Round 7 :
(2 sc, dec) x 6 (12)
Round 8-12 :
1 sc in each st (12)
Round 13 :
(1 sc, inc) x 6 (18) — optional widen for upper arm
Round 14-18 :
1 sc in each st (18)
Info :
Stuff the hand end firmly and the upper arm lightly. Leave a long tail for sewing the opening to the body. To add the tiny claws, use bright orange and crocheted bobbles sewn to the hand edge (see claws section)
— Back Legs (Make 2) :
Round 1 :
6 sc in magic ring (6)
Round 3 :
(1 sc, inc) x 6 (18)
Round 4 :
(2 sc, inc) x 6 (24)
Round 5 :
(3 sc, inc) x 6 (30)
Round 6-10 :
1 sc in each st (30)
Info :
Create a flat, rounded foot by working the first 6 rounds then stuffing firmly. The pictured dragon has large, rounded hind legs that flow into thighs; keep the foot area firmer and the thigh area slightly softer.
Round 11 :
(4 sc, dec) x 6 (24)
Round 12 :
(3 sc, dec) x 6 (18)
Round 13-18 :
1 sc in each st (18) — shape leg length
Round 19 :
(1 sc, dec) x 6 (12)
Info :
Leave a long tail for sewing. Sew legs to lower sides of the body, just in front of the base opening, so the dragon can sit with legs supporting its weight. Add claws to toes using small orange bobbles sewn to the top of the foot.
— Wing (Make 2) :
Info :
Each wing is made flat then edged and ribs added in black. Work the wing with orange center membrane and add black ribs worked in FLO or surface crochet to mimic pictured ribs. Wing dimensions approximate: base length 22-26 sts, height 12-16 rows (worked as rounds/spiral to maintain consistent edge).
Round 1 :
Ch 22, sc in 2nd ch from hook and across (21) — turn to work along chain base; join to first ch with sl st to make a small loop or work in joined rounds if you prefer a curved wing
Round 2 :
Working in rounds around the chain loop: 1 sc in each st (21)
Round 3 :
(1 sc, inc) across to increase width at middle edge to create scallop (28) — shape wing curve
Round 4-10 :
1 sc in each st (28) — continue building wing membrane height to desired size (7 rounds in sample)
Info :
To create the black ribs, use tapestry or surface slip stitch: starting at base, surface slip stitch three slightly curved ribs from base to outer edge; end each rib with a small bobble or finished point as shown. Alternatively, work ribs as crocheted narrow tubes sewn onto membrane.
Round 11 :
1 sc in each st BLO to create a clean top edge ridge if desired (28)
Round 12 :
Fasten off leaving long tail for sewing to body. Lightly stiffen wing by inserting thin wire along base or use felt spine for structure if you want poseable wings.
— Large Horn (Make 3) :
Round 1 :
6 sc in magic ring with orange (6)
Round 3 :
(1 sc, inc) x 6 (18)
Round 4 :
(2 sc, inc) x 6 (24)
Round 5-8 :
1 sc in each st (24) — work even to create horn length
Round 9 :
(2 sc, dec) x 6 (18)
Round 10 :
(1 sc, dec) x 6 (12)
Round 12 :
Stuff lightly, fasten off leaving long tail for sewing. Sew horns to top and back of head in a triangular arrangement. Position two larger horns up front and one medium behind as in photo.
— Small Spike / Scale (Make 6–8) :
Round 1 :
6 sc in magic ring (6)
Round 2 :
(1 sc, inc) x 3 (9)
Round 3 :
1 sc in each st (9)
Round 4 :
6 sc — flatten and fasten off leaving tail for sewing
Info :
Sew small spikes down the center-back of the head and down the tail to mimic the clustered spines in the reference. Place them symmetrically along the head sides and middle with about 4-6 stitches between each spike.
— Tail :
Round 1 :
6 sc in magic ring (6)
Round 3 :
(1 sc, inc) x 6 (18)
Round 4-8 :
1 sc in each st (18) — work even to build tail length (5 rounds in sample)
Round 9 :
(1 sc, dec) x 6 (12)
Round 10-12 :
1 sc in each st (12)
Round 13 :
(1 sc, dec) x 4 then 1 sc in remaining 4 sts (8) — begin tapering
Round 14-16 :
1 sc in each st (8) — finish tail tip length
Round 17 :
Fasten off leaving long tail for sewing. Sew tail to back center of body at round 5-6 area. Add small spikes along top using small spike pieces — space evenly.
— Claws / Toes (Make many small bobble claws) :
Claw Round 1 :
With orange, ch 2, 3 sc in 2nd ch (3) — or 4 sc in magic ring to make a tiny puff
Claw Round 2 :
Slip stitch into working stitch to close, fasten off with a short tail for sewing (no more than 2 rounds). Alternatively make a 3-sc bobble: sc3tog into same st to create a clustered bobble.
Info :
Sew 3–4 claws to front of each paw and 3–4 claws to each hind foot. Use tiny stitches to anchor each claw firmly. The pictured dragon has 4 small orange claws on each front paw and 4 orange plus a small mint-green accent on one hind foot.
— Decorative Accent (small mint/teal claw detail) :
Round 1 :
4 sc in magic ring with mint (4), fasten off leaving tail for sewing
Info :
Sew mint accent to one hind foot as pictured to break monotone and add visual interest. Use a short tail and mattress stitches or a whip stitch to secure firmly.
— Assembly Preparation :
Info :
Weave in all tails until final placement but keep long tails used for sewing. Pin parts in position on the body before sewing (head, legs, arms, wings, tail, horns). Use photos as guides: head sits on top center, wings attach slightly behind the shoulders, horns at the top/back of head, tail centered at lower back, legs at the base sides.
— Final Finishing Touches :
Info :
Sew the snout to the head between rounds 11-16 and ensure eyes are centered above snout. Sew horns and spikes with secure stitches and add a few extra anchoring stitches through the inner head to prevent rotation. Embroider nostrils or mouth if desired with black or orange yarn.
Info :
Secure all safety eyes with washers before finishing stuffing and closing head. Use a tuft of stuffing behind eyes to push them out slightly and create the expressive look seen in the photos.
Info :
Block wings slightly or insert thin wire for poseability. For the wing ribs, use surface crochet or narrow tubes sewn on top of the membrane. Add small black points at wing tips (tiny bobbles) to mimic reference spikes.
This spooky dragon amigurumi brings playful Halloween flair to your handmade collection with bold orange highlights and sculpted features. The pattern walks you through every stitch and connection so you can recreate the dramatic eyes, horns and wing membranes with confidence. Have fun customizing colors and small details — each little stitch makes this dragon feel alive! 🧶🦇✨