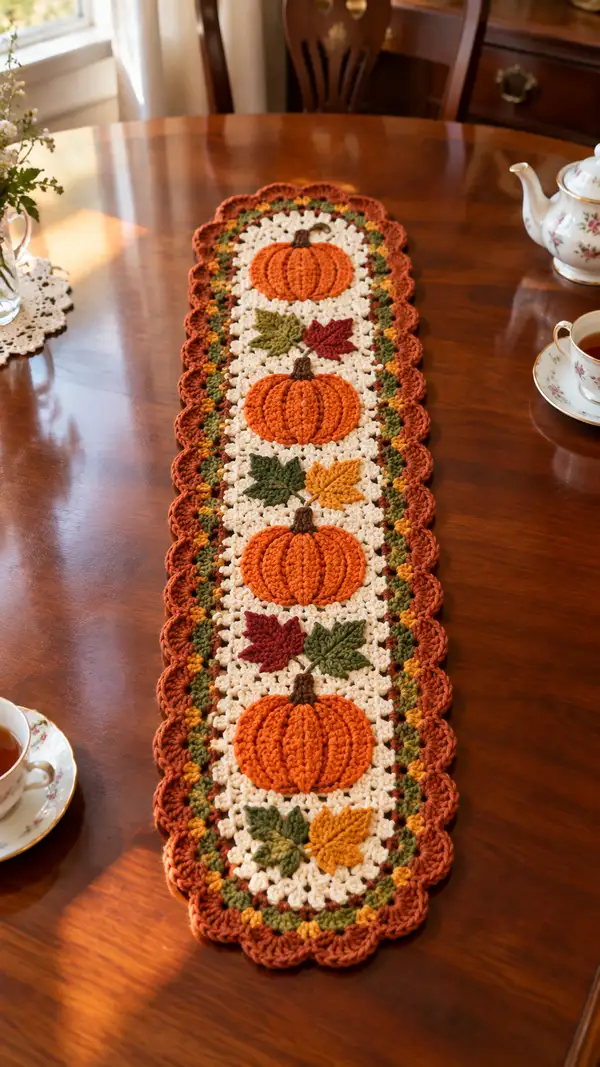
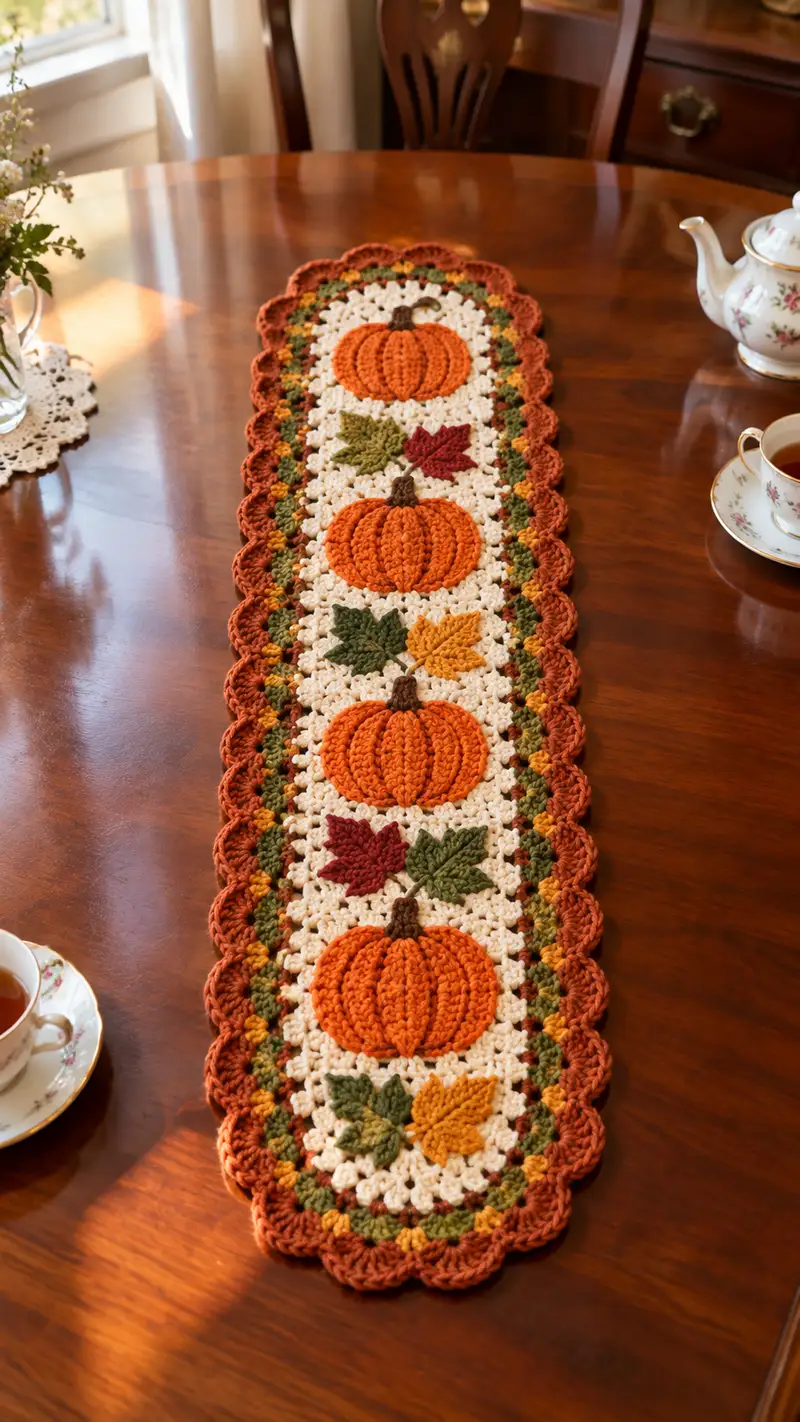
A warm, harvest-inspired table runner featuring four dimensional pumpkin appliques framed by autumn leaves and a scalloped rust border. Worked in worsted weight yarn, textured pumpkin ribs and layered leaves give a cozy vintage vibe. Perfect for a fall centerpiece or seasonal gift, the runner sits beautifully on a dining table and mixes cream, pumpkin orange, rust and leafy greens for classic autumn charm.
Progress Tracker
0% Complete
— Notes & Gauge :
Info :
Gauge is not critical for motif layout, but for size consistency test 10cm square using granny-cluster ground with 5.0mm hook; adjust hook size if motifs differ. Make all pumpkins and leaves using the same hook for consistency
Info :
Color key used in this pattern: Cream = background, Pumpkin = orange, Rust = border, Brown = stem, Green 1 = olive, Green 2 = forest, Mustard = golden yellow.
— Pumpkin Applique (Make 4 identical) :
Round 1 :
With Pumpkin yarn, mr, 6 sc in ring (6)
Round 2 :
Inc in each st around (12)
Round 3 :
(1 sc, inc) x 6 (18)
Round 4 :
(2 sc, inc) x 6 (24)
Round 5 :
(3 sc, inc) x 6 (30)
Round 6 :
(4 sc, inc) x 6 (36)
Round 7 :
(5 sc, inc) x 6 (42)
Round 8 :
(6 sc, inc) x 6 (48)
Info :
At this stage you have a flat circle approx 48 sts. We'll build a slightly oval shape for the pumpkin by working rows that extend two opposite sides. Keep a stitch marker at the start of each round.
Round 9 :
1 sc in next 6 sts, (inc in next st, 1 sc in next 6 sts) x 5, inc in next st (54)
Round 10 :
1 sc in each st around (54)
Round 11 :
1 sc in next 8 sts, (inc, 1 sc in next 8 sts) x 5 (60)
Round 12 :
1 sc in each st around (60)
Info :
We now have an oval disk. We'll use front-post stitches to create vertical ribbing that visually separates the pumpkin into segments. Place 8 equally spaced ribs by working FPdc around designated posts in the next rounds.
Round 13 :
Change to 4.0mm hook if you prefer tighter ribs. *1 sc in next 6 sts, FPdc around next st* rep around adjusting spacing so you make 8 FPdc ribs evenly (60) Note: count FPdc as worked in place of sc for spacing.
Round 14 :
1 sc in each sc and around each FPdc post (60)
Round 15 :
Work 1 sc in next 4 sts, FPdtr (front post double treble) around next post to extend rib height, 1 sc in next 4 sts, rep around (60)
Round 16 :
1 hdc in each st around working over tall ribs (60)
Info :
To shape the pumpkin slightly inward at the top and bottom, we'll work decreases on two opposite sides. Keep applying gentle pressure with fingers to form the pumpkin curve. You may add a small amount of stuffing or a thin piece of batting inside between rib rows for dimension.
Round 17 :
(6 sc, dec) x 6 (54)
Round 18 :
1 sc in each st around (54)
Round 19 :
(5 sc, dec) x 6 (48)
Round 20 :
1 sc in each st around (48)
Info :
Lightly stuff the center only if you want pumpkin to have a puffed look; do not overstuff as applique should sit flat on the runner. Stuff with tiny amounts at a time, shaping between fingers.
Round 21 :
(4 sc, dec) x 6 (42)
Round 22 :
1 sc in each st around (42)
Round 23 :
(3 sc, dec) x 6 (36)
Round 24 :
(2 sc, dec) x 6 (30)
Round 25 :
1 sc in each st around (30)
Round 26 :
Fasten off Pumpkin color leaving a 20-25cm tail for sewing. With Brown yarn, join at a central top point and ch 2.
Round 27 :
Brown: sc 6 in ch 2 loop, tighten to form small stem (6)
Round 28 :
Work 2 rounds of 6 sc around stem if you prefer a taller stem; sl st, fasten off leaving long tail for sewing (6)
Info :
Weave the long tail through the back of the pumpkin applique several times to secure and reduce chance of unraveling. Optionally add a tiny French knot with brown to simulate curling vine.
— Leaf Applique (Make 8 mixed colors) :
Round 1 :
With Green or Mustard, ch 6, sc in 2nd ch from hook, hdc, dc, hdc, sc (5 sts across) leave last loop on hook
Round 2 :
Work along opposite side of foundation chain: sc in next st, hdc, dc, hdc, sc (10) sl st to join at base
Round 3 :
Ch 1, sc in base, ch 3, sl st in tip to create point, ch 3, sc back in base to form one serrated lobe. Repeat to make a symmetrical opposite lobe (12)
Round 4 :
Work small picot points: *sc, ch 3, sl st in same st* around each lobe point to create textured edge (12)
Round 5 :
Fasten off leaving long tail for appliqué. Optionally embroider central veins with contrasting color using surface slip stitch: bring thread to front and make 3 short straight stitches radiating from base (Info)
Info :
Make leaf sizes uniform. Use a mix of olive, forest green, mustard, and rust for color variety. Pin leaves between pumpkins in arrangement shown in image (two small leaves per pumpkin area).
— Granny Cluster Background (Runner Base) :
Info :
This runner is constructed as a long rectangle of granny-cluster squares worked in the round using cream background. The runner in photo measures approximately 12-13 inches wide and about 44-48 inches long made of 4 motif columns lengthwise. Adjust number of rows for desired length.
Round 1 :
With Cream, ch 4, sl st to form ring, ch 3 (counts as dc), work 2 dc, ch 2, *3 dc, ch 2* rep 3 times to form a 4-cluster square, sl st to top of beginning ch-3 (12 dc clusters, 4 ch-2 corners)
Round 2 :
Ch 3, turn, in each ch-2 corner work (3 dc, ch 2, 3 dc), in each ch-1 space between clusters work 3 dc, rep around, sl st to join (corner clusters increase runner width) (16 clusters)
Round 3 :
Repeat Round 2 working 3 dc clusters into each space and corners as (3 dc, ch 2, 3 dc). Keep corners square. Continue until you have a rectangular panel approximately 28 clusters long by 6 clusters wide to accommodate four pumpkins vertically. For this runner we will work rows to make a long narrow strip: increase length by adding rounds building out one dimension only (see Info)
Info :
The runner is assembled as a single long rectangle rather than discrete joined squares. To lengthen, work additional rounds expanding the rectangle outward on the short edges only, maintaining cluster pattern. For precise placement of pumpkins work until panel measures about 44-46 inches long before border.
Round 4-18 :
Continue 1 dc clusters in each cluster space and (3 dc, ch 2, 3 dc) in corners. Increase only on short ends to lengthen the rectangle. Maintain consistent stitch count across width (for our 6-cluster width keep clusters per row constant). After each full round measure length. (Clusters vary: maintain 6 clusters across width)
Info :
Between pumpkins we will leave space of 6-8 cluster rows (depending on your gauge) so pumpkins can be appliqued centered within a square of clusters. Mark the centers for applique placement with safety pins or small stitch markers.
Round 19 :
Once desired length is reached, work 2 rounds of 1 sc in each dc stitch and 2 sc in each chain-2 corner to create a solid edge for easier appliqué (approx stitch count will vary with size; expect 6 sc x width clusters length + corners).
Round 20 :
Work 1 sc in each st around to create a neat base for attaching pumpkin appliques (use smaller 4.0mm hook if you prefer a tighter edge)
Info :
Block the panel lightly if you note any skewing before attaching motifs. Pin placement: mark four equal vertical centers along the runner where pumpkin centers will be sewn. Leave approx 2.5-3 inches from each short end to first/last pumpkin so scallops sit cleanly.
— Pumpkin Ribwork Enhancement (Surface Stitching) :
Round 1 :
With Pumpkin yarn and yarn needle, using a long tail left from each applique, create 6-8 evenly spaced vertical surface slip-stitches from base to top to simulate deep ribs. Insert needle at bottom center, come through front, make surface sl st up to top and back down to bottom to anchor (Info)
Info :
Work ribs before sewing the pumpkin flat to the runner so you can shape slightly by pulling threads to create indentation between ribs. Do not pull too tight; keep ribs rounded.
— Sew Pumpkin Appliques to Runner :
Round 1 :
Position first pumpkin centered over marked cluster square. Using matching pumpkin tail and tapestry needle, whip stitch around edge every 6-8 sts to flatten and secure (Info)
Round 2 :
Sew stem on top center of pumpkin. Use brown tail to embroider a short vine if desired. Repeat for remaining pumpkins aligning centers evenly. (Make sure each pumpkin is symmetrical left-right in layout)
Info :
When sewing, ensure applique lies flat but keep ribbed texture intact. Use tiny stitches through the outer-most row of stitches; hide tails between runner rows and weave in securely.
— Attach Leaves Between Pumpkin Sections :
Round 1 :
Pin 2-3 leaves between each pumpkin grouping, offset to look natural. Use long tail to tack each leaf at base and a couple small stitches through central vein to lay flat.
Info :
Mix colors for visual interest: pair one olive leaf with one mustard or rust leaf in alternating arrangement as seen in reference photo. Slightly overlap leaf bases over pumpkin tops for integrated look.
— Multi-Color Border (Join & Trim Rounds) :
Round 1 :
With Rust, join in any st on short end edge of runner, ch1, sc evenly around short end edge making approx 1 sc per cluster point and 3 sc in corners to create squared base (st count depends on runner length)
Round 2 :
Change to Green1 (olive). Ch3 (counts as dc), *skip 2 sts, (3 dc in next st), ch1, skip 2 sts, dc in next st* rep around ends and long edges to create small shell separators (Info)
Round 3 :
Change to Mustard. Work single-row of eyelets: *ch3, sk 2, sc* repeat along length to pick up color pops (Info)
Round 4 :
Change to Rust. Work a full round of sc in each st to even the edge and prepare for scallops (approx stitch count consistent with previous sc round)
Round 5 :
Scallop Round: *Skip 2 sts, work (5 dc) in next st, skip 2 sts, sl st in next st* repeat around. Work shells evenly spaced, put 7 dc shells centered at each end corner to create rounded ends. (Shell count varies; keep consistent spacing across long sides)
Info :
For a deeper scallop use (7 dc) shells for a pronounced edge. If your runner fabric is tight, reduce shells to 5 dc for a more delicate finish.
Round 6 :
Edge Finish: Sl st in each dc of shells to create defined edges, fasten off, weave ends. Block scallops gently to open shells and even spacing (Info)
— Optional Extra Round: Raised Shell Contrast :
Round 1 :
With Rust, work one round of FPdc around each shell's outer posts to give a raised ridge. This is worked behind shells to make border pop. Fasten off and weave ends (Info)
— Assembly & Finishing Touches :
Round 1 :
Weave in all tails from pumpkin, leaves and border on wrong side using yarn needle, trimming close after weaving through several stitches
Round 2 :
Block runner gently: dampen, pin to a flat surface measuring straight edges and scallop symmetry, leave to dry fully (Info)
Round 3 :
Optional: Add tiny French knots or embroidered veins on leaves using contrasting yarn to enhance detail (Info)
Info :
Final dimensions for this sample: approximately 12-13 inches wide x 44-48 inches long. Adjust number of granny rounds or clusters to make a longer or shorter runner as desired. Congratulations — your Autumn Pumpkin Table Runner is complete!
Finishing this Autumn Pumpkin Table Runner is such a cozy reward — the textured pumpkin ribs and layered leaves create a warm, hand-crafted centerpiece that instantly reads 'fall'. I love that the modular approach lets you make each applique at your pace, then assemble for a satisfying finish. Display it with candles or a teapot for a vintage-inspired table setting. 🍂🧶