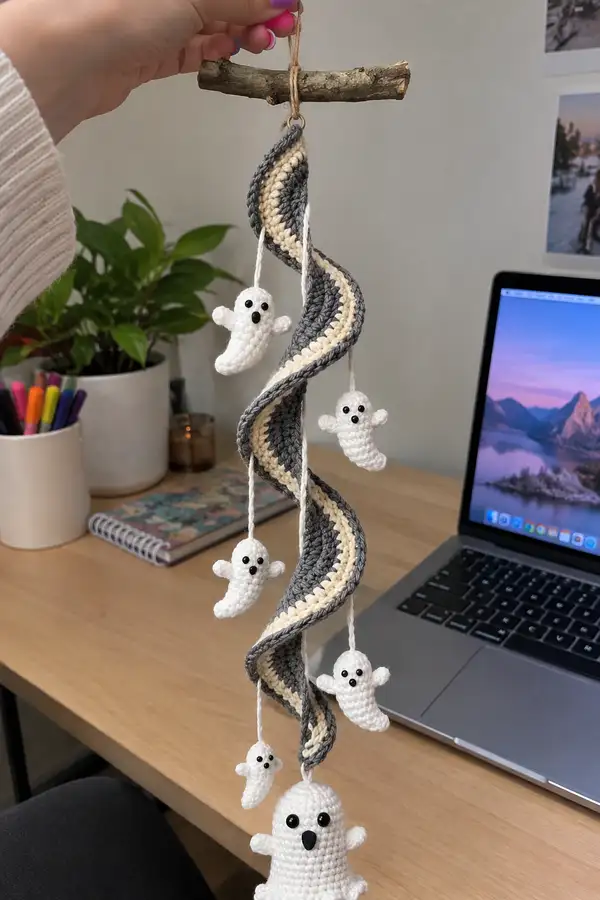
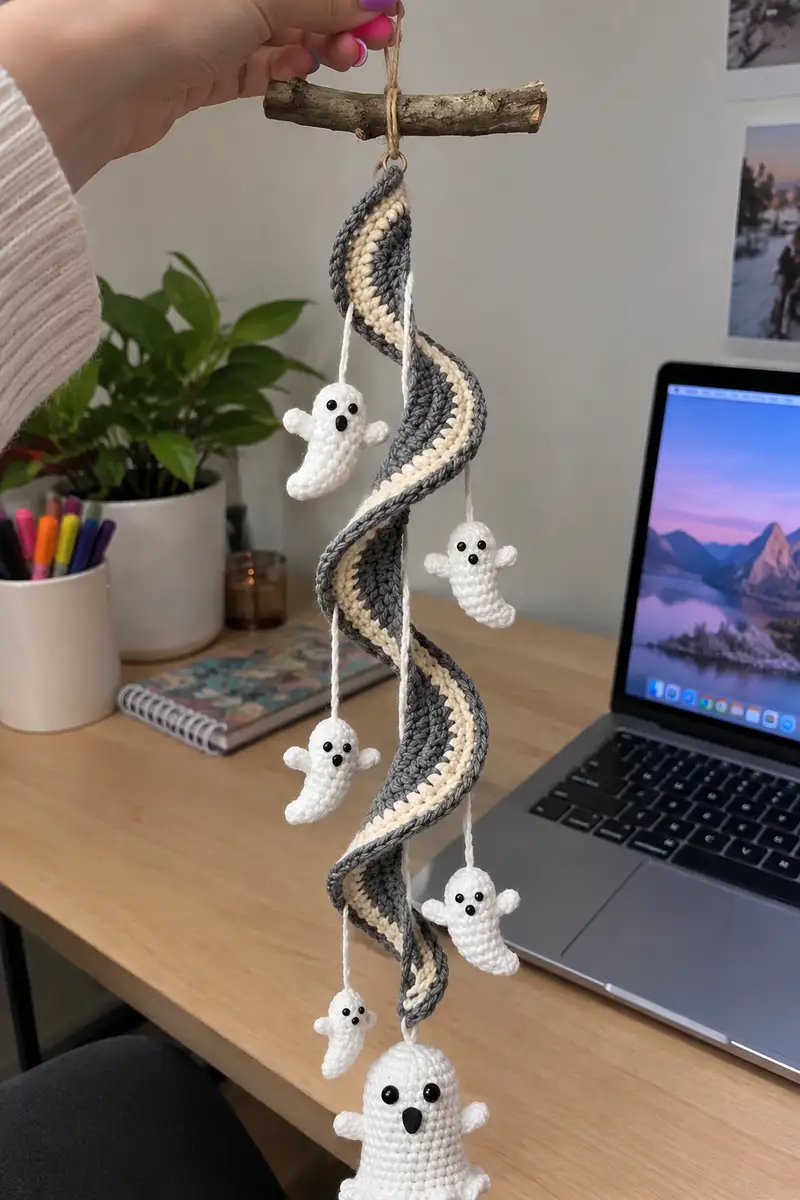
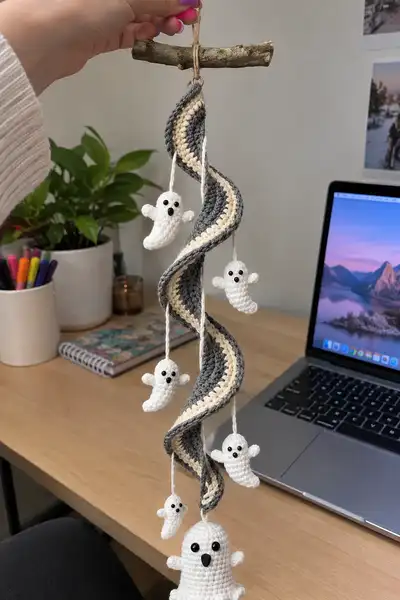
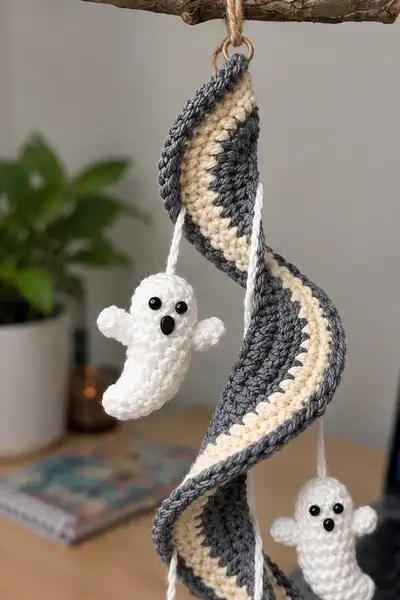
Create a whimsical hanging spiral garland decorated with floating little ghosts — a perfect seasonal mobile or wall accent. This pattern includes a twisted grey-and-cream spiral ribbon and six sweet amigurumi ghosts in three sizes, finished on a natural wooden branch. Detailed instructions guide you through shaping, color changes, and secure assembly for a stable, flowing mobile.
Progress Tracker
0% Complete
— Spiral Ribbon (make 1 long twisted strip) :
Info :
This spiral panel is worked flat in alternating colors and then coaxed into a three-dimensional helix. The strip pictured measures approximately 36-40cm long after twisting; you can lengthen or shorten by adding or reducing rows. Use worsted weight yarn with a 3.5mm hook for a firm fabric. Keep tension even to allow a graceful twist.
Foundation :
Ch 36 loosely (or ch 28-44 to change width; 36 gives a 4.5cm-wide strip with worsted on 3.5mm)
Round 1 :
Starting in 2nd ch from hook, 1 sc in each ch across (35)
Round 2 :
Ch 1, turn. 1 sc in each st (35)
Round 3 :
Change to cream yarn. Ch 1, turn. 1 sc in each st (35)
Round 4 :
Ch 1, turn. 1 sc in each st (35)
Info :
Weave in color-change ends as you go by carrying the unused color loosely or using a small tidy knot every few rows. For a cleaner look, fasten off and join new color at the beginning of the next row.
Round 5-6 :
Change to grey. 1 sc in each st (35) (work 2 rows in grey)
Round 7-8 :
Change to cream. 1 sc in each st (35) (work 2 rows in cream)
Round 9-10 :
Change to grey. 1 sc in each st (35)
Info :
At this stage you've created a simple two-color stripe. To create the gradual inward and outward curves that make the spiral twist naturally, we'll add subtle increases and decreases every 6-8 rows along alternate edges. Mark the first and last stitch of each row so you can target edges consistently.
Round 11 :
Grey: Ch 1, turn. 1 sc in first 3 sts, (inc) in next st, 1 sc in next 25 sts, (dec) over last 3 sts as follows: 1 sc in last 2 sts then sl st to end to keep edge tidy (36)
Round 12 :
Ch 1, turn. 1 sc in each st (36)
Round 13-14 :
Cream: 1 sc in each st (36)
Round 15 :
Grey: Ch 1, turn. On the opposite edge: 1 sc in first 2 sts, (dec) over next 2 sts, 1 sc in next 26 sts, (inc) in last st, 1 sc in final st (36)
Round 16-18 :
Alternate 3 rows even (1 sc each st) in cream then grey to stabilize width (36)
Info :
These alternating small edge increases and decreases create a gentle wave. Continue this pattern every 6-8 rows, alternating which edge receives the subtle increase. The overall width varies by 1-2 stitches which gives natural cupping.
Round 19 :
Grey: 1 sc in each st (36)
Round 20-22 :
Cream: 1 sc in each st (36)
Round 23 :
Grey: Along edge add (1 sc, inc) at start then even until last 3 sts then (dec, 1 sc) (38)
Round 24-25 :
1 sc in each st (38)
Round 26 :
Cream: Work 1 sc in each st BLO for a subtle ridge (38)
Info :
Working BLO on a row creates a ridge that reads nicely when the strip is twisted. Repeat a BLO ridge every 12 rows to add texture that helps the spiral hold its 3D shape.
Round 27-30 :
Grey: 1 sc in each st (38)
Round 31 :
Cream: 1 sc in each st, (dec) at edge every 9 sts to pull the panel slightly (34)
Round 32-34 :
1 sc in each st (34)
Round 35 :
Grey: (inc) every 8 sts at opposing edge to re-balance (38)
Round 36-44 :
Alternate colors every 2 rows, 1 sc in each st (38)
Round 45 :
Cream: Work 1 sc in each st BLO (38)
Info :
Continue building rows until your strip reaches the desired length (the sample pictured used approximately 80 rows total). For an 40cm finished hanging length use 70-90 rows depending on tension and yarn. Stop when your strip is long enough to create an attractive spiral with your ghosts spaced evenly.
Round 46-60 :
Continue alternating 2 rows grey, 2 rows cream, adding a subtle edge inc/dec every 6-10 rows and a BLO ridge every 12 rows. Maintain stitch counts shown for each adjustment. Aim for a final row count between 70-90 rows total.
Round 61 :
Final edge: Grey. 1 sc in each st BLO to create a firm curled border (38)
Info :
Fasten off leaving a long tail for sewing the strip into its spiral shape and for attaching cords. Block the strip lightly by pinning it into a loose spiral to set the curve before final assembly.
— Large Ghost (base ghost at bottom) :
Info :
Make 1 large ghost to sit at the base. This ghost measures approximately 8-10cm tall finished when using worsted weight yarn and a 3.5mm hook. Work tightly so stuffing does not show; use safety eyes 10mm or embroider the face.
Round 3 :
(1 sc, inc) x 6 (18)
Round 4 :
(2 sc, inc) x 6 (24)
Round 5 :
(3 sc, inc) x 6 (30)
Round 6 :
(4 sc, inc) x 6 (36)
Round 7 :
(5 sc, inc) x 6 (42)
Round 8 :
(6 sc, inc) x 6 (48)
Info :
Place safety eyes between rounds 10-12, approximately 8-10 sts apart to achieve the expression in the photo. If using 10mm eyes, position them on round 11 with 9-10 sts between centers. Insert the eyes and fasten washers securely before continuing and before stuffing.
Round 9-14 :
1 sc in each st around (48)
Info :
Stuff head portion firmly now to maintain round shape; use small bits of fiberfill and push into tight spaces with a stuffing tool. Leave lower body less stuffed so you can shape the tail later.
Round 15 :
(6 sc, dec) x 6 (42)
Round 16 :
(5 sc, dec) x 6 (36)
Round 17 :
(4 sc, dec) x 6 (30)
Round 18 :
(3 sc, dec) x 6 (24)
Info :
Begin tapering into a curved tail form. Add stuffing gradually so the body keeps a soft, flowing shape — light stuffing here creates the flowing tail look in the sample.
Round 19 :
(2 sc, dec) x 6 (18)
Round 20 :
(1 sc, dec) x 6 (12)
Round 22 :
Fasten off leaving long tail. Do not fully close — instead, fold and shape tail into a gentle S curve and close with mattress stitch to maintain curve; weave yarn tail into tail to anchor shape
Arms (Make 2) :
Round 1: 6 sc in mr (6). Round 2: Inc x6 (12). Round 3-5: 1 sc in each st (12). Round 6: Flatten arm and sl st across or sc2tog across to close leaving long tail for sewing. Stuff lightly. Attach to body at round 12-13 on sides evenly.
Info :
Sew arms to the sides at the shoulder area (approximately rounds 11-13) using a whip stitch and matching yarn. Add a couple of extra passes on each arm for durability since the mobile will be handled sometimes.
— Medium Ghost (make 4 identical) :
Info :
These medium ghosts are the floating mid-size figures. Make four for spacing along the spiral. Each measures about 4-5cm tall. Use 8mm safety eyes.
Round 3 :
(1 sc, inc) x 6 (18)
Round 4 :
(2 sc, inc) x 6 (24)
Round 5-8 :
1 sc in each st around (24)
Info :
Place safety eyes between rounds 6-7 approximately 6-8 stitches apart depending on eye size. Fasten eyes before stuffing.
Round 9 :
(2 sc, dec) x 6 (18)
Round 10 :
(1 sc, dec) x 6 (12)
Round 12 :
Fasten off leaving tail. Shape a small tail curve by folding at an angle then sew closed. Stuff lightly; tails should be airy to give a bobbing feeling.
Arms (Make 2 per medium ghost) :
Round 1: 6 sc in mr (6). Round 2: Inc x6 (12). Round 3-4: sc in each st (12). Round 5: Flatten and sl st across to close; leave tail for sewing. Attach to sides of each medium ghost around round 5-6.
Info :
Make four medium ghosts the same size so the garland looks balanced. For variety you may make one or two a round or two shorter or add a small picot edge around base for a ruffled look.
— Mini Ghost (make 1 tiny + 1 extra mini) :
Info :
Mini ghosts are tiny charm accents that hang higher on the spiral; make 1-2 small versions. Use 6mm safety eyes or embroider tiny dots. These measure approximately 2-3cm tall.
Round 3 :
(1 sc, inc) x 6 (18)
Round 4-5 :
1 sc in each st (18)
Round 6 :
(1 sc, dec) x 6 (12)
Round 8 :
Fasten off leaving long tail for hanging cord and sewing. Stuff very lightly.
Arms (Optional for minis) :
Make small nubs: 6 sc in mr, work 2 rows 6 sc, flatten and finish. Attach to sides of mini ghosts if desired.
Info :
For the smallest ghosts you can also simply embroider a head and leave the body unstuffed for weightless movement.
— Face & Finishing Details for All Ghosts :
Info :
Use safety eyes sized appropriately: 10mm for the large base ghost, 8mm for medium ghosts, 6mm for minis. Place eyes on rounds indicated above. Add a small oval nose using a slightly darker yarn or a safety nose bead as shown. Alternatively, embroider eyes and nose using satin-stitch or French knots for child-safe versions.
Embroidered Nose :
Use black yarn and a tapestry needle. Insert the needle between stitches just below eye row; make two or three short vertical satin stitches to create a small oval nose. Secure and weave tail inside.
Info :
For the charming slightly bumpy texture on the medium ghosts in the photos, you can add surface popcorn stitch bumps: after finishing the basic rounds, work 8-12 popcorn stitches randomly across the front using 3 sc popcorns, securing them on the inside with a yarn tail. This step is optional and decorative.
— Hanging Cords & Spacing :
Info :
Cut hanging cords of white worsted or jute for each ghost. Sample spacing used: large base ghost at bottom (cord length ~6cm), two medium ghosts spaced 6-8cm above on cords of 10-12cm, two additional mediums at 16-20cm, mini ghosts at 8-12cm near the top — adjust to your visual preference. Knot cords securely to ghost tops and to strip or to a hidden ring at the top of the spiral.
Cord Attachment :
Using tapestry needle, thread a 2-ply chain of white yarn through the top center of each ghost and knot inside. Leave a 2-3cm loop above knot, then tie to the spiral strip tail or slip stitch through the strip several times and fasten off. For extra security, stitch cords into the inside of the ghosts and add a dab of fabric glue where cord exits for non-child items.
Info :
Ensure distribution of weight is even along the strip so the spiral hangs balanced. You can move cords along the strip before final sewing and pin the positions while blocking the spiral to test balance.
— Final Spiral Shaping & Reinforcement :
Round 1 :
Lay strip flat and gently twist along its length into a loose helix. Fold edges inwards slightly so front stripe is visible on one side and grey on the other; use pins to hold shape temporarily.
Round 2 :
With long tail left from finishing strip, ladder-stitch or whip-stitch the strip along its back at 4-6 strategic points (every 6-8cm) to hold the helix. Use small, even stitches that are hidden behind the strip. Avoid stitching too tightly; keep a natural flow.
Round 3 :
Optional: Insert a thin floral wire or pipe cleaner down the center of the helix before closing to keep spiral more rigid. Wrap wire in yarn to prevent sharp ends. Reinforce wire ends into the top wooden ring area for stability.
Info :
If you prefer a softer drape, skip the wire. If you plan to hang the mobile outdoors or in a breezy area, a wire core will reduce twisting and prevent tangling from wind.
— Top Hanger Assembly :
Round 1 :
Attach a small metal ring to the top center of the spiral using a sewn-on yarn loop or jute. In the sample, an eyelet ring is wrapped with jute and attached to a small wooden branch.
Round 2 :
Wrap a length of jute or cord around your wooden branch and knot securely. Thread the metal ring from strip into the jute loop or tie the ring directly to the jute hanger. Trim ends and tuck under wrapping for tidy finish.
Info :
Balance the branch horizontally by testing the hang point and adjusting cord placement. If the spiral leans, move the ring position slightly along the strip until the entire mobile hangs evenly.
— Final Touches :
Round 1 :
Weave in all ends and trim. Add a small dab of fabric glue inside knots for extra security. If desired, add a few decorative stitches or tiny beads along the strip for subtle sparkle.
Info :
Gently steam-block the entire assembly if using cotton or acrylic to relax any bumps and help the spiral retain shape. Let cool fully before handling.
Round 2 :
Hang in a bright corner or near a window (away from direct sun if acrylic to prevent fading). Enjoy the gentle movement and charming ghosts!
This charming Spiral Ghost Garland blends playful amigurumi ghosts with sculptural crochet for a delightful hanging accent. The neutral palette makes it perfect for modern home decor or seasonal displays. Hang it in a nursery, entryway, or near a window to enjoy its gentle movement. 🧶👻 Each stitch brings the mobile to life — happy crocheting and share your finished creation! ✨