🧢 Beautiful ✨ Detailed πŸ’ Adorable

Owl and Harvest Moon Halloween Table Runner Pattern

Owl and Harvest Moon Halloween Table Runner Pattern
4.7β˜… Rating
8-10 Hours Time Needed
3.0K Made This
βœ‚οΈ

Intermediate Level

Ideal for those with basic crochet experience, featuring slightly more advanced stitches and techniques to expand your skills.

⏱️

All-Day Adventure

Requires 8-10 hours, ideal for a full day of immersive crocheting.

πŸ‚

Autumn Vibes

Earthy tones with cozy textures inspired by falling leaves and the rich, warm colors of harvest season.

🧢 Jump to Pattern ↓

About This Owl and Harvest Moon Halloween Table Runner Pattern

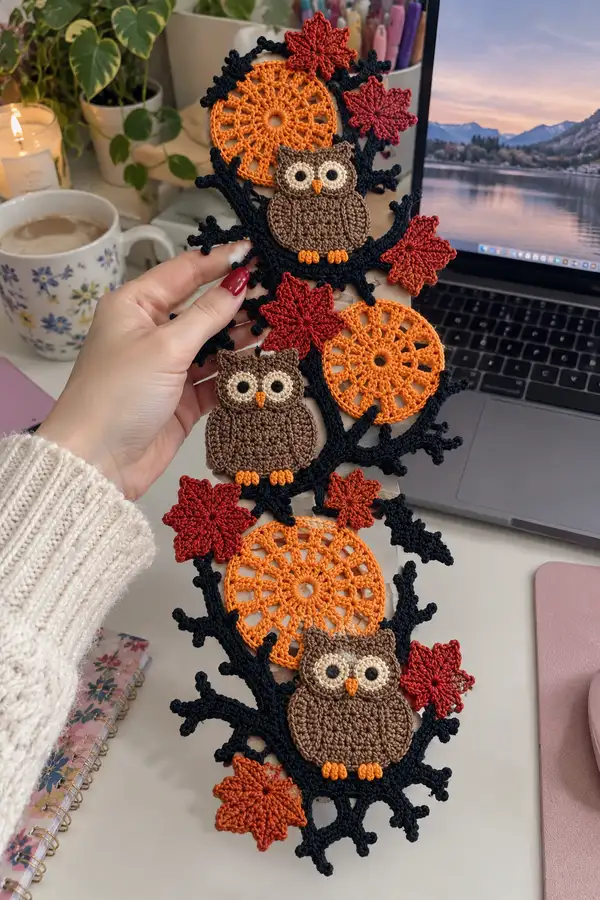
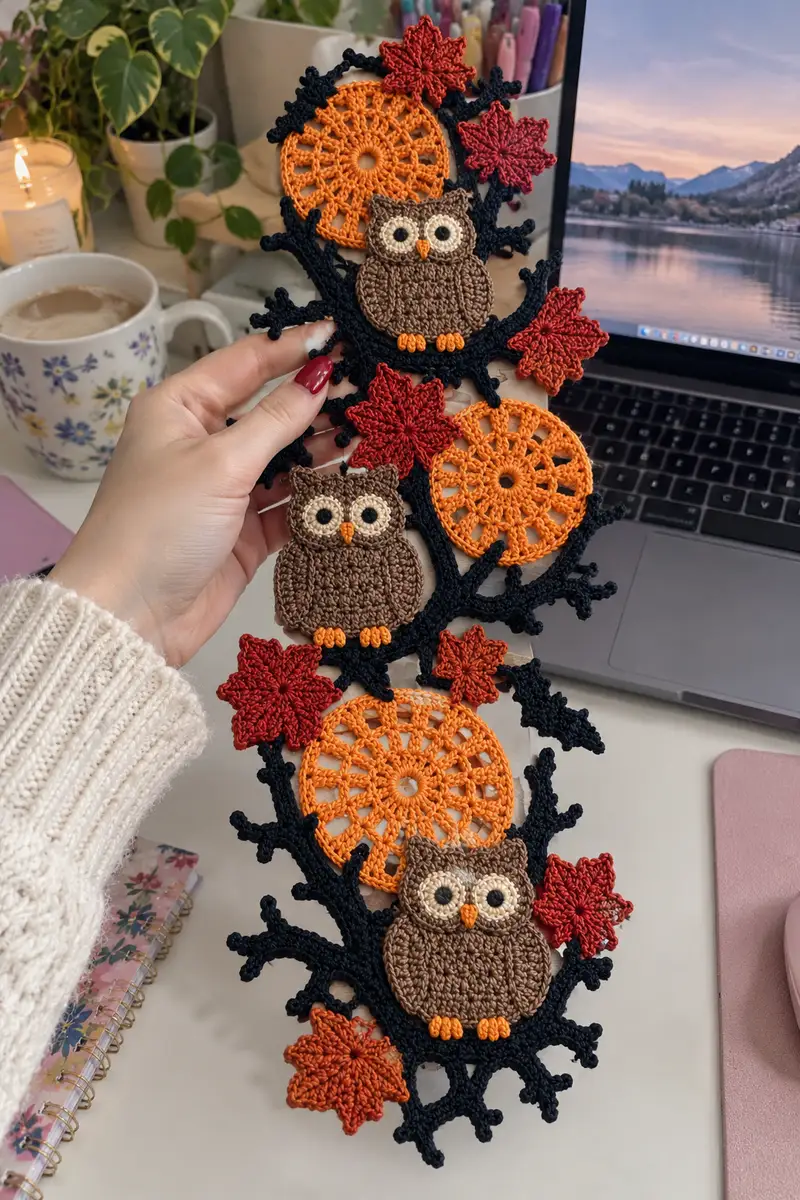
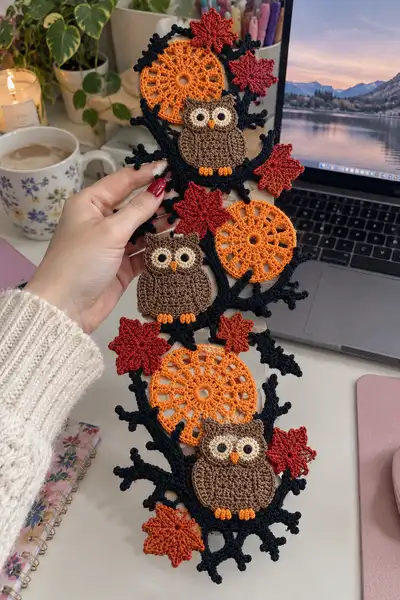
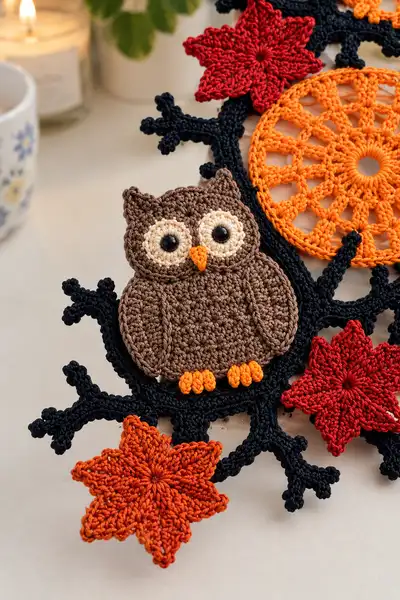
This table runner is built from individual motifs - three flat owl appliques, three harvest moon doilies, and multiple maple leaves - all joined by a sculpted black branch lace. The owls are worked flat in rounds with layered eye appliques and tiny orange feet. The moons are lacy round doilies in bright pumpkin orange. The leaves are worked in red and rust shades and feature raised veins for texture.

Owl and Harvest Moon Halloween Table Runner Pattern crochet pattern - detailed view of completed project

The motifs are joined with a freeform branch worked in black for dramatic contrast, producing a bold silhouette that pops on a light table. Uses mercerized cotton for crisp stitch definition and clean joins.

Why You'll Love This Owl and Harvest Moon Halloween Table Runner Pattern

I love how the little owls feel like tiny characters tucked into branches β€” they give the runner personality and charm. The bright orange moons and red maple leaves instantly say autumn and Halloween, while the black lace branch makes the composition feel elegant and a little mysterious. I also appreciate how each motif is worked separately, so you can personalize colors and placement as you assemble the runner.

Owl and Harvest Moon Halloween Table Runner Pattern step 1 - construction progress Owl and Harvest Moon Halloween Table Runner Pattern step 2 - assembly progress Owl and Harvest Moon Halloween Table Runner Pattern step 3 - details and accessories Owl and Harvest Moon Halloween Table Runner Pattern step 4 - final assembly and finishing

Switch Things Up

I absolutely loved designing this runner because each motif can be customized to suit your home β€” swap the orange moons for pale gold for a subtler autumn look or add extra leaves in different shades of red and ochre. The motif-based approach means you can rearrange the sequence and spacing to lengthen or shorten the runner easily.

I often try variations: make smaller owls and more moons for a daintier runner, or work the branch in a deep olive brown for a softer contrast than black. You can also add tiny beads to the leaf centers for a little sparkle if you like extra detail.

Don't be afraid to play with thread weight β€” going a little finer with 2-ply will make a laceier, more delicate runner while a slightly thicker cotton will give a bolder statement piece.

Common Mistakes & How to Fix Them

βœ— Skipping stitch markers at the start of each round causes miscounts in round-heavy motifs; mark each round start for accurate shaping. βœ— Using a hook that is too large for mercerized thread creates loose stitches and visible gaps; use a smaller hook for a dense, crisp fabric. βœ— Not blocking flat motifs like doilies and leaves will make them hard to join; pin and steam or wet-block prior to assembly for perfect shape. βœ— Joining motifs without pinning first can produce crooked branches; always pin pieces in place and check spacing before sewing. βœ— Overstuffing appliques (if stuffing small eyes) will distort flat pieces; keep appliques flat and only lightly pad where instructed. βœ— Not weaving in ends securely near the branch joins can lead to unraveling; bury tails through multiple stitches and knot if necessary.

Owl and Harvest Moon Halloween Table Runner Pattern

A delicate autumn table runner featuring three charming crocheted owls perched along a black lacy branch, warm orange harvest-moon doilies, and rich red maple leaves. The design uses fine mercerized cotton thread for crisp stitch definition and a sculptural, freeform branch to join the motifs. Perfect for seasonal dΓ©cor, this pattern includes detailed motif instructions and clear assembly notes to recreate the layered, dimensional runner pictured.

Intermediate 8-10 Hours

Materials Needed for Owl and Harvest Moon Halloween Table Runner Pattern

β€” Main Fabric

  • 01
    Mercerized cotton thread, sport/fingering weight (approx equivalent to light #3): 100-130g in black (main branch and outline)
  • 02
    30-40g bright pumpkin orange (harvest moon doilies and owl feet/beaks)
  • 03
    110-140g warm brown (three owl bodies)
  • 04
    30-40g cream or ecru (owl eye backing)
  • 05
    30-40g deep red and rust shades combined (maple leaves, approx 15-20g each color)
  • 06
    Small amounts (10-15g) of black for eye centers if using yarn rather than safety eyes

β€” Tools Required

  • 01
    2.0mm crochet hook (or size required to obtain firm, dense fabric with chosen thread)
  • 02
    1.75mm crochet hook for very fine detail (optional)
  • 03
    Black, brown, orange, cream and red mercerized cotton threads
  • 04
    Sewing needle (blunt tapestry needle) for assembly
  • 05
    Stitch markers (at least 6)
  • 06
    Scissors
  • 07
    Pins and blocking mat for flattening motifs
  • 08
    Optional: small safety eyes (6mm) if not embroidering eyes
  • 09
    Optional: fabric glue for securing very small knots

Progress Tracker

0% Complete

β€” Notes & Gauge :

Info :

Work tightly with a 2.0mm hook using mercerized cotton thread to create a dense, crisp fabric. Gauge is not critical for this decorative runner but maintaining consistent tension ensures motifs sit flat and join smoothly. Block all flat pieces before assembly. Use stitch markers when working long rounds.

β€” Owl Motif : (Make 3 identical owls)

Round 1 :

6 sc in magic ring (6)

Round 2 :

6 inc (12)

Round 3 :

(1 sc, inc) x 6 (18)

Round 4 :

(2 sc, inc) x 6 (24)

Round 5 :

(3 sc, inc) x 6 (30)

Round 6 :

(4 sc, inc) x 6 (36)

Round 7 :

(5 sc, inc) x 6 (42)

Round 8 :

(6 sc, inc) x 6 (48)

Info :

These rounds build the circular head/upper body. Keep last stitch of each round snug to avoid a visible ridge. Change to brown yarn on Round 1 if starting eyes later with contrasting color; for consistent brown owl, use brown from start.

Round 9 :

1 sc in each st (48)

Round 10 :

1 sc in each st (48)

Round 11 :

1 sc in each st (48)

Round 12 :

1 sc in each st (48)

Info :

Place eye bases on Rounds 6-7 area while head still flat: mark positions opposite each other about 12-14 sts apart depending on expression. If using safety eyes (6mm), insert through the fabric at these marked points; if crocheting eye circles, work them separately and sew on after blocking.

Round 13 :

(6 sc, 1 dec) x 6 (42)

Round 14 :

(5 sc, 1 dec) x 6 (36)

Round 15 :

(4 sc, 1 dec) x 6 (30)

Info :

Begin shaping into an almost-teardrop body by keeping decreases slightly off-center toward the bottom of the motif to leave a broader top for eyes and ear placement. Do not stuff; these are flat appliques. Keep tension tight for a firm edge.

Round 16 :

(3 sc, 1 dec) x 6 (24)

Round 17 :

(2 sc, 1 dec) x 6 (18)

Round 18 :

(1 sc, 1 dec) x 6 (12)

Round 19 :

6 dec (6)

Info :

Fasten off leaving long tail for sewing to branch. The main head/body shape is now complete and slightly cone-like to mimic an owl body. If you prefer a plumper owl, add a very small bit of fiberfill behind the motif before sewing to the branch.

β€” Owl Eye Appliques : (Make 3 pairs)

Round 1 :

6 sc in magic ring with cream (6)

Round 2 :

6 inc (12)

Round 3 :

(1 sc, inc) x 6 (18)

Round 4 :

1 sc in each st (18)

Info :

Sew cream circle onto the owl face centered on the earlier-marked spots (Rounds 6-7 of the head). Insert safety eye into the middle of the cream circle or embroider a black pupil in center. Secure the back tightly.

Round 5 :

Optional decorative round: BLO 1 sc in each st (18) to create a raised rim (18)

β€” Owl Beak and Feet :

Beak Round 1 :

ch 3, sl st into 2nd ch from hook and sl st in next, pull short tail to create a small triangle. Fasten off leaving a long tail for sewing (approx 1 cm beak)

Info :

Sew beak centered between eyes on Round 10-12 area of the head. Use a few tiny stitches beneath to angle the beak downward for character. Use bright orange yarn for contrast.

Feet Round 1 :

ch 4, sl st in 2nd ch, sc next, sl st in last (creates 3 small toes). Fasten off leaving long tail. Make two feet per owl spaced beneath lower edge of the body. Each foot uses 3 little loops worked in bright orange to mimic talons.

Info :

Sew feet so they slightly overhang the lower edge of the owl body to create the perched look. Add a short stitch at each toe to secure and maintain shape.

β€” Owl Wing Detailing :

Info :

Wings are surface slip-stitch lines or short sc arcs worked on the body front. Using the main brown yarn, with the right side facing, insert hook in a stitch near the side midline, pull up a loop and work a row of 6-8 sl sts forming a gentle curved wing. Fasten off and weave tail behind.

β€” Harvest Moon Doily : (Make 3)

Round 1 :

6 sc in magic ring (6)

Round 2 :

6 inc (12)

Round 3 :

(1 sc, inc) x 6 (18)

Round 4 :

(2 sc, inc) x 6 (24)

Round 5 :

(3 sc, inc) x 6 (30)

Round 6 :

ch 5 (counts as tr + ch2), *skip 2 sts, tr in next, ch2* around, join with sl st into top of starting tr to form spokes (15 tr + ch2 spaces)

Round 7 :

In each ch2 space: (ch1, 5 dc cluster, ch1) join with sl st in next tr. (15 petals)

Round 8 :

ch3, dc in each dc of previous petal until petal peak, ch1 at tip, continue around to form open lace (approx 96 dc total, counts vary by tension)

Info :

This doily is airy and should be blocked to exact circular shape. Keep stitch counts consistent within petals to keep them symmetrical. Use bright pumpkin orange for an autumnal glow.

Round 9 :

Join with sl st, work 1 round of sc evenly around to tidy edge (approx 48 sc)

Round 10 :

Optional decorative picot round: *sc, ch3, sl st into 3rd ch* repeat around for a small pointy edge

Info :

Use blocking pins to open the lace petals wide and create a uniform circular motif. These doilies will sit behind the owls and be affixed to the branch so the openwork shows through the branch openings.

β€” Maple Leaf Motif : (Make 6-8 in mixed red/rust)

Round 1 :

6 sc in magic ring (6)

Round 2 :

ch3, *(2 dc, ch1, 2 dc) in nextst (leaf point), sl st in next st* repeat to create 6 points (6 leaf lobes)

Round 3 :

Round the points by working in each point: sc, hdc, dc, tr, dc, hdc, sc to form a fuller leaf lobe; repeat around to all lobes

Round 4 :

Work a shallow ridge in between lobes using sl sts and ch2 spaces to emphasize veins, finishing with a tidy sc round along the perimeter

Info :

Leaves are intentionally slightly three-dimensional β€” after Round 3 pinch each lobe slightly and steam-block to set shape. Vary color saturations to create depth (some leaves in deep red, some in rust-orange).

Round 5 :

Optional: surface crochet vein lines in FLO with contrasting color for added texture using sl st from center outward on each lobe

β€” Branch Lace Foundation (Black) :

Info :

The branch is worked as a long freeform crocheted strip that creates forks and smaller twigs where motifs will be sewn. Work a foundation chain slightly longer than desired runner length (recommend 90-140 ch depending on desired spacing). We present a worked example that builds a 60cm runner. Adjust ch length to preference.

Round 1 (foundation) :

ch 120 with black, sc in 2nd ch from hook and in each ch across (119 sc). Fasten off and block straight if desired. This is the base trunk.

Round 2 :

Join black at chosen trunk point, ch 10, sl st back into trunk to create a small twig loop. Repeat every 6-8 sts along the trunk to begin twig placement. Make twigs asymmetrical: ch6-ch14 loops randomly spaced to mimic natural branch flow.

Round 3 :

To create forked branches: join yarn at a twig base, ch 6, (sc, ch 3, sc) back into the base, then along the extension ch work small picots to form tips: (sc, ch 3, sl st in loop) 2-4 times.

Info :

Use slip stitches and small clusters to form knobbly textures. Vary spacing and length of forked branches so that owls and leaves nestle naturally. Pin branch onto layout board to set composition before permanent joining.

Round 4 :

Work a second row of sc along trunk (working into back loops only of the foundation row) to thicken trunk: BLO 1 sc in each st across (119 sc)

Round 5 :

At ends of trunk and at twig bases, chain 3 and work 3 dc, ch3, sl st to form small knobbed nodes that will provide anchor points for motifs (work nodes roughly every 10-15 cm)

Round 6 :

For small twig detailing: join at node, ch 4, sl st back into node, then ch3 and sl st into 2nd chain from node to create a stubby bud. Repeat along nodes.

Info :

This freeform approach allows you to tailor where the owls perch and where the moon doilies slot behind them. Keep one side of the branch heavier with twigs for visual balance like the sample. The black branch should be firm; use slightly smaller hook or tighter tension than other motifs to add structural contrast.

Round 7 :

Where moon doilies will attach, create circular anchors: ch 6, join into ring with sl st, sc 8 in ring and fasten off β€” leave a long tail for sewing. Make three anchor rings at positions where the round doilies will sit behind owls.

Round 8 :

Between anchors and twig clusters, add decorative loops: *ch 8, sl st to trunk, ch5, sl st to trunk* to create open spaces - these will let the orange doilies peek through.

Info :

Because the branch is freeform, use pins and blouse pins on a blocking board to preview where motifs will be sewn. Mark points with removable markers to avoid misplacement during sewing.

β€” Detailed Branch Surface Texture (Optional repeat rounds) :

Round 9 :

Working into random trunk stitches, make knobbles: *join, ch3, (3 tr cluster), sl st into base; fasten off* repeat 12-16 times to add bark texture

Round 10 :

Go back with short sc rows across trunk top in BLO to hide tails and integrate anchor rings (approx 119 sc)

Info :

Work texture sparingly; too many knobbles can make sewing motifs tricky. Focus knots around motif anchor areas for naturalistic attachment points that conceal sewing stitches.

β€” Assembly Prep & Blocking :

Info :

Before sewing, block all components flat: pin doilies circular and spray or wet-block leaves and owls lightly with a damp cloth and let dry. Once dry, place branch on flat surface and arrange motifs. Leave space between stacked motifs so runner has breathing room.

Round 11 :

Optional: reinforce the underside of the runner with a thin interfacing or non-woven fabric stitched by hand to add stability if you plan to display heavy items atop the runner

Info :

Use pins to arrange three identical owls with a harvest moon behind each and alternating leaves. The sample layout staggers moons and leaves for a balanced vertical composition suitable for a short table runner.

β€” Joining Motifs (Sewing) :

Info :

Sew each doily to its anchor ring with matched orange thread, using invisible whip stitch around the ring. Then sew each owl over the junction where doily and branch meet so the doily peeks behind but the owl covers the central join. Sew leaves on secondary twig clusters to frame the owls and moons.

Round 12 :

Attach owl body to branch using mattress stitch: insert needle from back of branch through the body outer rounds every 2-3 stitches to create a flat, secure seam. Hide tails by weaving them back through sewn stitches at least 5cm.

Info :

When sewing, use the same color thread as the motif edge for invisibility, and stitch through both branch and motif outermost rounds to ensure flush contact. Tension of sewing should be firm but not puckering.

β€” Finishing Touches :

Round 13 :

Using black, run a tidy sc border along trunk edges and small twigs to hide limb ends and create a crisp outline (approx variable sc based on trunk length)

Round 14 :

Secure all small decorative picots on leaves and branch by placing a few stitches at their base and weaving in ends; trim flush

Info :

Optionally add a small loop at one end of the branch if you plan to hang the runner as a wall decoration; otherwise keep ends open for a naturalistic silhouette.

β€” Variation & Size Adjustments :

Info :

To lengthen the runner, increase the foundation chain by increments of 20 and add additional twig clusters and motif anchors. To shorten, reduce foundation chain thoughtfully so motifs still fit without crowding. Motifs can be made smaller or larger by changing thread weight and hook size proportionally.

Info :

For a table centerpiece instead of a runner, cluster motifs more tightly and create a wider branching mat. For a longer runner, repeat the moon/leaf/owl sequence and add more twig anchors accordingly.

Assembly Instructions

  • Block every motif flat before assembly. Pin the black branch onto a blocking board and arrange doilies, owls and leaves in the desired composition before sewing.
  • Sew each harvest moon doily to the pre-placed black anchor rings using invisible whip stitch and orange thread, catching both doily and the ring evenly to prevent puckers.
  • Position each owl so its lower edge overlaps the trunk slightly; sew through the outer rounds of the owl body and the trunk every 2-3 stitches using matching brown thread for an invisible seam.
  • Attach eyes and beaks after owl body is sewn in place: place eye centers between Rounds 6-8 of owl body and secure safety eyes or sew eye appliques; sew beak using a few secure stitches centered between the eyes.
  • Sew maple leaves to secondary twigs using a few whip stitches at the leaf base; angle leaves slightly outward and secure extra stitches through twig nodes for stability.
  • Weave all loose tails into adjacent stitches across the underside of the runner and trim close. If desired, tack the underside with a few hidden stitches to keep layers flat.
  • If hanging, sew or crochet a small loop into one trunk end using black yarn and reinforce with several stitches; if table use, ensure runner lies flat and gently steam to set final shape.
  • Inspect all joins for loose ends, add extra reinforcing stitches at stress points like owl feet and doily junctions, then do a final light steam-block to set the composition.

Important Notes

  • πŸ’‘Use stitch markers consistently at the beginning of each round to avoid counting errors and maintain proper shaping
  • πŸ’‘Block all flat motifs (doilies, leaves, owl bodies) so they sit flat and do not distort when sewn to the branch
  • πŸ’‘Stuffing is minimal for this project; owls are primarily flat appliques. If adding slight padding, use very small amounts and keep flat
  • πŸ’‘For safety eyes, position and secure before final sewing of the owl body to the branch; once locked, they cannot be repositioned
  • πŸ’‘When sewing motifs to the branch, use matched-color yarn and weave tails back through several stitches to secure them invisibly
  • πŸ’‘Maintain consistent tension throughout the branch so the runner remains flat and avoids curling; tighter tension on branch helps structure
  • πŸ’‘Pin pieces in position and photograph before sewing so you maintain placement if you need to unpin and adjust
  • πŸ’‘For durability, stitch through multiple trunk rounds when attaching heavier motifs like doilies to distribute tension

This harvest-inspired runner brings warmth, personality, and a little Halloween whimsy to your table. Each owl and moon is a tiny vignette, carefully worked and assembled into a flowing branch composition. The mix of crisp mercerized cotton and freeform black branches gives a gallery-worthy handmade look you can be proud of. 🧢🍁 Display on a console, table, or mantle to add cozy autumn charm to your home. Happy crocheting and enjoy creating a piece that will become a seasonal favorite! πŸŽƒ

You ask,

we answer.

FAQs

What is the finished size of this table runner?

Using the listed foundation chain and motif sizes, the sample runner measures approximately 60 cm long and 14-18 cm wide where motifs sit. You can lengthen or shorten the foundation chain to change overall length.

Can I use different yarn weights for this pattern?

Yes, but use a smaller hook than recommended for amigurumi-style tightness. A bulkier yarn will produce a thicker, larger runner β€” adjust foundation chain length and spacing accordingly.

Do I need to use safety eyes or can I embroider them?

Both options work well. Safety eyes give a shiny, defined look but are not recommended for pieces intended for small children. Embroidered pupils are safest and allow more expression.

How much blocking will I need?

Block each flat motif individually. Doilies and leaves benefit from wet-blocking and pinning to shape. Allow to dry fully before assembly; this ensures even joins and a flat final runner.

Can I make the branch rigid to hold shape?

Yes. Use tighter tension, a smaller hook, or add a hidden wire or thin felt backing sewn to the underside to add structure. If adding wire, conceal ends and cover them to avoid sharp points.

What if my stitch counts are off?

If a count error appears, it's best to frog back to the last correct round. Using a stitch marker at the first stitch each round helps avoid miscounts. For long even rounds, keep a row counter.

How much thread is needed in total?

Approximately 300-350g combined of fine mercerized cotton across all colors for the runner in the pictured size. Exact amounts depend on tension and final runner length.

How do I prevent motifs from shifting after sewing?

Sew through multiple stitches across the seam and add a few reinforcing stitches at high-stress points (e.g., doily center and owl lower edge). A few hand-stitched tacks on the underside will keep motifs flat.