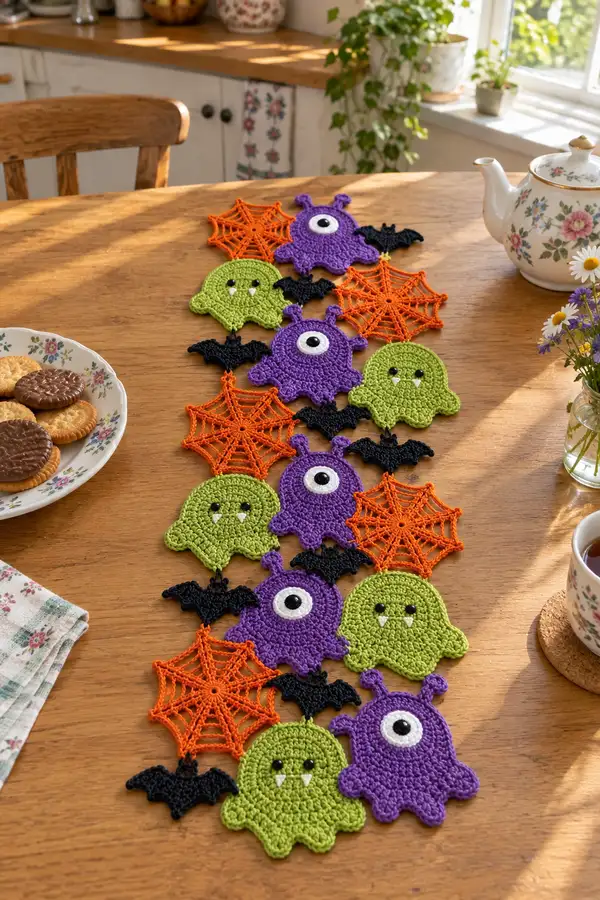
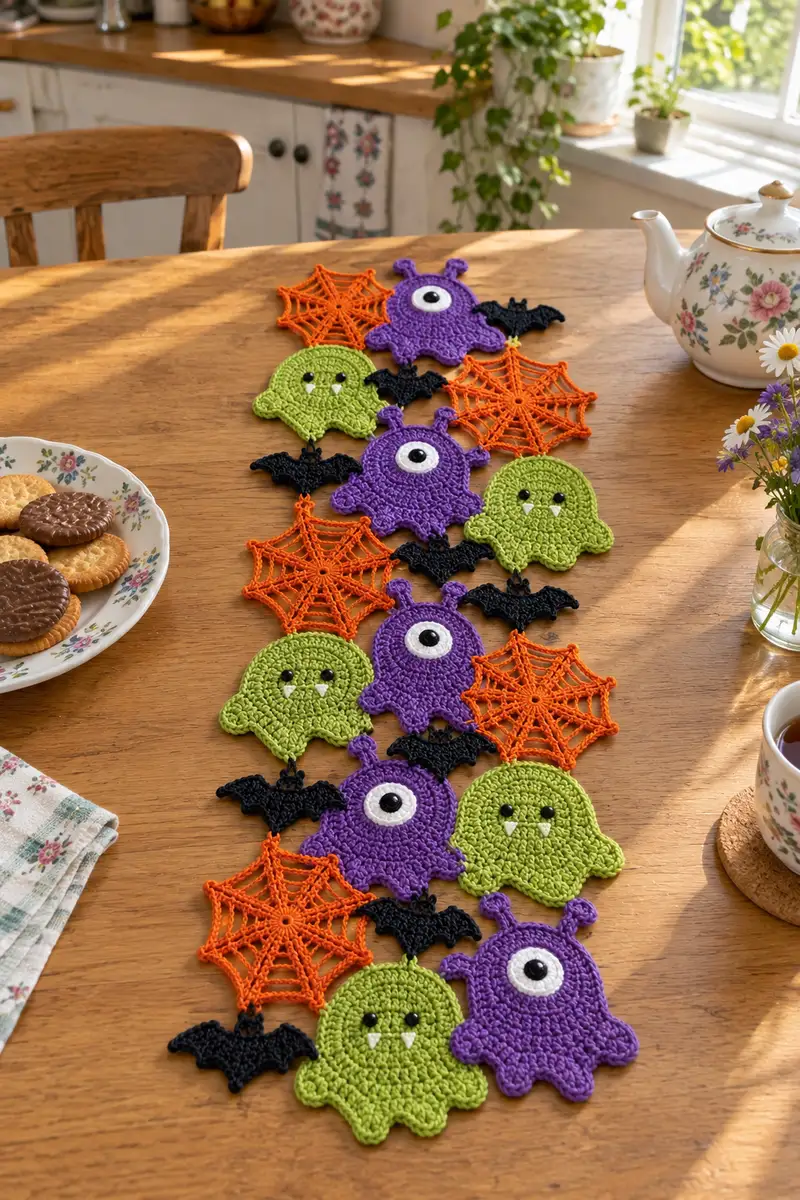
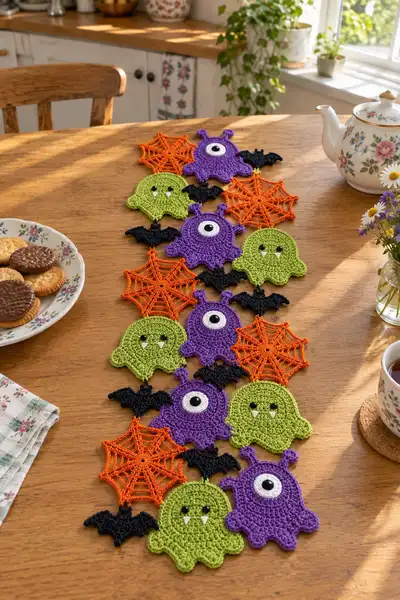
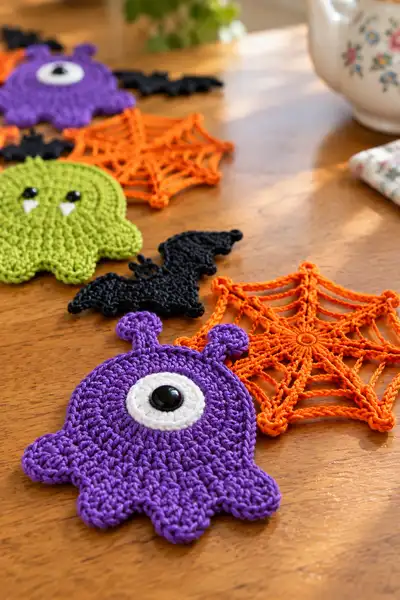
A playful Halloween table runner made from a parade of crochet monsters, bats and spiderweb motifs. Bright purple cyclops, lime-green fanged ghosts, vivid orange spiderwebs and jet-black bats are crocheted flat then joined into a festive runner. This pattern explains each motif, decorative details and the joining method so you can create a charming seasonal centerpiece.
Progress Tracker
0% Complete
— Materials & Gauge :
Info :
Use worsted-weight cotton yarn for crisp motifs. Gauge is not critical for motif shape, but test one monster motif: 8 rounds in main body equals approx 6.5cm across with 3.5mm hook. If your motifs come out noticeably larger or smaller, change hook size to match desired result.
— Purple One-Eyed Monster :
Round 1 :
6 sc in magic ring (6)
Round 3 :
(1 sc, 1 inc) x 6 (18)
Round 4 :
(2 sc, 1 inc) x 6 (24)
Round 5 :
(3 sc, 1 inc) x 6 (30)
Round 6 :
(4 sc, 1 inc) x 6 (36)
Round 7 :
(5 sc, 1 inc) x 6 (42)
Round 8 :
(6 sc, 1 inc) x 6 (48)
Info :
Stop increasing here to create a flat circle for the monster body. This 48-stitch round is the base circumference for the motif. Switch to consistent tension and use a stitch marker for the first stitch of each round.
Round 9-16 :
1 sc in each st (48)
Info :
These even rounds build height without increasing diameter. Place the eye laterally between rounds 11-13; count across the round so the eye sits centered slightly above the midline of the motif.
Round 17 :
1 sc in each st BLO (48)
Round 18 :
1 sc in each st (48)
Info :
Create the top antennae by reserving two small loops worked in the next rounds. Mark the two stitches where antennae will be anchored — place them symmetrical across the centreline, about 10 stitches apart on round 18.
Round 19 :
1 sc in each st (48)
Round 20 :
1 sc in each st (48)
Round 21 :
1 sc in each st (48)
Info :
At the next round we will add a decorative picot edge and the scallopy lower edge. Picots do not change the stitch count since they are formed with chains and sl st back into the same stitch.
Round 22 :
*sc in next 4 sts, picot (ch3, sl st into same st)*, rep from * to * across (48)
Round 23 :
1 sc in each st (48)
Info :
Create scallops at the bottom by working small clusters across an evenly spaced section of the round — use a stitch marker to note the bottom centre, then count 8-stitch sections for six scallops if desired.
Round 24 :
*sc in next 6 sts, shell in next st (3 dc in same st), sc in next 6 sts, sl st in next st*, rep to complete 6 scallops total (48)
Round 25 :
1 sc in each st (48)
Round 26 :
1 sc in each st BLO (48)
Info :
Work the small antennae now. Using the two reserved anchor stitches, work small tufts directly on top of the head.
Round 27 :
At anchor stitch 1: ch1, 5 sc into same st, sl st to join to anchor. Skip 10 sts, at anchor stitch 2: ch1, 5 sc into same st, sl st to join (this creates two small bobble antennae). Return to main round and continue with 1 sc in remaining sts to finish the round (48)
Round 28 :
1 sc in each st (48)
Info :
Fasten off and weave in ends for the main body. Leave a short tail if you plan to sew on the white eye circle; otherwise attach the eye now. If using safety eyes for the pupil, attach the eye to the centre of the white eye circle before sewing the white circle to the body.
— Cyclops Eye (make 1) :
Round 1 :
6 sc in white mr (6)
Round 3 :
(1 sc, 1 inc) x 6 (18)
Round 4 :
1 sc in each st (18)
Info :
Fasten off leaving a long tail for sewing. Center the eye on rounds 11-13 of the monster body and sew in place with whip stitch. If using a safety eye for pupil, apply to the white circle centre before sewing the circle to the monster. Alternatively, embroider the pupil with black yarn.
— Lime-Green Fanged Ghost Monster :
Round 1 :
6 sc in magic ring (6)
Round 3 :
(1 sc, 1 inc) x 6 (18)
Round 4 :
(2 sc, 1 inc) x 6 (24)
Round 5 :
(3 sc, 1 inc) x 6 (30)
Round 6 :
(4 sc, 1 inc) x 6 (36)
Round 7 :
(5 sc, 1 inc) x 6 (42)
Round 8 :
(6 sc, 1 inc) x 6 (48)
Round 9-15 :
1 sc in each st (48)
Info :
Mark the bottom center of the ghost to create three rounded feet later. Decide whether you want a centered mouth or two small fangs. Fangs will be embroidered later using white yarn in triangle shapes.
Round 16 :
1 sc in each st BLO (48)
Round 17 :
1 sc in each st (48)
Round 18 :
*sc in next 6 sts, picot (ch3, sl st into same st)* rep across to create textured border (48)
Round 19 :
1 sc in each st (48)
Info :
Create the scalloped lower edge like the purple monster: divide the bottom into six sections and form small shell clusters on the points that will become the three larger feet of the ghost. Use a stitch marker to mark bottom center before starting the shell placements.
Round 20 :
Work 6 small scallops across the bottom: *sc in next 6 sts, shell (3 dc in next st), sc in next 6 sts, sl st in next st* rep to complete round (48)
Round 21 :
1 sc in each st (48)
Round 22 :
1 sc in each st (48)
Info :
Embroider the triangular fangs directly onto the face area: using white yarn and a tapestry needle, stitch two small triangle tooth shapes pointing downward, about 6-8 stitches apart depending on how wide you placed the eyes. Use black beads or French knots for the eyes.
Round 23 :
Fasten off and weave in ends. Use small black safety eyes or sew two small black beads for eyes; if using beads, secure with a few tight stitches and knot the yarn tail on the reverse side.
— Black Bat Motif (make multiple) :
Round 1 :
6 sc in magic ring (6)
Round 3 :
(1 sc, 1 inc) x 6 (18)
Round 4 :
(2 sc, 1 inc) x 6 (24)
Round 5 :
1 sc in each st (24)
Info :
The bat has a small rounded body with wings worked out from the sides. We will form the wings by working short rows along the last round and fastening off specific stitches to shape wing points.
Round 6 :
1 sc in next 4 sts (right side wing anchor), ch6, skip 6 sts, 1 sc in next 4 sts, ch6, skip 6 sts to complete round (24)
Round 7 :
Working into ch6 spaces: at first ch6: sl st into ch1, sc in ch2, hdc in ch3, dc in ch4, hdc in ch5, sc in ch6, sl st into base to form right wing curve. Continue across the round working into the second ch6 to form left wing similarly. Finish with sl st to join (24)
Round 8 :
Work small picot points at wing tips: *sl st to wing tip, ch3, sl st back into same st* for each wing tip and two additional tiny points along the wing edge. Fasten off and weave ends.
Info :
Blocking the bat flat after making it gives the wing tips a nice crisp silhouette. Use rust-proof pins and spray with water or use a light starch spray if you want them stiff.
— Orange Spiderweb Motif :
Round 1 :
Ch4, sl st to form ring, ch3 (counts as first dc), work 12 dc into ring, sl st to top of ch3 (12)
Round 2 :
Ch1, *sc in next dc, ch5, skip next dc*, rep around to create 6 chain spokes, sl st to first sc (6 spokes)
Info :
This spiderweb is built from radiating chain spokes that are then connected with loops of chains and slip stitches to create the web effect. Keep your chains loose for a lacy appearance.
Round 3 :
Join with sl st to first chain-5; into each chain-5: (sl st, ch5, sl st) across the chain-5 to form a doubled spoke loop; repeat for all spokes and sl st to join (6)
Round 4 :
Working around: *in space between spokes: ch6, sl st into next space* repeat around forming 6 outer loops (6)
Round 5 :
Now form web rings: in each space formed by previous round work *(ch3, sl st in next space) x 3* to create an inner net connecting spokes; repeat around and join (visual count varies)
Info :
If following exact stitch counts is tricky with chains, focus on keeping regular spacing between spokes and consistent chain lengths so the web appears symmetrical. Blocking will even out small discrepancies.
Round 6 :
Form decorative outer edging: *sc around the outer chain loops working 3 sc into the top of each chain loop to create small pointed edges; sl st to join.* Fasten off and weave in ends.
Round 7 :
Optional: Add a small central picot by rejoining yarn at center, ch3, sl st into center hole and fasten off for a neat centre point.
— Additional White Eye Circle (alternate small size) :
Round 1 :
6 sc in white mr (6)
Round 3 :
1 sc in each st (12)
Round 4 :
Fasten off leaving long tail for sewing to monster body. If adding a pupil bead, place it at centre and secure from back of white circle.
— Joining & Decorative Runner Edging :
Info :
Lay out your motifs in the desired runner arrangement before joining. The photographed runner alternates columns of monsters with webs and bats placed in the offsets. Pin motifs on a blocking board to keep spacing even (approx 1-1.5cm between motifs in the runner pictured).
Round 1 :
With main yarn colour and 3.5mm hook, join round the outer edge of the entire assembled runner to add a neat border: sc evenly around each exposed edge of each motif, working 2 sc into corners or points to keep a flat border. Maintain tension so the runner does not cup (visual count varies by layout).
Round 2 :
*sc in each st around the runner; at seams between motifs where holes appear, work sl st into both motifs to pull them snugly together.* Continue all the way around and sl st to join. Fasten off and weave ends (visual count varies).
Info :
Alternative joining options: whip stitch motifs together with a tapestry needle for an invisible join, or use join-as-you-go (JAYG) during final round of each motif by slip stitching into adjacent motif’s outer rounds to connect them seamlessly. For a sturdier runner, sew motifs with an overcast stitch through the outermost loops.
Round 3 :
For a decorative scalloped border around the entire runner: *sc around, then in every 8th st work shell (5 dc in same st), skip 1-2 sts, sc in next 6 sts* rep to create gentle scallops along the long edges (visual count varies). Fasten off and weave in ends.
Info :
Block assembled runner flat: pin into shape on blocking board and spray lightly with water or steam carefully, then allow to dry completely. Blocking evens motif shapes and opens spiderweb chains into crisp lacy forms.
— Final Trimmings & Embellishments :
Info :
Sew on small black beads for pupils or use black crochet knots. Embroider two little white triangular fangs on green ghosts using a few short satin-stitch passes. Add tiny embroidered mouths or stitches to give expression. If using safety eyes, double-check their security and hide back washers between layers of yarn if motifs were joined for extra strength.
Info :
Weave all ends securely: run the yarn needle through several stitches in the wrong side or inside the edges you created and then trim close. If you plan to launder the runner, use mercerized cotton and avoid hot ironing directly on plastic safety eyes; remove beads if necessary before washing.
This Cute Monsters Halloween Table Runner brings playful spooky charm to any table with colourful monsters, bats and lacy spiderwebs. Each motif is quick to work up and fun to personalize — a perfect seasonal craft to enjoy with a warm cup of tea. The finished runner is light, washable and easy to store for yearly display. 🧶🎃🕸️