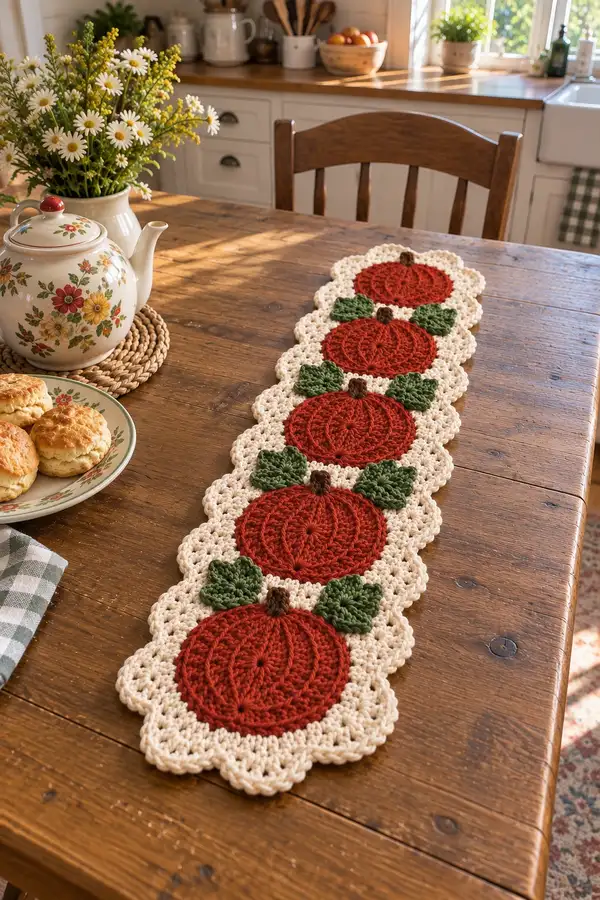
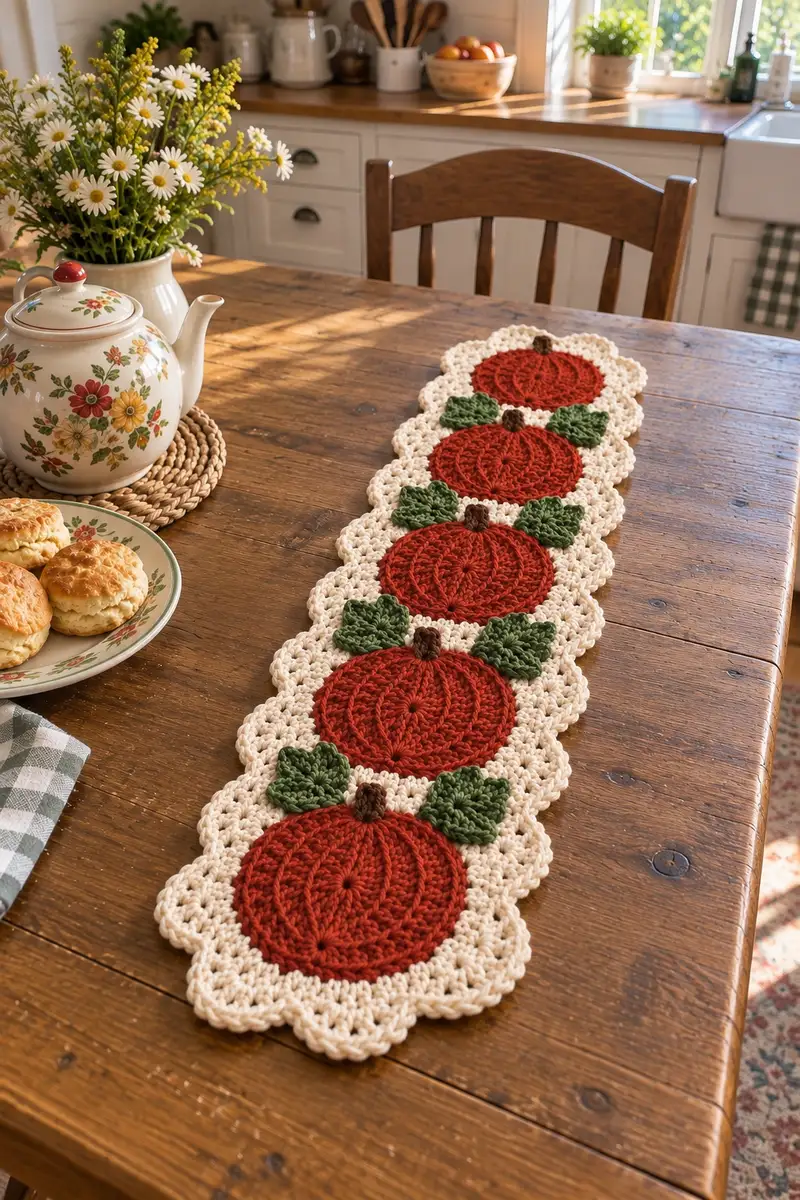
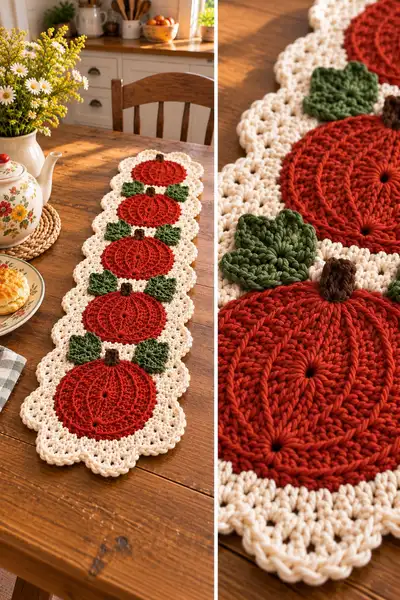
A warm, rustic table runner featuring four plump pumpkin motifs set into a creamy scalloped background with leafy accents and chunky stems. The runner shown uses rich burnt-orange pumpkins, forest-green leaves, and a soft cream scallop edge to create an inviting harvest centerpiece. Worked in a bulky yarn for quick build and squishy texture, it’s perfect for fall decor or a cozy dining table accent.
Progress Tracker
0% Complete
— Notes Before You Start :
Info :
This runner is built from 4 pumpkin motifs joined into a continuous scalloped background. Work each pumpkin, then make leaves and stems and join-as-you-go into the cream background. Gauge is flexible when using bulky yarn; finished runner in sample measures approximately 36" long x 6.5" wide. If you prefer a tighter fabric, drop hook size one step.
— Pumpkin Motif (Make 4 identical) :
Round 1 :
mr, ch1, 6 sc into magic ring (6)
Round 3 :
(1 sc, 1 inc) x 6 (18)
Round 4 :
(2 sc, 1 inc) x 6 (24)
Round 5 :
(3 sc, 1 inc) x 6 (30)
Round 6 :
(4 sc, 1 inc) x 6 (36)
Round 7 :
(5 sc, 1 inc) x 6 (42)
Round 8 :
(6 sc, 1 inc) x 6 (48)
Info :
These increase rounds create a flat disc. Keep tension even and lay flat occasionally to ensure it is not cupping. If you notice curling, work an extra even round before switching stitch types.
Round 9 :
ch2 (counts as first dc), dc in each st around (48)
Round 10 :
To form pumpkin 'segments' work subtle ribbing: *dc in next 5 sts, fpdc around the next dc; rep from * 8 times (48)
Round 11 :
Repeat Round 10 to deepen the ribs: *dc in next 5 sts, fpdc around next dc; rep 8 times (48)
Info :
Front post double crochets pull the stitches forward to form raised ribs. Count carefully to maintain 8 ribs. Place a stitch marker in the first fpdc of Round 10 to identify rib starts for Round 11 alignment.
Round 12 :
ch1, sc in each st around working tidy edge (48)
Round 13 :
Work a textured ring to help the motif sit into the cream background: *ch1, sc in next 3 sts, picot (ch3, sl st into first ch) in next st; rep from * 8 times (48 sc, 8 picots)
Info :
Picots are optional but create nice little joining points for the cream background. If your yarn is very bulky the picots may puff; keep them loose and even.
Round 14 :
ch1, sc in each stitch and around each picot (work 1 sc in picot loop) to create consistent spacing (56)
Info :
Fasten off leaving a 12-18" tail for sewing and joining. Make four identical pumpkin discs. Block lightly flat if desired to even the shape before adding leaves and stems.
— Pumpkin Stem (Make 4) :
Round 1 :
With brown, mr, ch1, 6 sc in mr (6)
Round 3 :
*sc in BLO around each st to give a slightly flat tube; rep 6 (6)
Round 4 :
sc in each st (6)
Info :
For a slightly taller stem, repeat Round 4 once more. Fasten off leaving long tail for sewing. Roll or pinch base slightly and sew into center top of pumpkin motif. Stems are intentionally short and chunky to match the sample photo.
— Leaf Applique (Make 8 - 2 per pumpkin) :
Info :
Leaves are worked flat as small three-lobed appliques; each is worked from a short ch foundation and shaped by working around each side of the foundation chain for a symmetric leaf.
Round 1 :
With green, ch7, sc in 2nd ch from hook, hdc in next, dc in next, tr in center ch, dc in next, hdc in next, sc in last (7 sts, one side of leaf)
Round 2 :
Turn and work on other side of chain: sc in first, hdc in next, dc in next, tr in center, dc in next, hdc in next, sc in last. Slip stitch to join center base (14 sts total across both sides)
Round 3 :
Working around entire leaf edge, *sc in next 2 sts, (hdc, dc, hdc) in next st to form a little lobed bump, sc in next 2 sts; rep from * once each side to create three lobes, sl st to base (approx 18-20 sts)
Info :
Leaves in the sample show deep texture which can be enhanced by working the last round into the BLO only to create a slight raised rim. You can also use light blocking to flatten and shape leaves before sewing down.
Round 4 :
For texture: *(sc in next st), fpdc around corresponding center stitch of the leaf; rep across edge to create ridges if desired, sl st to finish
Info :
Make 2 leaves and pin them symmetrically to the top of each pumpkin, one on left and one on right of the stem. They sit tucked under the stem and overlap the cream background slightly.
— Joining Background Panels & Runner Base (Make continuous cream scalloped strip) :
Info :
The runner background is built as a continuous scalloped strip in cream that nests each pumpkin motif. The easiest method is to work a granny-shell background round that creates 8 shell points per pumpkin and join-as-you-go to the picots or outer edge of each pumpkin motif on Round 13/14.
Round 1 :
With cream, ch5, sl st to form ring, ch3 (counts as dc), 11 dc into ring, sl st to top of ch3 (12 dc) — this creates a starter shell that will align with motif spacing
Round 2 :
Ch3, dc in same st, ch2, *2 dc in next st, ch2; rep around, sl st to top of ch3 (12 shell groups)
Info :
These initial rounds form the background stitch language. You will expand this band to accomodate the diameter of the pumpkin plus scallops around it. Keep the band flat as you work; avoid drifting by checking frequently against a pumpkin motif.
Round 3 :
Ch2, hdc in each st and ch2 space around to create an even surface (counts will vary by shell groups, approx 48-60 hdc)
Round 4 :
Start forming scallops that will eventually connect to pumpkins: *skip 2 hdc, 5 dc in next st (shell), skip 2 hdc, sl st in next; rep across to form even scallops (about 12 scallops)
Info :
At this stage measure: the width of your strip should be roughly the diameter of the pumpkin plus 1/2" on each side. If it is too narrow, add an extra hdc round before forming scallops. If it is too wide, omit a repeat in Round 3.
Round 5 :
Continue building the strip in cream: ch2, hdc in each stitch and in shells' center (work evenly) for one even round (keeps width consistent)
Round 6 :
Form the final scalloped border that will nest pumpkin edges: *(sc, ch2, sc) in shell top, skip 3 stitches between shells to form petaled scallop; rep across
Info :
Work lengthwise until you have 4 shell positions clearly marked and spaced to accept each pumpkin motif. You will place and join the pumpkins on this strip so their centers align with shell centers. The sample runner positions pumpkins evenly with ~1" cream space between motif edges.
Round 7 :
Lay out pumpkins along cream strip temporarily and mark join points on cream scallop centers. Fasten off cream and prepare to join pumpkins one at a time.
— Join-As-You-Go Pumpkin Attachment (Repeat for each pumpkin) :
Info :
We join each pumpkin to the cream strip by working a final joining round on the pumpkin (if not already left) and slip-stitching or singlecrocheting into the corresponding cream edge points. If you used picots on pumpkins, sew into those or use sl st join through picot loops for stability.
Round 1 :
Position one pumpkin over a cream scallop, align center to center. With cream held behind the pumpkin, sl st through pumpkin edge and into cream scallop center every 6 stitches to anchor (8 anchoring points)
Round 2 :
Once anchored, work a row of sc around the exposed pumpkin-cream seam: *sc in next 3 pumpkin stitches, sc into cream where you sl st anchored before to lock piece down; rep around to tidy seam (approx 56)
Info :
Take care when joining the second and subsequent pumpkins: pin first, then work the sc row to avoid pulling the cream strip out of shape. Keep tail ends free for finishing. Repeat for all four pumpkins, spacing evenly along the strip.
— Leaf & Stem Placement :
Info :
Pin two leaves on each side of the stem position before sewing. Leaves should tuck under the stem and overlap the cream background by about 1/4" for a natural look. See photo for approximate spacing: leaves sit roughly on the 10 o'clock and 2 o'clock positions relative to pumpkin center.
Step :
Using long tails left from stems and leaves, stitch stems first: insert needle through pumpkin center from underside to pop stem into place, then stitch around base of stem with whip stitch to secure. Sew leaves next using small invisible stitches through leaf base into cream and pumpkin to anchor.
Info :
Make sure leaves face outward in opposite directions for each pumpkin to create a repeating, alternating layout that mimics the photographed runner. Weave ends through the cream backing to hide them.
— Optional Extra Texture: Raised Ribs (Alternate method) :
Round 1 :
After Round 9 of pumpkin, instead of working fpdc in Round 10, you can create ribs by working 8 upright clusters: *(ch1, 3 tr in next st, sl st into next st) repeat 8 times across center; this will create pronounced ribs which can then be anchored down in subsequent rounds (maintain counts based on spacing)
Info :
This variation is for makers who desire deeper grooves on the pumpkin. Because treble clusters add height, work the following sc rounds tightly to prevent the motif from becoming bowl-shaped.
— Final Scalloped Edging Around Entire Runner :
Round 1 :
With cream, pick up at one end of the runner where the background begins. Work evenly around entire outer edge: *sc in each stitch across straight edges until you reach a scallop point, then work (5 dc, sl st) in each scallop center to create shell points; rep around entire perimeter.
Round 2 :
Ch1, sc evenly around, working (sc, ch2, sc) in the top of each shell made in previous round to form neat petals; work extra sc in corners to keep runner flat
Round 3 :
For a deeper scallop: *in each petal space work (sc, ch3, sc) to form noticeable points; rep around. Fasten off and weave all ends.
Info :
If your runner stretches while joining, lightly steam-block on low setting or pin and mist with water and allow to dry to regain shape. Keep the shape flat and scallops crisp by pinning during blocking.
— Optional Decorative Details :
Info :
You can add embroidered veins across each pumpkin using a contrasting rust or dark orange yarn and a yarn needle. Take two strands of yarn and stitch gentle radiating lines from stem to bottom in 6-8 places. This deepens the pumpkin look.
Info :
For a drapier runner use a lighter yarn and larger number of rounds in the background to make it wider. To shorten or lengthen, simply add or subtract pumpkin motifs; the pattern repeats seamlessly.
Working this Autumn Pumpkin Table Runner is a lovely way to bring cozy harvest charm into your home! Each pumpkin motif stitches up quickly with bold texture and pairs beautifully with the scalloped cream background. The join-as-you-go method keeps pieces neat and makes assembly satisfying and straightforward. 🍁🧶 Display it on your dining table or give it as a handmade gift—either way it will add instant autumn warmth to any room. Happy crocheting and enjoy the seasonal coziness! 🎃