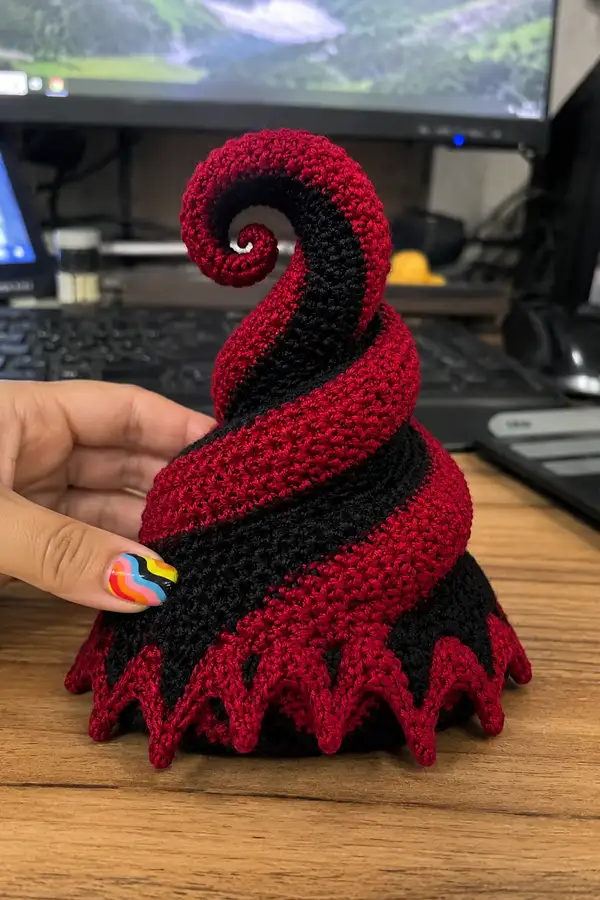
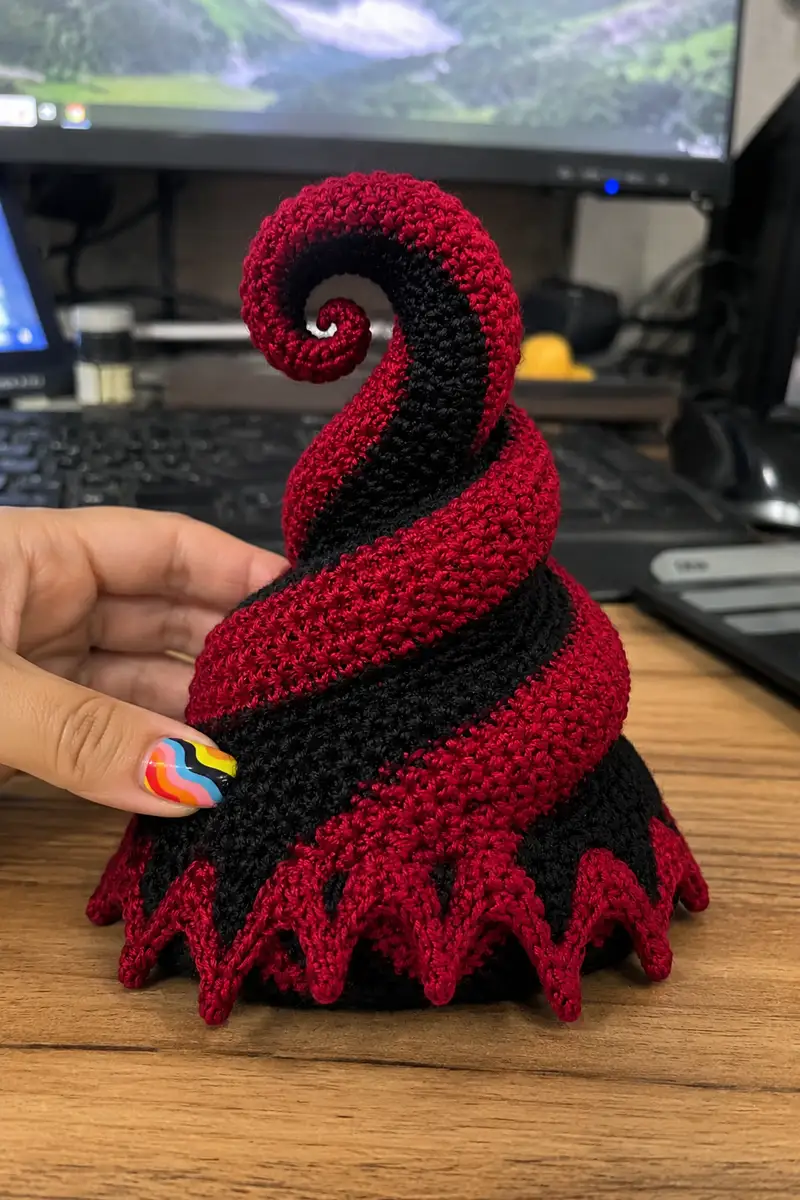
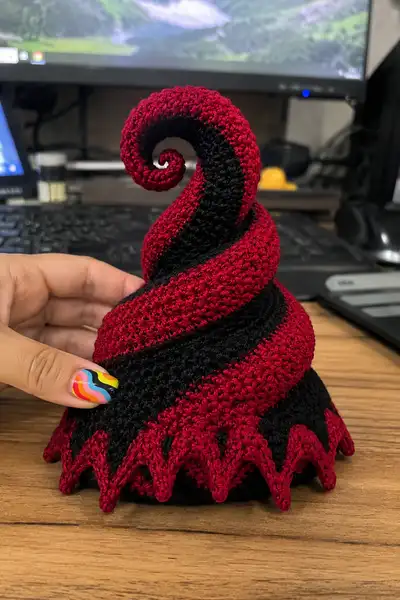
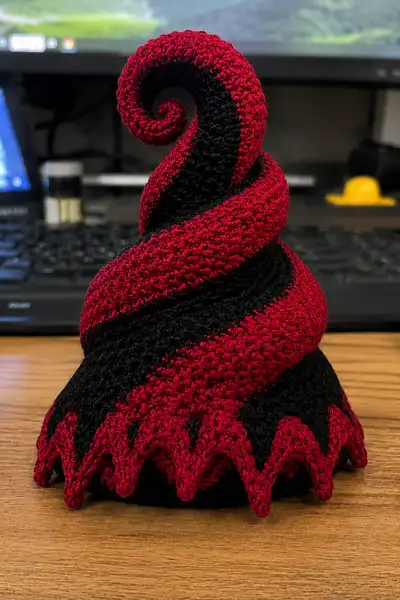
A dramatic spiraling amigurumi inspired by gothic corkscrews — deep blood-red and jet-black stripes twist into a thick, plush corkscrew with a pointed picot hem. This pattern walks you through building a firm stuffed base, a long spiraled tube with alternating color bands, and a curled top tip with a glossy finish. Finished piece stands as an eerie decorative companion or tabletop accent.
Progress Tracker
0% Complete
— Head (Top Curl) :
Round 1 :
6 sc in magic ring (6)
Round 3 :
(1 sc, inc) x 6 (18)
Round 4 :
(2 sc, inc) x 6 (24)
Round 5 :
(3 sc, inc) x 6 (30)
Round 6 :
(4 sc, inc) x 6 (36)
Round 7 :
(5 sc, inc) x 6 (42)
Round 8 :
(6 sc, inc) x 6 (48)
Round 9-20 :
1 sc in each st (48). Work even to build height for top curl (48)
Info :
This section forms the tight curled tip. Work in continuous rounds (no join) so the spiral structure is smooth. Place a stitch marker in the first stitch of Round 9 and move it every round to keep track. If you plan to insert wire for a stronger curl, leave a small channel in the center and slip the wire in after a few rounds, or slide the wire in at the end through the last round before closing.
Round 21 :
(6 sc, dec) x 6 (42)
Round 22 :
(5 sc, dec) x 6 (36)
Info :
Begin to stuff lightly now. Use small amounts of polyfill pushed into place with the blunt end of a yarn needle. The curl tip should be firm but still flexible so it can be shaped into a spiral.
Round 23 :
(4 sc, dec) x 6 (30)
Round 24 :
(3 sc, dec) x 6 (24)
Round 25 :
(2 sc, dec) x 6 (18)
Round 26 :
(1 sc, dec) x 6 (12)
Info :
At this point you have a small closed tip. Fasten off leaving a long tail for sewing. If you prefer a slightly longer tip, resume and add several even rounds of 6 sc to extend the curl core, then fasten off. Keep the tip fairly small and tight — this will be the very end of the corkscrew curl.
— Body (Base Dome) :
Round 1 :
6 sc in magic ring (6) — work with black yarn (60% of base)
Round 3 :
(1 sc, inc) x 6 (18)
Round 4 :
(2 sc, inc) x 6 (24)
Round 5 :
(3 sc, inc) x 6 (30)
Round 6 :
(4 sc, inc) x 6 (36)
Round 7 :
(5 sc, inc) x 6 (42)
Round 8 :
(6 sc, inc) x 6 (48)
Round 9 :
(7 sc, inc) x 6 (54)
Round 10 :
(8 sc, inc) x 6 (60)
Round 11-20 :
1 sc in each st (60) — maintain black for the entire dome circumference to match the reference image (60)
Info :
This wide band forms the base circumference. Work these rounds in even single crochet to produce a dense, stable dome surface. Stuff the base moderately when you reach rounds 14-16 so you can shape a firm but slightly soft bottom that will sit steady on a shelf. Keep stuffing even to avoid lumps.
Round 21 :
(8 sc, dec) x 6 (54)
Round 22 :
(7 sc, dec) x 6 (48)
Round 23 :
(6 sc, dec) x 6 (42)
Round 24 :
(5 sc, dec) x 6 (36)
Round 25 :
(4 sc, dec) x 6 (30)
Round 26 :
(3 sc, dec) x 6 (24)
Round 27 :
1 sc in each st (24) — this top opening will receive the spiral tube base (24)
Info :
Stop stuffing now if you haven't completed it — leave the dome firmly stuffed but allow a small cavity to help you sew on the spiral tube. Do not close this top opening; keep live stitches (or leave a long tail) to attach the spiral tube later. If you closed it already, you can use a yarn needle to reopen a small opening or sew the tube onto the top by sewing through the surface.
Round 28 :
Fasten off leaving a long tail for sewing the spiral base to the dome (do not close the opening fully if you will insert the tube from inside)
— Spiral Tube (Main Corkscrew) :
Info :
The spiral tube is the longest part of this project. Work this piece as a stuffed tube in continuous rounds (spiral rounds, no slip stitch joins) and alternate colors in blocks to create banding. When you wrap the long tube diagonally around the dome it will read as a corkscrew stripe. Keep your tension tight to prevent stuffing showing through. Use a stitch marker to keep track of the first stitch each round.
Round 1 :
6 sc in magic ring (6) — start with the black yarn if your bottom-most stripe near the dome is black
Round 3 :
(1 sc, inc) x 6 (18) — this will be the initial circumference of the tube (18)
Round 4-9 :
1 sc in each st (18) — maintain color A (work 6 rounds total in this color block) (18)
Info :
Change to the alternate color now (red) by completing the last pull-through of the last stitch of Round 9 with red. Carry the unused yarn inside the tube and twist both colors at the join to keep a neat color change. Work color blocks of 6 rounds to create thick bands; when wrapped diagonally, these will appear as spiral stripes.
Round 10-15 :
1 sc in each st (18) — alternate color block (red) (18)
Round 16-35 :
1 sc in each st (18) — work 20 rounds total here across alternating color blocks every 6 rounds to make a long even section (18)
Info :
At this stage you have a long, consistent tube. Continue stuffing lightly after every 8-12 rounds so the tube stays evenly filled. Use small plugs of fiberfill pushed in with a needle until the stuffing feels firm enough to hold the spiral shape but still flexible for wrapping. If you want a wire core, slip the wire into the hollow through the initial MR until the wire reaches the area where you want firm poseability — fold and cap the wire ends with tape and make sure ends are not exposed.
Round 36 :
(2 sc, inc) x 6 (24) — increase to create a slightly thicker midsection (24)
Round 37-55 :
1 sc in each st (24) — work 19 rounds to create a broad bulging corkscrew band (24)
Info :
Change colors every 6 rounds during the 37-55 block to maintain the alternating stripe motif. Because the tube circumference changed, you will now have slightly wider bands; plan your color changes before the round begins and secure tails neatly inside the tube as you go.
Round 56 :
(3 sc, inc) x 6 (30) — increase again for a larger mid-body (30)
Round 57-75 :
1 sc in each st (30) — even rounds to keep the wider midsection (30)
Round 76 :
(4 sc, inc) x 6 (36) — maximum width for the tube (36)
Round 77-95 :
1 sc in each st (36) — long even band where the spiral makes its broadest wrap (36)
Info :
These increases and even rounds create a tube that gently flares, producing the sculptural corkscrew effect once wrapped. Keep your color blocks consistent and remember to count your rounds in each color block so the stripes align visually when wrapped diagonally.
Round 96 :
(4 sc, dec) x 6 (30) — begin tapering (30)
Round 97-105 :
1 sc in each st (30)
Round 106 :
(3 sc, dec) x 6 (24)
Round 107-112 :
1 sc in each st (24)
Round 113 :
(2 sc, dec) x 6 (18)
Round 114-118 :
1 sc in each st (18)
Round 119 :
(1 sc, dec) x 6 (12)
Round 120 :
6 dec (6) — close to a small tip to accept the head curl (6)
Info :
Fasten off leaving a long tail for sewing. Stuff the final tapered end firmly so the tip is rigid enough to support attachment to the head curl. Make sure the tube is evenly stuffed along its full length; if needed, use small amounts of stuffing near the outer edge so the tube retains roundness when wrapped. If you used a wire core, secure the wire inside the tube and ensure the tip is capped and padded.
— Base Picot Edge (Scalloped Hem) :
Info :
Work this edging around the bottom rim of the base dome to create the pointed dripping motif in red. Rejoin red yarn at the bottom edge of the dome (round 1 of the base is the underside). The dome widest circumference is worked at 60 sts; we will place 12 scallops around the rim (5 sts per scallop). Use a stitch marker to ensure you complete exactly 12 repeats.
Round 1 :
Join red at any stitch on the base outermost round, ch1, sc in same st, 1 sc in each of the next 4 sts, *skip 1 st, (5 dc in next st) to form point? (See alternative below), repeat across to end aiming for 12 motifs (60)
Info :
There are two popular picot-style motifs you can use: (A) a deep pointed scallop using dc clusters (work 5 dc in a single stitch to form a peak) or (B) a sharp picot using chains and slip stitches to create a tripartite spike. Both are shown below — choose the one that matches the image more closely (the pictured motif reads like pointed triangular drips). I provide both for clarity.
Option A - Cluster Peaks (preferred for triangular drips) :
Work around evenly: *(sc in next 4 sts, skip 1, 5 dc in next st, sl st in next st) repeat x12 (ends approx 12 peaks)
Option B - Picot Spikes :
*(sc in next 4 sts, ch3, sl st in 3rd ch from hook to form a picot, sl st into base to anchor) repeat x12 — adjust spacing to keep 12 picots (60)
Round 2 :
Work a round of single crochet around the base to tidy peaks: sc in each sc and sc across clusters to weave the points into the hem, finishing with a slip stitch and fasten off. Weave in ends. If your picots or clusters are floppy, block them lightly or add a tiny dot of fabric glue inside each peak for hold.
Info :
Pin the base onto a flat surface before finishing to ensure that the spikes are evenly spaced and pointing outward. If desired, lightly steam-block the points into a downward 'drip' angle for a more dramatic effect.
— Finishing the Spiral Attachment & Curl Shaping :
Info :
With the dome prepared and the long spiral tube completed, you will sew the spiral onto the dome. On the dome top you have a ring of 24 stitches (Round 27 of Body). Use this top opening as the anchor. Begin sewing the closed tapered end of the tube (Round 120) to the small head curl (Head section) first, then wrap the long tube down the dome and sew the base end securely to the top 24- stitch opening. There are two ways to do this: (A) Sew the tube around the outer surface like a decorative wrap (recommended), or (B) insert the tube's base into the top opening and sew from the inside for a more anchored connection. I recommend method A for a sculpted outward spiral.
Step 1 :
Positioning: Starting from the dome top, pin the mid-length of the tube where you want the first wrap to sit. The photos show three broad wraps descending evenly: plan your placement so the tube crosses the dome about every 8-10 rows. Use pins to hold the spiral in place while you stitch.
Step 2 :
Sewing: Use a yarn needle and the long tail from the tube base. Whip stitch through the underside of the tube and the dome surface every 6-8 stitches to create an invisible seam. Sew through the inner loops where possible to hide the joining stitches. Keep stitches small and spaced equally for a neat look.
Info :
As you sew, keep checking the alignment of stripes — gently adjust the rotation of the tube to keep bands consistent. Stuff the tube more firmly if any flattened areas show while sewing; a rounder tube looks more like the photo.
Step 3 :
Attaching Tip: Finally, sew the tapered end of the tube to the already-made head tip. Tuck the head tip slightly into the final coil area and whip stitch evenly. The head tip can be shaped into a spiral by wrapping it around a small dowel or the end of a knitting needle while you baste it into place, then securing with hidden stitches. Fasten off securely and hide tails by weaving them into the tube interior.
Info :
If you used wire, bend the topmost wire gently into a perfect little spiral before closing the head, then cover with a final stuffing layer to keep it smooth. Ensure wire ends are well-padded and not poking out.
— Optional Decorative Gloss & Final Touches :
Info :
To achieve a dark glossy finish similar to the images, you can use a tiny amount of clear fabric gloss spray lightly applied to the red stripes after the piece is completed and allowed to dry. Test on a yarn scrap first. Alternatively use mercerized cotton for the red yarn to get an inherently glossier surface.
Round-like Instruction :
Weave in all ends. Inspect seams and reinforce any spots with additional stitching. Use small stitches and weave tails back and forth through the tube interior for security. Place the finished piece on a flat surface and shape the curl with your hands — pinch the spiral edges to sharpen ridges if desired.
Info :
Congratulations — you have completed the Vampire Night Spiral! If you'd like it to sit more stably, glue or stitch a round of felt to the bottom inside edge of the dome to flatten the base and protect surfaces.
This dramatic spiral amigurumi brings a touch of gothic theater to your handmade collection! The alternating red and black corkscrew, finished with pointed picot drips, is the perfect small sculpture for season displays or dark decor. Every stitch builds structure and character — you'll love watching the form come alive as you wrap and secure the long tube. 🧶🖤 Give it as a gift or keep it for yourself — either way it adds bold personality to any shelf. Happy stitching and share your creation with pride! ✨