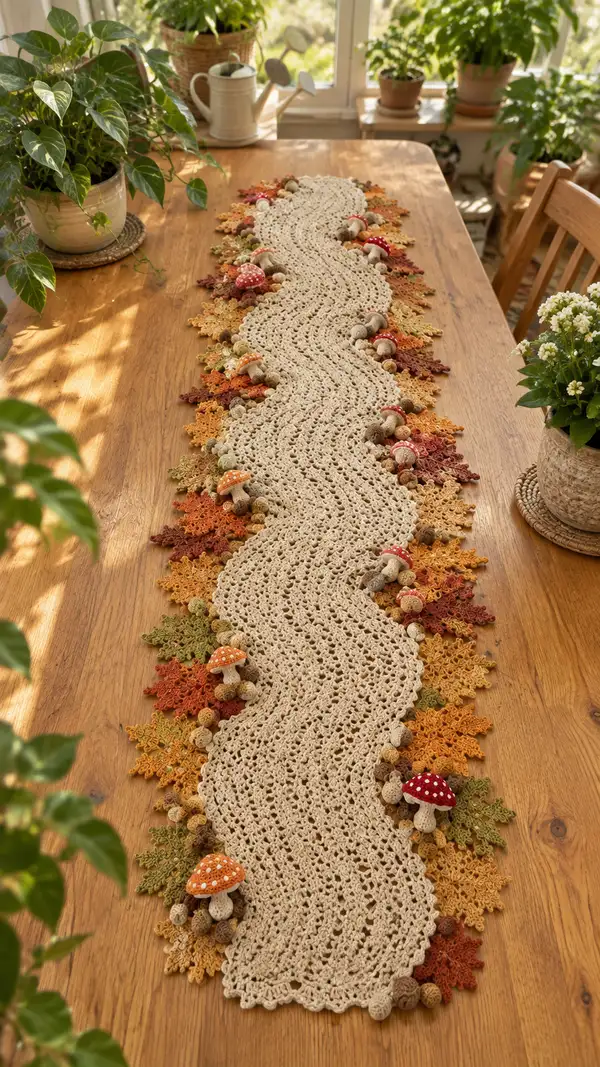
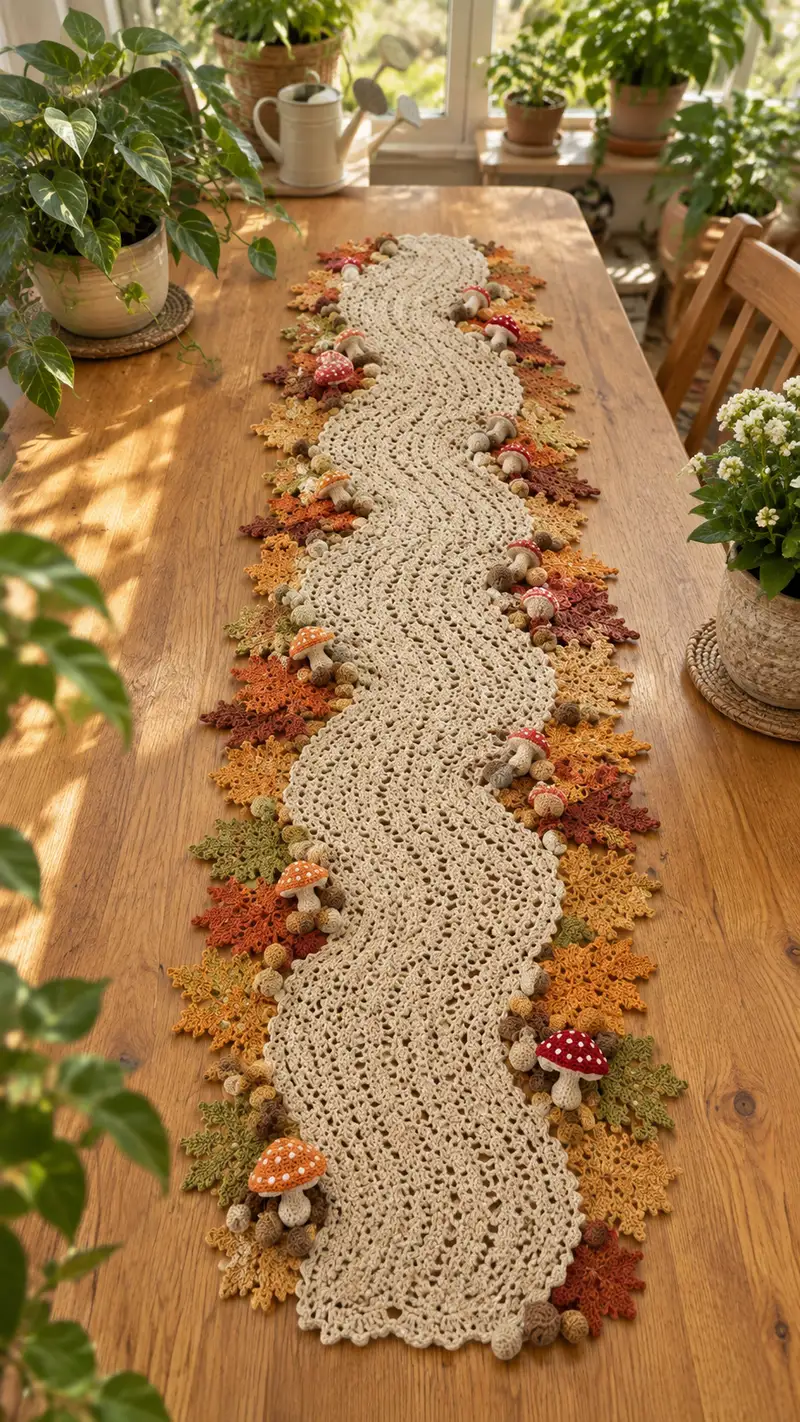
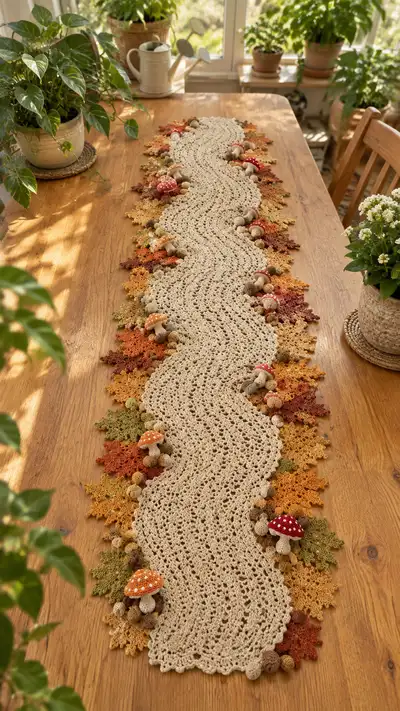
A long, wavy table runner inspired by autumn woodland floors — a delicate cream lace center framed with layered crochet maple-style leaves in warm fall tones and dotted with tiny crocheted mushrooms and acorn clusters. The design combines openwork stitches for a soft flowing center with textured motifs along both edges for a handcrafted seasonal centerpiece. Perfect for a dining table, sideboard, or festive display, this pattern guides you through every motif, mushroom, acorn, and assembly step for a polished finish.
Progress Tracker
0% Complete
— Notes & Gauge :
Info :
Finished runner as shown measures approximately 130cm (51") long x 28cm (11") wide including motifs. Gauge for center lace panel: 22 sts x 12 rows = 10cm in pattern using 3.5mm hook and DK cotton; adjust hook as needed. Pattern is modular: make as many leaf clusters and mushroom groups as you wish to match table length.
Info :
For consistency, work all motifs and runner using the same yarn weight and similar tension. Block the center panel flat before attaching motifs. Use stitch markers to mark the top/bottom of waves every repeat.
— Center Panel (Wavy Lace Runner) :
Round 1 :
Foundation: ch 156 (or any multiple of 12 + 12 for desired width). Turn; this creates the initial foundation chain for a long runner. Note: pattern below is written across rows (each 'Round' here is a worked row). (156 ch)
Round 2 :
Row 1: sc in 2nd ch from hook, sc across until last ch, sc in last ch. Turn. (155 sc)
Round 3 :
Row 2: ch2 (counts as hdc), hdc in same st, *sk 1, (3 dc, ch1, 3 dc) into next st (shell made), sk 1, hdc in next 3 sts; rep from * across to last 2 sts, hdc in last 2 sts. Turn. (Pattern creates alternating shell lanes; counts will vary slightly across repeats)
Round 4 :
Row 3: ch1, sc in each st and sp across aligning between shells: sc in top of ch2, sc in each hdc, sc in ch1 spaces inside shells (3 sc each shell), sc across to end. This row evens the edge and prepares for wave shaping. Turn.
Round 5 :
Row 4 (beginning of wave shaping): ch2, hdc in next 2 sts, *[(2 dc, ch1, 2 dc) in next sp] to narrow shell, sk next 2 sts, hdc in next 4 sts; rep across; end with hdc in last 2 sts. This variation reduces shell width on alternating rows to make gentle undulations.
Info :
Use a stitch marker at the center of your work to maintain symmetry for the wavy curve. The center marker helps align motifs later when attaching leaves and mushrooms.
Round 6 :
Row 5: ch1, sc across following the established pattern, placing sc in shell ch1 spaces and across hdc groups. Keep tension steady — this is an even row to set height. Turn.
Round 7 :
Row 6: ch3 (counts as dc), dc in same st, sk1, *3 dc in next sp, ch1, 3 dc in same sp (deep shell), sk1, dc in next 3 sts; rep across, ending with dc in last 2 sts. This row increases visual ripple by making larger shells at the peaks.
Round 8 :
Row 7: ch1, sc in each top of dc and in ch1 spaces to secure shells. Turn.
Round 9 :
Row 8: Repeat Row 4 across; this alternation of larger and smaller shells along with even sc rows will create the sinuous wavy center – continue to repeat Rows 4-8 until center length reaches desired length minus allowance for motif joins. For a runner of 130cm, work approximately 60-66 repeats (this equates to about 120-132 rows total including even rows). Stop when runner center is 120cm long to allow motif edging and blocking. (Work repeats to length)
Info :
Count repeats or track with a row counter. The center panel is intentionally slightly narrower than finished width so leaf motifs can overlap and create the fuller border shown.
Round 10 :
Final 6 rows to finish center edge: Work two rows of smaller shells (Row 4), one sc row (Row 3), then a last scallop row: ch3, (2 dc, ch1, 2 dc) across in the same spacing to create a scalloped edge. Fasten off and weave ends. Block flat to measured length before attaching motifs.
Info :
Blocking tip: Pin the scallops slightly outward to create a gentle, natural undulation and allow leaf motifs to be sewn under the scallop curves. Spray lightly with water and let dry completely.
— Leaf Motif (Make many — maple-style layered leaf) :
Round 1 :
Using chosen leaf color, form a magic ring, ch2 (does not count), 6 dc into ring. Pull to close. (6 dc)
Round 2 :
Ch2, 2 dc in each st around to enlarge base of leaf: inc in each dc (12 dc). Pull center flat. This creates a broad base for further shaping.
Round 3 :
Ch1, *sc in next st, hdc in next, dc in next, tr in next, dc in next, hdc in next; rep across forming a petal profile (work one petal per 6-st segment). End with sl st to first sc. (Leaf will have 6 small lobes)
Round 4 :
Turn leaf: ch1, working on FLO around: in each lobe work (sc, sc, hdc, dc, hdc, sc, sc) to create raised ridge and thickness. Sl st to base. This builds leaf body with textured veins. (Stitch count varies by lobe but totals about 42 sts)
Round 5 :
Edge shaping: ch1, *[sc in next 2 sts, picot in next st, sk 1] rep around each lobe to create serrated edges. Sl st to join. Fasten off leaving long tail for sewing. (Use tail to position leaf along runner edge)
Info :
Make a mix of sizes by stopping after Round 3 for smaller leaves (no extra edge serration) and by adding an extra round of tr and dc for larger leaves. Use 4-6 colors and stagger sizes when assembling for depth.
Round 6 :
Optional reinforced vein: Using a contrasting thinner yarn and yarn needle, embroider a central vein from base to tip with split stitch and add 2 smaller lateral veins on each lobe. This gives more realism when viewed close-up.
Info :
Make at least 40-60 leaf motifs for the full-length runner pictured. Cluster them in overlapping layers and vary colors: olive, mustard, orange, rust, deep red.
— Small Leaf Variant (Make many) :
Round 1 :
Ch5, sc in 2nd ch from hook, hdc in next, dc in next, tr in last; rotate to work on opposite side of foundation ch: dc, hdc, sc. Sl st to first sc to close small 8-st leaf. Fasten off. (8 sts)
Round 2 :
Info : Use this small leaf variant to tuck under larger maple leaves and fill gaps. Make 60-80 small leaves in assorted colors.
— Mushroom (Medium) — Make 6-8 :
Round 1 :
Cap (color A - bright red or orange): mr, 6 sc into magic ring (6)
Round 2 :
Inc around: 6 inc (12)
Round 3 :
(1 sc, inc) x 6 (18)
Round 4 :
(2 sc, inc) x 6 (24)
Round 5 :
(3 sc, inc) x 6 (30)
Info :
Switch to 3.0mm hook for tidier cap stitches if desired. The cap shape will be shallow and domed; stuffing is minimal to give a flat side for sewing to runner.
Round 6 :
1 sc in each st (30)
Round 7 :
1 sc in each st BLO (30) — this creates a defined rim beneath the cap. (30)
Round 8 :
Ch1, (sc3, dec) x 6 (24) — begin gentle decrease to create slight dome curvature
Round 9 :
(2 sc, dec) x 6 (18)
Round 10 :
Stuff cap lightly with fiberfill to hold shape. Note: do not overstuff; caps should be slightly malleable to flatten against runner when sewn. (18)
Round 11 :
(1 sc, dec) x 6 (12)
Round 12 :
6 dec (6) — leave long tail and close. Fasten off. (6)
Info :
Embroider white spots on the cap with small French knots or sew on tiny white circles crocheted from white scrap: mr, sc6, fasten off, sew onto caps. For a painted dot look, use fabric paint and a small brush and allow to dry fully.
Round 13 :
Stem (color B - cream): mr, 6 sc (6)
Round 14 :
Inc around: 6 inc (12)
Round 15 :
1 sc in each st for 5 rounds (12) — lengthen stem to about 2.5-3cm. Stuff lightly. (12)
Round 16 :
Round 6: (1 sc, dec) x 4 (8) — taper base slightly. Fasten off leaving long tail for sewing. (8)
Info :
Sew stem to underside of cap aligning center. Use whip stitch to attach. Hide seam within cap rim by stitching through BLO rim stitches and top of stem. Leave short stalk visible when sewing to runner for a natural mushroom silhouette.
Round 17 :
Assembly: Position mushroom groupings along runner edge, tucking base of stem into layered leaf clusters. Sew securely through center panel stitches and into leaf layers to firm mount. Use stuffing to shape cap slightly after sewing if desired.
— Mushroom (Small) — Make 8-12 :
Round 1 :
Cap: mr, sc6 (6)
Round 3 :
(1 sc, inc) x6 (18)
Round 4 :
1 sc in each st BLO (18) for rim (18)
Round 5 :
(1 sc, dec) x6 (12) — stuff lightly and close. Fasten off. (12)
Round 6 :
Stem: mr, sc6, inc around (12), 2 rounds sc (12), fasten off leaving tail. Sew as above. (12)
Info :
Small mushrooms are meant to sit in clusters and overlap leaves and acorns. Make a mix of small and medium mushrooms for interest and scale.
— Acorn Ball (Make many for clusters) :
Round 1 :
Cap/body: mr, 6 sc into ring (6)
Round 3 :
(1 sc, inc) x6 (18)
Round 4 :
1 sc in each st for 3 rounds (18)
Round 5 :
(1 sc, dec) x6 (12) — stuff firmly. (12)
Round 6 :
6 dec (6) — close and fasten off leaving tail for sewing. Make at least 30-40 small acorns in mixed brown tones to create generous clusters.
Info :
For acorn caps, crochet a tiny cup: ch6, join to form ring, hdc 12 around, sl st to join, fasten off and sew to top of each acorn ball. Alternatively, use small seed beads or craft clay caps.
— Leaf Cluster Assembly (Make clusters to seam to runner) :
Round 1 :
Info : Each cluster will contain 3-6 larger maple-style leaves and 3-6 small leaves, plus 4-8 acorns and 1-2 mushrooms. Lay pieces out on flat surface to plan overlapping before sewing.
Round 2 :
Step 1: Overlap two large leaves so bases align, then layer a small leaf slightly offset to create depth. Use running stitch with yarn tail to tack leaves together at base, then reinforce with 3-4 sewing passes. Leave tails for final attachment to runner.
Round 3 :
Step 2: Sew acorns into small clusters using yarn tails — group 3-5 acorns together with a few secure stitches through centers of the balls, creating a grape-like cluster. Tuck clusters behind leaves and tack into place.
Round 4 :
Step 3: Position one medium mushroom and 1-2 small mushrooms per cluster, sewing stems through leaf bases and into runner foundation. Ensure stems sit snugly against runner; add a tacking stitch through leaf back to hold mushroom at an angle.
Info :
Make 8-12 clusters of varying sizes for a long runner; space them approximately every 10-14cm along each edge of the center panel to mirror the photo composition. For asymmetry, alternate cluster placement slightly left/right on alternating repeats.
— Joining Motifs to Center Panel :
Round 1 :
Info : With center panel blocked and flat, lay a row of clustered motifs along one long edge. Allow leaves to overlap the scalloped edge about 1-2cm so they form a continuous border. Pin each cluster in place.
Round 2 :
Sewing method: Using a blunt tapestry needle and matching yarn tail, use a ladder stitch to sew through the base of leaf tails and corresponding loops on the center panel. Make sure not to compress scallops; maintain slight lift for realistic shadowing.
Round 3 :
Attach clusters: Sew each cluster with at least 8-10 secure stitches, catching several stitches of the center panel and multiple points of the cluster base to prevent rotation. Knot securely and weave tails at least 5cm into the fabric before trimming.
Round 4 :
Info : For additional stability, weave in a tone-on-tone sewing thread across the underside of the runner connecting cluster bases every 20cm, creating a non-visible running reinforcement.
Round 5 :
Repeat attachment along the opposite long edge mirroring placement for a balanced composition. Leave ends of runner free for optional tassel or additional motifs.
— Edge Finishing & Picot Border :
Round 1 :
With cream yarn, join at a corner scallop: ch1, sc evenly across scallop indentation counting each top stitch from shell rows; aim for 1 sc per 3 stitches of main lace. (Adjust count per scallop)
Round 2 :
Picot row: *sc3, picot, sc3, sl st into next scallop top; rep across. This creates neat tiny points along the runner and helps disguise joins beneath leaf clusters. Fasten off and weave ends into backside.
Info :
If you prefer a subtler edge, work a row of crab stitch (reverse single crochet) instead of picots for a more defined rolled edge.
— Final Embellishments :
Round 1 :
Optional bead accents: Using a fine thread, sew tiny wooden or ceramic beads into acorn clusters to add weight and interest. Beads should be secured with multiple passes and knotted on underside.
Round 2 :
Spot painting: For precise white mushroom spots, use diluted acrylic fabric paint and a small round brush to dab dots onto caps. Secure paint fully and do not use heavy coats that stiffen caps excessively.
Round 3 :
Info : Step back frequently during assembly to ensure even spacing and visual rhythm along the runner. Adjust clusters as necessary by unstitching and reseating before final securing.
— Care Instructions :
Info :
Hand wash gently in lukewarm water with mild detergent. Reshape while damp and lay flat to dry. Avoid tumble drying. If spots become soiled, dab cautiously rather than scrubbing to preserve shape and colors.
Info :
Store runner flat or rolled to prevent creasing of 3D motifs. For long-term storage, place acid-free tissue around mushroom caps and clusters to preserve form.
This autumn woodland runner brings the cozy warmth of fall into your home with layered leaves, tiny acorns, and charming mushrooms. Every stitch adds texture and seasonal personality, and assembling the motifs is a relaxing, meditative process. Whether you make a shorter version for a side table or a full-length centerpiece for the dining table, this pattern is a delightful way to celebrate handmade warmth. 🧶🍁✨