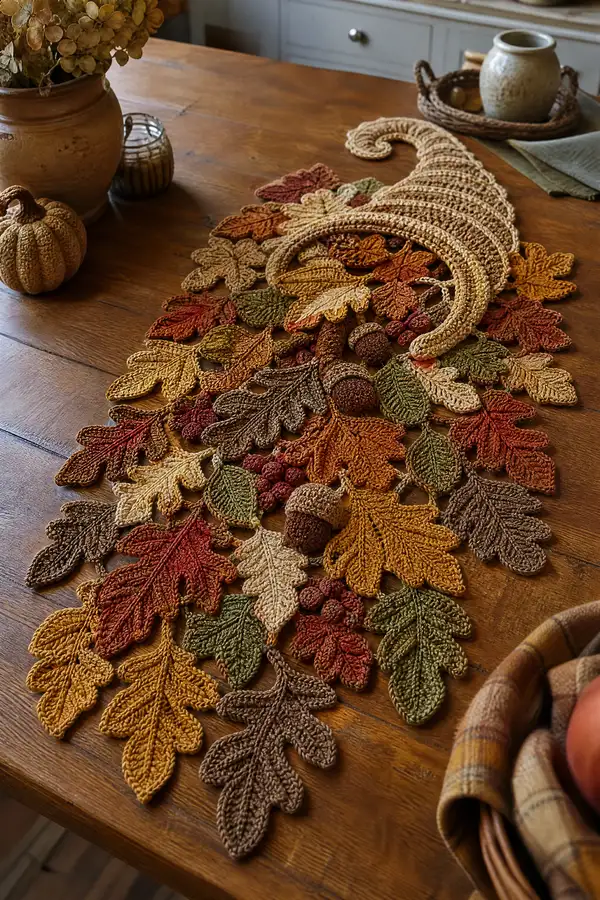
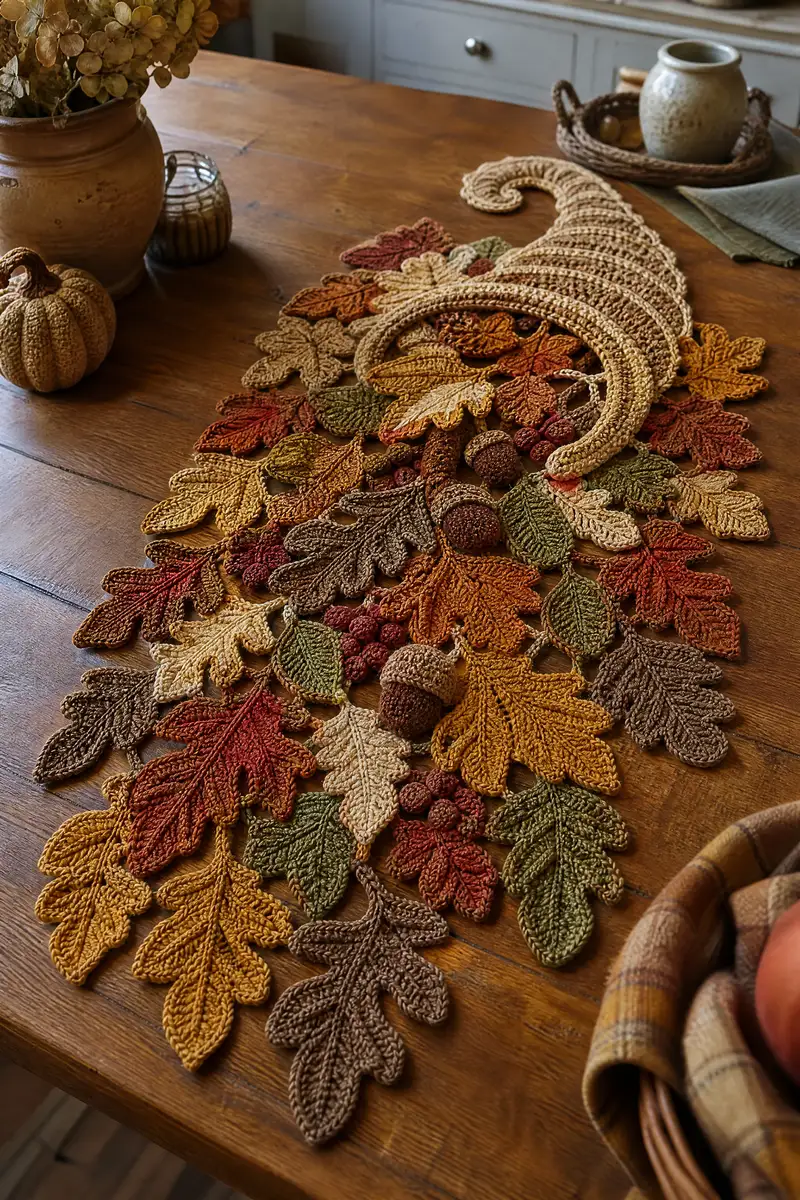
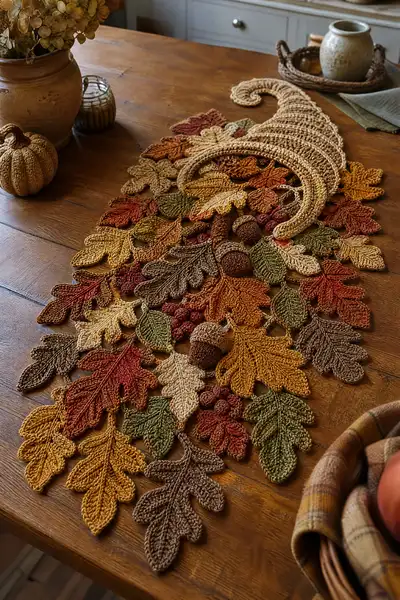
A richly textured crochet cornucopia table runner inspired by autumn harvest traditions. This pattern recreates the curled horn, layered leaves, acorns and berry clusters in warm fall tones with surface crochet texture and subtle color shifts. The design uses modular motifs—many leaf shapes and small 3D details—that are crocheted separately and joined to create a lush runner. Detailed stitch counts and assembly instructions make it approachable for crocheters comfortable with amigurumi-style shaping and textured surface stitches.
Progress Tracker
0% Complete
— Horn (Cornucopia) :
Info :
This horn is worked in a continuous spiral (no joining) to create a smooth curved cone that is supported by layered rounds. Use 4.0mm hook and a light tan/beige main color. For a firmer rim, consider inserting thin craft wire inside the last 10 rounds of the rim, wrapped in yarn, before closing.
Round 1 :
6 sc in magic ring (6)
Round 2 :
Inc in each st around (12)
Round 3 :
(1 sc, inc) x6 (18)
Round 4 :
(2 sc, inc) x6 (24)
Round 5 :
(3 sc, inc) x6 (30)
Info :
The first 5 rounds establish the small center at the tip of the horn. Work tightly and keep spiral without joins—use a stitch marker placed on the first stitch and move it each round if needed.
Round 6 :
(4 sc, inc) x6 (36)
Round 7 :
(5 sc, inc) x6 (42)
Round 8 :
(6 sc, inc) x6 (48)
Round 9 :
(7 sc, inc) x6 (54)
Round 10 :
(8 sc, inc) x6 (60)
Info :
At this stage the cone is widening. For the horn opening to lie flat later, you will add texture rounds that create a slight flared rim. Keep tension even and watch for bumps.
Round 11 :
1 sc in each st around (60)
Round 12 :
1 sc in each st BLO (60)
Round 13 :
1 sc in each st (60)
Round 14 :
(9 sc, inc) x6 (66)
Round 15 :
1 sc in each st (66)
Info :
To create the horn's wide mouth, we will work a combination of even rounds and occasional increases to flare the edge. Switch to a slightly lighter hand (looser) for rounds 14-16 if you want a softer rim curve.
Round 16 :
(10 sc, inc) x6 (72)
Round 17 :
1 sc in each st (72)
Round 18 :
1 sc in each st BLO (72)
Round 19 :
(11 sc, inc) x6 (78)
Round 20 :
1 sc in each st (78)
Info :
Begin shaping the interior rim with alternating BLO rounds and regular sc to create a subtle ridge that mimics woven wicker. If you want a more defined ridged band, substitute Round 18 with 1 sc in each st FLO instead.
Round 21 :
(4 sc, inc) x13 (91)
Round 22 :
1 sc in each st (91)
Round 23 :
1 sc in each st BLO (91)
Round 24 :
(5 sc, inc) x13 (104)
Round 25 :
1 sc in each st (104)
Info :
At the wide mouth we will begin layering rounds that will be folded slightly to sit on the table. If you want an extra-firm rim, add a length of wire wrapped in yarn and positioned under Round 26 after making Round 26, then continue rounds to enclose wire.
Round 26 :
1 sc in each st BLO (104)
Round 27 :
(6 sc, inc) x13 (117)
Round 28 :
1 sc in each st (117)
Round 29 :
1 sc in each st BLO (117)
Info :
Now we start the gentle taper that will form the long curled body of the horn. To create an elegant curl, decreases will be gradual and should be worked on alternating rounds so the horn length remains substantial.
Round 30 :
(10 sc, dec) x10 + 7 sc (107)
Round 31 :
1 sc in each st (107)
Round 32 :
(9 sc, dec) x10 + 6 sc (96)
Round 33 :
1 sc in each st BLO (96)
Round 34 :
(8 sc, dec) x9 + 6 sc (87)
Round 35 :
1 sc in each st (87)
Info :
To create the spiral curl, introduce short rows on the outer edge by working extra rounds across the outermost third of the horn—this will encourage the outer rim to sit slightly wider than the inner underside, producing a natural curl.
Round 36 :
(7 sc, dec) x10 + 4 sc (77)
Round 37 :
1 sc in each st (77)
Round 38 :
(6 sc, dec) x9 + 2 sc (68)
Round 39 :
1 sc in each st BLO (68)
Round 40 :
(5 sc, dec) x8 + 3 sc (59)
Round 41 :
1 sc in each st (59)
Info :
Continue decreasing while testing the curl shape. When you have a pleasing spiral, stop decreasing more rapidly. Stuffing is minimal—the horn is mostly flat and sculptural. If you used wire, ensure ends are covered and positioned away from exposed edges.
Round 42 :
(4 sc, dec) x9 + 2 sc (50)
Round 43 :
1 sc in each st (50)
Round 44 :
(3 sc, dec) x8 + 2 sc (42)
Round 45 :
(2 sc, dec) x7 (28)
Info :
Fasten off with a long tail for sewing to the assembled leaf bed. Block the horn gently to set the curve. If the opening edge needs to flare more, add one round of (1 sc, inc) across the outer rim before attaching.
— Large Oak Leaf (make multiple) :
Info :
This oak leaf uses post stitches and elongated stitches to create lobed edges and visible veins. Work flat; each leaf begins with a short center spine chain worked along both sides to form a symmetrical shape. Use 3.5–4.0mm hook depending on desired size. Pattern below creates a leaf approximately 6-7 inches long with worsted yarn.
Round 1 :
Ch 13, sc in 2nd ch from hook and across (12) — base foundation chain
Round 2 :
Ch1, turn, sc in each st across (12)
Round 3 :
Ch1, turn, 2 sc in first st, sc in next 10, 2 sc in last st (14)
Round 4 :
Ch1, turn, sc in first st, hdc in next, (dc in next, tr in next) across center 8 sts, hdc in previous, sc in last st (14)
Round 5 :
Working down opposite side of foundation chain: sl st to next ch, sc in next 2 ch, (hdc, dc, tr) mirroring the other side, sc in final 2 ch (14)
Info :
Use front post stitches along the center to create a raised vein: when you complete both sides, work a row of fpdc along the central spine by inserting hook around the post of the stitch directly below.
Round 6 :
Ch1, sc around entire leaf edge working (sc, hdc, dc) into lobes to form rounded lobes; total around approx 28 sts depending on tension (approx 28)
Round 7 :
FLO across the last row: 1 sc in each st FLO to create a defined ridge (28)
Round 8 :
Ch1, work 1 sc in next 2, (skip 1 st, 5 dc cluster into next st, skip 1 st, 1 sc) across to form scallops and lobes; adjust to maintain symmetry (approx 28)
Round 9 :
Work surface slip-stitch veins: with contrasting shade, surface sl st from tip to base in a slightly wavy line, anchoring at base and tip (no stitch count)
Round 10 :
Fasten off leaving long tail for sewing. Block lightly to open lobes and set shape.
Info :
Repeat this leaf pattern in varied colors. Make 8–12 large oak leaves for a full runner. Block each leaf flat and pin into shape while damp to ensure consistent size before assembly.
— Maple Leaf (medium) :
Info :
Maple leaf uses pointed lobes and central rib. This version creates a symmetric 5-lobed maple; each leaf is worked flat from the center outward.
Round 1 :
Ch 11, sc in 2nd ch from hook and across (10)
Round 2 :
Ch1, turn, 2 sc in first st, sc in next 8, 2 sc in last st (12)
Round 3 :
Ch1, turn, work along one side: (sc, hdc, dc, tr, dc, hdc, sc) into successive sts to form first lobe; sl st to opposite side and mirror to form other lobe (12)
Round 4 :
Ch1, sc in each st around to smooth edge; total approx 24 sts (24)
Round 5 :
Surface crochet central veins with contrasting yarn: weave a line of sl sts from base to tip and add shorter veins along each lobe.
Info :
Make 10-14 maple leaves in colors rust, deep red, and golden yellow. Vary the intensity by using variegated yarns for natural shading.
— Elongated Filler Leaf (small) :
Round 1 :
Ch 9, sc in 2nd ch from hook and across (8)
Round 2 :
Ch1, turn, 2 sc in first, sc across, 2 sc in last (10)
Round 3 :
Ch1, sc across one side, sl st to opposite side, sc back across to form a narrow leaf (10)
Round 4 :
FLO 1 sc in each st to form small ridge (10)
Round 5 :
Work surface sl sts to form mid rib; fasten off and leave long tail for sewing.
Info :
Make 20–30 small filler leaves in mixed greens and tans to weave between larger leaves for fullness.
— Acorn Nut :
Info :
Acorn is two-part: the rounded nut (worked in brown) and a textured cap (worked in darker brown). Use 3.5mm hook for a tighter, compact nut.
Round 1 :
6 sc in magic ring (6)
Round 2 :
Inc in each st (12)
Round 3 :
(1 sc, inc) x6 (18)
Round 4 :
(2 sc, inc) x6 (24)
Round 5 :
1 sc in each st (24)
Round 6 :
(3 sc, dec) x6 (18)
Round 7 :
(2 sc, dec) x6 (12)
Round 8 :
Stuff lightly with polyester fiberfill. (1 sc, dec) x4 (8)
Round 9 :
6 dec (3) - or finish with needle and close tightly (3)
Info :
Fasten off leaving long tail for sewing into cap. The nut should be firm but not overstuffed; shape by pushing the filling to the rounded portion with blunt end of crochet hook.
— Acorn Cap :
Round 1 :
6 sc in magic ring (6)
Round 2 :
Inc each st (12)
Round 3 :
(1 sc, inc) x6 (18)
Round 4 :
1 sc in each st BLO (18)
Round 5 :
Working textured cap: *ch1, skip next st, 5 dc cluster in next st, skip next st, sl st* repeat around to create a bumpy acorn cap (approx 9 clusters)
Round 6 :
Sl st in back loops only around base to create a neat inner rim (18)
Info :
Sew the acorn nut into the cap with long tail; use ladder stitch for invisible join and ensure the cap covers the top third of the nut. Make 6–10 acorns in mixed browns for a natural look.
— Berry (small sphere) :
Round 1 :
6 sc in magic ring (6)
Round 2 :
Inc in each st (12)
Round 3 :
(1 sc, inc) x6 (18)
Round 4 :
1 sc in each st (18)
Round 5 :
(1 sc, dec) x6 (12)
Round 6 :
6 dec (6). Stuff lightly then close. Fasten off leaving tail for sewing.
Info :
Make berry clusters of 3–6 berries by sewing small spheres together then attaching them to the leaf bed near the horn opening. Use deep red or burgundy for contrast.
— Small Decorative Leaves and Fillers :
Round 1 :
Ch 7, sc in 2nd ch from hook and across (6)
Round 2 :
2 sc in first st, sc in next 4, 2 sc in last (8)
Round 3 :
1 sc in each st around (8)
Round 4 :
FLO 1 sc in each st to create tiny ridge (8)
Round 5 :
Surface sl st rib down center, fasten off with tail for sewing.
Info :
Make 30–40 of these in mixed greens and warm neutrals—these fill gaps and create visual continuity between larger motifs.
— Joining & Border Motif (connect motifs into runner) :
Info :
Once all motifs are crocheted and blocked, lay them out in desired arrangement on a large flat surface. The runner pictured has the horn placed at one end with leaves radiating out, overlapped and stitched down. Use matched-color yarn and mattress or whip stitch to attach flats edge-to-edge. Join small leaves and berries to larger leaves using long tails and sew through both layers to hide stitches.
Round 1 :
With main horn color, work a joining chain: ch into small connecting loops between motifs by inserting hook into outermost chain spaces and sl st to create a neat concealed ladder. No strict stitch count—work connectors where needed (variable)
Round 2 :
Edge binding: 1 sc around entire runner perimeter through both layers where motifs overlap to create integrated edge; keep 1 sc per visible edge stitch for neat finish (variable)
Round 3 :
Optional picot edging: *ch3, sl st in 3rd ch from hook* every 6 sc around to create delicate picot trim (adjust spacing to taste)
Info :
Take frequent photos of your layout before sewing so you can reproduce placement if needed. Sew in long tails under leaf centers to hide ends, and use small running stitches to flatten any raised areas so the runner lays flat on the table.
— Finishing Touches :
Info :
After sewing all motifs in place, lightly steam block the completed runner on a protected surface to set joins and shape. Gently press edges with a damp cloth if needed. Add additional surface embroidery veins or shadowing with a slightly darker yarn to accent depth.
Round 1 :
Weave in all ends with tapestry needle, making sure each tail is woven at least 4–6 cm through multiple stitches to secure (no stitch count)
Round 2 :
Optional: attach small felt pads or thin cork bumpers under horn mouth so runner does not slide on the table (no stitch count)
Info :
Label your pieces and keep spare motifs on hand to replace any that may get damaged with time—this modular design allows easy repair of single leaves or accents without disrupting the entire runner.
This cornucopia table runner brings the warmth of harvest to any table with layered leaves, acorns and berries that look like they just tumbled from the forest. Each modular motif is fun to crochet and rewarding to assemble, and the finished runner becomes a centerpiece that lasts for seasons. I hope you enjoy creating and customizing your own autumn display—happy crocheting and may every stitch bring cozy memories! 🍁🧶