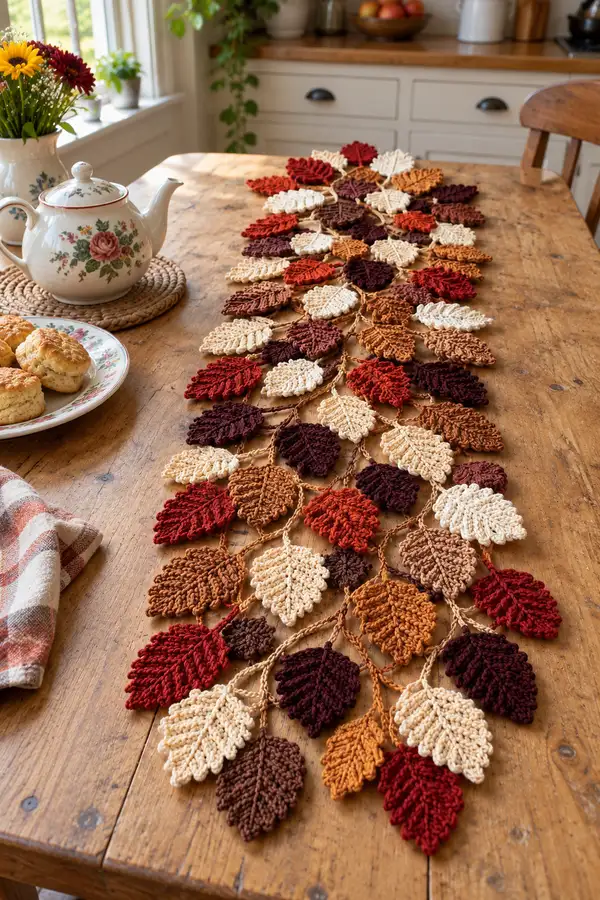
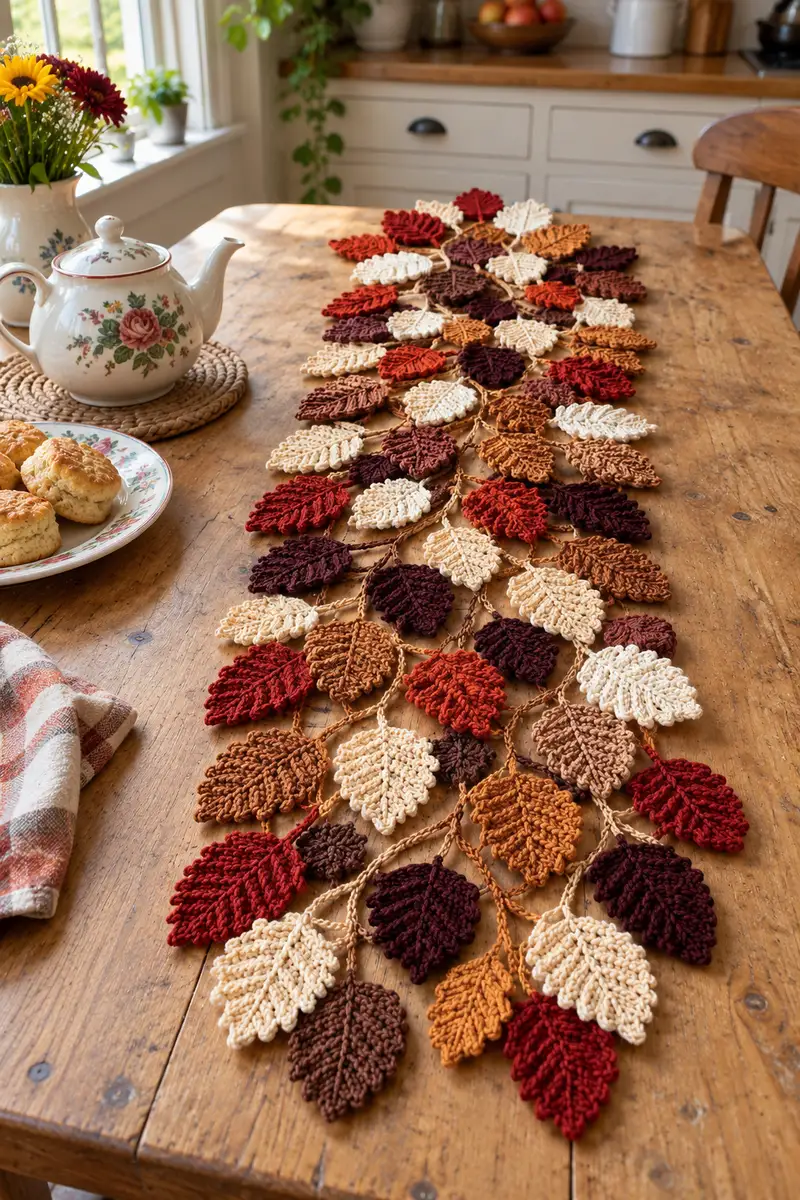
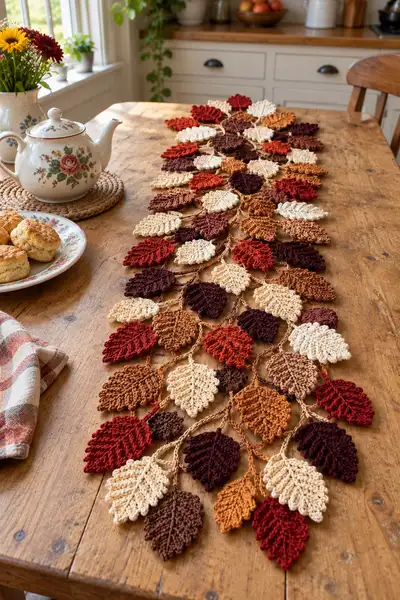
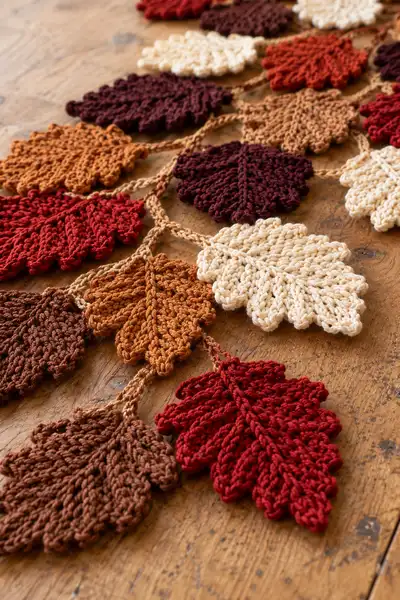
Create a cozy, autumn-inspired table runner made from dozens of crocheted leaves in warm fall hues. This pattern combines textured leaves, twisted stem connectors, and a forgiving assembly layout so you can scale the runner to any length. The design features rich rusts, deep burgundies, caramel browns and creamy neutrals with a textured central vein on each leaf for a handcrafted, heirloom look. Perfect for seasonal decor, a long farmhouse table centerpiece, or a thoughtful handmade gift.
Progress Tracker
0% Complete
— Notes & Gauge :
Info :
This pattern is worked in separate leaf motifs joined together with twisted chain stems. Gauge is not critical for overall looks, but approximate leaf width (at widest) should be about 3.5-4.5 inches when using worsted weight yarn and a 3.5mm hook. If your leaves come out larger or smaller, adjust hook size accordingly. Plan layout before final joining. Blocking each leaf flat after finishing will dramatically improve drape and alignment.
— Leaf Large (Oak-style) :
Round 1 :
6 sc in magic ring (6)
Round 3 :
(1 sc, inc) x 6 (18)
Round 4 :
(2 sc, inc) x 6 (24)
Round 5 :
(3 sc, inc) x 6 (30)
Info :
These first rounds form the rounded base of the leaf. Work tightly and keep the stitches small to create a neat curved base for the leaf. Leave a 6-8 inch tail to use for anchoring later if you prefer to sew the base down.
Round 6 :
1 sc in each st (30)
Round 7 :
(4 sc, inc) x 6 (36)
Round 8 :
1 sc in each st (36)
Round 9 :
(5 sc, inc) x 6 (42)
Round 10 :
1 sc in each st (42)
Info :
At rounds 6–10 you are widening the leaf. These rounds create the full body of the leaf. If you prefer a narrower leaf, reduce the number of increases in a few repeats (for example do (4 sc, inc) x 6 only once then even rounds).
Round 11 :
(6 sc, inc) x 6 (48)
Round 12 :
1 sc in each st (48)
Round 13 :
(7 sc, inc) x 6 (54)
Info :
These extra increases help the leaf reach its maximum width and will form the lobed silhouette once you start decreasing. If you wish to add a serrated edge later, plan picot or chain loops at the end of the shaping sequence.
Round 14 :
1 sc in each st (54)
Round 15 :
(7 sc, dec) x 6 (48)
Round 16 :
(6 sc, dec) x 6 (42)
Info :
Begin decreasing evenly to pull the shape into the leaf point. Keep the decreases evenly spaced so the leaf remains symmetrical. Use invisible decrease for a neat finish if you are comfortable with it.
Round 17 :
1 sc in each st BLO (42)
Round 18 :
(5 sc, dec) x 6 (36)
Round 19 :
1 sc in each st FLO (36)
Info :
Use BLO and FLO strategically: work one round in BLO to create a subtle ridge that will become the raised central vein, then work the opposite round in FLO to allow the vein to stand out. These texture choices give the leaf a realistic, ribbed center.
Round 20 :
(4 sc, dec) x 6 (30)
Round 21 :
1 sc in each st (30)
Round 22 :
(3 sc, dec) x 6 (24)
Round 23 :
1 sc in each st (24)
Round 24 :
(2 sc, dec) x 6 (18)
Round 25 :
(1 sc, dec) x 6 (12)
Info :
At this point the leaf has closed into a small tip. Fasten off leaving a 6-8 inch tail if you plan to sew the tip to a connecting stem. If you prefer a pointed tip with a small loop, after the final dec, ch 6 and sl st into the same st to form a tiny loop; fasten off and weave in ends.
Round 27 :
Using contrast or same color, rejoin at center base and work 1 sc evenly around the base edge to tidy the shape (6 sc) (6)
Round 28 :
Picot edge (optional): *ch 3, sl st in 3rd ch from hook (picot), sl st next st; rep around base to add scalloped base (6 picots)* Fasten off and weave in ends
Info :
To accentuate the vein, rejoin yarn at the center of the leaf and work a line of FPdc down the center from base to tip, working 1 FPdc in every 2-3 sts and anchoring with sc at the tip. This adds a tactile raised rib that catches light beautifully after blocking.
— Leaf Medium (Maple-ish) :
Round 1 :
6 sc in magic ring (6)
Round 3 :
(1 sc, inc) x 6 (18)
Round 4 :
(2 sc, inc) x 6 (24)
Round 5 :
(3 sc, inc) x 6 (30)
Info :
The medium leaf will be slightly narrower but with more serrated lobes. We'll use post stitches to carve the lobes and create texture reminiscent of a maple leaf. Keep tension even; do not pull too tight on post stitches or the fabric will pucker.
Round 6 :
1 sc in each st (30)
Round 7 :
(4 sc, inc) x 6 (36)
Round 8 :
1 hdc in each st (36)
Round 9 :
(5 sc, inc) x 6 (42)
Round 10 :
1 sc in each st (42)
Info :
To make lobes: at the next increase round, we'll create small chain loops that will be worked into on the return rounds to form serrations. Keep a stitch marker at the point where the first lobe starts to keep track of orientation for assembly.
Round 11 :
(6 sc, inc) x 6 (48)
Round 12 :
1 sc in each st (48)
Round 13 :
(9 sc, inc) x 4; (4 sc, inc) x 2 (54)
Round 14 :
1 sc in each st BLO (54)
Round 15 :
(8 sc, dec) x 4; (3 sc, dec) x 2 (48)
Info :
Use BLO to create a furrow that becomes the central valley between lobes. Later we will use ch loops between lobes for a serrated edge look — try to visualize the leaf silhouette as you decrease so each lobe remains pronounced.
Round 16 :
1 sc in each st (48)
Round 17 :
(5 sc, dec) x 6 (42)
Round 18 :
1 sc in each st (42)
Round 19 :
(4 sc, dec) x 6 (36)
Round 20 :
1 sc in each st (36)
Round 21 :
(3 sc, dec) x 6 (30)
Round 22 :
1 sc in each st (30)
Round 23 :
(2 sc, dec) x 6 (24)
Round 24 :
(1 sc, dec) x 6 (18)
Info :
Fasten off leaving a 6-8 inch tail for joining. If you created chain loops for serrations, work into each loop with 3 sc to form little teeth on the next round before final decreases. Block flat to open the lobes out for a maple-like effect.
— Leaf Small (Rounded) :
Round 1 :
6 sc in magic ring (6)
Round 3 :
(1 sc, inc) x 6 (18)
Round 4 :
(2 sc, inc) x 6 (24)
Round 5 :
1 sc in each st (24)
Info :
This small rounded leaf is used to fill gaps and provide contrast. It's worked quickly to a shallow oval and finished with a tidy edge. Make many of these to add texture to the runner.
Round 6 :
(3 sc, inc) x 6 (30)
Round 7 :
1 hdc in each st (30)
Round 8 :
(2 sc, dec) x 6 (24)
Round 9 :
1 sc in each st (24)
Round 10 :
(1 sc, dec) x 6 (18)
Round 12 :
Fasten off leaving long tail for joining; optional: rejoin and work 1 sc around edge for neatness
Info :
These small leaves are excellent to place between larger motifs; arrange as needed. Block gently to flatten and give a little body without stiffness.
— Leaf Narrow (Elm-style) :
Round 1 :
6 sc in magic ring (6)
Round 3 :
(1 sc, inc) x 6 (18)
Round 4 :
(2 sc, inc) x 6 (24)
Round 5 :
1 sc in each st (24)
Round 6 :
(3 sc, inc) x 6 (30)
Round 7 :
1 sc in each st FLO (30)
Round 8 :
(4 sc, dec) x 6 (24)
Round 9 :
1 sc in each st (24)
Round 10 :
(3 sc, dec) x 6 (18)
Round 11 :
(2 sc, dec) x 6 (12)
Info :
The narrow leaf is long and tapered. Use FPdc along the center line to create a raised midrib; work 1 FPdc every 2 stitches from base to tip then secure at tip with sl st. Fasten off and weave in tail for tidy finish.
— Twisted Stem Connector (make many) :
Info :
Twisted stems are crocheted as short chain ropes that connect leaves. They are worked with 3 chains twisted together or made by crocheting a 2-3 chain cord and twisting. They are flexible and lie flat. Make stems in the warm tan/carame color for cohesion.
Round 1 :
Ch 24 for a long stem or ch 12 for a short stem (length varies). Sl st in 2nd ch from hook and in each ch back to start to create a cord (24 sc along foundation for long stem)
Round 2 :
Fold cord in half and with working yarn, sl st through both layers every 3rd stitch to create a twisted rope look. Fasten off leaving long tail for sewing (approx 24 sl sts)
Info :
For a more organic twisted look, make three short crocheted cords and braid them loosely; tack at ends to secure. Trim tails to desired length before joining leaves so stems do not read too thick at joins.
Round 3 :
Alternatively, create a crocheted i-cord: ch 7, sc in each ch, leaving tail; twist cord around itself and anchor ends with a couple of sl sts to form a neat braided stem (7 sc)
— Decorative Midrib (optional detail) :
Info :
To create a prominent midrib, rejoin contrasting or same color at base of each leaf and work a line of FPdc up the leaf: ch 1, FPdc in every 2nd st for the length of the leaf, finishing at the tip with a sl st. Use blocking to make the midrib set into the leaf.
— Edging & Serration Rounds (optional) :
Round 1 :
After leaf shaping, rejoin at outermost edge and *ch 3, sl st in same st (picot), sl st next 2 sts; rep around to create a scalloped serration* (count depends on leaf perimeter)
Info :
Serration adds a delicate, lacy edge that is particularly pretty on maple-style leaves. If you plan to block, add picots after blocking so they lay naturally outward rather than turning under.
— Joining Plan & Layout :
Info :
Plan your runner layout on a large flat surface: place large and medium leaves alternately, sprinkle small leaves as filler, and align narrow leaves to create flow. Measure your table and arrange rows—this runner in the photo uses roughly 7 columns of leaves across and a length of 24–28 leaves, but adjust for your table size.
Round 1 :
To join a leaf: rejoin stem yarn at base of leaf with a sl st, then sl st across 3-5 sts at the base to anchor. Use a short twisted stem (ch 12 cord) to connect to the next leaf; join the next leaf at a point approx 8–12 stitches from its base depending on desired overlap.
Info :
Work join-as-you-go for neat connections: while crocheting the final round of a leaf, leave a 6–8 st gap where you want the stem to emerge, then ch the stem length and sl st into the partner leaf's chosen insertion stitch. This eliminates extra sewing and gives cleaner joins.
— Joining Example Sequence (One Pair) :
Round 1 :
Work final round of Leaf A until the base insertion point; ch 12 (or desired stem length), sl st into insertion st on Leaf B, ch 12 back, sl st into Leaf A base to secure. Continue finalizing Leaf A round and fasten off (this forms a double-side stem).
Round 2 :
Repeat joining sequence for each connection point across the runner; alternately attach leaves to form overlapping network with 2–3 stems emerging from some leaf bases for natural variety.
Info :
If you plan a symmetrical runner, measure and mark positions along a central guideline (use pins) and attach leaves to the guideline cords. For a looser, natural scatter, attach leaves more randomly but keep balance of colors on both sides.
— Blocking & Final Shaping :
Info :
Pin each leaf to a blocking board or towel, shaping lobes and flattening midrib to your liking. Lightly mist with water and steam from a small distance or use a gentle spray and allow to dry overnight. Do not over-press; natural drape is desirable. For slightly stiffer leaves, use a diluted starch spray, pinning edges flat until dry.
Round 1 :
After blocking, check all joins and tighten any loose stems with a few hand stitches. Weave in all ends and trim close to the fabric, taking care to avoid cutting the runner's live joins.
— Finishing Touches & Variations :
Info :
Variations: add tiny bead 'dew drops' with clear seed beads sewn into center of some leaves, or embroider small veins with contrasting color. For a denser runner, add more small leaves clustered between large leaves. For a lighter, airy runner use longer stem connectors and fewer leaves per column.
Round 1 :
Optional fringe at ends: attach yarn to outermost stem and ch 8–12, sl st at base to create a tassel loop; repeat every 4–6 stems for a gentle fringe. Trim loops to even length and shape.
Info :
Store runner flat or rolled to maintain shape; avoid folding across leaves which may create creases. Re-block lightly each season if needed.
This autumn leaves table runner gathers the warmth of season into a beautiful, handmade centerpiece. Each leaf brings a tactile richness — the raised midribs, serrated edges, and twisted stems form a charming, organic spread across your table. Making it is meditative and customizable: swap colors, adjust spacing, or shorten for a placemat set. 🧶🍂 I hope this pattern brings cozy, handcrafted cheer to your home — happy stitching and may your table be full of warmth! 🍁