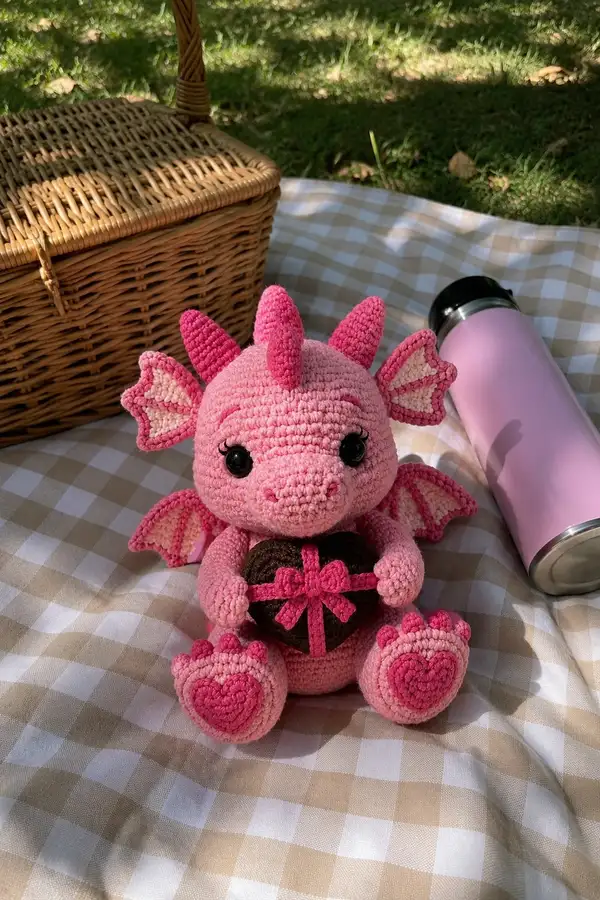
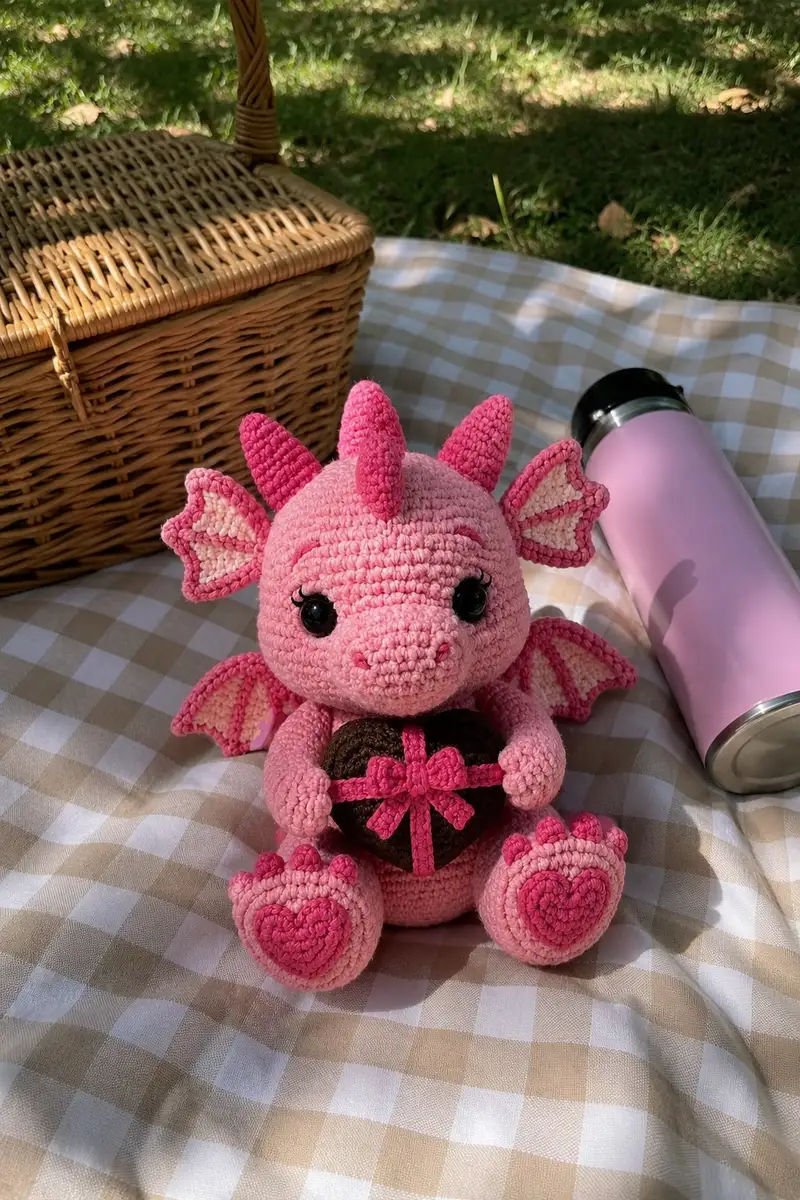
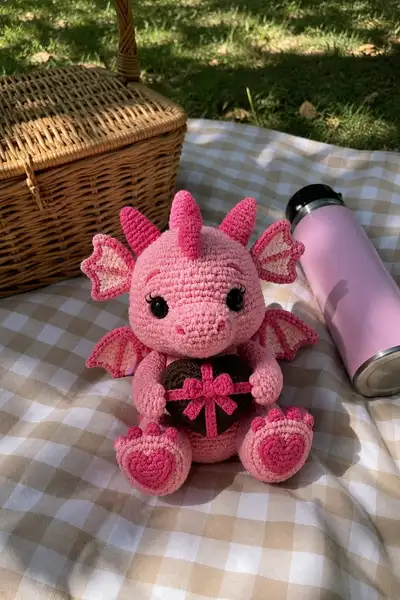
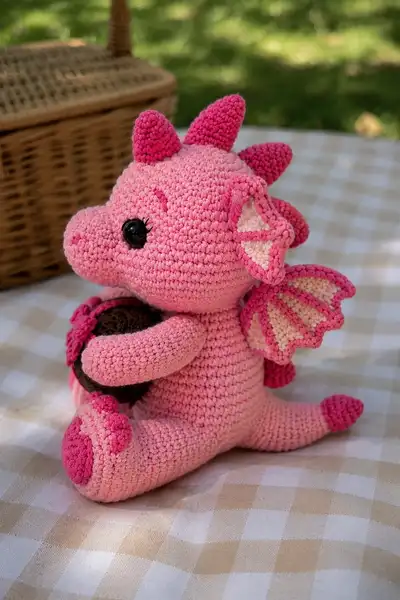
Make an irresistibly cute pink dragon that hugs a chocolate heart box — perfect as a handmade gift or decor. This pattern includes detailed rounds for the head, snout, body, arms, legs, wings, ears, spikes, tail, paw-heart appliques and the chocolate heart with ribbon. Worked in soft light pink with hot pink accents and cream inner wing detailing, the finished dragon has expressive safety eyes, sculpted snout, and a sweet heart accessory for extra charm.
Progress Tracker
0% Complete
— Head :
Round 1 :
6 sc in magic ring (6)
Round 3 :
(1 sc, inc) x 6 (18)
Round 4 :
(2 sc, inc) x 6 (24)
Round 5 :
(3 sc, inc) x 6 (30)
Round 6 :
(4 sc, inc) x 6 (36)
Round 7 :
(5 sc, inc) x 6 (42)
Round 8 :
(6 sc, inc) x 6 (48)
Round 9-18 :
1 sc in each st (48)
Info :
Place safety eyes between rounds 12 and 13 about 10-12 stitches apart for a wide, cute expression. Measure on the live rounds before securing. If embroidering eyelids or lashes, note placement now and mark with removable pins.
Round 19 :
(6 sc, dec) x 6 (42)
Round 20 :
(5 sc, dec) x 6 (36)
Info :
Begin light stuffing now. Use small amounts of fiberfill and push material evenly toward the top of the head to maintain roundness. Keep stitches tight so stuffing does not show.
Round 21 :
(4 sc, dec) x 6 (30)
Round 22 :
(3 sc, dec) x 6 (24)
Round 23-26 :
1 sc in each st (24)
Info :
Mark the front center stitch where the snout will be attached (approximately between rounds 10-12). If adding eyelash embroidery, embroider now before head closes too much — use black yarn and small, neat stitches.
Round 27 :
(1 sc, dec) x 6 (18)
Round 28-30 :
1 sc in each st (18)
Info :
Stuff head firmly to this point and leave opening for sewing to body. Fasten off leaving a 30-40cm tail for sewing. Stuff slightly firmer at cheeks to create chubby face effect.
— Snout :
Round 1 :
6 sc in magic ring (6)
Round 3 :
(1 sc, inc) x 6 (18)
Round 4 :
(2 sc, inc) x 6 (24)
Round 5-7 :
1 sc in each st (24)
Round 8 :
(2 sc, dec) x 6 (18)
Round 9 :
1 sc in each st (18)
Round 10 :
(1 sc, dec) x 6 (12)
Round 11 :
1 sc in each st (12)
Info :
Before closing completely, stuff the snout firmly and use the tail to sew the snout to the head at the marked front center. Position snout so the top aligns with the center of the eyes and the lower edge rests around round 16 of the head for natural placement.
Round 12 :
6 dec (6) - Fasten off leaving long tail for sewing
— Body :
Round 1 :
6 sc in magic ring (6)
Round 3 :
(1 sc, inc) x 6 (18)
Round 4 :
(2 sc, inc) x 6 (24)
Round 5 :
(3 sc, inc) x 6 (30)
Round 6 :
(4 sc, inc) x 6 (36)
Round 7-12 :
1 sc in each st (36)
Info :
If you want a belly panel in a slightly lighter pink or cream, change color in the last stitch of round 12. Carry the unused yarn inside or fasten off and rejoin when ready. Working the belly in BLO will create a subtle ridge at the color change.
Round 13 :
1 sc in each st BLO (36)
Round 14-18 :
1 sc in each st (36)
Info :
Begin stuffing body gradually from round 15 onwards. Stuff lightly until you reach round 20, then add more pressure to create a stable base for sitting. Keep stuffing firm but not rock-hard to preserve softness.
Round 19 :
(4 sc, dec) x 6 (30)
Round 20 :
(3 sc, dec) x 6 (24)
Round 21 :
(2 sc, dec) x 6 (18)
Round 22-26 :
1 sc in each st (18)
Info :
Leave the top opening large enough to insert the head. Finish stuffing the body so it forms a firm base; when head is attached the combined weight will help the dragon sit upright without tipping forward.
Round 27 :
(1 sc, dec) x 6 (12)
Round 28 :
6 dec (6) - Fasten off leaving a long tail for joining to head
— Arm (Make 2) :
Round 1 :
6 sc in magic ring (6)
Round 3 :
(1 sc, inc) x 6 (18)
Round 4-6 :
1 sc in each st (18)
Info :
Stuff hand portion firmly to create a rounded paw that can cup the chocolate heart. If you plan to add wire for poseability, insert a thin piece of floral wire now, leaving ends folded and covered by stuffing.
Round 7 :
(3 sc, dec) x 4 (14)
Round 8-11 :
1 sc in each st (14)
Round 12 :
(2 sc, dec) x 3, 1 sc (11)
Round 13-15 :
1 sc in each st (11)
Round 16 :
(1 sc, dec) x 3, 2 sc (8)
Round 17-18 :
1 sc in each st (8) - Fasten off leaving long tail for sewing
Info :
Sew arms to body at sides around rounds 14-16 of the body for a natural hugging position. Slightly curve arms inward when positioning so hands meet at center front.
— Leg (Make 2) :
Round 1 :
6 sc in magic ring (6)
Round 3 :
(1 sc, inc) x 6 (18)
Round 4 :
(2 sc, inc) x 6 (24)
Round 5-9 :
1 sc in each st (24)
Info :
Work toes and paw heart appliques separately (see Paw Heart Applique section). Stuff feet firmly to create a stable sitting posture and add extra stuffing at the heel for base support.
Round 10 :
(4 sc, dec) x 4 (20)
Round 11-18 :
1 sc in each st (20)
Round 19 :
(3 sc, dec) x 4 (16)
Round 20-22 :
1 sc in each st (16) - Fasten off leaving long tail for sewing
Info :
Sew legs to bottom of body at the base rounds 4-6 so the dragon sits with knees slightly bent. Position paw hearts centered on the foot tops with toes toward the front.
— Ear (Make 2) :
Round 1 :
6 sc in magic ring (6)
Round 3 :
(1 sc, inc) x 6 (18)
Round 4 :
(2 sc, inc) x 6 (24)
Round 5 :
Change to cream/light pink yarn. 1 sc in each st (24)
Round 6 :
1 sc in each st (24)
Round 7 :
Join hot pink and sc around edge in FLO to create ridge (24) - Fasten off leaving tail for edging
Info :
Pin ears to the head top around rounds 6-8 on either side, angling slightly forward. Use the hot-pink edge to add definition and stitch the ear base into the head with yarn needle for a secure attachment.
— Wing (Make 2) :
Round 1 :
6 sc in magic ring (6)
Round 3 :
(1 sc, inc) x 6 (18)
Round 4 :
(2 sc, inc) x 6 (24)
Round 5 :
Change to cream/light pink for inner wing panel. 1 sc in each st (24)
Round 6 :
1 sc in each st (24)
Round 7 :
Change to hot pink. Work 1 sc in BLO around to create ridge along outer edge (24)
Round 8 :
Using hot pink, stitch 4 evenly spaced 'ribs' across cream interior by working foundation sc rows (create 4 small chain ribs anchored to edge). See Info for rib technique
Info :
Wing ribs: Start at the seam between hot-pink edge and cream panel. Chain 6, slip-stitch down next stitch toward wing tip, repeat to create faint raised ribs. Secure ends and hide tails inside wing. Pin wings with slight curve for natural look before sewing to back at body rounds 8-10.
Round 9-12 :
Refine edge with 1 sc around (24) - Fasten off leaving tail for sewing
— Head Spikes (Make 5) :
Spike 1 - Round 1 :
4 sc in magic ring (4)
Spike 1 - Round 2 :
(1 sc, inc) x 2 (6)
Spike 1 - Round 3-6 :
1 sc in each st (6) - Fasten off leaving tail for sewing
Info :
Make 5 spikes total. Place one central and two each side evenly along head top between rounds 8-14. Sew spikes firmly into the head, slanting slightly backward for a playful look.
— Tail :
Round 1 :
6 sc in magic ring (6)
Round 3-14 :
1 sc in each st (12)
Round 15 :
Change to hot pink for tail tip. (2 sc, dec) x 3 (9)
Round 16-18 :
1 sc in each st (9) - Stuff tail evenly
Round 19 :
3 dec (3) - Fasten off leaving a long tail for sewing
Info :
Sew tail to back lower body centered between leg placement. Add 2-3 small hot-pink spikes along tail base for matching detail; stitch them on after tail is attached.
— Paw Heart Applique (Make 2 for feet + 2 small for hands) :
Round 1 :
Magic ring: ch 2, 3 sc in ring, ch 2, sl st to form top lobe (3 small sc lobe)
Round 2 :
Attach hot pink and sc around shaping a heart: 6 sc around each lobe and 6 sc for the lower almond forming point until approx 24 sts total (24)
Round 3 :
Work 1 sc around to smooth edge (24) - Fasten off leaving tail for sewing
Info :
Sew paw hearts to the top front of each foot centered on toe area. For hand-sized small hearts, reduce to 12-14 sts by omitting a round and adjusting shape accordingly.
— Chocolate Heart Box - Base :
Round 1 :
6 sc in magic ring with brown yarn (6)
Round 3 :
(1 sc, inc) x 6 (18)
Round 4 :
(2 sc, inc) x 6 (24)
Round 5-8 :
1 sc in each st (24)
Round 9 :
(3 sc, dec) x 6 (18)
Round 10-12 :
1 sc in each st (18) - Stuff firmly
Round 13 :
(2 sc, dec) x 6 (12)
Round 14 :
6 dec (6) - Fasten off leaving long tail for closing and sewing
Info :
Poke stuffing down inside to create a domed chocolate look. You can lightly sculpt the top by adding more stuffing to center. The finished base should be squat and able to be cupped by the hands.
— Chocolate Heart Box - Ribbon & Bow :
Ribbon Strip :
With hot pink, ch 40 (or long enough to wrap around base). Sl st back along chain to make a flat strap. Fasten off and weave ends to hide.
Bow :
Ch 10, sc back along chain 9 (9), fasten off leaving long tail. Wrap yarn tightly around center 4-5 times, tie off and sew bow onto ribbon. Make two small loops and stitch bow center to heart box top.
Info :
Sew ribbon snugly around chocolate heart base and secure with a small stitch under the bow. Position the bow near the top center so the dragon appears to be holding the gift with both hands around it.
— Finishing Touches & Embroidery :
Info :
Use black yarn to add a small nose stitch centered on the snout tip. Add tiny embroidered eyelash accents above the safety eyes using 3-4 short straight stitches. Use hot pink to add stitch lines on the wings and small claws on toes by couching short vertical stitches.
Info :
Weave all tails inside pieces and hide ends. For extra stability on sitting pieces, add a small disk of felt inside the base before final stuffing or add a minimal amount of craft glue where legs join to maintain position.
— Extra Decorative Spikes (Optional, Make 3 for Tail & Additional Accents) :
Round 1 :
4 sc in magic ring (4)
Round 2 :
(1 sc, inc) x 2 (6)
Round 3-5 :
1 sc in each st (6) - Fasten off and sew where desired
Info :
Mix spike sizes and placement for a playful silhouette. Sew small spikes on tail and a couple along the back if desired for extra texture.
— Additional Small Details :
Info :
Create little toe pads using small rounds of hot pink or embroider three small dots near the front of each foot to simulate toes. Add a faint blush using textile-safe pastel chalk brushed on gently if desired.
Info :
Final assembly tips: pin everything and photograph your pinned placement to check symmetry before sewing. Use sturdy, even stitches and reinforce high-stress areas such as arm joins to body and ribbon attachment points.
This candy-pink dragon is pure joy to finish — every stitch brings out its charm and personality. The chocolate heart box adds a playful story element and makes this amigurumi a lovely gift or keepsake. Enjoy the process of sculpting the face, shaping the wings, and adding tiny details like paw hearts and ribbon. 🧶💕 Share your creation and celebrate the little handmade moments that make crochet so special. Happy stitching! 🎁