🧢 Beautiful ✨ Detailed πŸ’ Adorable

Big Emerald Dragon Amigurumi Pattern

Big Emerald Dragon Amigurumi Pattern
4.7β˜… Rating
10-12 Hours Time Needed
3.0K Made This
βœ‚οΈ

Advanced Level

Designed for experienced crocheters, these patterns involve intricate designs and complex techniques to challenge and inspire.

⏱️

Slow & Steady

A 10+ hour projectβ€”great for savoring the process over several sessions.

🐰

Whimsical Buddy

Playful characters full of personality, designed to spark imagination and become cherished playtime favorites.

🧢 Jump to Pattern ↓

About This Big Emerald Dragon Amigurumi Pattern

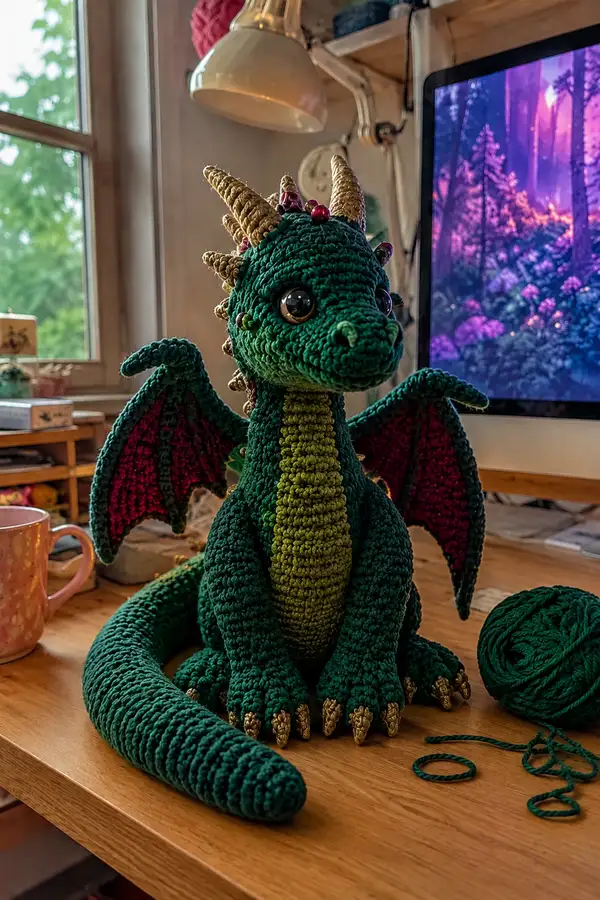
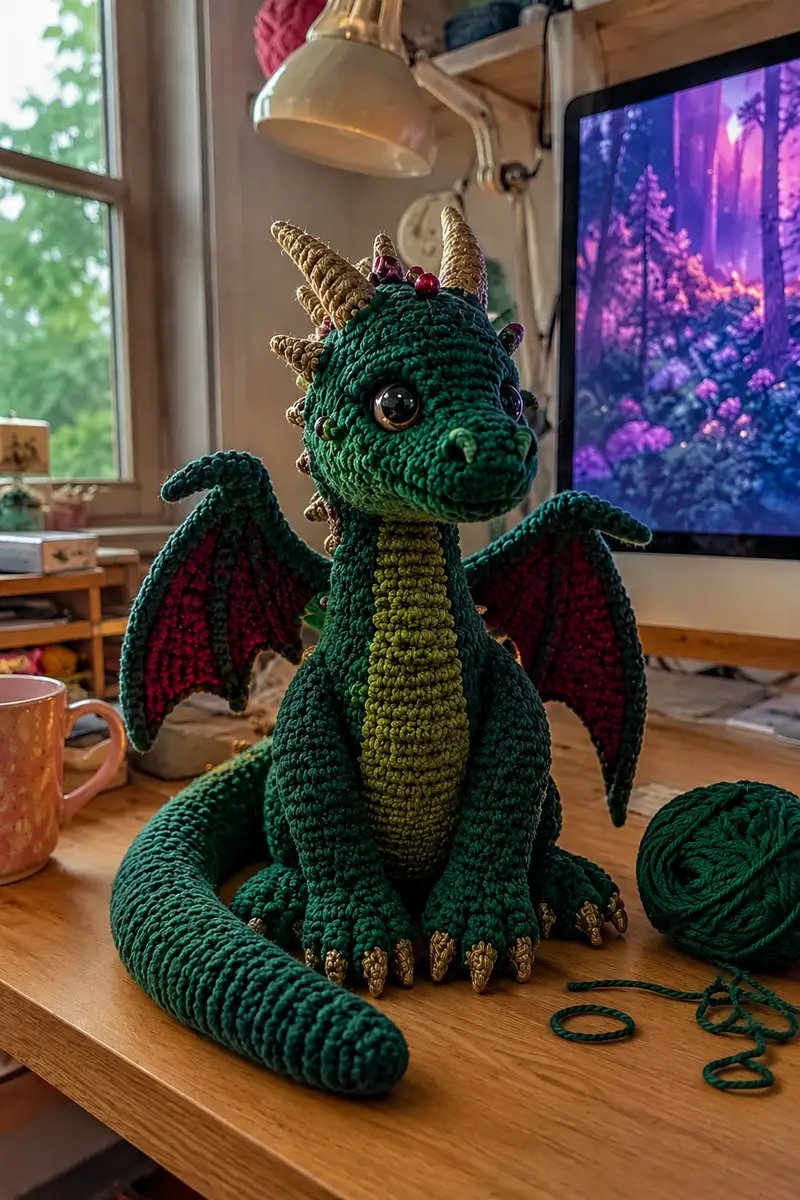
This pattern guides you through making a large emerald-green dragon amigurumi with a textured, ribbed belly, magenta inner wings, metallic gold horns, spikes and claws, and large shiny eyes. The construction uses tight single crochet in the round, layered spike pieces, and a separate wing membrane for crisp edges. The finished dragon sits upright with a long, curving tail and has bead and light embellishments optional.

Big Emerald Dragon Amigurumi Pattern crochet pattern - detailed view of completed project

Built for structure and charm, this design balances dense stuffing with flexible limbs so the dragon holds a seated pose. The gold metallic yarn details and contrasting wing membrane add a festive, eye-catching finish.

Why You'll Love This Big Emerald Dragon Amigurumi Pattern

I love this pattern because it combines bold color contrast with sculptural shaping β€” the ribbed belly and layered horns give the dragon real character. It’s satisfying to see each small piece (spikes, claws, wing ribs) come together into a large, huggable figure. The pattern leaves space for personalization like bead lights or embroidered markings so every dragon can be unique.

Big Emerald Dragon Amigurumi Pattern step 1 - construction progress Big Emerald Dragon Amigurumi Pattern step 2 - assembly progress Big Emerald Dragon Amigurumi Pattern step 3 - details and accessories Big Emerald Dragon Amigurumi Pattern step 4 - final assembly and finishing

Switch Things Up

I absolutely loved designing this pattern because it offers so many ways to personalize while keeping a clear structure that’s satisfying to follow. Swap colorways to make seasonal versions β€” try icy blue and silver for a winter dragon or warm amber and bronze for an autumn companion.

Try changing the scale by using a thicker yarn and larger hook for an oversized cuddly dragon, or fine cotton for a more detailed, smaller figure. You can also make wings fully poseable by inserting thin wire into the wing leading edge or add battery fairy lights for a magical glow. I encourage you to experiment with embroidered markings, bead trims, or different horn shapes to make each dragon unique.

When I make these as gifts, I often adjust the facial expression by moving the eyes a stitch or two or adding a tiny embroidered smile β€” small changes make a big difference in personality. Don’t be afraid to adapt the pattern to your style and have fun with it!

Common Mistakes & How to Fix Them

βœ— Skipping stitch markers at round starts can cause misaligned features and uneven shaping; always mark your first stitch of each round. βœ— Inconsistent tension between rounds creates lumpy or uneven surfaces; practice maintaining steady, even tension throughout the entire project. βœ— Not stuffing gradually as you work causes difficulty reaching inside later; stuff sections as you complete them for best results. βœ— Changing hook sizes mid-project will alter gauge; keep the same hook unless intentionally resizing pieces. βœ— Attaching limbs without pinning first leads to crooked placement; pin and check symmetry before sewing permanently. βœ— Using bulky stuffing in small sections (horns, spikes) makes sewing and shaping difficult; stuff those parts lightly and carefully. βœ— Not securing metallic yarn ends well can cause unraveling; weave ends through multiple stitches and use a tiny dab of fabric glue if necessary.

Big Emerald Dragon Amigurumi Pattern

Create a charming, seated emerald dragon with a ribbed lighter-green belly, magenta wing membranes, and metallic gold horns and claws. This pattern recreates the plush, textured look with large safety eyes, layered spikes, and a long poseable tail. Perfect as a festive decorative friend or a heartfelt handmade gift.

Advanced 10-12 Hours

Materials Needed for Big Emerald Dragon Amigurumi Pattern

β€” Main Fabric

  • 01
    Worsted weight yarn (#4) approximately 220-260g in main emerald green (deep forest / emerald shade)
  • 02
    Worsted weight yarn (#4) approximately 80-110g in lighter grassy green for belly and inner neck
  • 03
    Worsted weight yarn (#4) approximately 60-90g in magenta / deep raspberry for wing membranes
  • 04
    Metallic gold DK or similar weight yarn approximately 30-40g for horns, claws and spike tips
  • 05
    Small amounts (10-20g each) of contrast yarns or bead-trim yarns for fairy light accents (red, purple, gold beads)

β€” Tools Required

  • 01
    3.5mm (E) crochet hook for main work (use smaller if you prefer denser fabric)
  • 02
    3.25mm (D) crochet hook for smaller details and tails of limbs (optional)
  • 03
    Large tapestry/yarn needle for sewing pieces together and weaving ends
  • 04
    Safety eyes 18-22mm (choose 20mm for proportions shown)
  • 05
    Polyester fiberfill stuffing (approx 150-250g total depending on tightness)
  • 06
    Stitch markers (at least 4-6) to mark round starts and placement points
  • 07
    Small sharp scissors
  • 08
    Pins for temporarily positioning limbs and wings
  • 09
    Optional: thin floral wire or craft wire for a poseable tail and wing edges
  • 10
    Optional: needle-nose pliers for manipulating wire and attaching small beads
  • 11
    Optional: fabric glue or clear glue drop to secure metallic yarn ends if needed
  • 12
    Optional: stuffing tool or blunt knitting needle to push stuffing into small corners

Progress Tracker

0% Complete

β€” Head :

Round 1 :

6 sc in magic ring (6)

Round 2 :

6 inc (12)

Round 3 :

(1 sc, 1 inc) x 6 (18)

Round 4 :

(2 sc, 1 inc) x 6 (24)

Round 5 :

(3 sc, 1 inc) x 6 (30)

Round 6 :

(4 sc, 1 inc) x 6 (36)

Round 7 :

(5 sc, 1 inc) x 6 (42)

Round 8 :

(6 sc, 1 inc) x 6 (48)

Round 9 :

(7 sc, 1 inc) x 6 (54)

Round 10 :

(8 sc, 1 inc) x 6 (60)

Round 11-16 :

1 sc in each st (60)

Info :

Place safety eyes between rounds 13-14. For the look shown, place the centers of eyes about 11-12 stitches apart (measure across the round) and approximately 9-10 rounds down from the crown. Mark placement with stitch markers before inserting eyes.

Round 17 :

(8 sc, 1 dec) x 6 (54)

Round 18 :

(7 sc, 1 dec) x 6 (48)

Info :

Begin slightly stuffing the head now to shape cheeks and muzzle. Use small amounts of fiberfill and a stuffing tool to push into tight areas around the eyes. Keep stuffing medium-firm so eyes sit proud but not bulging.

Round 19 :

(6 sc, 1 dec) x 6 (42)

Round 20 :

(5 sc, 1 dec) x 6 (36)

Round 21 :

(4 sc, 1 dec) x 6 (30)

Round 22 :

(3 sc, 1 dec) x 6 (24)

Info :

Add more stuffing at the forehead and upper head to keep a rounded silhouette. For a dragon snout, leave the lower part slightly less stuffed so the snout can be added smoothly.

Round 23 :

(2 sc, 1 dec) x 6 (18)

Round 24 :

(1 sc, 1 dec) x 6 (12)

Round 25 :

6 dec (6)

Info :

Fasten off leaving a long tail for sewing the head to the neck/bodice or use this as the crown if attaching a separate neck tube. If you prefer a more elongated snout, see the separate Snout section below and do not fully close this opening.

β€” Snout (Make 1) :

Round 1 :

6 sc in magic ring (6)

Round 2 :

6 inc (12)

Round 3 :

(1 sc, 1 inc) x 6 (18)

Round 4-6 :

1 sc in each st (18)

Info :

To create the slightly upturned dragon nose from the photo, work three even rounds then shape the tip with two gradual decreases and a little firm stuffing. Sew the snout onto the head opening between rounds 20-22, centering it below the eyes.

Round 7 :

(1 sc, 1 dec) x 6 (12)

Round 8 :

6 dec (6)

Info :

Fasten off leaving long tail for sewing. Stuff lightly. Pin snout into place on head and make small adjustments so it sits flush with lower face.

β€” Neck Tube (Join head to body) :

Round 1 :

6 sc in magic ring (6)

Round 2 :

6 inc (12)

Round 3 :

(1 sc, 1 inc) x 6 (18)

Round 4-8 :

1 sc in each st (18)

Info :

Work neck tube long enough to insert into the body opening when assembling β€” about 6-8 rounds in our proportions. Leave a long tail for sewing. Stuff the tube moderately so it has structure but remains flexible for head movement.

β€” Body :

Round 1 :

6 sc in magic ring (6)

Round 2 :

6 inc (12)

Round 3 :

(1 sc, 1 inc) x 6 (18)

Round 4 :

(2 sc, 1 inc) x 6 (24)

Round 5 :

(3 sc, 1 inc) x 6 (30)

Round 6 :

(4 sc, 1 inc) x 6 (36)

Round 7 :

(5 sc, 1 inc) x 6 (42)

Round 8 :

(6 sc, 1 inc) x 6 (48)

Round 9-14 :

1 sc in each st (48)

Info :

If you wish to add the lighter-green belly as a separate sewn panel, make that now (see Belly Panel section) and continue body rounds above the point where you plan to attach. If attached later, keep the body rounds even and a little larger to accept a sewn-in belly panel.

Round 15 :

(6 sc, 1 dec) x 6 (42)

Round 16 :

(5 sc, 1 dec) x 6 (36)

Round 17 :

(4 sc, 1 dec) x 6 (30)

Round 18-22 :

1 sc in each st (30)

Info :

Begin stuffing the body firmly from the bottom up β€” the seated dragon needs weight in the rear and base to sit properly. Stuff in small amounts and shape outward to form rounded hips and chest before decreasing for the waist.

Round 23 :

(2 sc, 1 dec) x 6 (24)

Round 24 :

(1 sc, 1 dec) x 6 (18)

Round 25 :

6 dec (6)

Info :

Do not fasten off; leave opening large enough to insert the neck tube from the head. Insert neck tube and sew around opening with mattress or ladder stitch until secure. Make sure head sits straight and centered.

β€” Belly Panel (Make 1, ribbed) :

Info :

Work a long flat oval in lighter green to create the ribbed belly strip that runs from chin down to base. This will be sewn to the front of the body.

Row 1 :

Ch 16. 2 sc in 2nd ch from hook, sc across 12, 3 sc in last ch. Rotate and work on opposite side of chain: sc across 12, 2 sc in last ch (32)

Row 2-26 :

Turn in continuous rows (or join and work in rounds) to make a long strip approx. 24-28 rows depending on your tension. Work 1 sc in each st. To make ribs, every other row work in BLO to create slight ridges.

Info :

Block or shape the belly panel flat, then pin it centered on the body before sewing. For the look shown, the belly is slightly narrower at the top and wider at the base β€” trim length or shape by decreasing the width with short rows near the top if needed.

β€” Front Legs / Arms (Make 2) :

Round 1 :

6 sc in magic ring (6)

Round 2 :

6 inc (12)

Round 3 :

(1 sc, 1 inc) x 6 (18)

Round 4-8 :

1 sc in each st (18)

Info :

These rounds form the paw/hand. For the wide, rounded paw in the photos, keep these rounds unshaped and stuff firmly so paw pads look plump. Place claws later as small cone pieces sewn into the paw edge.

Round 9 :

(2 sc, 1 inc) x 6 (24)

Round 10-14 :

1 sc in each st (24)

Round 15 :

(3 sc, 1 dec) x 6 (18)

Round 16 :

1 sc in each st (18)

Round 17-18 :

(1 sc, 1 dec) x 6 (12) then 1 sc in each st (12)

Info :

Stuff the paw firmly and then continue stuffing the lower arm lightly so the arm can fold against the body. Leave long tail for sewing. Attach arms at body rounds 14-18 about 8-10 stitches from center front on either side for the seated look.

β€” Hind Legs / Feet (Make 2) :

Round 1 :

6 sc in magic ring (6)

Round 2 :

6 inc (12)

Round 3 :

(1 sc, 1 inc) x 6 (18)

Round 4 :

(2 sc, 1 inc) x 6 (24)

Round 5-8 :

1 sc in each st (24)

Info :

These rounds form the broad foot base visible in the photo. Keep the bottom rounded and stuffed firmly to create a stable seated base. Consider flattening last round slightly with a few extra sl st to make a flattened sole if you wish the dragon to sit more securely.

Round 9 :

(1 sc, 1 inc) x 12 (36)

Round 10-14 :

1 sc in each st (36)

Round 15 :

(4 sc, 1 dec) x 6 (30)

Round 16 :

(3 sc, 1 dec) x 6 (24)

Round 17-20 :

1 sc in each st (24) Stuff foot firmly, shaping toes by sewing claw pieces in place afterwards.

Round 21 :

(1 sc, 1 dec) x 6 (12)

Round 22 :

6 dec (6). Fasten off leaving long tail for sewing.

Info :

Sew feet to body base at the positions indicated by pins in the photo: two larger feet slightly angled and two inner feet tucked near the body center. Reinforce stitches for stable sit.

β€” Claws (Make 15-18) :

Round 1 :

5 sc in magic ring (5)

Round 2 :

5 inc (10)

Round 3 :

1 sc in each st (10)

Round 4 :

(1 sc, 1 dec) x 3, 1 sc (7)

Round 5 :

1 sc in each st (7)

Info :

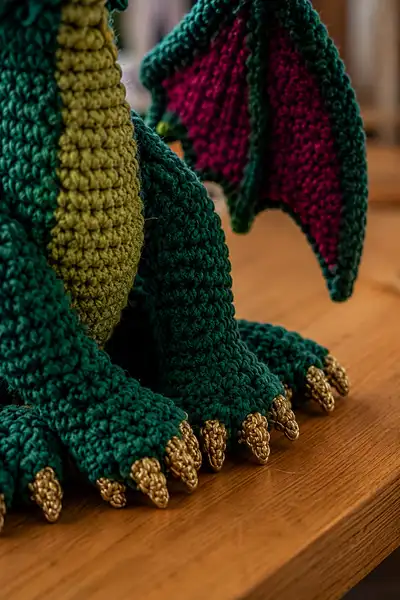
Make claws using metallic gold yarn for the look in photos. Stuff lightly and sew the base of each claw into the toes and paw edges, clustering 3-4 claws per foot depending on width. For a sharper claw, reduce rounds and taper more with decreases.

β€” Tail :

Round 1 :

6 sc in magic ring (6)

Round 2 :

6 inc (12)

Round 3 :

(1 sc, 1 inc) x 6 (18)

Round 4 :

(2 sc, 1 inc) x 6 (24)

Round 5-12 :

1 sc in each st (24)

Info :

For the long, flexible tail in the photo, consider inserting a length of thin floral wire centered inside the tail before stuffing. Leave a few extra rounds at the end unstuffed so you can bend the tip to a natural curve.

Round 13 :

(2 sc, 1 dec) x 6 (18)

Round 14 :

(1 sc, 1 dec) x 6 (12)

Round 15-20 :

1 sc in each st (12) Add more stuffing so tail is firm but bendable.

Round 21 :

(1 sc, 1 dec) x 4 (8)

Round 22 :

4 dec (4)

Round 23 :

Fasten off leaving long tail for sewing. Slip the end into the base and close or sew into the body base depending on desired curve length.

β€” Wing Structure (Outer Wing - Make 2) :

Round 1 :

Ch 6, join into ring with sl st, or 6 sc in mr to make a small base (6)

Round 2 :

6 inc (12)

Round 3 :

(1 sc, 1 inc) x 6 (18)

Round 4 :

(2 sc, 1 inc) x 6 (24)

Round 5-8 :

1 sc in each st (24)

Round 9 :

(3 sc, 1 inc) x 6 (30)

Round 10-14 :

1 sc in each st (30)

Info :

The outer wing will form the scalloped edge you see in the photo. Work in rounds and shape by increasing on the outer edge and decreasing the inner edge where it will attach to the body. Keep one or two rounds in BLO near the attachment edge to get a neat ridge for sewing.

Round 15 :

(3 sc, 1 dec) x 6 (24)

Round 16 :

(2 sc, 1 dec) x 6 (18)

Round 17 :

(1 sc, 1 dec) x 6 (12)

Round 18 :

6 dec (6) Fasten off leaving long tail for joining to wing membrane and body.

β€” Wing Membrane (Inner Wing - Make 2) :

Info :

Use magenta (raspberry) yarn to make a flat triangular membrane. Work in rows for a pointed membrane that will be edged by the outer wing structure for a crisp two-color wing.

Row 1 :

Ch 12, sc in 2nd ch from hook and across (11)

Row 2 :

Ch 1, turn, sc across (11)

Row 3-10 :

Decrease 1 st at beginning and end of rows every other row to shape a triangle until piece measures desired height to match outer wing curve. Aim for approx 8-10 decreases to create a tall membrane.

Info :

Block membrane flat and pin to the outer wing rounding. Sew the membrane into the inside edge of the outer wing, using the outer wing’s inner ridge for neat attachment. Add a wire to the leading edge if you want poseable wings.

β€” Horns & Spikes (Make 8 small spikes and 4 larger horns) :

Small Spike Round 1 :

4 sc in magic ring (4)

Small Spike Round 2 :

4 inc (8)

Small Spike Round 3 :

1 sc in each st (8)

Small Spike Round 4 :

(1 sc, 1 dec) x 2 (6)

Small Spike Round 5 :

6 dec to close or 3 dec then fasten off leaving tail for sewing (optional: make slightly longer by adding two more rounds)

Info :

Use metallic gold yarn or a gold blend for spikes tips to mimic the photograph. Stuff extremely lightly or not at all for pointed spikes. Attach in a center ridge from crown down the neck and along the tail; pin spacing about 5-7 stitches between small spikes.

Large Horn Round 1 :

6 sc in magic ring (6)

Large Horn Round 2 :

6 inc (12)

Large Horn Round 3 :

(1 sc, 1 inc) x 6 (18)

Large Horn Round 4-7 :

1 sc in each st (18) tapering slightly near the tip by alternating dec rounds

Large Horn Round 8 :

(1 sc, 1 dec) x 6 (12)

Large Horn Round 9 :

6 dec (6) Fasten off leaving long tail. Stuff lightly and curve while sewing into place above and behind the eyes.

Info :

Make 4 larger horns for the crown and 6-8 small spikes for neck and tail. When sewing, angle the horns outward and upward as pictured. Reinforce base stitches for stability if horns are heavy.

β€” Decorative Beads & Fairy Lights (Optional) :

Info :

For the beaded/light-wrapped appearance, thread small round beads onto a thin cord or metallic embroidery thread and wrap loosely around horns and neck, sewing at a few anchor points. Alternatively, string battery fairy lights and carefully route the wire under stitches or pin along the seam so the battery pack sits discreetly behind the base or under a wing.

β€” Assembly & Finishing Touches :

Info :

Weave in all ends, attach belly panel to the front using mattress stitch, sew arms to rounds 14-18 of the body so paws rest on the knees, and attach hind feet to the base so the dragon sits balanced. Add claws, horns and spikes, and sew wings symmetrically to the upper back between rounds 8-12. Add embroidered nostrils and mouth with a few stitches of darker green or brown for subtle detail. Securely fasten and weave tails into the inner structure for longevity.

Info :

Block the wings and shape the ribs using steam or a damp cloth over the fabric for a sharper look. Use optional wire inside wing leading edges to create poseable wings or to hold the wing upright as in the photograph.

Info :

For more realism, embroider small lines on the belly ribs and add tiny French knots in complementary colors to represent scales or light catches.

Assembly Instructions

  • Attach head to body by inserting the neck tube into the body opening. Pin in place first, then sew securely using whip stitch or ladder stitch all around, ensuring the head is centered and stable.
  • Position arms on sides of the body at rounds 14-18 for a natural look. Pin so paws rest slightly forward on the knees. Sew through both arm and body using ladder stitch for an invisible seam and reinforce with backstitches for strength.
  • Attach hind feet to the bottom of the body at the base rounds 1-4. Space them evenly to create a stable seat; sew firmly with multiple passes to hold weight.
  • Sew belly panel down the center front of the body from chin to base. Start under the snout and work downward so seams are hidden along the sides of the belly ribs.
  • Pin outer wings to the upper back at rounds 8-12, centering them symmetrically. Sew along the inner ridge; then pin and sew the inner magenta membrane to the inner edge of the outer wing so the two layers are secure.
  • Attach horns and spikes from crown to tail center. Use pins to position each spike the same distance apart (approx 5-7 stitches). Sew securely and weave ends through the base of each spike.
  • Sew claws into paw and toe edges, clustering 3-4 claws per foot. Use metallic yarn ends to make stitches less visible and reinforce attachment points.
  • Add decorative beads or fairy lights by threading onto thin wire or embroidery thread, then sewing anchor points. Hide battery pack behind a wing or under the body base for display.

Important Notes

  • πŸ’‘Use stitch markers consistently at the beginning of each round to avoid counting errors and maintain proper shaping.
  • πŸ’‘Stuff body parts gradually as you work rather than waiting until the end, especially for narrow openings like arms and neck tubes.
  • πŸ’‘For safety eyes, position and secure before stuffing head fully - they cannot be repositioned once locked in place.
  • πŸ’‘Maintain consistent tension throughout the project; too tight creates stiff, small pieces, too loose creates floppy, holey fabric.
  • πŸ’‘When sewing pieces together, use yarn slightly thinner than working yarn for neater, less visible seams.
  • πŸ’‘Pin all pieces in position before final sewing to ensure proper placement and symmetry.
  • πŸ’‘For amigurumi, work tightly enough that stuffing doesn't show through stitches; use a slightly smaller hook than yarn label if necessary.
  • πŸ’‘Reinforce heavy or protruding pieces (horns, large spikes) by sewing through the base multiple times and tucking tails back into the body.

This majestic emerald dragon makes a striking handmade companion with detailed horns, a ribbed belly and vibrant wing membranes. Each stitch builds texture and character, and the gold accents add a festive sparkle. Enjoy the mindful process of crocheting each piece and then seeing them all stitched together into a proud seated dragon. πŸ‰βœ¨ Share your creation and celebrate the finish with a warm cup and a little pride. 🧢

You ask,

we answer.

FAQs

What is the finished size of this amigurumi?

Based on the specified yarn and hooks, the finished dragon will measure approximately 14-16 inches tall when seated (35-40 cm) with the tail adding additional length. Using different yarn weights will proportionally change the final size.

Can I use different yarn weights for this pattern?

Yes! You can substitute different yarn weights, but adjust your hook size accordingly (generally 1-2 sizes smaller than the yarn recommendation for tight amigurumi fabric). Keep in mind different weights will change final size and stitch counts slightly.

Do I need to use safety eyes or can I embroider them?

Both options work beautifully. Safety eyes give a polished, glossy look and are secure for decorative items. Embroidered or felt eyes are safer for small children and allow more expression options.

How much stuffing will I need?

For this size project, approximately 150-250 grams of polyester fiberfill should be sufficient. Stuff firmly for structural parts (head, body base, feet) and more lightly for small spikes and horns.

Can I make the arms and legs poseable?

Absolutely. Insert pipe cleaners or floral wire into limbs before stuffing, or use thin armature wire for stronger poseability. Be careful to fold and secure any exposed wire ends so they don't poke through stitches.

What if my stitch count is off?

If you notice a counting error, unravel back to where the count was correct and correct it. Trying to compensate later often creates visible distortion. Using a stitch marker at the start of each round helps prevent errors.

How do I prevent holes when stuffing?

Work with tight, consistent tension and a slightly smaller hook than the yarn label suggests. Add stuffing in small increments and use a stuffing tool to push fiber into small corners.

Can I customize colors and details?

Definitely. You can change the main color, make multi-colored wings, or swap gold accents for silver. Personalize with embroidered markings, bead trims, or tiny crochet accessories to create a unique dragon.