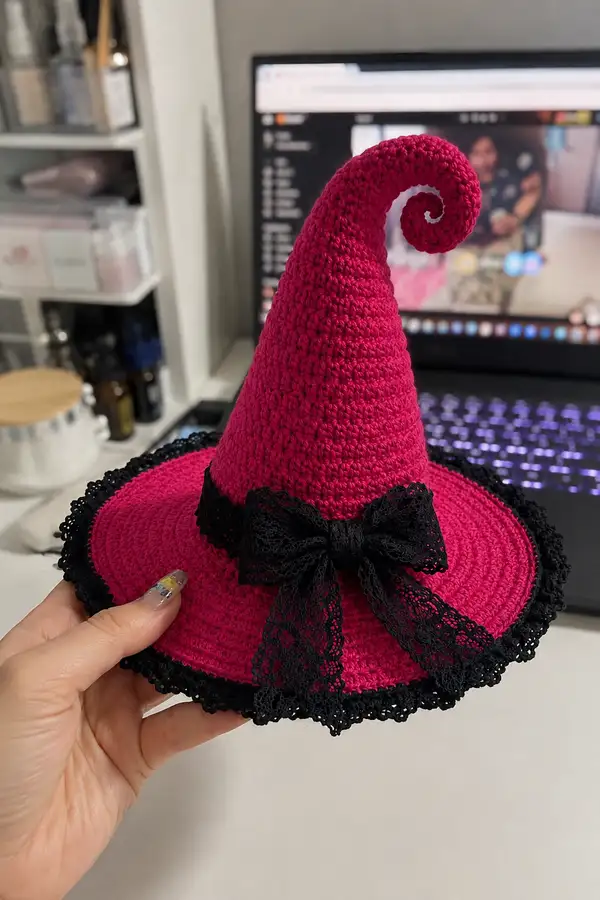
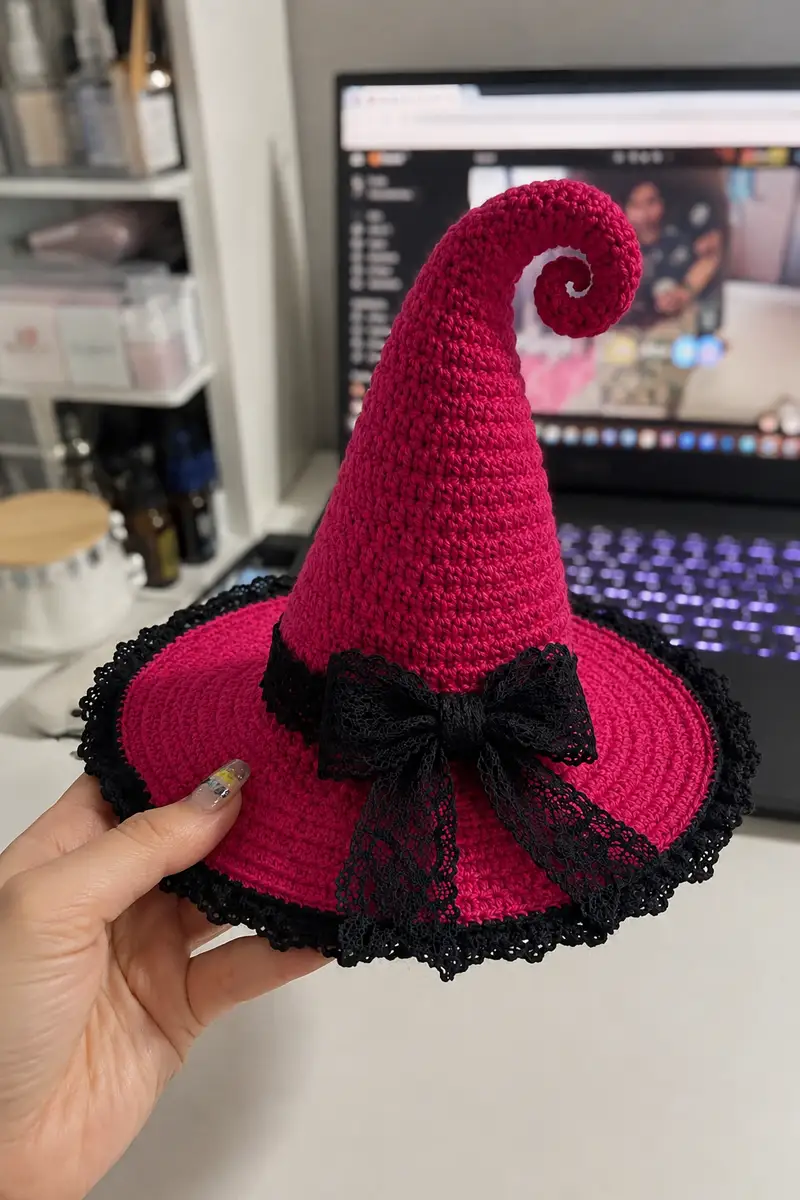
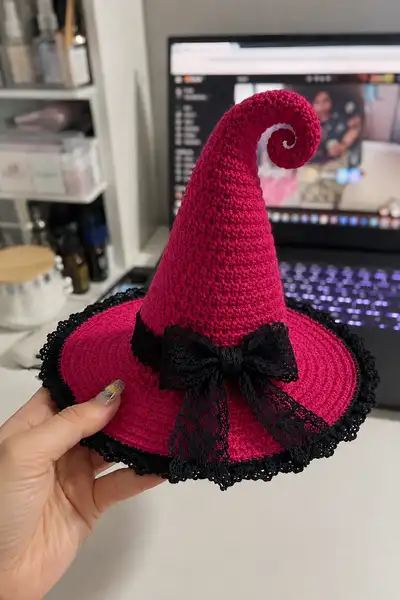
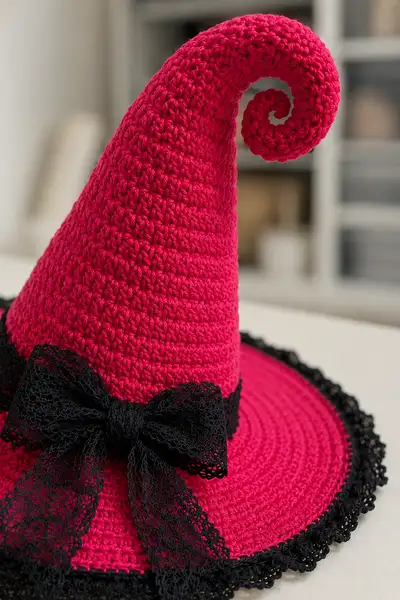
Make a dramatic hot-pink spiral witch hat with a curly tip, wide structured brim, and a decorative black lace band and bow. This is a structured accessory worked in rounds with a scalloped lace edge for a finished, polished look. The pattern includes step-by-step shaping for the cone, a coiled spiral tip, a flat reinforced brim, ruffled edge, and a removable lace bow.
Progress Tracker
0% Complete
— Cone (Main Tall Spiral Cone) :
Info :
We will crochet the cone starting from the base (the portion that will be sewn into the brim) and work upward, decreasing gradually to form a tall tapered cone. Working from the base inward lets us measure the base against the brim opening for a neat fit. Use tight tension for a firm fabric. Use hot-pink yarn throughout this section.
Round 1 :
6 sc in magic ring (6)
Round 3 :
(1 sc, inc) x 6 (18)
Round 4 :
(2 sc, inc) x 6 (24)
Round 5 :
(3 sc, inc) x 6 (30)
Round 6 :
(4 sc, inc) x 6 (36)
Round 7 :
(5 sc, inc) x 6 (42)
Round 8 :
(6 sc, inc) x 6 (48)
Round 9 :
(7 sc, inc) x 6 (54)
Round 10 :
(8 sc, inc) x 6 (60)
Info :
At the end of Round 10 you have created the full base circle that will be sewn to the brim. If you are matching the brim exactly, hold this base circle to the brim opening to verify fit; you may add or skip an extra increase round to match your brim circumference. If your brim is slightly larger, work one more increase round and adjust subsequent decreases to maintain shaping.
Round 11 :
1 sc in each st (60)
Round 12 :
1 sc in each st (60)
Info :
These even rounds create the bottom edge depth so the cone has a neat lip to attach to the brim. Work 2-4 of these rounds to build a sturdy base. Keep stitches tight.
Round 13 :
(8 sc, dec) x 6 (54)
Round 14 :
(7 sc, dec) x 6 (48)
Round 15 :
(6 sc, dec) x 6 (42)
Round 16 :
(5 sc, dec) x 6 (36)
Info :
Begin decreasing gradually to shape the cone; decreases should be evenly placed. Use invisible decrease (sc2tog) for smoother lines. Place a stitch marker at the start of each round to keep track.
Round 17 :
(4 sc, dec) x 6 (30)
Round 18 :
(3 sc, dec) x 6 (24)
Round 19 :
(2 sc, dec) x 6 (18)
Round 20 :
(1 sc, dec) x 6 (12)
Info :
As you decrease, the cone narrows. Check symmetry by holding it upright: even decreases produce a smooth taper. If you want a slightly pointier tip, continue decreasing one more round; for a blunter tip, stop and create the spiral tip separately.
Info :
Fasten off leaving a long tail (about 20-25 cm) for sewing. We will attach a spiral curl to this small tip. If you prefer a continuous cone with the spiral integrated, leave the tail and do not fasten off — instead work the spiral directly from the tip.
— Spiral Tip (Curl) :
Info :
The spiral curl can be worked as a narrow flat spiral strip then coiled and stitched onto the cone tip. This gives a defined curl that stays put. Optionally insert a thin floral wire into the spiral for shape stability. Use hot-pink yarn. If you left the cone tip open, you can join the spiral directly to Round 21 and work outward; these instructions show the spiral as a separate piece to attach later.
Round 1 :
6 sc in magic ring (6)
Round 3 :
(1 sc, inc) x 6 (18)
Round 4 :
(2 sc, inc) x 6 (24)
Round 5 :
(3 sc, inc) x 6 (30)
Round 6 :
1 sc in each st (30)
Info :
We will now convert this small disk into a long narrow spiral by working in a spiral strip. Do not join rounds; instead turn to work rows along the outer edge, or continue in rounds and use increases on every other stitch to elongate one side and cause curling. The method below adds incremental increases to one side to produce a curl-ready strip.
Round 7 :
(3 sc, inc, 6 sc) around - work a single increase every 8 stitches to begin biasing one side (33)
Round 8 :
1 sc in each st (33)
Round 9 :
(4 sc, inc) x 6 (39)
Round 10 :
1 sc in each st (39)
Round 11 :
(5 sc, inc) x 6 (45)
Round 12 :
1 sc in each st (45)
Round 13 :
(6 sc, inc) x 6 (51)
Round 14 :
1 sc in each st (51)
Info :
Continue this pattern until the strip is long enough to coil tightly into the spiral you want — typically 14–20 rounds for a hat of this size. The strip will naturally curve; when coiled the increases will form the outer spiral edge. Try coiling it as you go to check size.
Round 15 :
(7 sc, inc) x 6 (57)
Round 16 :
1 sc in each st (57)
Round 17 :
(8 sc, inc) x 6 (63)
Round 18 :
1 sc in each st (63)
Round 19 :
(9 sc, inc) x 6 (69)
Round 20 :
1 sc in each st (69)
Info :
When you reach desired length, fasten off leaving a long tail for sewing. Coil the strip into a tight spiral starting at the smallest end and stitch it to the cone tip with the long tail. If inserting wire, thread it through the center before coiling and secure ends inside the cone tip to prevent poking.
— Brim (Flat Reinforced Brim) :
Info :
The brim is a wide flat disk worked in the round with consistent six-increase-per-round math for a smoothly flat circle. We will create 15 rounds of increases to create a medium-large brim (approx 20–22 cm / 8–9 inches across depending on tension). If you want a larger or smaller brim adjust the number of increase rounds. Use the same hot-pink yarn for a seamless look.
Round 1 :
6 sc in magic ring (6)
Round 3 :
(1 sc, inc) x 6 (18)
Round 4 :
(2 sc, inc) x 6 (24)
Round 5 :
(3 sc, inc) x 6 (30)
Round 6 :
(4 sc, inc) x 6 (36)
Round 7 :
(5 sc, inc) x 6 (42)
Round 8 :
(6 sc, inc) x 6 (48)
Round 9 :
(7 sc, inc) x 6 (54)
Round 10 :
(8 sc, inc) x 6 (60)
Round 11 :
(9 sc, inc) x 6 (66)
Round 12 :
(10 sc, inc) x 6 (72)
Round 13 :
(11 sc, inc) x 6 (78)
Round 14 :
(12 sc, inc) x 6 (84)
Round 15 :
(13 sc, inc) x 6 (90)
Info :
At this diameter you should have a brim large enough for the pictured hat. If you prefer a smaller brim stop earlier; for a larger brim continue the same increase pattern adding 6 sts per round. The circumference at round 15 is 90 stitches; measure across your disc to check size.
Round 16 :
1 sc in each st (90)
Round 17 :
1 sc in each st (90)
Info :
Reinforcement :
To add structure to the brim, work 1–2 rounds of slip stitches in BLO: Round 18: 1 sl st in each st BLO (90). Alternatively, slip stitch a second strand of yarn around the brim or add lightweight interfacing beneath the rounds before sewing cone in place. This prevents excessive curl or flop.
Round 18 :
1 sl st in each st BLO (90)
Info :
If your brim has domed upward slightly, block it flat: dampen lightly, pin to flat surface in desired shape, and allow to dry. Add interfacing only after the brim is seam-stitched to cone if you prefer a removable stiffener.
— Brim Edge Ruffle (Decorative Scalloped Lace Edge) :
Info :
The scalloped edge is crocheted in black yarn for contrast. You can use black yarn to crochet small scallops, or attach a purchased lace trim as shown. Below is a crocheted scallop edging worked around the brim edge. Work with 3.0mm hook for a slightly tighter edge.
Round 1 :
Join black yarn at any stitch on brim edge, ch1, sc in same st, *skip 2 sts, (5 dc, sl st) in next st, skip 2 sts, sc in next st; rep from * around (approx 30 scallops depending on brim size)
Round 2 :
Work a second row of small picot details: join in center dc of each scallop, *(ch3, sl st in 3rd ch) picot, sl st to next scallop center; rep around
Info :
If using purchased lace, pin lace to edge, then sew with small whip stitch from the underside so stitches are hidden. Keep lace taut but not stretched so scallops sit evenly.
— Lace Band (Black Decorative Band around Cone Base) :
Info :
The lace band wraps around the cone base over the seam between cone and brim. You can crochet a band or use black lace ribbon. The crochet band shown here is a narrow band of black yarn with a lacy filet pattern. Make it removable for washing or optionally sew it in place.
Round 1 :
With black yarn ch 70 (adjust to fit around cone base with slight overlap), join with sl st to form band ring, being careful not to twist (70)
Round 2 :
Ch1, sc in each ch around (70)
Round 3 :
Ch3 (counts as dc), *skip 1 sc, dc in next sc, ch1, skip 1 sc, dc in next sc; rep around to create spaced lacy rows. Adjust spacing so band sits flat and lacy.
Info :
Finish by folding the band flat and whipstitching the short ends together. Pin band to the cone where cone meets brim and baste by hand before final sewing to ensure even placement.
— Bow Accessory (Make 1) :
Info :
The large black bow is a decorative lace or crocheted bow tied around the cone base. We provide a simple crocheted bow rectangle method and a lace tie option. The pictured bow is lace ribbon tied and cinched in the middle with a narrow black yarn wrap. To crochet the bow, use black yarn and a 3.0mm hook.
Round 1 :
Ch 30, turn, sc in 2nd ch from hook and across (29)
Round 2-6 :
Ch1, turn, sc in each st (29)
Info :
Fold rectangle in half width-wise so ends meet; gather center tightly and secure with several wraps of yarn to form the bow shape. Attach the bow to the lace band using small stitches through the center knot to secure. For the long tails seen in the picture, use purchased lace and tie under the bow before stitching down.
— Optional Interior Support & Finishing :
Info :
For a stable brim and cone that keep their shape, insert lightweight interfacing or sew in a circle of plastic canvas between rounds on the underside of the brim. If adding interior support to the spiral tip, use a thin piece of floral wire inserted through the spiral before coiling and hide ends inside the cone. Weave in all ends to the inside so they are invisible from the outside.
Round :
Finishing: Weave in ends from cone and brim using yarn needle, trim excess. If you added interfacing or plastic canvas, ensure edges are covered and secured by top stitching a round of sc along the inside brim.
— Detailed Stitch Notes, Tips & Troubleshooting :
Info :
Keep tension slightly tighter than usual to maintain a neat surface and prevent holes where stuffing or support might show. If your brim cups up, add additional increases and re-block flat. If it flops down, add a round of dense slip stitches in the inside row or insert interfacing. Always check fit: hold cone base to brim opening frequently to ensure alignment and avoid mismatched circumferences.
Info :
Edge finishes: For a softer edge, work hdc scallops instead of dc; for a sharper lace look use picot details. If using purchased lace, sneak-stitch from underside so a neat seam shows on top. For durability, double-stitch the band and bow to the cone with small stitches and tie off well.
Info :
Cleaning: Spot clean only. If you want washable trim, use washable lace and avoid interfacing that cannot be laundered. Store hat on a flat shelf to keep brim from warping. If the spiral loses shape, reshape gently with steam and allow to dry in desired curvature.
Info :
Alternate sizes: To scale the hat up, use heavier yarn and a larger hook, then increase the number of brim rounds and proportionally increase the cone base circumference and height. To make a miniature version for dolls, use thinner yarn and a smaller hook and reduce round counts proportionally.
This hot-pink spiral witch hat is a show-stopper — bold color, elegant black lace trim, and a graceful curled tip come together in a charming accessory you'll be proud to wear or gift. The modular pattern makes shaping approachable and fun while the decorative edge and bow add a polished finish. Enjoy the satisfying process of shaping and embellishing — each stitch adds personality to the final piece. 🎀🧶