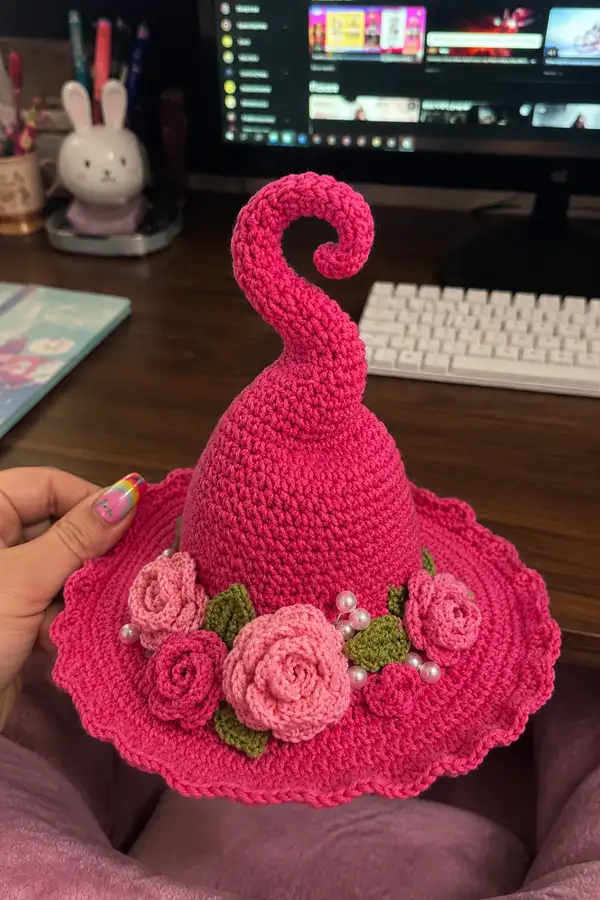
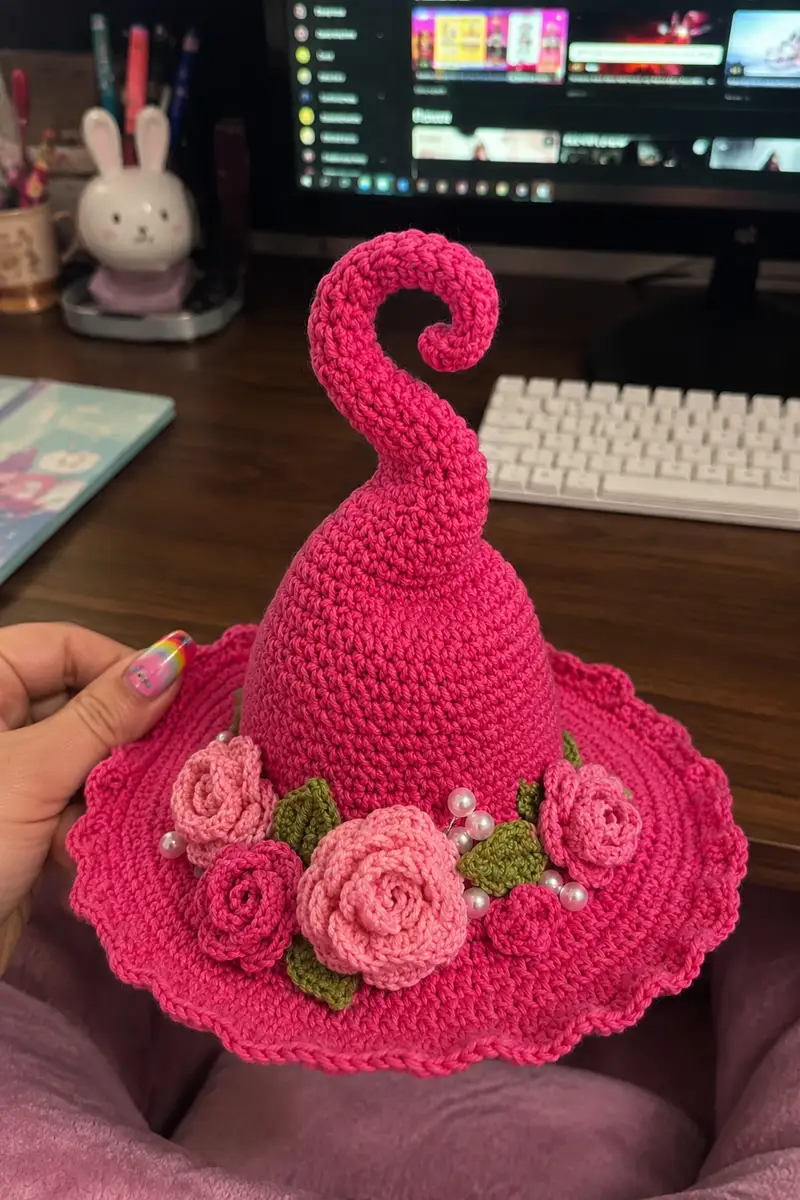
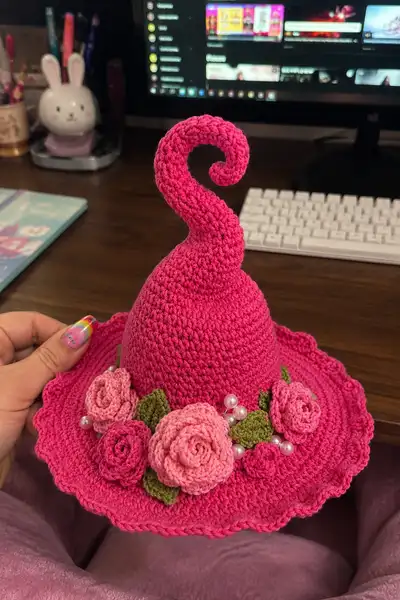
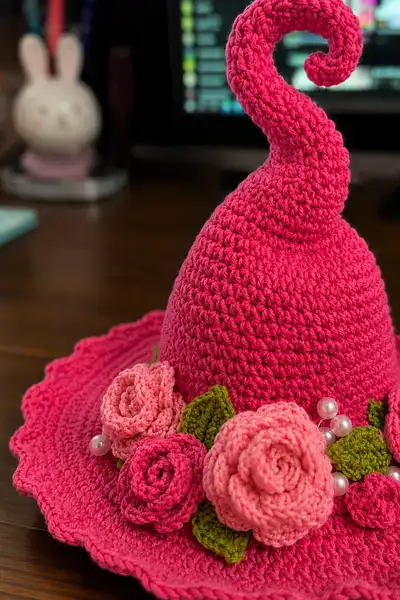
A bold, whimsical witch hat crocheted in vibrant hot pink with a curled spiral tip, wide scalloped brim, and a lush garland of crochet roses, green leaves and pearl accents. The hat is structured to hold its shape while remaining soft and wearable. Perfect for costume, decor, or a standout accessory, this pattern includes step-by-step shaping, decorative flowers, and assembly notes to recreate the exact look.
Progress Tracker
0% Complete
— Materials & Gauge :
Info :
Gauge is not critical for a decorative hat but for a fitted wearable size aim for 16 sc and 18 rows = 4 inches in worsted weight with a 3.5mm hook. Adjust hook size if your tension is different to ensure the brim lays flat and the crown holds shape.
Info :
Work in continuous rounds unless instructed to join. Use a stitch marker to mark the first stitch of each round. This pattern assumes US terminology.
— Hat Brim (Flat Round Base & Scalloped Edge) :
Round 3 :
(1 sc, inc) x 6 (18)
Round 4 :
(2 sc, inc) x 6 (24)
Round 5 :
(3 sc, inc) x 6 (30)
Info :
We are creating a flat circular brim base. Keep tension even and check that the circle is not cupping (too tight) or ruffling (too loose). Adjust increases every other round if necessary to keep flat.
Round 6 :
(4 sc, inc) x 6 (36)
Round 7 :
(5 sc, inc) x 6 (42)
Round 8 :
(6 sc, inc) x 6 (48)
Round 9 :
(7 sc, inc) x 6 (54)
Info :
At this point check diameter. For a brim approximately 10-11 inches across, continue increases. Stop increasing when desired brim size is reached. This pattern continues to a medium-wide brim used on the sample.
Round 10 :
(8 sc, inc) x 6 (60)
Round 11 :
(9 sc, inc) x 6 (66)
Round 12 :
(10 sc, inc) x 6 (72)
Round 13 :
(11 sc, inc) x 6 (78)
Round 14 :
1 sc in each st (78)
Round 15 :
1 sc in each st (78)
Info :
Work these even rounds to stabilize the brim. If your brim begins to ruffle, work one or two fewer increases in the last increase round. If it cups, add another increase round before even rounds.
Round 16 :
1 sc in each st BLO (78)
Round 17 :
1 sc in each st BLO (78)
Info :
Using BLO here creates a subtle ridge that helps the scallop edge sit nicely. On the right side the scallops will be worked into these BLO rounds.
Round 18 :
*Scallop set up: ch1, skip 1 st, 5 dc in next st, skip 1 st, sl st in next st; rep from * around to form scallops (approx 26 scallops). Adjust spacing so scallops sit evenly around brim.
Info :
When making scallops count and distribute evenly: if your stitch count differs, divide total sts by desired number of scallops to calculate spacing. Example: 78 sts divided by 26 gives roughly 3 sts per scallop section.
Round 19 :
If you want a pronounced wavy edge, work into each scallop 1 sc, 1 hdc, 3 dc, 1 hdc, 1 sc over the arc of the previous 5 dc. Fasten off and weave tail. (This completes the brim edging.)
Info :
Press the brim lightly with a damp cloth or block with pins to shape scallops if needed. For wearable sturdiness, you can insert a circle of felt under the brim and sew it in place invisibly.
— Crown (Conical Body) :
Round 1 :
Join hot pink to center of brim: 6 sc in mr (6) - this creates the inner crown base started separately; alternatively you may begin crown directly onto a 4-5 inch disk to create a firm brim join
Round 3 :
(1 sc, inc) x 6 (18)
Round 4 :
(2 sc, inc) x 6 (24)
Round 5 :
(3 sc, inc) x 6 (30)
Round 6 :
1 sc in each st (30)
Round 7 :
1 sc in each st (30)
Info :
The crown is created separately and then sewn to the brim's inner edge. You can also join by single crocheting around the brim inner circle and then working the crown up in the round. The sample uses a seamless join then worked up in continuous rounds.
Round 8 :
(4 sc, inc) x 6 (36)
Round 9 :
1 sc in each st (36)
Round 10 :
1 sc in each st (36)
Round 11 :
(5 sc, inc) x 6 (42)
Round 12 :
1 sc in each st (42)
Round 13 :
1 sc in each st (42)
Info :
These rounds begin to form the lower slope of the crown. Check fit against head or mannequin if making wearable size; adjust rounds of even height to raise or lower crown height.
Round 14 :
(6 sc, inc) x 6 (48)
Round 15 :
1 sc in each st (48)
Round 16 :
1 sc in each st (48)
Round 17 :
(7 sc, inc) x 6 (54)
Round 18 :
1 sc in each st (54)
Round 19 :
1 sc in each st (54)
Info :
If you want a smoother slope like the sample, avoid sudden increases; distribute gentle increases across multiple rounds. Stop increasing when crown base circumference looks right to you for the height you want.
Round 20 :
(8 sc, inc) x 6 (60)
Round 21 :
1 sc in each st (60)
Round 22 :
1 sc in each st (60)
Round 23 :
1 sc in each st (60)
Info :
Once the main body base has been grown to about 60 stitches, we will start forming the narrowing that leads to the spiral tip. Work even rounds to obtain the desired height before shaping the taper.
Round 24 :
(8 sc, dec) x 6 (54)
Round 25 :
(7 sc, dec) x 6 (48)
Round 26 :
(6 sc, dec) x 6 (42)
Info :
Begin stuffing lightly into the lower crown if you prefer a slightly padded look to keep shape. Use small amounts of stuffing and distribute evenly. The sample hat is mostly unstuffed and holds shape through stitch tension and optional internal wire.
Round 27 :
(5 sc, dec) x 6 (36)
Round 28 :
(4 sc, dec) x 6 (30)
Round 29 :
(3 sc, dec) x 6 (24)
Round 30 :
(2 sc, dec) x 6 (18)
Info :
At round 30 (18 sts) the crown transitions into the spiral shaping. Leave a long tail for sewing or join directly to the spiral section to maintain continuity. If you prefer a firmer internal structure, insert a length of thin floral wire now through the center and up toward the tip, leaving extra for shaping the spiral later (wrap ends safely).
— Spiral Tip (Tall Curled Top) :
Round 1 :
With 18 sts at base (from crown round 30) continue: 1 sc in each st (18)
Round 2 :
(2 sc, inc) x 6 (24) - begin to lengthen and shape the spiral neck
Round 3 :
1 sc in each st (24)
Round 4 :
(3 sc, inc) x 6 (30)
Round 5 :
1 sc in each st (30)
Info :
We will alternate gentle increases and even rounds to create a long tapered cone that can be curled. Keep the fabric dense and avoid large holes; use a slightly smaller hook if necessary.
Round 6 :
(4 sc, inc) x 6 (36)
Round 7 :
1 sc in each st (36)
Round 8 :
(5 sc, inc) x 6 (42)
Round 9 :
1 sc in each st (42)
Round 10 :
1 sc in each st (42)
Info :
Continue shaping with gradual increases if you want a full, whimsical spiral. If you prefer a tighter spiral like the sample, start to slightly reduce increases after round 10 and begin tapering later.
Round 11 :
(6 sc, inc) x 6 (48)
Round 12 :
1 sc in each st (48)
Round 13 :
1 sc in each st (48)
Round 14 :
(7 sc, inc) x 6 (54)
Round 15 :
1 sc in each st (54)
Round 16 :
(6 sc, dec) x 6 (48)
Info :
From round 16 onward we will begin to taper the cone and then start to force the crochet fabric into a spiral by gradually decreasing and working shorter rounds when we curl. If using wire, shape the wire in the desired spiral curve as you go and wrap crochet around it.
Round 17 :
(5 sc, dec) x 6 (42)
Round 18 :
(4 sc, dec) x 6 (36)
Round 19 :
(3 sc, dec) x 6 (30)
Round 20 :
(2 sc, dec) x 6 (24)
Info :
Stuff lightly if you want the spiral to hold volume; the sample hat was mostly unstuffed and used swirling technique. If using wire, insert it now into the hollow core and continue crocheting around it. Secure wire ends by bending or wrapping within inner crown later.
Round 21 :
(1 sc, dec) x 6 (18)
Info :
After reducing to 6 sts, begin working short-row spiral shaping: instead of completing full rounds, work into the front loop only of the first 12 sts and then turn to create a curl. Use a smaller hook if stitches become loose.
Round 23 :
Attach to the side and begin short row curl: ch1, sc in next 12 sts (12) leave remaining stitches unworked; turn.
Round 24 :
sc in next 12 sts (12)
Round 25 :
dec 2 across the center of these 12 sts to begin tighter curl: (4 sc, dec) x 2 (10)
Round 26 :
sc in next 10 sts (10)
Round 27 :
(3 sc, dec) x 2 (8)
Round 28 :
sc in each st (8)
Round 29 :
(2 sc, dec) x 2 (6)
Round 30 :
sc in each st (6)
Round 31 :
Work short spiral rounds decreasing occasionally and shaping by crocheting into the front loops to force rotation: continue approx 10 more short-row rounds until the tip naturally curls into a spiral. Fasten off leaving long tail for final shaping and sew opening closed over any wire.
Info :
To match the sample tall curl, shape with your hands gently to a tight spiral. Insert additional thin wire if you want a sustained curl that faces forward. Secure wire inside by sewing through crown base to hide ends.
— Large Rose (Make 2) :
Round 1 :
With light pink, ch 41 (this creates the long strip for spiraled rose). (Note: ch length adjusts bloom size; 41 creates a 2-2.5 inch rose)
Round 2 :
Row along chain: 1 sc in 2nd ch from hook, 1 sc in each ch to end (40 sc). Fasten off leaving a long tail for rolling and sewing.
Round 3 :
Turn strip with right side out and work small decorative edge if desired: *sl st, ch1, sl st* along one long edge to add texture. Fasten off.
Round 4 :
Assembly: start at one short end and roll strip tightly, using the long tail to sew through the base as you roll. After rolling fully, sew the base of the rolled rose with small whip stitches to secure the layers. Shape petals slightly by pulling the outer edge to flare it.
Info :
Create two of these large roses. For a fuller look, use ch 50 to 60 for larger rosettes and add another row of sc along the edge to widen petals before rolling.
— Medium Rose (Make 2) :
Round 1 :
With deep pink, ch 31. 1 sc in 2nd ch from hook, sc across (30 sc). Fasten off leaving long tail.
Round 2 :
Optional: add a decorative edge: *hdc, ch1, hdc* across one side for extra petal texture. Fasten off and roll like Large Rose. Sew base tightly and shape petals.
Info :
Medium roses sit between large and small; make two to three for varied garland. Vary tightness while rolling for varied petal openness.
— Small Rose (Make 3) :
Round 1 :
With deep pink or hot pink, ch 21. 1 sc in 2nd ch from hook, sc across (20 sc). Fasten off leaving long tail.
Round 2 :
Roll strip tightly and sew base. For a tiny rose, you may chain 15 and finish similarly.
Info :
Make three small roses to fill gaps in the garland. Layer them next to larger roses for natural arrangement.
— Leaves (Make 8-10) :
Round 1 :
With green, ch 11.
Round 2 :
sc in 2nd ch from hook, hdc in next, dc in next 3, hdc in next, sc in next, sl st in last. Now work on the opposite side of starting ch: sc in next, hdc, dc 3 times, hdc, sc. Fasten off. (Leaves approx 1.5 inches)
Round 3 :
Pinch center and sew a running stitch along the midline then pull to create a vein. Secure with a knot. Repeat to make 8-10 leaves in varying sizes by changing chain length to 8-14.
Info :
Leaves can be lightly stiffened with diluted glue or fabric stiffener if you want them to sit upright. Alternatively, sew them flat along the crown band for a softer look like the sample.
— Pearl Bead Clusters :
Round 1 :
Thread 3-5 small pearl beads on a length of strong thread or thin yarn. Knot at the end and sew clusters to the base of roses between leaves using small stitches so beads appear nestled among blooms.
Info :
To match sample, make three bead clusters with 3 pearls each and two smaller single pearls. Sew beads down firmly, hiding thread tails under leaves or within rose base.
— Optional Reinforcement & Internal Wiring :
Info :
If you want the spiral to hold a very firm curve, cut a length of thin floral wire approx twice the height of the spiral. Thread it through the crown into the spiral hollow and wrap the crochet fabric around it as you work, or sew it inside after crocheting. Bend ends so they don’t poke through fabric and anchor to the crown base with a few secure stitches.
Info :
For a very structured brim, cut a disc of felt or craft stiffener the diameter of your brim and sew it into place under the brim with blind stitches to hide seams. This gives a stable wearing brim for costume use.
— Finishing Touches & Assembly Prep :
Info :
Block the completed hat by pinning it into shape on a flat surface and misting lightly with water if cotton yarn is used. Allow to dry to maintain scalloped shape. Pin flowers into place and adjust spacing until you are happy with composition before sewing.
Info :
Weave in all tails and tuck ends under flower bases or under the felt brim disc for a neat finish. Trim excess threads close to the fabric after weaving through multiple stitches to prevent unraveling.
— Detailed Step-by-step Assembly Sequence :
Step 1 :
Position the crown on the brim with the inner circle of the crown aligning to the brim's central hole. Use pins to hold. Check that the brim sits evenly and the scallops face outward correctly.
Info :
If you joined the crown during construction, skip this step. If the crown was made separately, sew the brim and crown together using a mattress or whip stitch, catching the inner loops of the brim and the base rounds of the crown. Use matching yarn and a yarn needle.
Step 2 :
Arrange roses in a garland around the lower crown where crown meets brim. Place two large roses centered front, add medium and small roses on either side, and tuck leaves in between. Pin clusters and beads to preview.
Step 3 :
Sew each rose by stitching through the base of rolled rose and through crown fabric, making several passes to secure. Use a thread color matching the rose, hide knots under petals. Reinforce each rose with 3-4 passes.
Info :
To prevent sagging, stitch through both the petals base and the inner crown joining area so flowers are anchored to the structural part of the hat rather than just edge rows.
Step 4 :
Sew leaves in place around flowers, angling them outward slightly. Use small stitches to hide thread and create natural leaf placement. Add bead clusters last so you can place them visually among petals where they look most natural.
Step 5 :
Secure any inserted wire by tying it off at the crown base and sewing several times through the adjacent rows of the crown. Hide the ends inside the crown by folding and stitching over them.
Info :
Give the hat a final light block or steam (careful with synthetic blends) and position the spiral tip so it faces slightly forward as in the sample. Check all attachments for security before gifting or displaying.
— Care & Storage :
Info :
Hand wash gently in cool water with mild soap if using cotton yarn; reshape and air dry. Store on a flat surface or on a wide hook to avoid crushing the brim. Remove movable beads before washing if insecure.
Info :
Sparkle option: A few drops of fabric glue mixed with glitter can be lightly brushed onto outer petals for a subtle shimmer, but avoid getting glue on pearls or stitching areas.
Completing this Big Hot Pink Spiral Witch Hat is such a rewarding experience — from forming the tall whimsical spiral to arranging the cluster of roses and pearls, every step adds character and charm. The finished hat makes a stunning costume piece or decorative accent that's sure to draw compliments. I hope you enjoy stitching each petal and shaping every curl — it's a joyful, creative project that shines! 🎀🌸