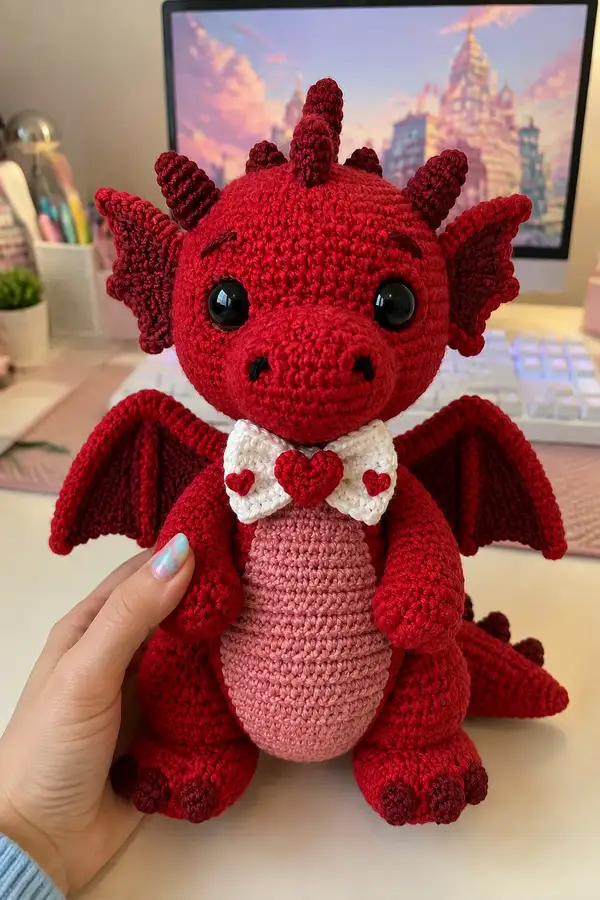
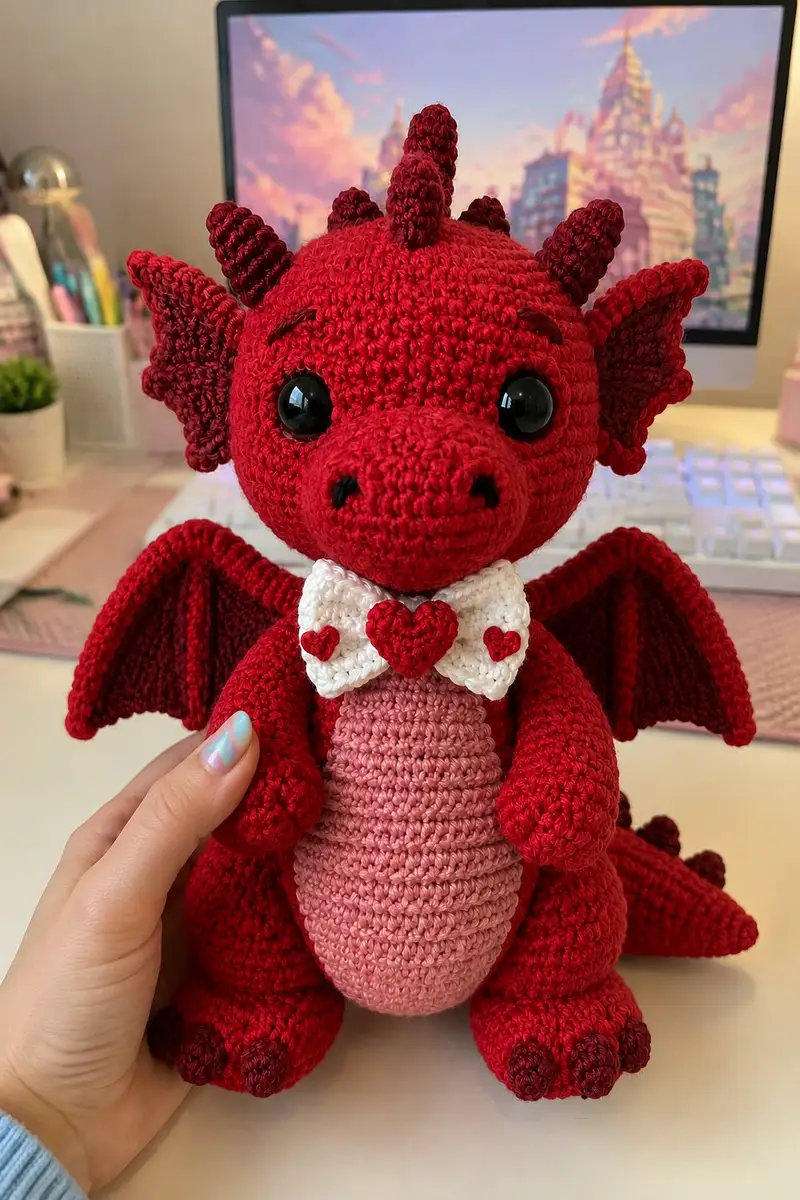
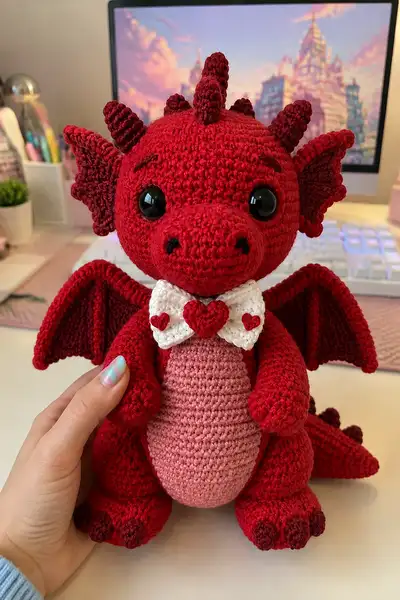
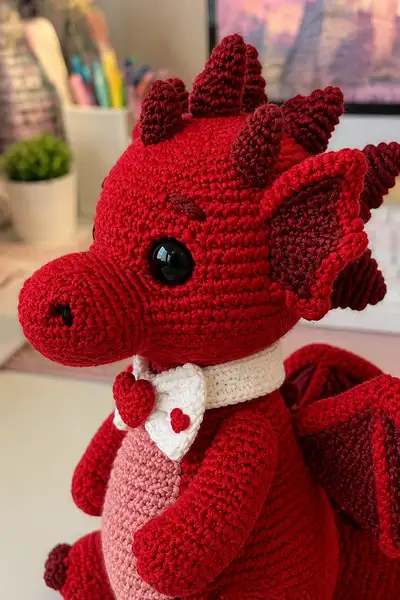
Make a cuddly ruby-red dragon with a soft pink belly, deep burgundy spikes and a sweet white bow tie decorated with tiny hearts. This plush sits upright with articulated-looking wings, a rounded snout and large glossy eyes for maximum charm. Perfect as a heartfelt gift or desk companion, the pattern includes assembly and finishing tips to achieve a neat, professional result. Suitable for crocheters who enjoy shaping, small parts and playful colorwork.
Progress Tracker
0% Complete
— Head :
Round 1 :
6 sc in magic ring (6)
Round 3 :
(1 sc, 1 inc) x 6 (18)
Round 4 :
(2 sc, 1 inc) x 6 (24)
Round 5 :
(3 sc, 1 inc) x 6 (30)
Round 6 :
(4 sc, 1 inc) x 6 (36)
Info :
Use a stitch marker at the start of Round 1 and move it up each round. Work tightly so stuffing won't show; a 3.5mm hook works well with worsted yarn for a dense fabric.
Round 7 :
(5 sc, 1 inc) x 6 (42)
Round 8 :
(6 sc, 1 inc) x 6 (48)
Round 9-14 :
1 sc in each st (48)
Info :
Place safety eyes between rounds 12-13 about 10-12 stitches apart (approx). For the look shown, place eyes centered on the head with 11 stitches between the eye centers. Attach backs securely.
Round 15 :
(6 sc, 1 inc) x 6 (54)
Round 16-20 :
1 sc in each st (54)
Info :
Begin lightly stuffing the head from round 16 to maintain a rounded top. Stuff gradually and firmly enough so the eyes sit flush but not bulging.
Round 21 :
(6 sc, 1 dec) x 6 (48)
Round 22 :
(5 sc, 1 dec) x 6 (42)
Round 23 :
1 sc in each st (42)
Round 24 :
(4 sc, 1 dec) x 6 (36)
Round 25 :
(3 sc, 1 dec) x 6 (30)
Info :
As you approach round 24-26, stuff firmly around the eye sockets and cheeks to keep the face full and smooth. Use a pencil or blunt tool to shape stuffing into the temples for smooth curves.
Round 26 :
(2 sc, 1 dec) x 6 (24)
Round 27 :
(1 sc, 1 dec) x 6 (18)
Info :
Fasten off leaving a long tail for sewing if you plan to join head directly to neck later. Make sure head is well-stuffed but not overfilled to keep seam neat.
— Snout / Muzzle :
Round 1 :
6 sc in magic ring (6)
Round 3 :
(1 sc, 1 inc) x 6 (18)
Round 4 :
(2 sc, 1 inc) x 6 (24)
Round 5 :
1 sc in each st (24)
Round 6 :
(3 sc, 1 inc) x 6 (30)
Round 7 :
1 sc in each st (30)
Round 8 :
(4 sc, 1 inc) x 6 (36)
Info :
The snout on the pictured dragon is sculpted and slightly elongated. Work the rounds up and then stuff firmly before decreasing to retain shape.
Round 9 :
1 sc in each st (36)
Round 10 :
(4 sc, 1 dec) x 6 (30)
Round 11 :
(3 sc, 1 dec) x 6 (24)
Round 12 :
(2 sc, 1 dec) x 6 (18)
Round 13 :
(1 sc, 1 dec) x 6 (12)
Info :
Before fully closing, embroider nostrils with black yarn using small satin stitch on the front rounds of the snout; place nostrils 6-8 stitches apart on the top-most visible curve. Fasten off and leave tail for sewing.
— Neck (Short collar section to join head & body) :
Round 1 :
6 sc in magic ring (6)
Round 3 :
(1 sc, 1 inc) x 6 (18)
Round 4-6 :
1 sc in each st (18)
Info :
Make the neck slightly shorter than the head opening — it will be sewn into the body's top opening later. Leave a long tail for sewing and lightly stuff only to keep a bit of form.
— Body :
Round 1 :
6 sc in magic ring (6)
Round 3 :
(1 sc, 1 inc) x 6 (18)
Round 4 :
(2 sc, 1 inc) x 6 (24)
Round 5 :
(3 sc, 1 inc) x 6 (30)
Round 6 :
(4 sc, 1 inc) x 6 (36)
Round 7 :
(5 sc, 1 inc) x 6 (42)
Round 8 :
(6 sc, 1 inc) x 6 (48)
Round 9-12 :
1 sc in each st (48)
Info :
If you plan to change to the belly color later, mark the rounds where you will join the belly panel now. Carry yarn inside or fasten off and rejoin for neat color transition.
Round 13 :
(6 sc, 1 inc) x 6 (54)
Round 14-20 :
1 sc in each st (54)
Info :
Begin stuffing the body lightly at round 16 and increase stuffing density from round 18 onward. Keep the lower body firmer to help the toy sit upright.
Round 21 :
(6 sc, 1 dec) x 6 (48)
Round 22 :
(5 sc, 1 dec) x 6 (42)
Round 23 :
1 sc in each st (42)
Round 24 :
(4 sc, 1 dec) x 6 (36)
Round 25 :
(3 sc, 1 dec) x 6 (30)
Round 26 :
(2 sc, 1 dec) x 6 (24)
Round 27 :
(1 sc, 1 dec) x 6 (12)
Info :
Leave a long tail to sew the neck to the body opening. Make sure body is firmly stuffed but leave a little space for closing after assembly with head.
— Belly Panel (Dusty Pink) :
Round 1 :
6 sc in magic ring (6)
Round 3 :
(1 sc, 1 inc) x 6 (18)
Round 4 :
(2 sc, 1 inc) x 6 (24)
Round 5-12 :
1 sc in each st (24)
Info :
Make a flat oval by working even rounds. Adjust rounds 5-12 to match the length of your dragon's front when placed on the body. Fasten off leaving tail for sewing; position centered on front body.
— Arms (Make 2) :
Round 1 :
6 sc in magic ring (6)
Round 3 :
(1 sc, 1 inc) x 6 (18)
Round 4-6 :
1 sc in each st (18)
Info :
Arms are worked in the round and stuffed lightly. Stuff hands more firmly than the arm shafts so they sit forward when attached.
Round 7 :
(2 sc, 1 dec) x 6 (12)
Round 8-12 :
1 sc in each st (12)
Round 13 :
(1 sc, 1 inc) x 6 (18)
Round 14-16 :
1 sc in each st (18)
Round 17 :
(2 sc, 1 dec) x 6 (12)
Round 18 :
1 sc in each st (12) - Fasten off leaving long tail for sewing
Info :
Position arms on body sides at approximately body rounds 16-20 and stitch through both body and arm rounds for a secure seam. Add internal stitch-throughs if you want poseable arm movement.
— Legs / Feet (Make 2) :
Round 1 :
6 sc in magic ring (6)
Round 3 :
(1 sc, 1 inc) x 6 (18)
Round 4 :
(2 sc, 1 inc) x 6 (24)
Round 5-7 :
1 sc in each st (24)
Info :
Feet are rounded and wide to create stability — make sure to stuff the foot very firmly. The toes are created with small accent color clusters later.
Round 8 :
(3 sc, 1 inc) x 6 (30)
Round 9-11 :
1 sc in each st (30)
Round 12 :
(3 sc, 1 dec) x 6 (24)
Round 13 :
1 sc in each st (24)
Round 14 :
(2 sc, 1 dec) x 6 (18)
Round 15 :
1 sc in each st (18)
Round 16 :
(1 sc, 1 dec) x 6 (12)
Round 17 :
1 sc in each st (12)
Round 18-22 :
1 sc in each st (12) - Fasten off leaving tail for sewing
Info :
To create claw accents, use deep burgundy yarn and embroider three small French knots or make tiny 3-sc clusters across the front toe area and sew them on. Secure well for durability.
— Ears (Make 2) :
Round 1 :
6 sc in magic ring (6)
Round 3 :
(1 sc, 1 inc) x 6 (18)
Round 4 :
(2 sc, 1 inc) x 6 (24)
Round 5 :
1 sc in each st (24)
Info :
Make an inner ear with deep burgundy: chain 6, sc across to create an oval insert if you want the two-tone inner. Alternatively work BLO on round 5 to create a rim and then join inner piece by sewing.
Round 6 :
(3 sc, 1 dec) x 6 (18)
Round 7 :
(2 sc, 1 dec) x 6 (12)
Round 8 :
1 sc in each st (12)
Round 9 :
(1 sc, 1 dec) x 4, 4 sc (8)
Round 10 :
1 sc in each st (8)
Round 11 :
1 sc in each st (8) - Fasten off leaving tail for sewing
Info :
Sew ears onto head at approximately rounds 10-12, slightly angled forward. Use pins to check symmetry and angle before sewing.
— Horns / Spikes (Make 7 total: 1 center head, 2 front head, 4 tail/neck) :
Spike Set - Each Cone Round 1 :
6 sc in magic ring (6)
Round 3 :
(1 sc, 1 inc) x 6 (18)
Round 4 :
1 sc in each st (18)
Round 5 :
(1 sc, 1 dec) x 6 (12)
Round 6 :
1 sc in each st (12)
Round 7 :
6 dec (6) - Fasten off leaving long tail for sewing
Info :
Work spikes in deep burgundy for contrast. Stuff lightly, using a toothpick to push fiberfill into tight cones. Sew spikes spaced along the head center from forehead to back and a line down the tail.
— Wings (Make 2) :
Round 1 :
Ch 26, sl st to form a short loop, ch 1 (foundation loop method) - or create a starting ring then work around to create a long oval base (use 26 chains)
Round 2 :
Work 1 sc in each ch around both sides of the chain to form an oval (52 sc total) - join to first sc
Round 3 :
1 sc in each st (52)
Round 4 :
1 sc in next 4, hdc next 6, dc next 6, hdc next 6, 1 sc in remaining sts (52)
Round 5 :
Fold wing along the center and work 1 sc across the fold to create a slight ridge (work about 12 sc across folded edge) - leave remaining wing open for membrane
Round 6-8 :
1 sc in each st (52) - Fasten off leaving tail for sewing
Info :
The pictured wings have a fluted membrane and a rolled edge. To create the inner membrane color, you can surface crochet a row of deep burgundy down the inner edge in BLO. Pin wings to body to decide final angle before sewing.
— Wing Edging Detail (Optional, make 2) :
Round 1 :
Join deep burgundy to wing edge and sc around working 3 sc in each corner for ruffle (approx 56 sc)
Round 2 :
Work 1 sc in each st (56) - Fasten off
Info :
Sew wing edging to the outer rim so the dark color peeks from the inside of the wing, matching the photo where the wing inner membrane is darker than the body.
— Tail :
Round 1 :
6 sc in magic ring (6)
Round 3 :
(1 sc, 1 inc) x 6 (18)
Round 4-8 :
1 sc in each st (18)
Round 9 :
(1 sc, 1 dec) x 6 (12)
Round 10-12 :
1 sc in each st (12)
Round 13 :
(1 sc, 1 dec) x 4, 4 sc (8)
Round 14-15 :
1 sc in each st (8)
Round 16 :
Work a short flat tail fin by ch 8, sc across, fold and join along the last row to create a rounded fin; attach to last tail round
Info :
Sew small spikes down the tail center using the burgundy cones made earlier. Position the tail so the stuffed base sits flat against the bottom of body for stability.
— Bow Tie Collar (White) :
Round 1 :
Ch 28, join to form a loop making sure it fits snugly around neck (or ch to desired collar circumference)
Round 2-3 :
1 sc in each ch around to create collar band (28)
Round 4 :
Fasten off and set aside. Make a separate bow by making a 12-ch rectangle: ch 12, sc across both sides to form loop, 3 rounds of sc, fasten off
Info :
Wrap the bow around the collar and stitch the edges to hold in place. The large red heart sits centered on top of the bow. Adjust collar size to fit snugly but not too tight.
— Big Heart (Center of Bow) :
Round 1 :
6 sc in magic ring (6)
Round 3 :
(1 sc, 1 inc) x 6 (18)
Round 4 :
1 sc in each st (18) - Fold and sculpt into heart shape by sewing edges with mattress stitch, fasten off
Info :
Sew the heart firmly to the bow center. For extra dimension, stuff the heart lightly and close tightly. Add two small hearts on either side using the small heart pattern below.
— Small Heart Accent (Make 2) :
Round 1 :
6 sc in magic ring (6)
Round 2 :
6 inc (12) - Fasten off leaving tail for sewing
Info :
Sew the small hearts to each side of the bow as shown in the photo. Use a few tight whip stitches to keep them flat against the bow face.
— Small Details & Embroidery :
Info :
Use dark burgundy to embroider two thin eyebrow ridges above the eyes using loose satin stitches. Embroider small nostrils on the snout top and a smile line under eyes if desired. Keep stitches small and evenly spaced.
— Assembly Prep :
Info :
Before sewing, block parts flat with pins to match angles, and stuff final pieces fully. Use pins to mark placement of legs at body rounds 1-6 (bottom), arms at rounds 16-20 and ears at head rounds 10-12. Check symmetry by counting stitches from center front.
— Final Finishing Rounds & Closing :
Info :
When sewing the neck into the body's top opening, use the long tail from both pieces and mattress or whip stitch around the opening. Close any remaining hole in the body by decreasing evenly and using a yarn needle to draw closed. Weave in tails through several rounds before trimming.
Info :
Trim any stray fibers and use a lint brush to neaten pile. Optional: add a small amount of blush to cheeks with craft chalk for soft color without staining yarn.
You did it — your Big Ruby Love Dragon is ready to spread charm and hugs! Each carefully crocheted section comes together to form a lovable, stable plush with a sweet heart-adorned bow tie. The combination of ruby, burgundy and dusty pink makes this dragon feel warm and special. 🧶 Keep your finished dragon proudly on display or give as a heartfelt gift; it's sure to brighten anyone’s day. 💝✨