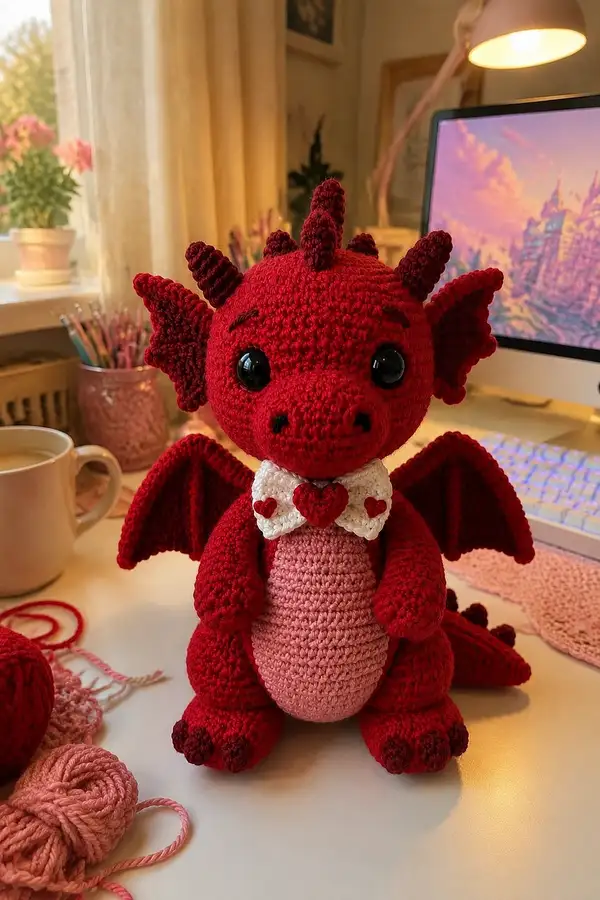
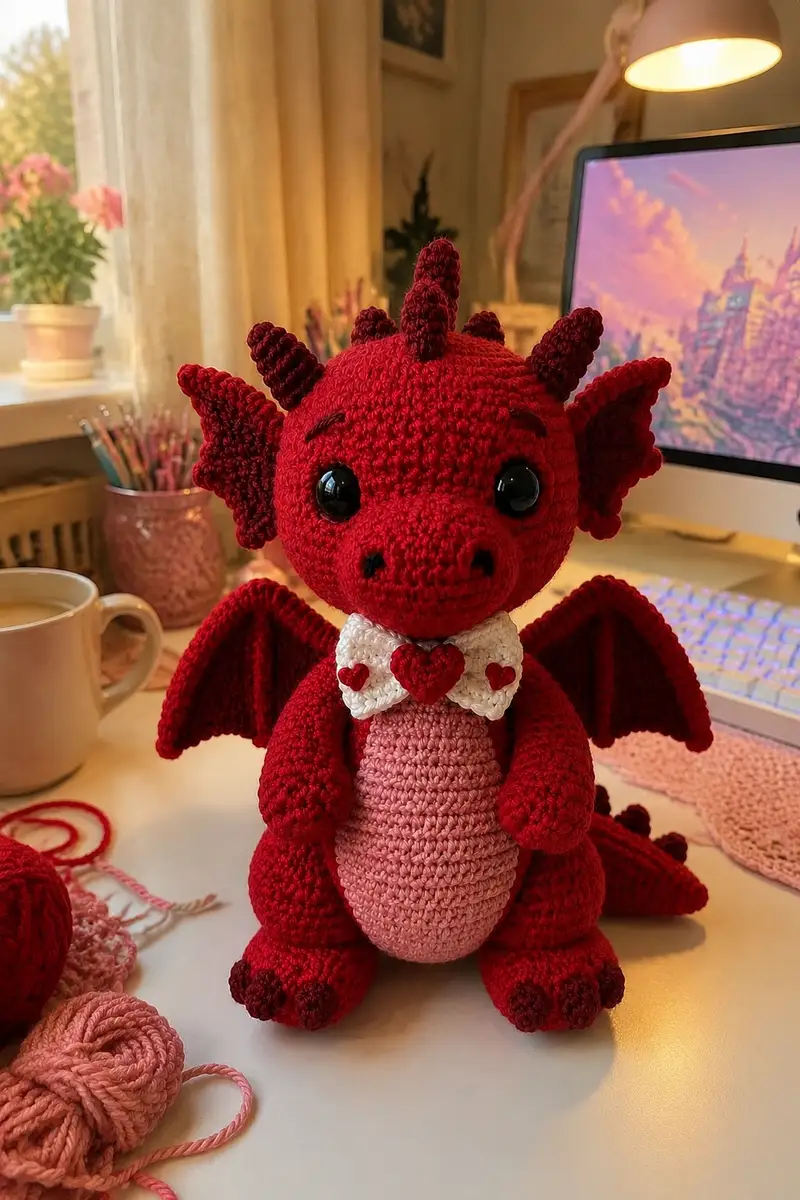
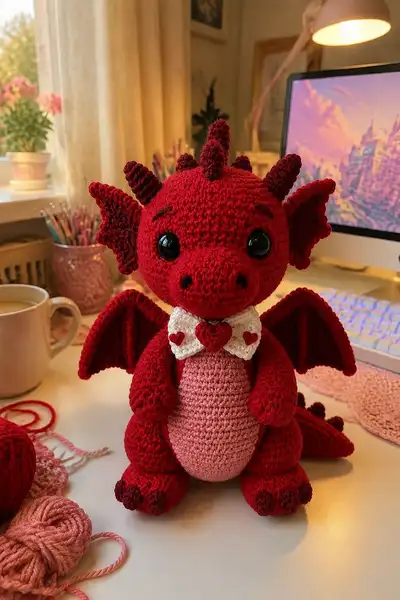
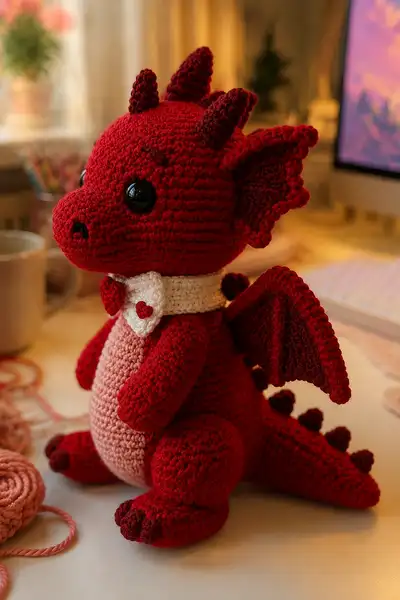
Create a cuddly ruby-red dragon with soft pink belly, curled tail, signature heart bow tie collar and expressive glossy eyes. This pattern guides you through making the head, snout, wings, spikes, limbs and tiny heart details, with clear round-by-round stitch counts for a professional finish. Perfect as a sweet gift or a decorative keepsake, the finished dragon sits upright with sturdy legs and poseable-feeling wings. Detailed assembly and finishing notes included for a neat, polished amigurumi.
Progress Tracker
0% Complete
— Head :
Round 1 :
6 sc in magic ring (6)
Round 3 :
(1 sc, 1 inc) x 6 (18)
Round 4 :
(2 sc, 1 inc) x 6 (24)
Round 5 :
(3 sc, 1 inc) x 6 (30)
Round 6 :
(4 sc, 1 inc) x 6 (36)
Round 7 :
(5 sc, 1 inc) x 6 (42)
Round 8 :
(6 sc, 1 inc) x 6 (48)
Round 9-12 :
1 sc in each st (48)
Info :
Mark the first stitch of each round. Keep tension moderately tight so stuffing does not show; this tall head keeps 10 rounds of even height to get the rounded look in the photo.
Round 13-16 :
1 sc in each st (48)
Info :
Place safety eyes between rounds 13 and 14, spacing approximately 10-12 stitches apart center-to-center for a wide, innocent expression like the sample. Use pins to check placement before locking washers in place.
Round 17 :
1 sc in each st (48)
Round 18 :
1 sc in each st (48)
Info :
Begin facial shaping note: the muzzle is made separately and sewn on for a pronounced snout. Do not decrease further here if you plan to sew a muzzle; leave rounds 17-18 to maintain head height and placement for the muzzle connection.
Round 19 :
(6 sc, 1 dec) x 6 (42)
Round 20 :
(5 sc, 1 dec) x 6 (36)
Info :
Begin stuffing head firmly but not overpacked. Stuff evenly around eye sockets so the eyes sit flush and round. Use small bits of stuffing to arrive at a smooth shape.
Round 21 :
(4 sc, 1 dec) x 6 (30)
Round 22 :
(3 sc, 1 dec) x 6 (24)
Round 23 :
(2 sc, 1 dec) x 6 (18)
Round 24 :
(1 sc, 1 dec) x 6 (12)
Info :
Fasten off leaving a long tail for sewing to the body if you prefer to close the head later. Alternatively leave open to attach directly to the body with visible neck shaping. Round counts above produce a round, slightly flattened head size consistent with pictured proportions.
— Muzzle / Snout :
Round 1 :
6 sc in magic ring (6)
Round 3 :
(1 sc, 1 inc) x 6 (18)
Round 4 :
(2 sc, 1 inc) x 6 (24)
Round 5-8 :
1 sc in each st (24)
Info :
These rounds give the snout its length and should align with the position of the safety eyes on the head. Hold muzzle to head and pin before sewing: center it so the nostrils will sit above the base of the muzzle.
Round 9 :
(2 sc, 1 dec) x 6 (18)
Round 10 :
(1 sc, 1 dec) x 6 (12)
Info :
Stuff the muzzle quite firmly to produce a nice forward projection. Do not overstuff—firm but slightly springy. Fasten off leaving 20–25cm tail for sewing. Embroider two nostrils with deep burgundy yarn before attaching if easier.
— Body :
Round 1 :
6 sc in magic ring (6)
Round 3 :
(1 sc, 1 inc) x 6 (18)
Round 4 :
(2 sc, 1 inc) x 6 (24)
Round 5 :
(3 sc, 1 inc) x 6 (30)
Round 6 :
(4 sc, 1 inc) x 6 (36)
Round 7-10 :
1 sc in each st (36)
Info :
If you plan to add a sewn belly panel (pink), make it now or crochet the panel separately and attach later. Keep the first 10 rounds even to provide a stable shoulder area for arm attachment.
Round 11 :
(4 sc, 1 inc) x 6 (42)
Round 12-14 :
1 sc in each st (42)
Info :
Begin adding moderate stuffing after round 12 to build a solid midsection. Use small amounts and shape with your hands so the body sits flat when finished.
Round 15 :
(5 sc, 1 dec) x 6 (36)
Round 16 :
1 sc in each st (36)
Round 17 :
(4 sc, 1 dec) x 6 (30)
Round 18 :
(3 sc, 1 dec) x 6 (24)
Info :
Stop increasing and shape the lower body with decreases. Leave the top opening with a long tail for sewing head later. Keep stuffing gradually while you decrease to maintain shape without lumps.
Round 19 :
(2 sc, 1 dec) x 6 (18)
Round 20 :
(1 sc, 1 dec) x 6 (12)
Round 21 :
6 dec (6) — OR leave open for neck attachment depending on assembly method (leave to match head opening)
Info :
If attaching head by sewing, leave rounds 20-21 open and do not fasten off. Pin head in place first and sew through back loops of body rounds for a secure seam. If you close the body completely, attach head by sewing through fabric opening instead.
— Belly Panel (Make 1 in pink) :
Round 1 :
6 sc in magic ring (6)
Round 3 :
(1 sc, 1 inc) x 6 (18)
Round 4 :
(2 sc, 1 inc) x 6 (24)
Round 5 :
(3 sc, 1 inc) x 6 (30)
Round 6-8 :
1 sc in each st (30)
Info :
This oval will be sewn to the front of the body for the pale pink tummy. For a neat edge, use BLO for the last round to create a ridge, then attach using whip stitch around the outside of the panel to the body front from round 7–12 depending on alignment.
Round 9 :
(3 sc, 1 dec) x 6 (24)
Round 10 :
(2 sc, 1 dec) x 6 (18)
Round 11 :
(1 sc, 1 dec) x 6 (12)
Round 12 :
6 dec or fasten off leaving long tail for sewing (6)
— Arm (Make 2) :
Round 1 :
6 sc in magic ring (6)
Round 3 :
(1 sc, 1 inc) x 6 (18)
Round 4-6 :
1 sc in each st (18)
Round 7 :
(3 sc, 1 inc) x 6 (24)
Round 8-11 :
1 sc in each st (24)
Info :
Arms in the photo sit close to body with slight curve. Stuff the hand/forearm fairly firmly for a weighted look; stuff the upper arm more lightly for easy sewing to the shoulder area.
Round 12 :
(3 sc, 1 dec) x 6 (18)
Round 13-15 :
1 sc in each st (18)
Round 16 :
(2 sc, 1 dec) x 6 (12)
Round 17 :
(1 sc, 1 dec) x 6 (6)
Round 18 :
6 sc (6) — Fasten off leaving long tail for sewing
Info :
Insert a few extra stitches through the front of the arm to create a slight crease where the hand meets the arm for a natural hug-like pose. Use a yarn needle and the tail to shape before final sewing.
— Leg / Foot (Make 2) :
Round 1 :
6 sc in magic ring (6)
Round 3 :
(1 sc, 1 inc) x 6 (18)
Round 4 :
(2 sc, 1 inc) x 6 (24)
Round 5-7 :
1 sc in each st (24)
Round 8 :
(3 sc, 1 inc) x 6 (30)
Round 9-12 :
1 sc in each st (30)
Round 13 :
(4 sc, 1 dec) x 6 (24)
Round 14 :
(3 sc, 1 dec) x 6 (18)
Round 15-17 :
1 sc in each st (18)
Info :
Stuff the foot base firmly to create a flat, stable surface. The dragon sits upright so ensure the bottom of each foot is filled and slightly flattened for stability.
Round 18 :
(1 sc, 1 dec) x 6 (12)
Round 19-21 :
1 sc in each st (12)
Round 22 :
Fasten off leaving a long tail for sewing to the body (12)
Info :
For the small dark claws on the toes, embroider three short stitches at the front of each foot using darker burgundy yarn or make three tiny slip-stitch clusters across the final round. Place claws symmetrically on each foot for a cute look.
— Ear (Make 2) :
Round 1 :
6 sc in magic ring (6)
Round 3 :
(1 sc, 1 inc) x 6 (18)
Round 4 :
(2 sc, 1 inc) x 6 (24)
Round 5 :
1 sc in each st (24)
Round 6 :
1 sc in each st BLO (24)
Round 7 :
(3 sc, 1 dec) x 6 (18)
Round 8 :
(2 sc, 1 dec) x 6 (12)
Round 9 :
(1 sc, 1 dec) x 6 (6)
Round 10 :
Fasten off leaving a long tail for sewing and shaping (6)
Info :
Sew ears to the top sides of the head (between rounds 8–12) with the scalloped edge pointing slightly forward. Use pins to check symmetry and angle before stitching.
— Horns (Make 3 for top of head plus extra spike cones) :
Round 1 :
6 sc in magic ring (6)
Round 3-5 :
1 sc in each st (12)
Round 6 :
(2 sc, 1 dec) x 3 (9)
Round 7 :
(1 sc, 1 dec) x 3 (6)
Round 8 :
6 dec (3) — Fasten off leaving tail for sewing
Info :
Sew three horns down the center-top of the head with the largest in the middle and two slightly smaller ones in front and back for the clustered horn look. Place horns between rounds 7–10 for proper proportion relative to the eyes and ears. For darker tips, work the final 2 rounds in darker burgundy yarn.
— Back Spike (Make 6 small cones) :
Round 1 :
4 sc in magic ring (4)
Round 3 :
1 sc in each st (8)
Round 4 :
(1 sc, 1 dec) x 2 (6)
Round 5 :
2 sc, 1 dec, 2 sc (5) — Fasten off leaving tail for sewing
Info :
Make 5–7 of these small spikes and sew them along the center of the tail and lower back. Space evenly; use pins to place and stitch securely. Use darker yarn for each spike tip if desired.
— Tail :
Round 1 :
6 sc in magic ring (6)
Round 3 :
(1 sc, 1 inc) x 6 (18)
Round 4 :
(2 sc, 1 inc) x 6 (24)
Round 5-8 :
1 sc in each st (24)
Round 9 :
(3 sc, 1 dec) x 6 (18)
Round 10-12 :
1 sc in each st (18)
Round 13 :
(2 sc, 1 dec) x 6 (12)
Round 14-16 :
1 sc in each st (12)
Round 17 :
(1 sc, 1 dec) x 6 (6)
Round 18 :
6 sc (6) — Fasten off leaving long tail for sewing
Info :
Sew back spikes (small cones) along the top of the tail from base to tip. Space spikes so that the tail resembles the photo's cottage-style bumpy spine. Pin before sewing and secure with ladder stitch for a neat finish.
— Wing (Make 2 identical) :
Round 1 :
6 sc in magic ring (6)
Round 3 :
(1 sc, 1 inc) x 6 (18)
Round 4 :
(2 sc, 1 inc) x 6 (24)
Round 5 :
1 sc in each st (24)
Round 6 :
1 sc in each st BLO (24)
Round 7 :
(3 sc, 1 dec) x 6 (18)
Round 8 :
(2 sc, 1 dec) x 6 (12)
Round 9 :
(1 sc, 1 dec) x 6 (6)
Round 11 :
Fold wing in half and work 6 sc across the edge to create a membrane ridge; fasten off leaving long tail for sewing
Info :
For the bat-like wing shape, create a second smaller inner membrane in darker burgundy by working an edging row of sc around the inside edge before sewing wings to the body. Sew wings to the back on rounds 8–12 of the body for the pictured low-back placement.
— Collar Band :
Round 1 :
Ch 36 (or measure around your dragon's neck and chain to fit snugly), join with sl st to form loop
Round 2-4 :
1 sc in each ch around (36)
Info :
Work collar in white. If necessary, adjust stitch count to fit your dragon's neck snugly. This collar will be the base for the bow tie and hearts.
Round 5 :
1 sc in each st BLO (36) — Fasten off leaving a tail to secure collar around neck
— Bow Tie Front (Make 1) :
Round 1 :
Ch 10, 1 sc in second ch from hook and across (9), ch 1, turn
Round 2-6 :
1 sc in each st across (9)
Round 7 :
Fold rectangle and stitch ends together slightly to create bow shape, wrap center with a small piece of white yarn or make a tiny band. Fasten off and attach to collar center.
Info :
Optionally attach a small pink heart or larger central heart on top of the bow for the look shown. Pin before sewing to ensure centered placement.
— Tiny Heart (Make 4 small hearts) :
Round 1 :
Ch 4, 3 sc in 2nd ch from hook, 2 sc in next, sl st in last ch to form small loop (approx heart top)
Round 2 :
Attach to central bow or collar with a few stitches; make two tiny hearts for collar tips and one for bow center (adjust size by working extra rounds or using smaller hook)
Info :
If you prefer, crochet small hearts in deep burgundy to contrast against white collar as in the photograph. Stitch securely and weave in ends tightly.
— Eyes & Facial Embroidery :
Info :
Use 12mm safety eyes placed between rounds 13-14 of head. Embroider upper eyebrow lines with 2-3 stitches of burgundy yarn above each eye to create sweet expression. For nostrils, use deep burgundy and embroider two small vertical stitches at top of muzzle. For mouth, use short horizontal satin-stitched line in burgundy at the muzzle seam.
— Assembly & Final Shaping :
Info :
Before sewing any pieces permanently, arrange on your body and pin into position. This ensures symmetry and allows adjustments for a natural sitting posture. Use the long tails left from each part for sewing with mattress or whip stitch. Reinforce joints with a few extra passes for durability.
Step :
Sew muzzle to head centered below eyes; position so nostrils align with eye base. Sew through both pieces neatly and close any gaps with small whip stitches.
Step :
Sew head to body by inserting neck into body's opening; use even whip stitches around the neck. Add a few extra stitches at the front to draw head slightly forward for the cuddly look in the photo.
Step :
Sew arms to sides of the body around rounds 10-12 so that hands rest on the belly. Sew legs at body base evenly spaced so the dragon sits upright. Add a few internal anchoring stitches between inner foot base and body bottom for stability.
Step :
Attach wings to back between body rounds 8-12. Pin wings symmetrically, then attach with invisible ladder stitch or small whip stitches at the base. Add a few stitches up into the back to create a slightly raised base like photo.
Step :
Sew spikes and horns in place. Use photos as guide: three horns across the head and 5–6 small spikes down the tail and lower back. Secure each spike with tight stitches through the spike base into body or tail.
Step :
Sew collar around the neck, secure with small hidden stitches. Place the bow at the front and stitch the little hearts on either side of the collar, then add the central heart on the bow for the final decorative touch.
Info :
Weave in all tails securely. Trim close, but leave enough to tuck into stitches for extra hold. Add slight blush to cheeks with makeup or fabric paint if desired. Use fabric glue sparingly under bow tie center for extra hold if you plan to gift to a small child.
This ruby love dragon is such a joy to stitch — every little spike, the soft pink tummy and the heart bow make it utterly lovable. The step-by-step rounds help you build each part with confidence, and the final assembly is a rewarding reveal as the character comes together. Whether you make one to gift or keep it on your desk for smiles, it's a handmade treat that shows care in every stitch. 🧶💖