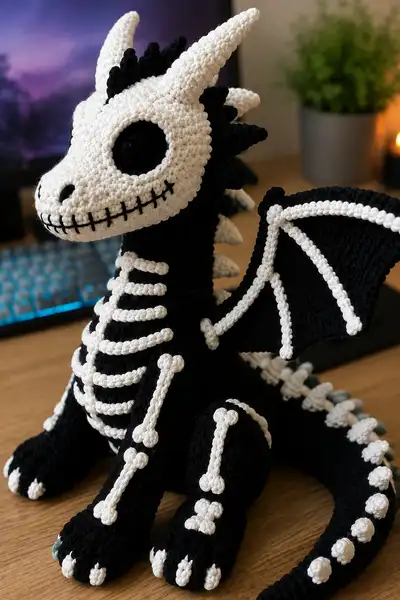
🧶 Beautiful ✨ Detailed 💝 Adorable

Big Skeleton Dragon with Bone Pattern and Stitched Smile Amigurumi Pattern

Big Skeleton Dragon with Bone Pattern and Stitched Smile Amigurumi Pattern
4.8★ Rating
10-12 Hours Time Needed
4.2K Made This
✂️

Advanced Level

Designed for experienced crocheters, these patterns involve intricate designs and complex techniques to challenge and inspire.

⏱️

Slow & Steady

A 10+ hour project—great for savoring the process over several sessions.

🧸

Cute Companion

An adorable friend to cherish, handcrafted with love to bring comfort and joy for years to come.

🧶 Jump to Pattern ↓

About This Big Skeleton Dragon with Bone Pattern and Stitched Smile Amigurumi Pattern

This pattern recreates a large black amigurumi dragon decorated with contrasting white bones sewn on as appliques. The skull is white with large hollow eye sockets and a stitched smile; the body, wings and limbs are black with white bone strips and round spinal nodules. Horns and dorsal spikes add character, and wings have bone ridges worked separately and sewn on.
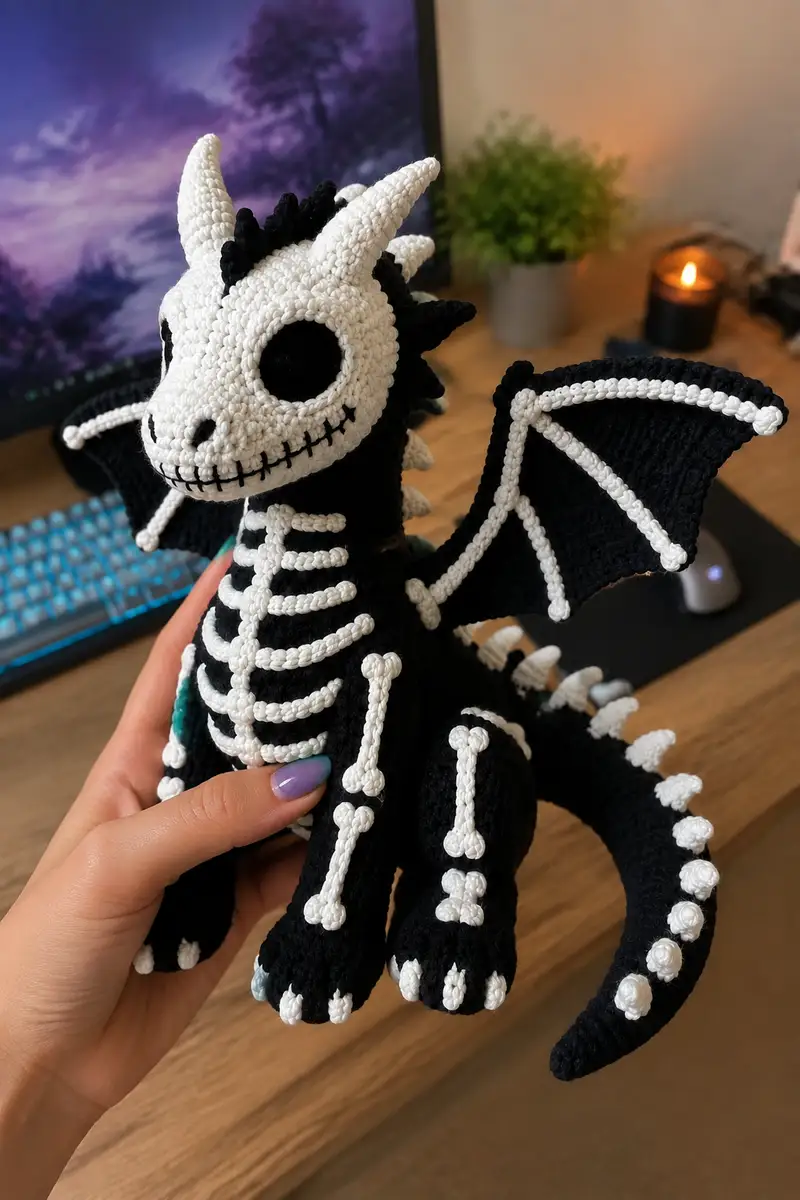
Big Skeleton Dragon with Bone Pattern and Stitched Smile Amigurumi Pattern crochet pattern - detailed view of completed project

The pattern is modular: head, body, legs, arms, wings, tail, horns and multiple bone appliques are made separately and assembled. It uses surface-crochet and sewn appliques to achieve the high-contrast skeleton look.

Why You'll Love This Big Skeleton Dragon with Bone Pattern and Stitched Smile Amigurumi Pattern

I love this pattern because it blends classic amigurumi shaping with bold graphic applique work to create a toy that looks sculptural and playful at once. The stitched smile, hollow eye sockets and spine knobbles give the dragon personality, while the bone detailing lets you practice surface techniques for striking results. I enjoy how customizable the bones and spikes are — you can make it spooky or sweet depending on colors and size.

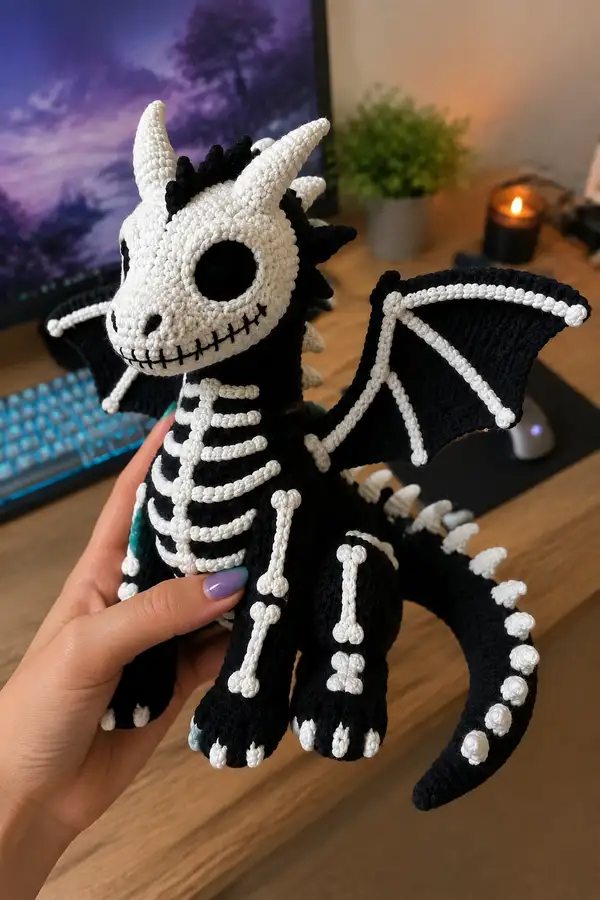
Big Skeleton Dragon with Bone Pattern and Stitched Smile Amigurumi Pattern step 1 - construction progress Big Skeleton Dragon with Bone Pattern and Stitched Smile Amigurumi Pattern step 2 - assembly progress Big Skeleton Dragon with Bone Pattern and Stitched Smile Amigurumi Pattern step 3 - details and accessories Big Skeleton Dragon with Bone Pattern and Stitched Smile Amigurumi Pattern step 4 - final assembly and finishing

Switch Things Up

I absolutely loved designing this pattern because it offers so many opportunities for creative customization while maintaining a strong structural base. You can make the bones crisp white like the sample, or swap to cream or gray for a more aged skeleton look.

I like to add wire only to wings when I want a poseable shape, and leave the legs un-wired for stability. Try changing the color of the eye sockets or using felt for a softer expression. You could also make a smaller or larger version by swapping yarn weights and hooks — just keep stitch math consistent.

I enjoy adding little accessories like a tiny crocheted scarf or a fabric patch to personalize the dragon. The applique ribs and bone strips are forgiving and fun to place differently for a unique personality each time.

Common Mistakes & How to Fix Them

✗ Skipping stitch markers at round starts can cause misaligned features and uneven shaping; always mark your first stitch of each round ✗ Inconsistent tension between rounds creates lumpy or uneven surfaces; practice maintaining steady, even tension throughout the entire project ✗ Not stuffing gradually as you work causes difficulty reaching inside later; stuff sections as you complete them for best results ✗ Attaching bone appliques before ensuring the final placement can result in crooked ribs; pin and check spacing before sewing ✗ Using a hook that is too large for amigurumi leaves holes where stuffing shows through; tighten up one hook size from the yarn recommendation ✗ Failing to secure safety eyes or using them on toys for small children can be unsafe; consider embroidered eyes for baby-safe versions
Big Skeleton Dragon with Bone Pattern and Stitched Smile Amigurumi Pattern

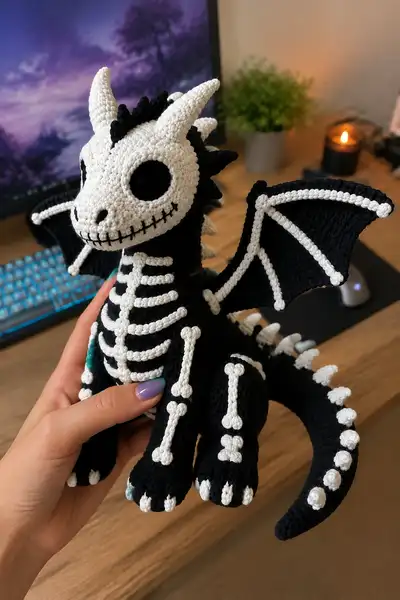
Create a dramatic black-and-white skeleton dragon amigurumi with a stitched Halloween smile, large hollow eye sockets, articulated wings and a row of bony spines. This pattern recreates the plush dragon shown, complete with rib bones, leg bones, tail knobbles and horned skull details. Detailed, friendly instructions guide you through shaping, stuffing and surface-bone appliques to make a striking finished piece.

Advanced 10-12 Hours

Materials Needed for Big Skeleton Dragon with Bone Pattern and Stitched Smile Amigurumi Pattern

— Main Fabric

  • 01
    Worsted weight yarn (#4), approximately 220-260g in main color (black)
  • 02
    Worsted weight yarn (#4), approximately 140-180g in accent color (white)
  • 03
    Small amount (10-20g) of teal or mint for claw/sole accent (optional)
  • 04
    Small scraps (5-10g) in black for embroidered mouth details (if using contrast thread)

— Tools Required

  • 01
    3.5mm (E) crochet hook for main work (use smaller 3.25mm if you crochet loosely)
  • 02
    3.0mm (D) hook for tighter details and bones (optional)
  • 03
    2.75mm (C) hook for horns/spikes (optional)
  • 04
    Safety eyes 12-14mm or black crochet discs or felt for hollow eyes (see Info on alternatives)
  • 05
    Polyester fiberfill stuffing (50-100g depending on final size)
  • 06
    Yarn needle for sewing pieces and weaving ends
  • 07
    Stitch markers (at least 4)
  • 08
    Scissors
  • 09
    Pins for assembly and positioning
  • 10
    Optional: 18-20 gauge floral wire for poseable wings/limbs
  • 11
    Optional: Fabric glue for securing small appliques or hiding knots

Progress Tracker

0% Complete

— Head (Skull) :

Round 1 :

6 sc in magic ring (6)

Round 2 :

6 inc (12)

Round 3 :

(1 sc, inc) x 6 (18)

Round 4 :

(2 sc, inc) x 6 (24)

Round 5 :

(3 sc, inc) x 6 (30)

Round 6 :

(4 sc, inc) x 6 (36)

Info :

Work head in white yarn to create the skull. Place stitch marker at the first stitch of every round to keep track. Tight stitches create a neat skull without stuffing showing.

Round 7 :

(5 sc, inc) x 6 (42)

Round 8 :

(6 sc, inc) x 6 (48)

Round 9 :

1 sc in each st (48)

Round 10 :

1 sc in each st (48)

Round 11 :

1 sc in each st (48)

Info :

Mark eye placement now: measure 11-13 stitches apart horizontally (approx) and place temporary safety eyes or pins between rounds 12-13. The shown skull has very large sockets; plan roughly 10-12 stitches for the eye opening circumference.

Round 12 :

1 sc in each st (48)

Round 13 :

1 sc in each st (48)

Info :

If you are cutting eye holes and lining with felt, mark the center of each socket at this stage. For safety eyes, insert them now before heavy stuffing; for crocheted black inner discs, leave until Round 23 to stitch them in place.

Round 14 :

(6 sc, dec) x 6 (42)

Round 15 :

(5 sc, dec) x 6 (36)

Round 16 :

(4 sc, dec) x 6 (30)

Info :

Begin stuffing the head moderately. Stuff firmly around the brow and cheeks but keep nose and snout area slightly softer to allow shaping when sewing muzzle pieces later.

Round 17 :

(3 sc, dec) x 6 (24)

Round 18 :

(2 sc, dec) x 6 (18)

Round 19 :

(1 sc, dec) x 6 (12)

Round 20 :

6 dec (6)

Info :

Fasten off leaving a long tail for sewing. Close the top of the skull by sewing through the front loops for a slightly flattened crown if desired. Finish stuffing and shape to a skull-like roundness.

— Skull Snout / Jaw (Make 1) :

Round 1 :

6 sc in magic ring (6)

Round 2 :

6 inc (12)

Round 3 :

(1 sc, inc) x 6 (18)

Round 4 :

(2 sc, inc) x 6 (24)

Round 5 :

1 sc in each st (24)

Round 6 :

1 sc in each st (24)

Round 7 :

(3 sc, dec) x 6 (18)

Round 8 :

(2 sc, dec) x 6 (12)

Round 9 :

1 sc in each st (12)

Info :

Stop stuffing slightly before closing; you will attach this piece to the skull front to create the pronounced snout. Leave a long tail for sewing. Shape so the snout projects about 2.5-3.5 cm (1-1.5 in) from skull base.

Round 10 :

1 sc in each st (12)

Round 11 :

6 dec (6). Fasten off leaving tail for sewing

— Eye Sockets (Make 2 inner discs in black) :

Round 1 :

6 sc in magic ring (6)

Round 2 :

6 inc (12)

Round 3 :

(1 sc, inc) x 6 (18)

Round 4 :

1 sc in each st (18). Fasten off leaving tail to sew into skull opening, or use a 12-14mm safety eye placed behind an opening created in rounds 12-14 of the skull.

Info :

For hollow-eye illusion: sew the black disc inside the eye opening flush to the skull front then add a narrow white crochet ring around (see Round 23 of skull ring below) to create the dark recessed look seen in the photo.

— Skull Rim / Eye Ring (Make 2) :

Round 1 :

6 sc in magic ring (6)

Round 2 :

6 inc (12)

Round 3 :

(1 sc, inc) x 6 (18). Do not fasten off. Use this small ring to stitch around the black disc, then tack the whole assembly into the skull opening for deep-set eyes.

Info :

Adjust the ring size to fit your eye disc and skull opening. If you prefer button or safety eyes, measure first and adapt the ring to cover the raw edges for a neat finish.

— Horns (Make 2 large horns and 1 small horn at back) :

Round 1 :

6 sc in magic ring (6)

Round 2 :

(1 sc, inc) x 3 (9)

Round 3 :

1 sc in each st (9)

Round 4 :

(2 sc, inc) x 3 (12)

Round 5 :

1 sc in each st (12)

Round 6 :

(3 sc, inc) x 3 (15)

Round 7 :

1 sc in each st (15)

Round 8 :

(3 sc, dec) x 3 (12)

Round 9 :

(2 sc, dec) x 3 (9)

Round 10 :

(1 sc, dec) x 3 (6)

Round 11 :

6 sc (6)

Round 12 :

6 sc. Fasten off leaving a long tail for sewing and shaping. Stuff lightly. For the small back horn, work rounds 1-8 only to create a stub horn.

— Dorsal Spikes (Make 9-11 small spikes) :

Round 1 :

4 sc in magic ring (4)

Round 2 :

4 sc (4)

Round 3 :

2 sc, inc, 1 sc (5)

Round 4 :

1 sc in each st (5). Fasten off leaving tail. Make at least 9 spikes; alternate colors black and white to create contrast on the neck as shown.

— Neck (Make 1) :

Round 1 :

6 sc in magic ring (6)

Round 2 :

6 inc (12)

Round 3 :

(1 sc, inc) x 6 (18)

Round 4 :

(2 sc, inc) x 6 (24)

Round 5 :

(3 sc, inc) x 6 (30)

Round 6-9 :

1 sc in each st (30)

Info :

Work neck in black. This long tubular neck will be joined to the body; keep it slightly flexible by stuffing lightly and adding stitch-marker rows to align when sewing to body (see assembly).

Round 10 :

(4 sc, dec) x 5 (25)

Round 11 :

1 sc in each st (25)

Round 12-16 :

1 sc in each st (25). Fasten off leaving long tail for attaching to skull and body base. Stuff lightly to keep shape.

— Body (Torso) :

Round 1 :

6 sc in magic ring (6)

Round 2 :

6 inc (12)

Round 3 :

(1 sc, inc) x 6 (18)

Round 4 :

(2 sc, inc) x 6 (24)

Round 5 :

(3 sc, inc) x 6 (30)

Round 6 :

(4 sc, inc) x 6 (36)

Round 7-10 :

1 sc in each st (36)

Info :

Work body in black. If you want a slightly longer torso, add extra even rounds here. The posture in the photo is upright; body is wider at the base and narrows slightly into the neck.

Round 11 :

(4 sc, dec) x 6 (30)

Round 12 :

1 sc in each st (30)

Round 13 :

(3 sc, dec) x 6 (24)

Round 14 :

1 sc in each st (24)

Round 15 :

(2 sc, dec) x 6 (18)

Info :

Begin moderate stuffing now, leaving the top opening wide enough to sew in the neck later and to attach limbs. Ensure the body bottom sits flat by stuffing firmly at the base.

Round 16 :

1 sc in each st (18)

Round 17 :

(1 sc, dec) x 6 (12)

Round 18 :

1 sc in each st (12)

Info :

Do not fasten off. This opening will be used to attach the tail and secure internal stuffing. Use a longer tail to sew on the neck and to close after assembly.

— Front Rib Bones (Make 6 strips) :

Round 1 :

6 sc in magic ring with white yarn (6)

Round 2 :

(1 sc, inc) x 3 (9)

Round 3 :

1 sc in each st (9)

Round 4 :

1 sc in each st (9). Fasten off leaving a long tail for sewing. Make 6 ribs with increasing lengths; increase rounds on ribs 2-6 by adding 2-4 even rounds each to create progressively longer ribs as shown.

— Leg Bones (Make 4 bone sticks for legs, 2 for arms) :

Round 1 :

6 sc in magic ring (6)

Round 2 :

6 inc (12)

Round 3-4 :

1 sc in each st (12)

Round 5 :

Fasten off leaving tail. These thin cylindrical bones will be placed on limbs. For joints, make small round knobs by making a short 6 sc tube and flattening one end then sewing into place.

— Arms (Make 2) :

Round 1 :

6 sc in magic ring (6)

Round 2 :

6 inc (12)

Round 3 :

(1 sc, inc) x 6 (18)

Round 4 :

(2 sc, inc) x 6 (24)

Round 5-7 :

1 sc in each st (24)

Info :

These are forelimbs that attach near the chest. Stuff the lowest part (hand/paw) quite firmly and the upper arm lightly so they bend naturally when attached. You can insert floral wire for poseability before stuffing upper arm.

Round 8 :

(3 sc, dec) x 6 (18)

Round 9 :

1 sc in each st (18)

Round 10 :

(2 sc, dec) x 6 (12)

Round 11 :

1 sc in each st (12)

Round 12 :

(1 sc, dec) x 4, 4 sc (8+4=12) — shape variation for elbow (12)

Round 13-15 :

1 sc in each st (12). Fasten off leaving long tail for sewing. Make small white toe/claw bits: 3 tiny cones (3 sc in MR, 2 rounds) to sew at the hand edge.

— Legs (Make 2) :

Round 1 :

6 sc in magic ring (6)

Round 2 :

6 inc (12)

Round 3 :

(1 sc, inc) x 6 (18)

Round 4 :

(2 sc, inc) x 6 (24)

Round 5 :

(3 sc, inc) x 6 (30)

Round 6-9 :

1 sc in each st (30)

Info :

These are hind legs and should be broader at the top and taper toward paw. Stuff foot firmly and leg lightly to create a stable seated base. Mark the front center to align bone appliques later.

Round 10 :

(4 sc, dec) x 5 (25)

Round 11 :

1 sc in each st (25)

Round 12 :

(3 sc, dec) x 5 (20)

Round 13 :

1 sc in each st (20)

Round 14 :

(2 sc, dec) x 5 (15)

Round 15 :

1 sc in each st (15)

Round 16 :

(1 sc, dec) x 5 (10)

Round 17 :

1 sc in each st (10)

Round 18 :

10 sc. Fasten off leaving long tail for sewing. Add toe/claw small white cones (3 per foot) by sewing small 3-stitch cones at the toe edge.

— Tail :

Round 1 :

6 sc in magic ring (6)

Round 2 :

6 inc (12)

Round 3 :

(1 sc, inc) x 6 (18)

Round 4-8 :

1 sc in each st (18)

Info :

Make tail long and slightly tapered. The photo shows a curving tail with white rounded nodules; add nodules after tail is completed by sewing small white cones at regular intervals.

Round 9 :

(1 sc, dec) x 6 (12)

Round 10-14 :

1 sc in each st (12). Stuff firmly then taper with decreases: Round 15: (1 sc, dec) x 4 (8). Round 16: 1 sc in each st (8). Round 17: 4 dec (4). Round 18: 4 sc. Fasten off leaving long tail for sewing to body.

— Tail Nodules (Make 10-12) :

Round 1 :

6 sc in magic ring (6)

Round 2 :

6 sc (6). Fasten off leaving tail. Sew these to the tail at even intervals to create round bony knobbles.

— Wing Main Panels (Make 2) :

Round 1 :

Ch 21, sc in 2nd ch from hook and across (20). Turn (20)

Round 2 :

Ch1, sc across (20)

Round 3 :

Ch1, 1 sc in first 3, hdc next 14, 1 sc in last 3 (20)

Round 4-10 :

1 sc in each st across (20). Fasten off leaving tail for sewing. Shape a triangular outer edge by decreasing one stitch at each end every other row if you prefer a tapered wing shape.

— Wing Bone Ridges (Make 4 per wing: 2 long, 2 short) :

Round 1 :

6 sc in magic ring (6)

Round 2 :

6 sc (6)

Round 3 :

1 sc in each st (6). Fasten off leaving long tail. For long ridge, make a long chain of sc strips by chaining to desired length then working sc in each chain back to create a flat ridge. Use white yarn and sew onto wing panel to create the skeleton wing bones visible in the photo.

— Wing Joints (Make 2 small ball joints per wing) :

Round 1 :

6 sc in magic ring (6)

Round 2 :

6 sc (6). Fasten off leaving tail. These are sewn to wing base and body to create a pivot point.

— Bone Applique: Rib Center Spine (Make 1 long central spine strip) :

Round 1 :

Ch 25, sc in 2nd ch from hook and across (24). Fasten off leaving long tail for sewing. Create a slight raised ridge by working a second row in FLO or by surface crochet after sewing in place.

— Bone Applique: Short Round Knobs for Bones (Make many) :

Round 1 :

6 sc in magic ring (6)

Round 2 :

6 sc (6). Fasten off leaving tail. Use these for joint knobs at shoulders, hips and on tail spikes.

Info :

Make all appliques in white yarn. Use a yarn needle to position and baste them in place with pins before sewing permanently. Surface-crochet around applique edges can help secure them neatly.

— Assembly Prep :

Info :

Pin the neck to the body opening aligning seams so dorsal spikes line along the center back. Pin wings symmetrically to the upper sides of the torso. Test leg and arm placement by holding pieces in place; the photo shows legs planted wide and arms on the chest area.

— Surface Embroidery (Stitched Smile & Nose) :

Info :

Use black embroidery yarn or thick thread to stitch vertical lines for the tooth-like smile and to outline nostrils. The shown smile is a horizontal chain of vertical whip-stitches along the lower snout junction. Secure ends at the inside with a knot or fabric glue.

— Final Finishing Rounds & Tips :

Info :

Weave in all ends and ensure every applique is sewn down with small invisible whip stitches. For extra durability sew through multiple stitches at high-stress points (leg base, wing base). Optionally add wire to wing ridges to pose them.

Assembly Instructions

  • Attach head to body by inserting neck portion into the body opening at body Rounds 17-18. Pin in place first, then sew securely using a whip stitch around the neck seam; make sure dorsal spikes line up along the center back.
  • Position wings on the upper sides of the torso at body Rounds 8-10. Sew wing joints and the wing base to the body using ladder stitch through the wing base and body stitches for an invisible seam. Reinforce with additional passes.
  • Attach arms to the sides of the chest between body Rounds 9-12, spacing them evenly. Sew through both arm and body using mattress or ladder stitch for stability, and stuff more around the seam if needed to hide gaps.
  • Attach legs to the bottom of the body at the base (body Rounds 1-6). Space them slightly apart for a seated pose. Sew each leg with multiple passes and add extra stitches in the center to prevent the toy from leaning.
  • Sew the snout piece to the front of the skull aligning with the skull lower rounds 14-16. Stitch the black inner discs into the eye sockets from behind, then sew the eye rings in place around the openings so the eyes sit recessed.
  • Position and sew horns and dorsal spikes along the neck and skull crown. Use the long tails to pull them tight and make small hidden stitches into the skull or neck to lock them in the desired orientation.
  • Sew all bone appliques—ribs, leg bones, toe claws, tail nodules—into the planned positions. Pin each applique first, check symmetry and then sew with close invisible stitches. Use small backstitches to make the bones lie flat against curves.
  • Secure any loose ends by weaving them through several stitches and trimming close to work. Optionally add a dab of fabric glue to knots to keep them from unravelling.

Important Notes

  • 💡Use stitch markers consistently at the beginning of each round to avoid counting errors and maintain proper shaping
  • 💡Stuff body parts gradually as you work rather than waiting until the end, especially for narrow openings like arms and legs
  • 💡For safety eyes, position and secure before stuffing head fully - they cannot be repositioned once locked in place
  • 💡Maintain consistent tension throughout the project; too tight creates stiff, small pieces, too loose creates floppy, holey fabric
  • 💡When sewing pieces together, use yarn slightly thinner than working yarn for neater, less visible seams
  • 💡Pin all pieces in position before final sewing to ensure proper placement and symmetry
  • 💡For amigurumi, work tightly enough that stuffing doesn't show through stitches
  • 💡Keep a row counter or notepad to track rounds, especially in long even-stitch sections

This skeleton dragon brings a spooky-cute energy to any shelf or Halloween display! Each round and applique brings the character to life with sculpted skull, hollow eye sockets and dramatic bone detailing. The project is satisfying to build and makes a unique handmade gift or decor piece. 🧶🎃✨

You ask,

we answer.

FAQs

What is the finished size of this amigurumi?

Based on the specified materials and 3.5mm hook, the finished dragon will measure approximately 28-35 cm (11-14 in) tall from feet to horn tips. Using thicker yarn and a larger hook will increase size proportionally.

Can I use different yarn weights for this pattern?

Yes! You can use any yarn weight, but adjust your hook size accordingly (generally 1-2 sizes smaller than the yarn recommendation for tight amigurumi fabric). Different weights will change the final size proportionally and may require more yarn.

Do I need to use safety eyes or can I embroider them?

Both options work beautifully! Safety eyes give a professional look but are small parts; embroidered or crocheted discs are safer for young children and create the recessed hollow-eye effect shown in the photos.

How much stuffing will I need?

For this size project, approximately 70-120 grams of polyester fiberfill should be sufficient depending on how firmly you stuff the pieces. Stuff feet firmly and torso moderately for a sturdy seated pose.

Can I make the arms and legs poseable?

Absolutely! Insert floral wire or pipe cleaners before stuffing limbs completely. Bend wire ends inward or wrap with tape to prevent poking, and continue stuffing around the wire for poseable limbs.

What if my stitch count is off?

If you notice a counting error, it's best to unravel back to where the count was correct and fix it; trying to compensate later often creates visible distortions. Using a stitch marker at round starts helps prevent counting mistakes.

How do I prevent holes when stuffing?

Work with tight, consistent tension throughout, using a hook slightly smaller than the yarn recommendation. When stuffing, distribute fiberfill in small increments rather than large lumps to avoid holes.

Can I customize colors and details?

Definitely! Change the color of bones, use variegated yarn for a stylized look, or add accessories like a tiny scarf or crown. The applique method makes color swaps and customizations easy to implement.