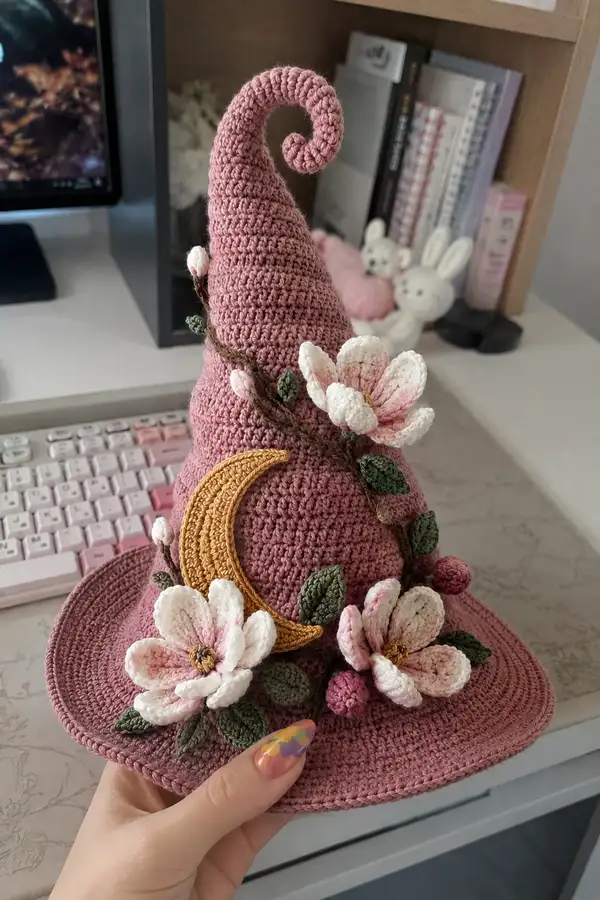
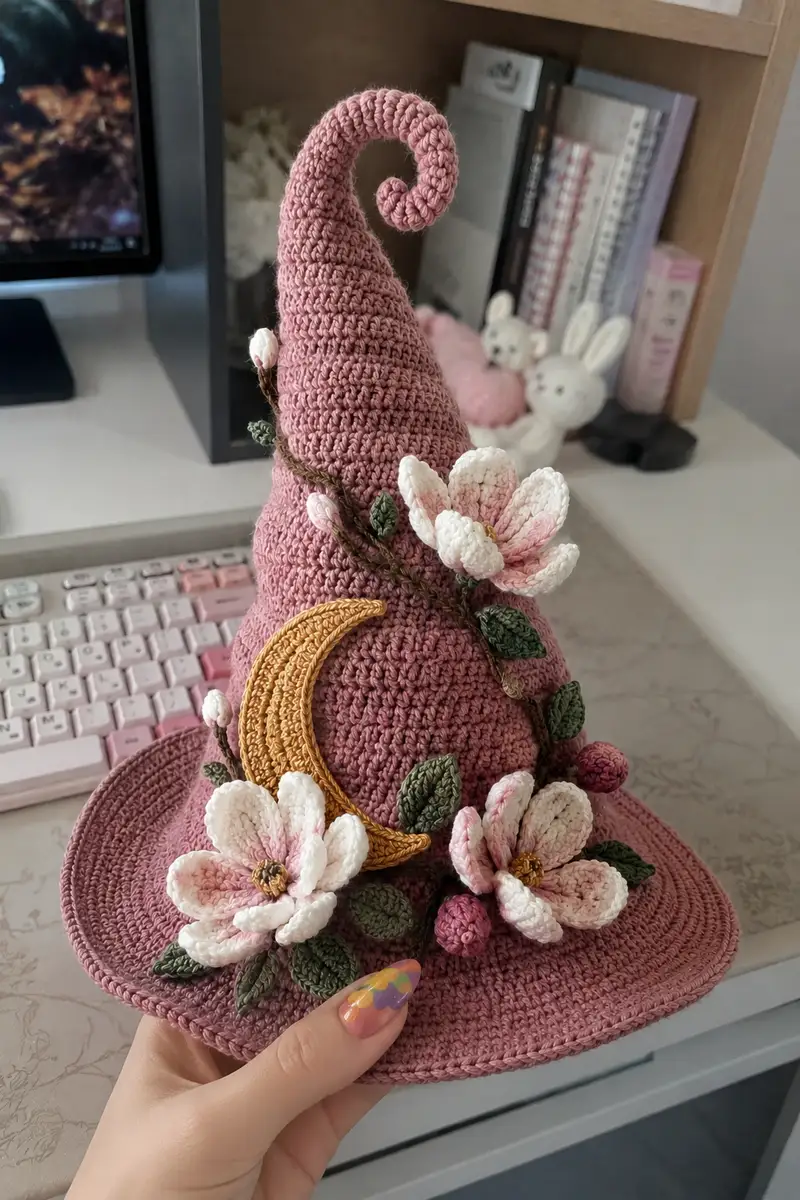
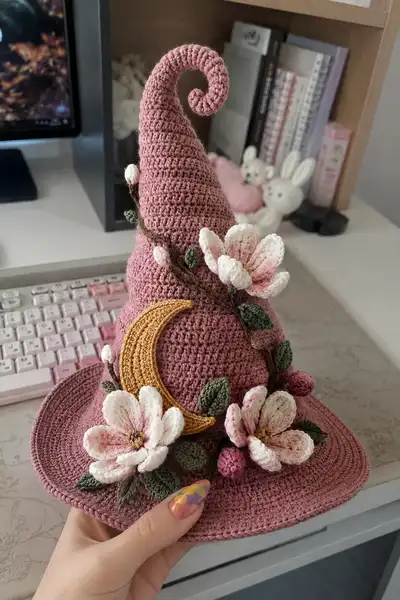
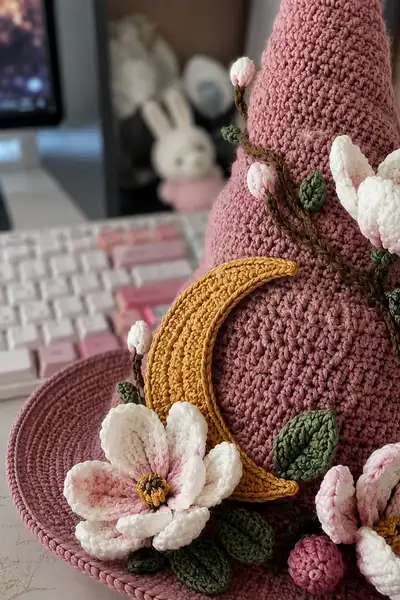
A tall, whimsical dusty rose witch hat crocheted with a spiral tip, wide brim and lavish magnolia blooms. Adorned with a gold crescent moon applique, delicate buds and leafy vines, this hat is a decorative wearable that doubles as a display piece. The textured stitches and sculpted petals give it a hand-crafted, storybook look perfect for seasonal decor, photos, or as a special gift. Uses layered floral appliques and a removable internal support option to keep the spiral curl in place.
Progress Tracker
0% Complete
— Main Crown (Build the rounded base) :
Round 1 :
6 sc in magic ring (6)
Round 3 :
(1 sc, 1 inc) x 6 (18)
Round 4 :
(2 sc, 1 inc) x 6 (24)
Round 5 :
(3 sc, 1 inc) x 6 (30)
Round 6 :
(4 sc, 1 inc) x 6 (36)
Round 7 :
(5 sc, 1 inc) x 6 (42)
Round 8 :
(6 sc, 1 inc) x 6 (48)
Round 9 :
(7 sc, 1 inc) x 6 (54)
Round 10 :
(8 sc, 1 inc) x 6 (60)
Round 11 :
(9 sc, 1 inc) x 6 (66)
Round 12 :
(10 sc, 1 inc) x 6 (72)
Info :
Use a 3.5mm hook and work tightly - this hat uses even rounds to form a structured crown. Place a stitch marker at the first stitch of each round to avoid losing the start in continuous-round construction.
Round 13-22 :
1 sc in each st (72)
Info :
Work these even rounds to build height for the lower bulbous portion of the crown. The pictured hat has a slightly rounded lower section before it tapers into the cone. If you want a taller bulb, add more even rounds here.
Round 23 :
(10 sc, 1 dec) x 6 (66)
Round 24 :
(9 sc, 1 dec) x 6 (60)
Info :
Begin gentle decreases to encourage the transition from the bulb into the cone shape. Start lightly - the spiral will be created later with an attached tip, but tapering here keeps a smooth silhouette.
Round 25 :
(8 sc, 1 dec) x 6 (54)
Round 26 :
(7 sc, 1 dec) x 6 (48)
Round 27 :
(6 sc, 1 dec) x 6 (42)
Round 28 :
1 sc in each st (42)
Round 29 :
1 sc in each st (42)
Info :
At the end of round 29 you have a narrow neck area ready to accept the spiral tip. If you want a removable spiral, leave this edge slightly larger and attach with a few rounds of slip-stitching when ready.
Round 30 :
(5 sc, 1 inc) x 6 (48)
Round 31-34 :
1 sc in each st (48)
Info :
These rounds re-expand slightly to create a graceful curve where the crown starts to slope upward. Switching to FLO for one round here (optional) will create a subtle ridge if you want more texture.
Round 35 :
1 sc BLO in each st (48)
Round 36-40 :
1 sc in each st (48)
Info :
Continue building the cone section with even rounds; the hat pictured uses many single-crochet rounds to create a dense, tidy surface. Begin checking placement for appliques and plan where the moon and flower cluster will sit (photo reference: the moon sits central front left).
— Spiral Tip (Make separately and attach) :
Round 1 :
6 sc in magic ring (6)
Round 3 :
(1 sc, 1 inc) x 6 (18)
Round 4 :
1 sc in each st (18)
Round 5 :
(2 sc, 1 inc) x 6 (24)
Round 6-9 :
1 sc in each st (24)
Info :
This spiral will be tapered by alternating rounds and decreasing rows later. If you plan to insert wire, thread or floral stem inside for a firm curl, run that wire down the center before closing the very tip, tucking ends inward and securing with tape.
Round 10 :
(2 sc, 1 dec) x 6 (18)
Round 11 :
(1 sc, 1 dec) x 6 (12)
Info :
Do not fasten off yet. Instead, continue crocheting in the round without joining to form a spiral tube: fold the small closed end flat and seam the inside with slip-stitches to close, then work a long tube from the wider opening so you can curl it into a spiral.
Round 13 :
Attach main dusty rose yarn to the wide opening and work 1 sc in each st around (6)
Round 14 :
(1 sc, 1 inc) x 3 (9)
Round 15 :
1 sc in each st (9)
Round 16 :
(2 sc, 1 inc) x 3 (12)
Round 17-26 :
1 sc in each st (12)
Info :
Work this long narrow tube until it reaches the length you want for the spiral. The pictured hat has a long tapered curl; this tube is later coiled tight at the tip. If using wire, slide wire into the tube before stuffing lightly. Keep tube lightly stuffed so it holds shape but remains pliable.
Round 27 :
(2 sc, 1 dec) x 3 (9)
Round 28 :
(1 sc, 1 dec) x 3 (6)
Round 29 :
1 sc in each st (6)
Round 30 :
Fasten off leaving long tail for sewing. Lightly stuff and curl tube from the closed end into a spiral; sew coil to itself at intervals to fix curl. Attach the base of the spiral to the crown neck opening using whip stitch; hide tail and weave in ends inside.
Info :
If you prefer the spiral permanently firm, insert a length of wire or lightly fill with pipe insulation (foam) inside the tube prior to coiling, then sew closed. For a softer curl, skip wire and rely on sewing stitches to hold the coil.
— Brim (Work flat in rounds for a clean wide brim) :
Round 1 :
Attach dusty rose to the bottom edge of crown. Ch 1, pick up 72 stitches around the base evenly with sc (72)
Round 2 :
(1 sc, 1 inc) x 24 (96)
Round 3 :
(2 sc, 1 inc) x 24 (120)
Round 4 :
(3 sc, 1 inc) x 24 (144)
Round 5 :
(4 sc, 1 inc) x 24 (168)
Info :
We increase very evenly so the brim lays flat. If you notice cupping or ruffling, adjust by adding or skipping a few increases in the next round to compensate. The brim in the image is wide but firm, achieved with many increases and a dense gauge.
Round 6 :
1 sc in each st (168)
Round 7 :
1 sc in each st (168)
Round 8 :
1 sc BLO in each st (168)
Round 9-12 :
1 sc in each st (168)
Info :
Working one round in BLO creates a subtle ridge for the brim's inner edge and helps the brim maintain its shape. If you want a slightly softer brim, omit the BLO round and simply work even sc rounds instead.
Round 13 :
(6 sc, 1 dec) x 24 (168 - shaping if desired) OR 1 sc in each st to keep even (168)
Round 14-20 :
1 sc in each st (168)
Info :
At rounds 14-20 you may choose to firm the brim by adding a row of slip-stitches on the very edge or use a slightly smaller hook for the last 2-3 rounds. This creates a crisp rim similar to the one in the photo.
Round 21 :
Optional edging: sc around with 3.0mm hook, working sc evenly to create a tighter rim (168)
Round 22 :
Fasten off and weave in ends. Block brim flat by gently wetting and pinning to shape, allow to dry fully.
— Crescent Moon Applique (Make 1) :
Round 1 :
With Gold/Mustard yarn, ch 7, join with sl st to form a small ring and work 6 sc in ring (6)
Round 2 :
(1 sc, 1 inc) x 3 (9)
Round 3 :
1 sc in each st (9)
Round 4 :
(2 sc, 1 inc) x 3 (12)
Round 5 :
1 sc in each st (12)
Round 6 :
Switch to 3.0mm hook: sc around to flatten and widen crescent edge (12)
Round 7 :
Work a second thin half-moon strip: ch 14, sc back along chain to create a thin curve. Shape by aligning and seaming the two pieces together using sl st to form a slightly raised crescent.
Round 8 :
Seam two layers together and finish by working a tight sc border around the outside of the crescent to create the raised look seen in the sample. Fasten off leaving long tail for sewing (approx 14-18 sts around edge).
Info :
The gold moon in the photo is slightly padded to add dimension. Add a little stuffing or a tiny scrap of felt between layers before seaming if you want it raised. Sew the moon to the crown with evenly spaced whip stitches and hide ends inside the hat.
— Large Magnolia Flower (Make 2 large flowers) :
Petal (Make 6 petals per flower) Round 1 :
Using White yarn, ch 6, sc in 2nd ch from hook and across (5 sc)
Petal Round 2 :
Ch 1, turn, sc in each st (5)
Petal Round 3 :
Ch 1, turn, (hdc, dc, hdc) across center two stitches to create a tall center cluster, sc in remaining sts (5)
Petal Round 4 :
Work 1 sc around the petal edge to create rounded shape, placing 2 sc at each corner to prevent curling (approx 9 sc)
Petal Round 5 :
Repeat round 3 with light pink yarn held together with white for subtle blush effect: in center area work (hdc, dc, hdc) and finish with sc on edges. Fasten off leaving long tail for sewing.
Info :
Each petal is worked flat and shaped with height in the middle. Use a 3.0mm hook on petals for tighter texture if your yarn tends to be loose. Block petals lightly to shape before assembly.
Flower Assembly Round 1 :
Sew 6 petals evenly around a central ring (ch 3, sl st to make a small loop) with petals overlapping slightly at base. Use long tails and whip stitch to secure bases together.
Flower Center :
With mustard/gold, make a small bobble: mr, 6 sc in ring (6), then (inc) x6 (12), sl st next 2 sts to make a raised center and fasten off. Sew center into middle of petals and add a few embroidery knots in brown to imitate stamen detail.
Info :
The large magnolias in the image have multiple layers for depth — make an inner layer of 6 petals and an outer layer of 6 slightly larger petals. Stagger layers when sewing for a natural look.
— Small Flower Buds (Make 3-4) :
Round 1 :
6 sc in magic ring (6)
Round 2 :
(1 sc, inc) x 3 (9)
Round 3 :
1 sc in each st (9)
Round 4 :
Fold bud and sc two sts together across the top to close. Fasten off leaving tail for sewing and attach to vine or directly to hat.
Info :
Stuff buds very lightly or leave unstuffed to maintain a tight round shape. Use deeper rose yarn for buds to mirror the pictured tonal cluster.
— Leaves (Make 10-14 assorted sizes) :
Round 1 :
Ch 8, sc in 2nd ch from hook, hdc, dc, hdc, sc, sl st to base to form one side of leaf (approx 6 stitches), rotate and work back along chain: sc, hdc, dc in center top, hdc, sc to base. (This creates a symmetric leaf)
Round 2 :
Optional: work a row of sl sts around leaf edge for firmness and a slightly raised center (use 3.0mm hook if you prefer a firm leaf)
Info :
Vary leaf sizes by changing chain length (6-12 chains) and make some leaves worked in BLO to create a folded vein effect. Use olive green yarn and mix slightly darker and lighter greens for realism.
— Twisted Vine / Stem (Make 2 lengths) :
Method :
Ch 60 (or desired length). Attach a second strand of yarn, turn and sc in each ch to create a cord. Alternatively, make an I-cord by chaining 6 and working continuous sc around the chain, pulling tight to twist as you go. When complete, slightly wet-block and twist into shape. Fasten off leaving long tails for sewing.
Info :
The vine in the photo is a twisted cord with small leaves and buds sewn on. Attach leaves with whip stitch and pin the vine in a spiral around the crown to mimic the arrangement. Use brown/olive two-tone for depth.
— Small Decorative Balls (Make 2-3) :
Round 1 :
6 sc in magic ring (6)
Round 3 :
1 sc in each st (12)
Round 4 :
(1 sc, dec) x 4 (8)
Round 5 :
4 dec (4) - fasten off and close. Stuff lightly before final decrease and sew into place on brim or among leaves.
Info :
These tiny balls are the little berries seen near the flowers. Use the same dusty rose or darker rose color to tie them into the composition.
— Petal and Leaf Finishing Rounds :
Round 1 :
Edge all petals and leaves with a single crochet border using a 3.0mm hook to define shapes and create structure for sewing (work 1 sc around each petal/leaf).
Round 2 :
Optional: Use a single strand of light pink held together with white on petal centers for subtle blush—work a few slip-stitches into the center top of petals to anchor shading yarn and weave in ends.
Info :
Blocking each petal and leaf lightly will allow you to shape bloom profiles before assembling. Pin petals over a rounded surface to curve them naturally and steam lightly from a distance.
— Assembly Prep Rounds and Tips :
Info :
Before attaching any appliques, arrange them on the hat and pin in place. The pictured arrangement places the gold moon slightly off-center on the front-left crown, with two large magnolias at the brim near the moon and a third smaller bloom higher on the crown toward the spiral. Vines wrap around and attach with small hidden stitches.
Info :
Sew all large components using long tails and a yarn needle. Use small whip stitches through the hat fabric and through the base of appliques; backstitch a few times for security. Hide ends on the inside of the hat or inside a leaf when possible for neatness.
Info :
When attaching the moon, sew around the inner curve first, then the outer edge, making sure to hold it slightly raised by adding a small dab of fiberfill or felt between moon layers to replicate the 3D look.
Info :
To position the spiral tip, use a handful of stitches around the base neck opening formed at crown round 29. Pin the spiral first, check the overall silhouette, then sew securely. Reinforce by running a second row of stitches if necessary.
— Final Edge and Support Options :
Info :
If you want a firmer brim that keeps a flat plane like the image, glue a thin plastic hat stiffener or cut a circle of heavy-weight interfacing and insert it between the brim rounds before finishing the last few rounds. Alternatively, use flexible craft wire sewn into the rim to maintain shape.
Info :
For a secure spiral wire: feed 18-22 gauge craft wire into the spiral tube leaving a few inches beyond the base. Bend the exposed wire into a small coil and sew that portion into the hat base to anchor it. Cap the wire ends or wrap in tape before inserting to avoid needle puncture or yarn abrasion.
Info :
Weave all remaining tails and trim. Give the hat a final steam-block to smooth fabric and set the brim and petals. Attach any optional decorative pins or ribbon if desired. Enjoy your finished hat!
This dusty rose spiral witch hat is a labor of love—each petal, leaf and stitch comes together to form a whimsical wearable sculpture. I adore the combination of the soft magnolias and the warm gold moon, which give the hat a romantic, storybook charm. Whether you wear it for photos or let it sit on a shelf as a seasonal accent, every inch rewards the time you put in. 🧶🌙 Enjoy making it and share your gorgeous creation with friends! ✨