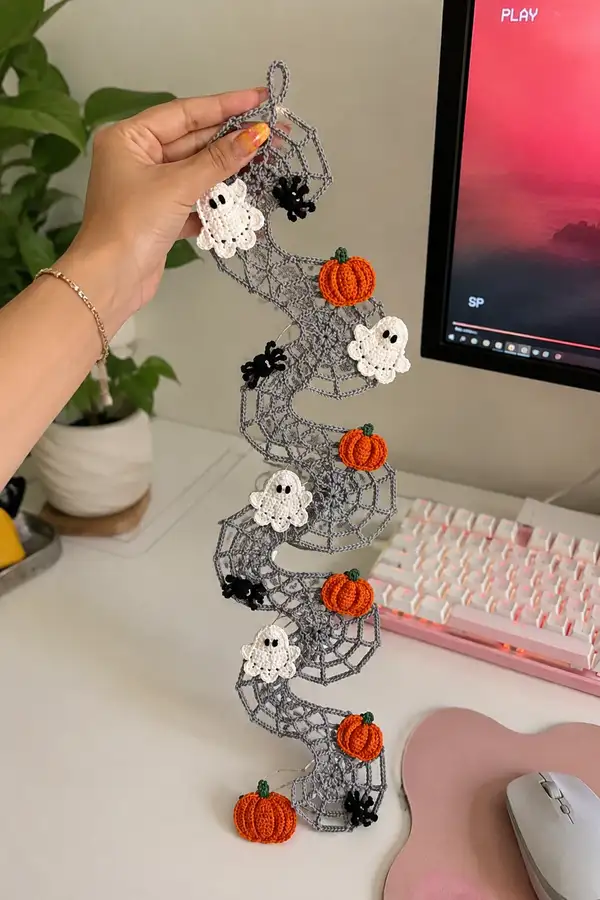
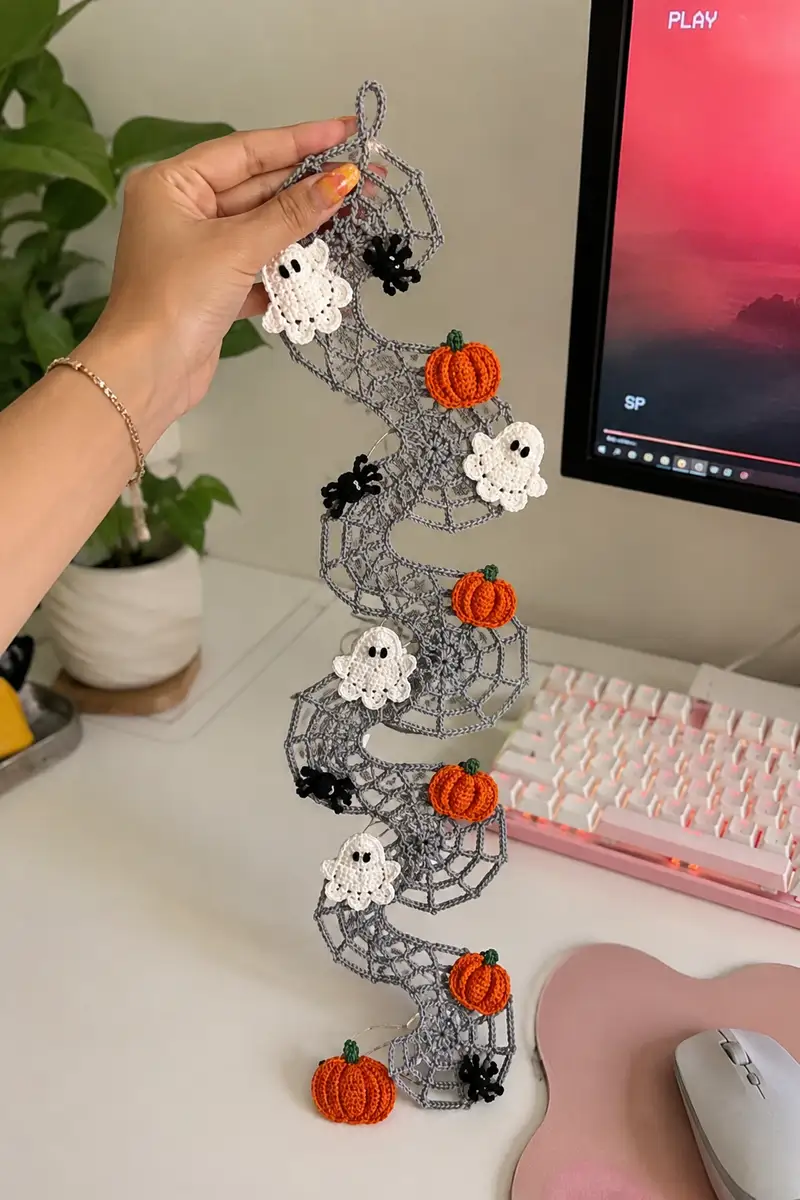
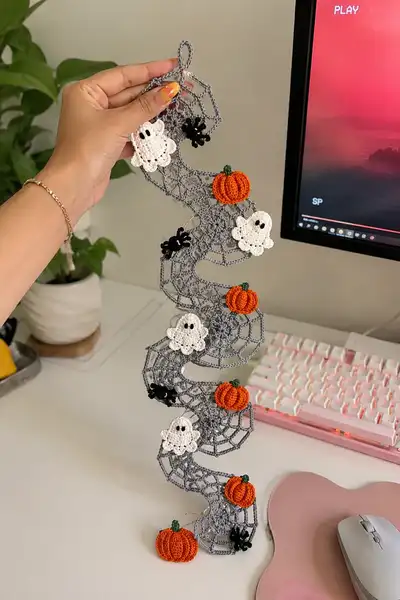
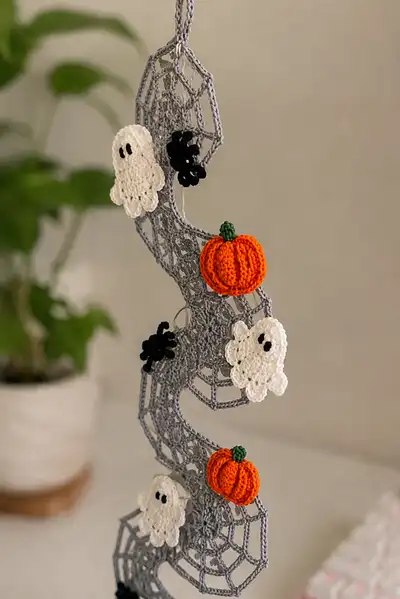
A whimsical spiral Halloween garland featuring a delicate grey spiderweb ribbon decorated with tiny white ghosts, ribbed orange pumpkins and little black spiders. This lightweight hanging decoration curls into an S-shaped spiral and works beautifully over a mantel, doorway, or as part of a seasonal vignette. The pattern uses simple motifs combined into an airy lace spiral — perfect for gifting or seasonal décor.
Progress Tracker
0% Complete
— Materials & Gauge :
Info :
Gauge is not critical for this decorative garland, but aim for a light lacy fabric. Using the recommended DK/sport-weight cotton and 3.0mm hook, the web spiral measures approximately 70-90cm long when relaxed (without additional S-shaping) and motifs are small: ghosts about 4-5cm wide, pumpkins about 3.5-4cm diameter. Adjust hook size to get similar motif sizes.
— Spiderweb Spiral Base :
Round 1 :
Make a loose foundation loop: ch 16, join with sl st to form a ring (16)
Round 2 :
Ch 3 (counts as first dc), *dc in next 3 ch, ch 3, skip 1 ch*; rep from * to * around, join with sl st to top of ch-3 (4 ch-3 arches, 16 dc total)
Round 3 :
Sl st to first ch-3 sp, ch 4 (counts as tr), tr in same sp, ch 2, (2 tr) in next ch-3 sp, ch 2; rep around to make 8 tr groups separated by ch-2 loops, join with sl st (16 tr written as 8 groups)
Info :
Keep the first couple rounds loose to give the lace good drape. If your first ring tightens, unravel and start with longer foundation chain for a wider center.
Round 4 :
Sl st to ch-2 sp, ch 3, 3 dc in same sp, ch 3, sc in next tr group top, ch 3; rep around making alternating 3-dc clusters and single sc anchors (repeat 8 times). Join with sl st (8 clusters + 8 sc anchors)
Round 5 :
Ch 1, sc evenly around each stitch and ch space (work 3 sc in each ch-3 space to build ring), join with sl st (approx 64 sc - depends on how many spaces created)
Round 6-8 :
1 sc in each st around (64) - 3 rounds to stabilize center
Info :
After round 8, you will create the first large openwork ring that will start the spiral arm. Place stitch markers at the positions where you want each outward arm to begin; in the pictured garland there are three main S-curve arms formed by alternating expansion zones and scaffold rows.
Round 9 :
*Ch 6, skip next 4 sc, sl st into next st (this builds an open arch), sc in next 6 st to anchor*; rep around to create 8 arches and anchor sections, join with sl st
Round 10 :
In each ch-6 arch: join, (sc, hdc, 3 dc, hdc, sc) all in arch; in each anchor 6-sc section: 1 sc per st. This forms petal-like open sections (approx 8 petals)
Round 11 :
Ch 5, sk to middle of next petal, sl st, ch 5, repeat between petals to form a larger web ring with 8 long loops; join with sl st
Round 12 :
In each ch-5 loop: (sc, ch 3, sc, ch 3, sc) to create small spider web points; in between loops work 1 sc per visible stitch to stabilize (approx stitch count varies by tension)
Info :
We will now begin the spiral shaping. Instead of working perfectly concentric rings, we will build elongated rings on alternating sides to create an S-shaped spiral. Mark the side that will curve outward for the next 6 rounds with a removable marker.
Round 13 :
Begin spiral arm shaping: On the marked side, ch 10 and form a long arch (sl st back at anchor). On the opposite side, ch 4 for a short arch. Continue alternating long (ch 10) and short (ch 4) arches around the ring, join. This creates alternating big and small openings (approx 8 long + 8 short loops)
Round 14 :
Work (sc, hdc, 3 dc, hdc, sc) in long arches; work (sc, 2 dc, sc) in short arches. In anchor zones work 1 sc per stitch to maintain structure. Join.
Round 15-16 :
Repeat Round 13-14 once to extend spiral arm length and add stability. After round 16 the lace should begin to show a gentle wave; if too flat, lengthen long arches by 2 chains each repeat.
Info :
At this point you have the first expanded ring with alternating long and short loops. Continue to build outward, adding two rounds of arches for each 'segment' of the S-curve. We will build six such segments to make a long spiral similar to the image.
Round 17 :
Ch 1, sc evenly around first expanded ring to lock stitches (approx 120 sc), join
Round 18 :
On side to curve outward: create 12-ch arch; opposite side: create 6-ch arch; alternate around to lengthen spiral on one side and shorten on the other. Join
Round 19 :
In 12-ch arch: (sc, hdc, 5 dc, hdc, sc); in 6-ch arch: (sc, 3 dc, sc); in anchors: 1 sc each. Join.
Round 20 :
Ch 1, sc around to stabilize (approx 150 sc). Use stitch markers to define the inside edge of the next spiral curve — these act as anchor points where motifs will be attached later.
Info :
You will repeat expansion segments so the spiral is long enough for multiple motifs. The garland pictured has five wave segments; make between four and six depending on desired length. Each two-round expansion above counts as one segment. After every 2-3 segments, add a stabilizing sc round to keep edges tidy.
Round 21-28 :
Repeat the sequence from Rounds 18-20 three times, increasing long arch chain counts gradually (12, 14, 16) as you move outward so the spiral gently swells. After each pair of construction rounds, add a tidy sc round to stabilize. After Round 28 you should have about 4 segments and approx 200-240 sc overall.
Round 29 :
Transition to outer edge shaping: ch 5, sl st into every 3rd sc (creates mesh border) all around the outer edge; join.
Round 30 :
Work shell scallop edges along the outermost openwork loops: *5 dc in next ch-5 sp, sl st in next anchor*; rep around to create decorative scalloped edge, join (approx 20 scallops)
Info :
To create the S-shaped spiral from this flat piece, gently fold and pin the spiral into an S shape on a blocking board. Using a few small stitches with matching grey yarn or very discreet invisible thread, tack key points of the inner rings to form the gathered S-curve. Alternatively, use a thin wire sewn along the back to hold the shape.
Round 31 :
Fasten off leaving long tail for hanging loop if you prefer to crochet a loop here. Secure tail and weave in ends. If adding lights, weave the light string along inner web spaces before final tacking.
Info :
If your web seems too floppy, rework with smaller hook or add a thin wire along the inner edge. The spiral should hang with three or four visible scalloped web pockets for motifs to attach like in the photo.
— Loop Hanger :
Round 1 :
At the top inner ring, join grey yarn with sl st, ch 30 (or length desired for hanging), fold and sc across the chain into base to make a flat loop: sc across both sides of chain (60 sc total over folded loop) if desired
Round 2 :
Sl st around loop edge to tidy; fasten off and weave in ends. This creates a strong braided-looking hanger at the top.
Info :
You may instead create a three-strand braid from three long ch-30 pieces and sew them to the top for a more decorative hanger. Make sure hanger is securely sewn and reinforced with several secure stitches.
— Ghost Motif (Make 4) :
Round 1 :
With white, mr, 6 sc in mr (6)
Round 3 :
(1 sc, inc) x 6 (18)
Round 4 :
(2 sc, inc) x 6 (24)
Round 5 :
(3 sc, inc) x 6 (30)
Round 6 :
(4 sc, inc) x 6 (36)
Round 7 :
(5 sc, inc) x 6 (42)
Round 8-9 :
1 sc in each st (42) - two rounds to flatten and build a small face area
Info :
Place safety eyes between Rounds 7 and 8 approximately 6-8 stitches apart; for small children's items I recommend embroidering the eyes instead. If using safety eyes, secure backs before proceeding.
Round 10 :
Begin scallop hem: *sc in next 4 st, (picot) ch 3, sl st into last ch to form small scallop, sc in next 4 st*; rep to make 7 small scallops across bottom edge (the scallop pattern adjusts to stitch count; you will place 6-7 scallops evenly around bottom). Fasten off leaving tail for sewing.
Round 11 :
With black yarn and tapestry needle, embroider two small oval eyes: make two vertical satin stitch ovals approx 3-4 stitches tall and 2 stitches wide. We worked eye placement earlier; embroider if not using safety eyes.
Info :
Each ghost should be slightly padded with a tiny bit of fiberfill behind the face area to give a slight puff; insert a small flat wisp of stuffing before finishing Round 10 scallops then close the gap with neat sewing stitches. Don't overstuff as they should remain flat enough to lay against web surface.
— Pumpkin Motif (Make 4) :
Round 1 :
With orange, mr, 6 sc in mr (6)
Round 3 :
(1 sc, inc) x 6 (18)
Round 4 :
(2 sc, inc) x 6 (24)
Round 5 :
(3 sc, inc) x 6 (30)
Round 6 :
(4 sc, inc) x 6 (36)
Round 7-9 :
1 sc in each st around (36) - these rounds form the belly of the pumpkin
Info :
Begin stuffing lightly at the end of Round 8. Use small amounts of fiberfill and shape the pumpkin as you go so the body is round but slightly flattened at top and bottom for a pumpkin look.
Round 10 :
(4 sc, dec) x 6 (30)
Round 11 :
(3 sc, dec) x 6 (24)
Round 12 :
(2 sc, dec) x 6 (18)
Round 13 :
(1 sc, dec) x 6 (12)
Round 14 :
6 dec (6) - leave long tail and close. Fasten off and secure. Finish stuffing as needed before final closure.
Round 15 :
Switch to a tapestry needle and with a length of orange yarn, run yarn from bottom center to top center through the middle of the pumpkin and pull gently to create a small dimple; repeat this process around the pumpkin to create 8 vertical ribs. Space ribs evenly by counting 8 even lines (every 4 to 5 stitches depending on final stitch count) and pulling gently to create signature pumpkin grooves. Tie ends firmly and hide tails inside.
Round 16 :
Stem: With green, mr, 6 sc in mr (6)
Round 18 :
1 sc in each st around for 2 rounds (12)
Round 19 :
Fold stem top slightly and sl st across to form a short tube; fasten off leaving long tail to sew stem to the top of pumpkin. Sew stem securely; hide ends inside pumpkin. Optional: add tiny tendril by chaining 8 and slip stitching along chain to curl, sew base to top.
Info :
When making ribs, you can also use surface slip stitch vertical lines from top to bottom for a raised effect; however the technique described (running yarn through center to create wedges) gives a soft, stuffed pumpkin look as pictured.
— Spider Motif (Make 4) :
Round 1 :
With black, mr, 6 sc in mr (6)
Round 3 :
1 sc in each st around (12)
Info :
Do not stuff — spiders are flat. Fasten off leaving long tail for sewing. You will add legs from the body with short chains.
Round 4 :
Attach black yarn at one side, ch 6, sl st back into same attachment point to make a small loop leg; repeat to create 4 legs on each side around the body (total 8 legs). Use tiny picot at tips for added detail: (ch 3, sl st into last ch).
Round 5 :
Arrange legs so spider sits naturally and trim any long tails. Sew spider to web using secure stitches through center only so legs remain free.
Info :
For slightly three-dimensional spiders, you can crochet a separate tiny abdomen (mr, 6 sc, inc to 12, 1 round even, close) and sew together with the head piece to form a two-section spider.
— Assembly of Motifs onto Web :
Info :
Layout the web spiral on a flat surface or pinned to a blocking board in the desired S-curve. Decide where motifs will be placed — the pictured garland alternates ghost, spider, pumpkin roughly every 10-14cm with three pumpkins and four ghosts along the length and spiders nestled in inward web pockets. Pin motifs to test spacing before sewing.
Round 1 :
Attach each ghost by sewing through the flat back of the motif to the web using matching white yarn. Use tiny whipstitches or mattress stitch around the perimeter, anchoring 6-8 evenly spaced attachment points so the ghost lays flat against the web.
Round 2 :
Sew each pumpkin by passing the yarn tail through the inner web strands and around several neighboring stitches; secure firmly with multiple passes to prevent pumpkins from swinging loose. Sew from bottom and through top under the stem to anchor.
Round 3 :
Sew spiders with black yarn through the central round only. Keep legs free by sewing only through the spider center; if desired tack one or two leg bases so spiders appear to cling to web loops.
Info :
Position pumpkins roughly on the outer arcs to show their round profiles and ghosts near flatter web areas to display scalloped hems. Spiders work well tucked into inward turns of the spiral.
Round 4 :
After sewing all motifs, weave in all tails and tidy the back. If using a light string, tuck the wire behind the web and glue or sew small loops to hold it in place. If you secured the spiral shape with invisible thread or thin wire, hide the ends inside a motif or weave them along back loops of the web.
Info :
Use small stashes of glue only as a last resort for tiny parts. Hand-sewing provides the cleanest, most repairable results. Block lightly if needed after assembly for best presentation.
— Optional Finishing Details :
Round 1 :
Add tiny bead eyes to spiders for a glossy look (sew beads on with thread from behind), or embroider smiles on ghosts for a friendly face. Add a light spray of starch or fabric stiffener to the web for a slightly firmer hanging shape.
Round 2 :
If you want to lengthen the garland, crochet additional spiral segments following the same expansion pattern and join them by slip-stitching or sewing the anchor rails together invisibly.
Info :
To change scale, use a heavier cotton yarn and a larger hook to make a chunkier garland, or thin thread and a smaller hook for a delicate miniature version. Maintain proportional changes across motifs for a cohesive result.
This grey spiderweb spiral garland blends delicate lacework with playful Halloween motifs for a charming, hand-crafted decoration. Each tiny ghost, pumpkin and spider adds personality while the airy web provides movement and visual interest. Gather family and friends to admire your seasonal creation — it's a beautiful piece to display or gift. 🧶🎃👻