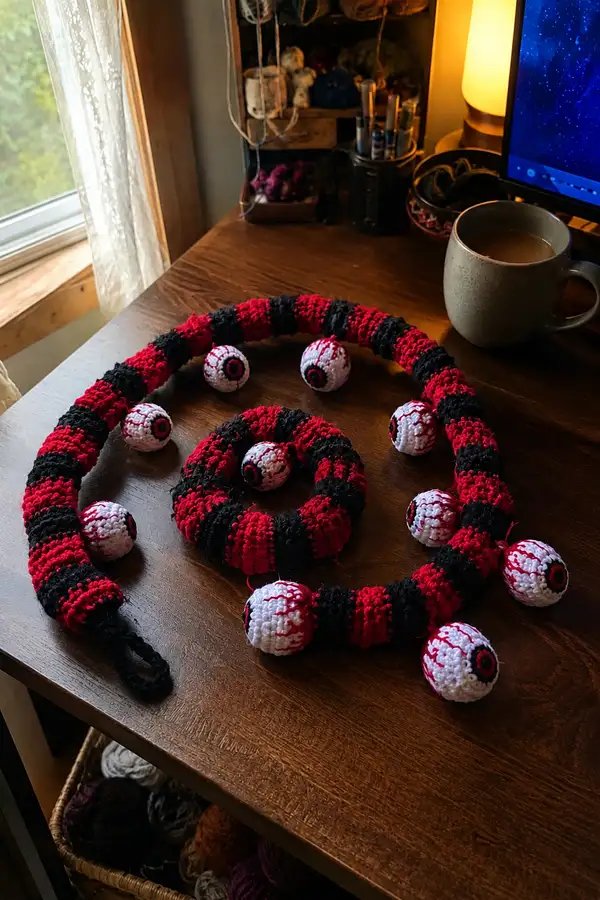
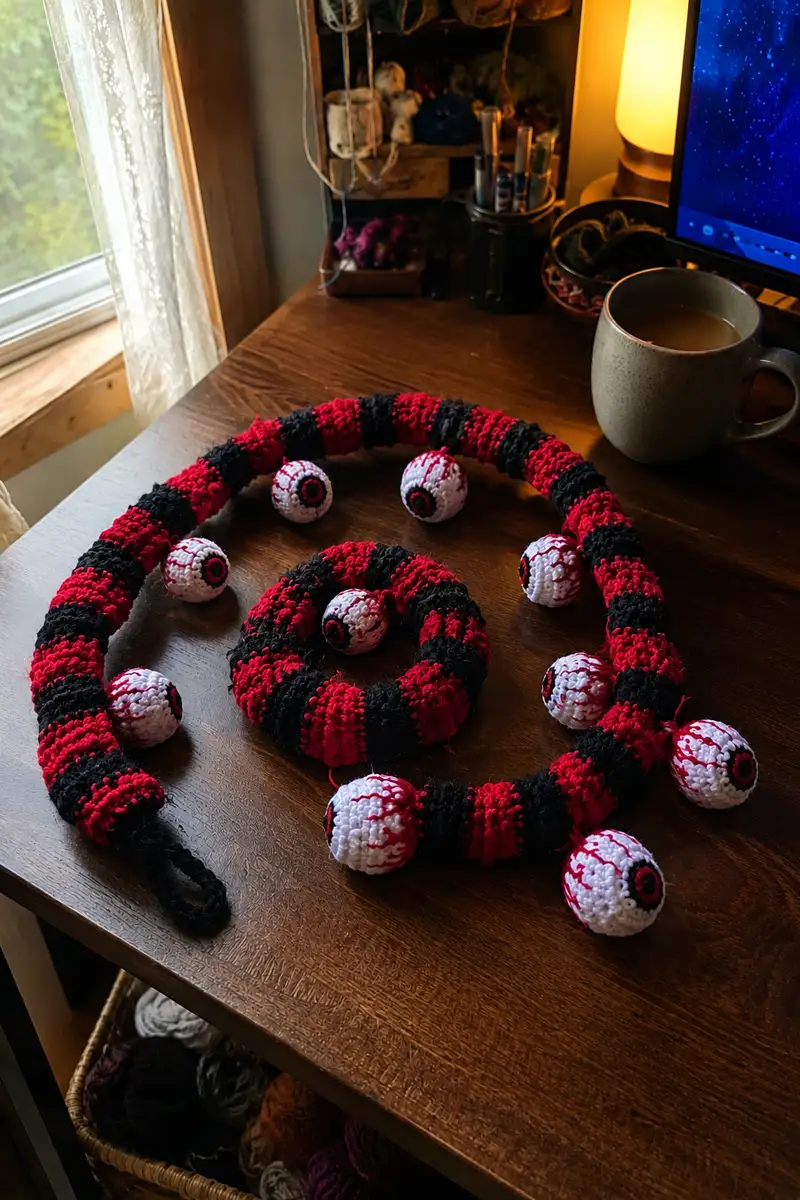
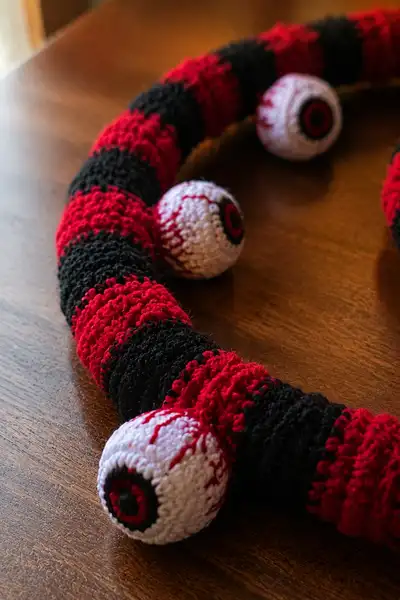
Create a spooky, flexible spiral garland wrapped in alternating red and black stripes and punctuated by creepy crocheted bloody eyeballs. This pattern shows how to crochet a padded, tubular garland around a rope core, make multiple amigurumi-style eyeballs with embroidered blood veins, and assemble them into a dramatic Halloween decoration. Finished garland coils and drapes beautifully for doorways, mantels, or party displays.
Progress Tracker
0% Complete
— Overview & Notes :
Info :
Pattern creates one padded spiral garland approximately 1.5-2 meters long (adjust core length to desired finished size) with 8 detachable crocheted eyeballs. Make adjustments to stripe width by changing the number of rounds per stripe. Work tightly so stuffing and rope core do not show through. Suggested finished eyeball diameter is approximately 2.0-2.5 inches (5-6.5cm) using worsted yarn and a 3.25-3.5mm hook.
Info :
Gauge is not critical for decorative garland, but for a snug tube around 8mm rope we target 30 sc around the core circumference. If your core is larger or smaller, adjust the increase rounds to reach a snug circumference (see Body Round 1-5 math).
— Materials Prep :
Info :
Cut core: choose braided rope, pipe insulation, or wrapped wire core. If using pipe insulation or floral wire, bend into a loose spiral shape to test drape. Important: test a 10cm sample of your stitch count around your chosen core to know how many stitches you need to cover the circumference snugly.
Info :
Prepare yarn tails: when switching colors for stripes plan to leave 6-10cm tails for weaving inside the tube, or carry the yarn up through the tube to the next color change. For clean stripes, fasten off and weave in ends on the inside.
— Eyeball (make 8) :
Round 1 :
6 sc in magic ring (6)
Round 3 :
(1 sc, 1 inc) x 6 (18)
Round 4 :
(2 sc, 1 inc) x 6 (24)
Round 5 :
(3 sc, 1 inc) x 6 (30)
Round 6 :
(4 sc, 1 inc) x 6 (36)
Round 7 :
(5 sc, 1 inc) x 6 (42)
Round 8 :
(6 sc, 1 inc) x 6 (48)
Info :
At this point the sphere diameter is at its maximum. If you prefer slightly larger eyeballs, continue increasing one more round: (7 sc, 1 inc) x 6 = 54. For this pattern we keep 48 to keep a compact, round eyeball that fits the garland size.
Round 9-20 :
1 sc in each st (48) — work 12 rounds even to build height (48)
Info :
Place pupil/iris discs after round 12 if you are using safety eyes or sewing on discs. To sew the pupil later, mark the center front with a removable stitch marker between rounds 11-13 so you have consistent placement for all eyeballs.
Round 21 :
(6 sc, 1 dec) x 6 (42)
Round 22 :
(5 sc, 1 dec) x 6 (36)
Info :
Begin stuffing: work in small amounts, pushing the fiberfill evenly into the sphere. Use a stuffing tool or blunt pencil to reach the center. Eyeballs should be firm but not rock-hard to maintain a smooth surface after sewing.
Round 23 :
(4 sc, 1 dec) x 6 (30)
Round 24 :
(3 sc, 1 dec) x 6 (24)
Round 25 :
(2 sc, 1 dec) x 6 (18)
Round 26 :
(1 sc, 1 dec) x 6 (12)
Info :
Fasten off leaving a 20-25cm tail. Thread tail through remaining 6 sts, pull tight to close, and weave tail inside sphere for a neat finish. Repeat to make 8 eyeballs total. Ensure each eye is stuffed to approximately the same firmess for consistency.
— Pupil & Iris Discs (make 8 sets) :
Disc - Pupil Round 1 :
Magic ring, 6 sc in ring (6)
Disc - Pupil Round 2 :
6 inc (12)
Disc - Pupil Round 3 :
(1 sc, inc) x 6 (18)
Info :
Make pupil disc in black yarn. Fasten off leaving a 15-20cm tail for sewing. For a slightly recessed pupil stitch the pupil into the center, flattening slightly before attaching iris.
Disc - Iris Round 1 :
Start with black pupil sewn to the center of a short white disc, then add red iris — in red yarn: mr, 6 sc in ring (6)
Disc - Iris Round 2 :
6 inc (12)
Disc - Iris Round 3 :
(1 sc, inc) x 6 (18) — fasten off, leave long tail for sewing onto eyeball
Info :
Sew pupil and iris on before final closing of the eyeball if easier: mark the front center (round 12), place iris/pupil discs on the marked spot and baste in place. Then finish closing the eyeball to secure discs neatly in position.
— Eyeball Embroidery (Blood Veins) :
Info :
Use embroidery floss or stranded yard in red (same red as stripes) to stitch blood veins. For a thicker, yarn-like vein use a single strand of worsted weight red yarn. Bring tail of floss/yarn out from a point around round 10-14 (midside) and work irregular straight stitches toward the pupil area. Make several branching stitches; vary length and thickness for realism. Knot securely inside the eyeball and weave ends in.
Info :
Tips: keep stitches slightly raised by using surface chain stitch or long straight stitches on top of the crocheted surface. Use small backstitches around the pupil edge to create a ragged wet look. If you want a glossy blood effect use a tiny amount of clear-drying craft glue over stitched veins and let dry thoroughly.
— Tube Garland Body (work over core) :
Round 1 :
6 sc in magic ring (6)
Round 3 :
(1 sc, inc) x 6 (18)
Round 4 :
(2 sc, inc) x 6 (24)
Round 5 :
(3 sc, inc) x 6 (30)
Info :
You should now have a comfortable circumference to cover an 8mm rope core. If your core is larger, add one more increase round: (4 sc, inc) x 6 = 36. For smaller cores reduce to 24-28 circumference. Keep this starting circumference consistent so stripes and eyeball placement match.
Info :
Insert core now: slide the rope or pipe insulation through the opening. If using pipe insulation, cut it slightly shorter than your final tube so ends won't poke out. If you want a poseable core, feed thin floral wire through the pipe insulation and fold ends inside the insulation to avoid sharp points.
Round 6-11 :
1 sc in each st (30) — work first red stripe; 6 rounds makes a bold stripe (30)
Info :
Color Change :
Change to Black yarn. Fasten off red or carry it inside the tube and work over the tail to hide it. If carrying, twist the two yarns every round inside the tube to prevent long floats from showing.
Round 12-17 :
1 sc in each st (30) — work first black stripe; 6 rounds (30)
Info :
Change back to Red yarn. You can vary stripe width if you prefer thinner or thicker stripes; for thinner stripes use 3 rounds per color instead of 6.
Round 18-23 :
1 sc in each st (30) — red stripe (30)
Round 24-29 :
1 sc in each st (30) — black stripe (30)
Info :
Continue alternating Red and Black in blocks of 6 rounds until you reach desired length. Keep count of stripe repetitions. For a dramatic garland like the sample, work 12 full stripes (each stripe is 6 rounds), which equals 12 x 6 = 72 rounds plus the first 5 shaping rounds = 77 rounds total for the tube body.
Round 30-35 :
1 sc in each st (30) — red (30)
Round 36-41 :
1 sc in each st (30) — black (30)
Round 42-47 :
1 sc in each st (30) — red (30)
Round 48-53 :
1 sc in each st (30) — black (30)
Round 54-59 :
1 sc in each st (30) — red (30)
Round 60-65 :
1 sc in each st (30) — black (30)
Round 66-71 :
1 sc in each st (30) — red (30)
Round 72-77 :
1 sc in each st (30) — black (30) — finish final stripe
Info :
Before finishing the final rounds, test the garland length and coil it loosely to ensure stripes line up visually when spiral is formed. Adjust rounds if you want an extra stripe of either color at the ends.
Round 78-80 :
1 sc in each st (30) — finishing section; work 2-3 rounds in black to finish end neatly (30)
Info :
Create a hanging loop at one end: with black yarn, ch 15 (or desired loop length), sl st to the base stitch to form a loop. Fasten off and weave tail inside the tube. If you prefer a hidden loop, insert a metal ring inside the tube and sew securely to the inner core at the end rounds.
Info :
Optional texture: to create a more 'ridged' spiral effect, work the last round of each stripe in BLO (back loops only). This produces a shallow ridge that reads as a spiral when wrapped.
— Finishing the Tube Ends :
Round 81 :
Work 1 sc in each st around last round then decrease 3-4 rounds if you want a tapered end: (3 sc, dec) x 6 => 24 then (2 sc, dec) x 6 => 18
Round 82 :
(2 sc, dec) x 6 (18)
Round 83 :
(1 sc, dec) x 6 (12)
Info :
Fasten off leaving a long tail. Thread tail through last stitches, pull tight to close, and weave the tail into the tube core. Trim any exposed rope if necessary. Repeat a small tapered finish at the other end if you prefer symmetrical ends.
— Small Spiral Coil (decorative center coil) :
Round 1 :
6 sc in magic ring (6)
Round 3 :
(1 sc, inc) x 6 (18)
Round 4-12 :
1 sc in each st (18) — continue for 9 rounds to create a short padded tube that you can coil and slip inside the outer garland if you like a double-spiral look (18)
Info :
Stuff lightly and sew coil closed at the ends, then place it at the center of the garland for display. This is optional; the sample photo shows a coiled inner spiral for a layered effect.
— Attachment Points for Eyeballs :
Info :
Plan eyeball placement along the tube before final assembly. In the sample, eyeballs are spaced roughly every 8-12 cm along the garland with groups of 1-3 eyeballs clustered at ends and some placed along the body. Using pins or safety pins insert them into the tube to mark positions (approx between stripe changes gives a nice rhythm).
Info :
For a more organic look, vary spacing and location (side, bottom, or top of the tube). Mark each position with a stitch marker on the tube so you can find exact sewing locations later.
— Sewing Eyeballs to Tube :
Info :
Sew eyeballs securely through both the tube cover and into the inner rope core if possible. Use the long tail left from closing each eyeball to whipstitch through the tube fabric and loop around the rope core to anchor. For a removable eye option, attach with a small button or snap inserted under the tube fabric and into the eye base.
Info :
To sew permanently: position the eyeball at the marked spot, weave the long tail through the bottom stitches of the eyeball and through the tube as though stitching a button. Make 8-12 passes through the rope core and tube to secure. Knot and weave ends into the tube interior.
— Optional: Internal Wiring for Poseable Garland :
Info :
If you want the garland to hold shapes, insert thin floral/aluminum wire along the rope core before closing ends. Make sure wire ends are folded back and wrapped with tape to avoid poking through yarn. Work wire in segments so the garland remains flexible at desired joints.
Info :
When using wire, stitch eyeballs extra securely as wire movement can add torque to attachment points. Consider adding an extra internal knot of yarn around the wire at each eyeball position before sewing the eyeball to help anchor it.
— Extra Decorative Options :
Info :
Add fringe, tassels, or small crocheted 'drips' (2-3 rounds of sc into chain tails) near some eyeballs for more gore. You can also add tiny safety lights inside hollow eyeballs (make a small opening and insert a micro LED) for illuminated effects — secure battery pack in the core near the hanging loop.
Info :
Use BLO on the transition rounds to emphasize stripes, or add a slip-stitch ridge in a third color for subtle detail. Embellish with small beads or sequins for a wet look around the pupil if desired.
— Care & Storage :
Info :
Spot clean with a damp cloth. Store loosely coiled in a box or hung to preserve shape. If you used pipe insulation, avoid high heat sources when storing to prevent warping.
This bold black and red spiral garland with bloody eyeballs is a dramatic, handmade accent that brings just the right spooky energy to your Halloween decor. Each crocheted eyeball and stripe is designed to pair structure with playful creepiness for a piece you'll love displaying every fall. Enjoy making it—it's a fun, theatrical project that packs so much personality into each stitch! 🧶👁️🩸