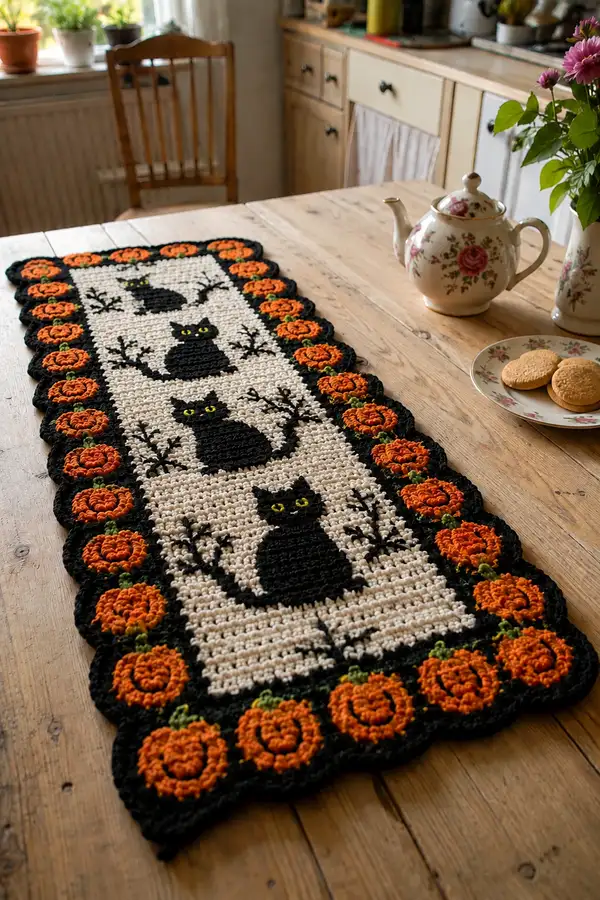
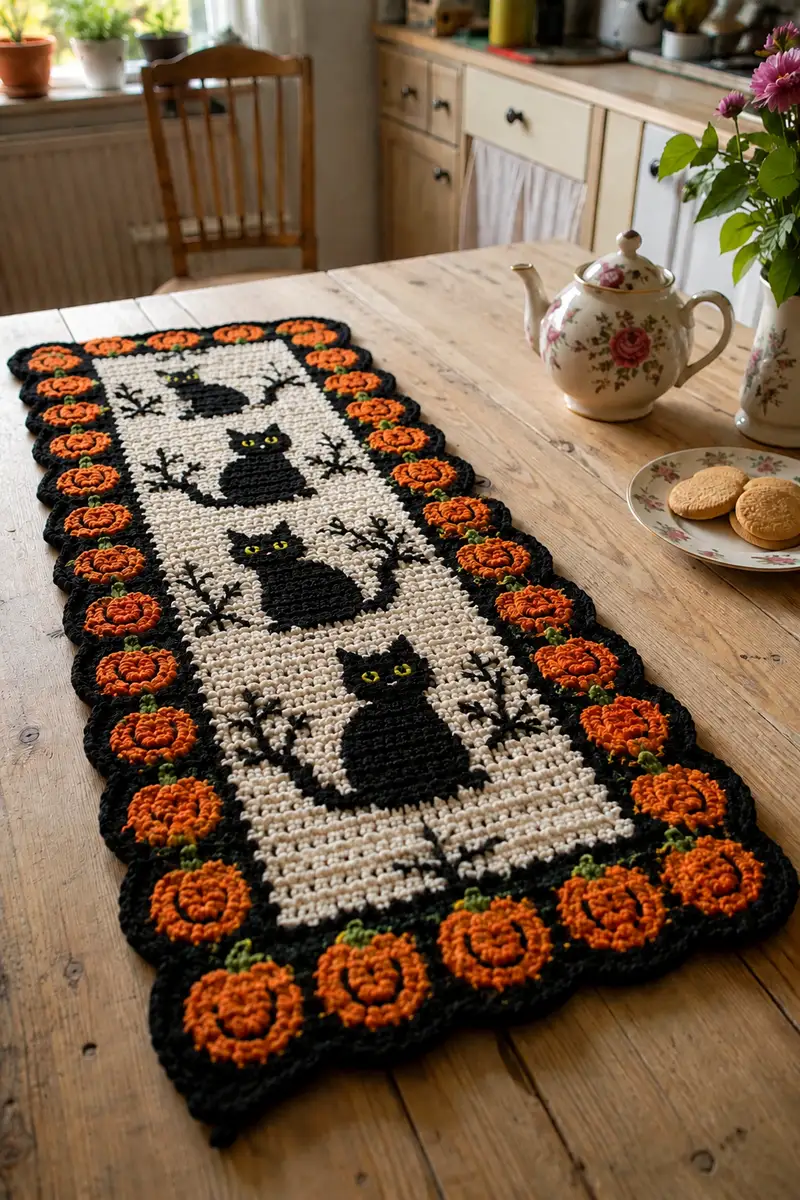
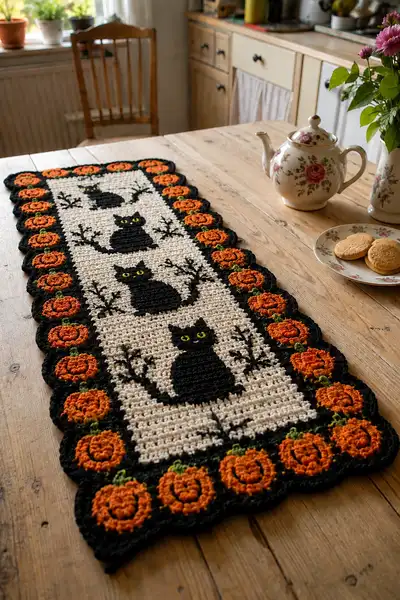
Create a charming Halloween table runner featuring three stacked black cat silhouettes framed by a scalloped border of raised orange pumpkins. This runner is worked in single crochet tapestry for the center panel and textured puff/bobble stitches for the pumpkins, creating bold contrast between the creamy background, black outlines and bright orange pumpkins. The finished piece adds a cozy vintage-meets-spooky touch to your autumn table setting. Detailed stitch counts and join-as-you-go border instructions make this rewarding for intermediate crocheters.
Progress Tracker
0% Complete
— Notes & Overview :
Info :
This runner is worked flat in rows for the center panel using tapestry single crochet to create the black cat silhouettes on a cream field. The centre panel remains a consistent width throughout. After the panel is completed we will work pumpkin motifs around the perimeter and join them as you go into a scalloped black edging. The pattern assumes US crochet terms and that you can read colorwork instructions tied to stitch counts. Tension should be relatively tight to prevent gaps in the cats and to make the pumpkins sit crisp on the edge.
Info :
Finished gauge: 16 sc x 20 rows = 4 in / 10 cm square worked in single crochet with 4.0 mm hook. The sample runner measures approximately 12 in (30 cm) wide x 40 in (100 cm) long. Adjust width by adding or subtracting multiples of the colorwork repeat (see Notes on Width) and adjust the number of center rows to change length.
Info :
Color shorthand used in the round-by-round instructions: BG = Background (Ivory/Cream), BLK = Black (cats and border), ORG = Orange (pumpkins), GRN = Green (stems). Carry unused yarn along WS when possible; or fasten off and rejoin for neat edges. Work each row turning at ends, starting chain does not count as a stitch unless specified.
— Materials & Prep :
Info :
Chain foundation: Pattern uses a starting chain of 41 stitches to create a working width of 40 sc. This width conveniently allows a centered cat silhouette of 18 stitches (adjustable). For a wider runner, increase chain in multiples of 2 to retain centering symmetry.
Round 1 :
Ch 41, sc in 2nd ch from hook and across (40) — This creates Row 1 of the center panel in BG. Turn.
Round 2 :
1 sc in each st (40) — Row 2 BG. Turn.
Round 3-6 :
1 sc in each st (40) — Continue in BG to create a bottom margin for the first cat. These rows form a neat cream border at the bottom of the runner. Place a stitch marker at the center stitch (st 20) to help locate centered motifs.
Info :
We will now work the first cat silhouette (18 rows tall) using tapestry crocheting: carry BG and BLK along the WS and work each sc in the appropriate color. When carrying yarn, catch the unused color under the working loop to avoid long floats showing at the RS.
— Cat Silhouette Template (repeat for 3 cats) :
Info :
Cat silhouette dimensions: 18 rows tall x 18 stitches wide, centered on a 40-st width. Cat occupies stitches 12 through 29 (inclusive) with BG on both sides. The following 18-row sequence is designed to produce a rounded cat body, tail and ears. Follow the exact BLK/BG counts per row. All rows total 40 stitches.
Round 7 :
11 BG, 18 BLK, 11 BG (40) — This begins the cat base (Row 1 of cat).
Round 8 :
10 BG, 20 BLK, 10 BG (40) — Shape broadens slightly. Carry BG and BLK accordingly.
Round 9 :
9 BG, 22 BLK, 9 BG (40)
Round 10 :
8 BG, 24 BLK, 8 BG (40)
Info :
Rows 7-10 create the rounded lower body of the cat. Maintain even tension; if floats appear on the RS, drop and rejoin colors more frequently or use bobbins.
Round 11 :
8 BG, 24 BLK, 8 BG (40) — continue straight to build body height.
Round 12 :
8 BG, 24 BLK, 8 BG (40)
Round 13 :
9 BG, 22 BLK, 9 BG (40) — start slight taper for waist.
Round 14 :
10 BG, 20 BLK, 10 BG (40)
Round 15 :
11 BG, 18 BLK, 11 BG (40)
Round 16 :
12 BG, 16 BLK, 12 BG (40)
Info :
Rows 13-16 begin shaping the neck and adding space for the head/ears silhouette. Keep stitches neat where BLK and BG meet to preserve a crisp outline.
Round 17 :
13 BG, 14 BLK, 13 BG (40)
Round 18 :
13 BG, 14 BLK, 13 BG (40) — this row can include small ear tip shaping within the BLK region on the RS; we will refine ear points with two upper rows.
Round 19 :
14 BG, 12 BLK, 14 BG (40) — taper for collars/neck.
Round 20 :
15 BG, 10 BLK, 15 BG (40)
Round 21 :
16 BG, 8 BLK, 16 BG (40) — narrow neck; the ears will occupy the BLK stitches in the next rows.
Info :
Now we will form two ear points over the next two rows by splitting the BLK section into two small BLK blocks separated by a single BG to create ear notch definition on the RS.
Round 22 :
16 BG, 3 BLK, 1 BG, 4 BLK, 16 BG (40) — left ear (3 BLK), ear notch (1 BG), right ear (4 BLK). Adjust slightly if you prefer symmetrical ears (swap counts to 4 and 3).
Round 23 :
16 BG, 2 BLK, 3 BG, 2 BLK, 17 BG (40) — create sharper ear tips and finish cat head shaping.
Info :
Embroider small yellow eyes centered roughly two rows above the neck: attach yellow yarn on RS, embroider two small eye shapes into the BLK area spaced about 4-6 stitches apart depending on preference (for our centering place them on Row 18 around st 17-24). Use small satin stitch or French knot technique for bright eyes.
Round 24-25 :
1 sc in each st BG (40) — spacer rows following cat silhouette. These rows separate the cats visually and give breathing room for the border.
Info :
Repeat Rows 7-23 for the second and third cat silhouettes by following the exact BLK/BG stitch counts shown above. For each cat, maintain the same centering (stitches 12-29). Below we list the row numbers to make placement clear.
Round 26-43 :
Repeat Cat Silhouette Sequence (Rows 7-23) for Cat 2 across the next 18 rows. Maintain exact stitch counts and embroider eyes on the RS as described. After finishing Row 43, work two BG spacer rows (44-45).
Round 46-63 :
Repeat Cat Silhouette Sequence (Rows 7-23) for Cat 3 for rows 46-63. After Row 63, work BG spacer rows 64-66.
Info :
If you prefer the cats to vary slightly, you can mirror one silhouette by swapping the ear shaping rows differences. The central cat in the sample has slightly larger eyes and a rounded belly (use Row 9-12 wider counts) — adjust those rows if you want variation.
Round 64-88 :
Continue in BG 1 sc each st (40) for 25 rows — extended top margin and filler rows to reach desired length. These rows help center the visual weight of the runner in relation to the border. Work until you reach Row 88 (final center panel row).
Info :
At the end of the center panel, fasten off BG leaving a long tail (approx 24-30 in/60-75 cm) to use later to sew the first row of pumpkins or to anchor the join-as-you-go. The panel can be blocked lightly at this point to square the edges.
— Pumpkin Motif (Make 22 — join-as-you-go) :
Info :
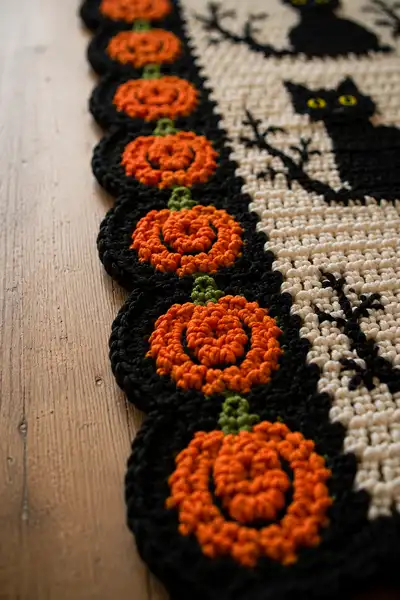
The pumpkin motif is worked in rounds and later attached around the panel edge with the black scalloped join. Each pumpkin is worked flat in the round and uses puff or bobble stitches for a raised textured pumpkin body. The sample has 22 pumpkins spaced evenly (11 on each long side) with single pumpkins on short ends to preserve corner rounding. Measurements: completed pumpkin motif diameter is approx 2.5 in / 6.5 cm.
Round P1 :
With ORG, ch 3, sl st to form a small ring, ch 1, work 8 sc into ring. Join with sl st to first sc. (8)
Round P2 :
Ch 1, (inc) x 8 around — 16 sc. Join. (16)
Round P3 :
Ch 1, sc in next st, *puff in next st, sc in next st* rep around (16 sts total, 8 puff stitches separated by sc). Join. (16)
Info :
Puff stitch: Yarn over, insert hook in indicated st, yarn over and pull up loop (3 loops on hook), yarn over, insert hook in same st, yarn over and pull up loop (5 loops), yarn over, insert hook third time in same st and pull up loop (7 loops), yarn over and pull through all 7 loops, ch 1 to close the puff. The puff counts as a single stitch for counts above.
Round P4 :
Ch 1, *sc in next sc, puff in next puff* rep around, join. This creates layered ridges; total stitch count remains 16 (8 sc + 8 puff/cluster). (16)
Round P5 :
Switch to ORG if needed and work 1 sc in each st BLO to create a flattened outer ridge: 16 sc BLO. Join. (16)
Round P6 :
Change to BLK for the pumpkin border rim: ch 1, (2 sc, sc in next) around increasing slightly to shape the pumpkin round edge — work pattern (sc, inc) x 8 to create 24 sts. Join. (24)
Info :
Switch to GRN and work a small stem: ch 4, sl st into center top of pumpkin or make 3 sc chain for a stem and attach with sl st. For a thicker stem, chain 5 and work back along chain with sc.)
Round P7 :
Fasten off ORG/GRN leaving tail for sewing if you will join motifs later. If joining-as-you-go attach at this round by slip-stitching to outer edge of center panel at spacing points described in the join section. Each completed pumpkin will sit on top of the BLK scallop so join carefully to ensure pumpkin center sits inside scallop curve.
Info :
Make 22 pumpkin motifs total (count and layout: 11 along each long side plus 1 at each short end if desired). Pin them around the panel spacing them evenly before joining. Use measuring tape to divide panel perimeter into equal intervals.
— Join-As-You-Go Pumpkin Placement :
Info :
Work the outer scalloped black border in rounds and attach pumpkins into scallops as you form the border. Alternatively, sew pumpkins onto the finished black scallop using the long tail and whip stitch. Joining-as-you-go creates a cleaner edge and saves sewing later.
Round J1 :
With BLK along RS at the edge of the center panel, join BLK with sl st anywhere on side edge. Ch 1, work 1 sc in each of the next 4 sts evenly, ch 2, skip 2 sts, 1 sc in each of the next 4 sts, ch 2 — repeat along the row to form anchor loops for scallops. Turn at corners and work anchor loops around short ends with slightly smaller spacing to keep corners neat. These small ch-2 spaces will allow scallops to be shaped and pumpkins to be attached.
Info :
At each anchor ch-2 loop where a pumpkin will be placed, align the pumpkin motif center with the loop and sl st through the BLK rim of the pumpkin motif and then into the ch-2 loop. Continue to build scallop shells over the rim to surround the pumpkin creating an even scalloped frame.
— Scalloped Shell Edge (Black) :
Round S1 :
With BLK, ch 1 from anchor loop, *work 5 dc into the ch-2 loop, sl st into next anchor sc* rep around. This creates bold scallops that will cradle each pumpkin. Work evenly so scallops line up with pumpkin positions. (number of shells = number of pumpkins + corner shells)
Info :
If your pumpkins have been joined-as-you-go, make sure to sl st through both pumpkin rim and panel anchor so pumpkins are secured. If you are sewing pumpkins later, create the full scalloped rim and then whip-stitch pumpkins into the center of each scallop.
Round S2 :
Work an additional round in BLK to deepen the scallop: sl st into middle dc of each scallop, ch 1, 7 sc into same space, sl st into next scallop center — this creates a deeper black border and adds stability. Fasten off and weave ends thoroughly on WS. (Estimated 7 sc per scallop x number scallops)
Info :
For extra neatness, work a small slip-stitch ridge along the seam where scallops meet the center panel: insert hook into side panel stitches and sl st with BLK every 2-3 sts before working scallop shells.
— Pumpkin Attachment & Stem Embroidery :
Info :
Sew pumpkin motifs to the scalloped shells by stitching through the BLK rim round (Round P6) into the scallop center. Use the ORG long tail and a yarn needle. For the stem leave a small GRN loop at the top and tack down the base of the loop to the pumpkin center. Add small French knot vine accents with GRN between scallops if desired.
Round ST1 :
With GRN, embroider small 3-4 stitch leaves between pairs of pumpkins along the long sides: attach GRN at the WS, bring to RS between pumpkins and embroider 3 chain-stems of 3 sc-length then secure on WS. Fasten off and weave ends.
Info :
The pumpkins pictured have very textured concentric rings. To mimic this, you can work multiple puff rounds (P3-P4) alternating directions to build concentric puff rings. Work tightly to keep puff height consistent and stitch density even.
— Final Blocking and Finishing :
Info :
Lightly block the runner to flatten and set edges. Pin scallops evenly and steam or wet block according to yarn care. Press carefully from WS if your yarn allows. Trimming stray fibers and weaving in ends will make the border crisp.
Round F1 :
Weave in all loose ends using a yarn needle, especially where pumpkin rims meet scallops and where color changes occur in the tapestry sections. Tie tidy knots only when necessary; prefer weaving for a cleaner finish.
Info :
Optional: You can stiffen the pumpkins slightly by light starch or a spray fabric stiffener to help them hold shape on the table when the runner is flat and unattended.
Round F2 :
Final inspection: confirm pumpkin spacing is even, that no floats are visible on RS, and that embroidery eyes and branches are symmetrical. Make minor corrections before final blocking.
Info :
Stitch counts: The center panel maintains 40 sc per row. Cat silhouette rows substitute BG for BLK in the counts shown so total remains 40. Pumpkin motifs have 16-24 sts depending on puff rounds and BLK rim. Scallops are built from BLK shells (5 dc or 7 sc depending on round) repeated across the panel perimeter.
Info :
Techniques summary: tapestry single crochet for center panel, puff/bobble cluster stitches for pumpkins, join-as-you-go (JAYG) for motifs, scalloped shell edging, simple surface embroidery for stems and eyes. Use consistent marker placement to keep long runs straight and symmetrical.
This Halloween runner brings a perfect mix of texture and graphic contrast to your table — the bold black cats against a creamy background are beautifully framed by puffed orange pumpkins that pop right off the scalloped edge. Every stitch builds a cozy, seasonal scene that feels handmade and heirloom-ready. I hope you enjoy working the tapestry center and the tactile pumpkin border as much as I did designing it! 🎃🖤