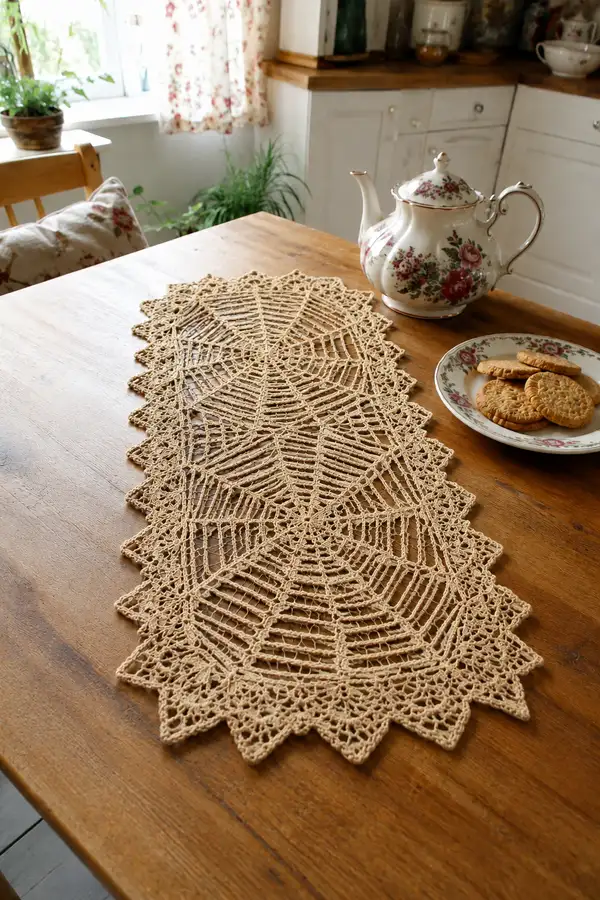
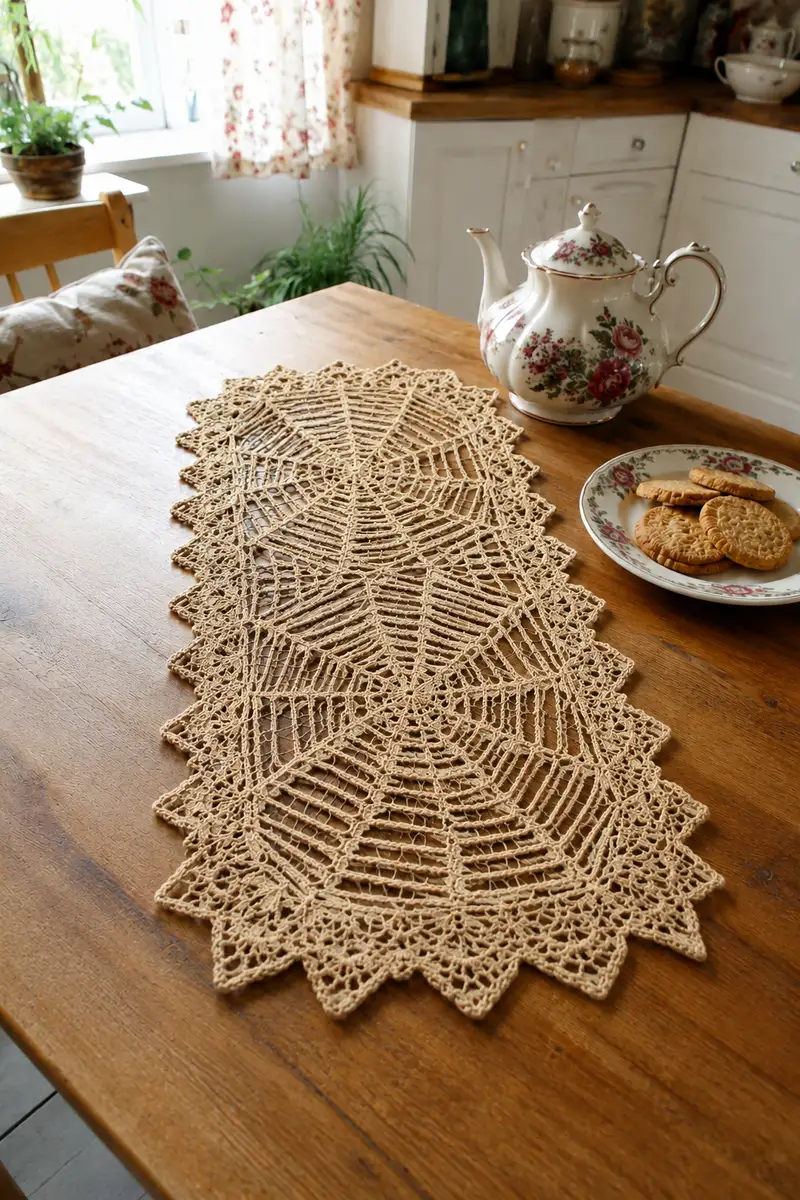
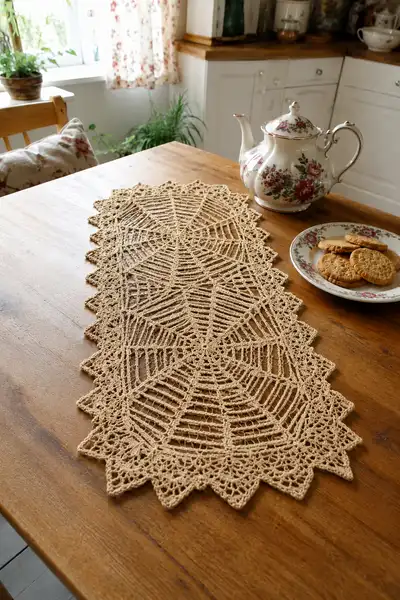
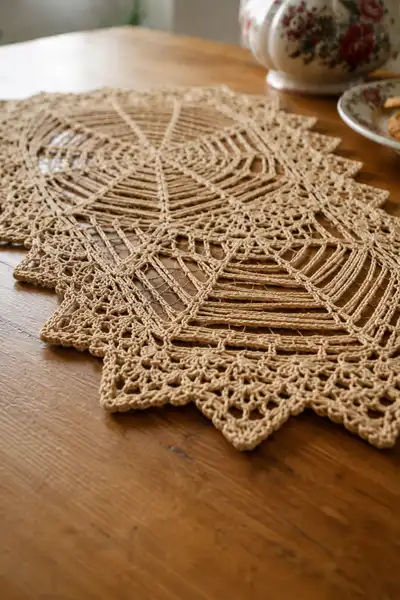
A delicate, vintage-inspired spider web table runner with intricate lace edging—perfect for Halloween or autumn décor. This long, rectangular runner is constructed from repeated spider-web motifs joined as you go and finished with a dramatic black lace scallop. The neutral beige body and contrasting dark edging give a subtle spooky elegance that sits beautifully beneath a teapot or centerpiece.
Progress Tracker
0% Complete
— Materials & Gauge :
Info :
Gauge is not critical for pattern function but affects final size. With thread size 10 and 1.75 mm hook, a finished motif (one spider-web diamond unit) measures approximately 13.5 cm (5.25 in) across at the widest point. Adjust hook size for tighter or looser fabric. Work at a consistent tension for crisp lace.
— Abbreviations & Notes :
Info :
Each 'Round' described refers to a working row around a motif or edge. We use ch-spaces extensively to create the web. Work on RS unless otherwise noted. Join-as-you-go rounds are marked and described in the Joining section.
— Central Spider Web Motif (Make 3) :
Round 1 :
Ch 8, sl st to first ch to form a ring (or make a small magic ring if preferred). (1 ring)
Round 2 :
Ch 3 (counts as dc), work 1 dc in ring, ch 2; [2 dc in ring, ch 2] x 7; join with sl st to top of beginning ch-3. (16 dc, 8 ch-2 spaces)
Round 3 :
Sl st into the next ch-2 sp. *Ch 8, sl st into next ch-2 sp* around to create 8 long chain spokes; join with sl st to foundation. (8 long ch-8 spokes)
Info :
These long chain spokes form the primary radial lines of the spider web—keep tension even so spokes lay flat. Use stitch marker at the start of rounds to mark join points.
Round 4 :
Work into the middle of each ch-8 spoke: [sl st into 4th ch of spoke, ch 3 (counts as dc), 3 dc in same place, ch 2, sl st back into same point] x 8. Join to form small clusters along each spoke. (8 clusters)
Round 5 :
Sl st to the next spoke center. *Ch 6, dc in next spoke center, ch 6, sl st in same spoke center*; repeat around. This creates the first outer ring of connecting chains. (8 dc, 16 ch-6 loops)
Round 6 :
Into each ch-6 loop work: sl st, ch 1, [1 sc, ch 3, 1 sc] across the loop, sl st to next loop. This gives a decorative connecting picot chain between spokes. (8 small loop motifs)
Info :
If you prefer a denser web, replace ch-6 with ch-4 in previous round and adjust these loops to ch-1, sc - that will tighten the mesh but maintains geometry.
Round 7 :
Ch 1, sc evenly across the chain-connection area around center to create a circular ring of sc; place 32 sc around total (approx) depending on exact tension. Join with sl st. (approx 32 sc)
Round 8 :
Ch 5 (counts as tr + ch2), *skip 3 sts, tr in next st, ch 2* around to form a tall spoke base; finish with sl st to top of ch-5. (16 tr, 16 ch-2 spaces)
Round 9 :
Work into each ch-2 space: ch 3, 2 dc, ch 3, sl st into the same ch-2 space to form small shells between spokes. Repeat around. (16 shells)
Round 10 :
Ch 1, sc in same st, *ch 6, skip shell, sc in next shell center* around to create elongated chain arcs between spokes (8 major arcs, 16 small arcs). Adjust chains so arcs sit flat. (8 major ch-6 arcs)
Info :
At this stage the motif shows its characteristic concentric arcs. Keep stitches loose in chain arcs to allow for later blocking; too tight will pull the motif inward.
Round 11 :
Into each chain arc: sl st, ch 1, [1 sc, ch 4, 1 sc] across the arc, sl st to next. This adds mesh for the web. (16 sc pairs, 16 ch-4 spaces)
Round 12 :
Ch 3, dc across the top of each sc pair to form a ring of dc ridges: [dc in sc, dc in next sc] around, finish with sl st. (approx 32 dc)
Round 13 :
Ch 1, sc in each dc across to flatten the ring; place 40 sc evenly around to widen the motif slightly. Join. (40 sc)
Round 14 :
Ch 7 (counts as tr + ch4), *dc in next 5th st, ch 4, skip 3 sts, dc in next st*; continue around building elongated web bands—this will create the first large web ring. (8 major dc per ring alternated with ch-4 loops)
Round 15 :
Into each ch-4 loop: work [sl st, ch 1, 3 dc, ch 1, sl st] to create a netted motif between the longer dcs. Repeat around to create an outer web lattice. (8 net motifs)
Info :
Count repeats after each round; at this stage the motif width should increase noticeably—each motif aims for incremental growth by approx 8-10% width per two rounds.
Round 16 :
Ch 1, sc evenly across the netted motifs to prepare for the tall vertical nets: place 56 sc total around (approx). Join with sl st. (approx 56 sc)
Round 17 :
Ch 9 (counts as dtr + ch4), *skip 6 sts, dtr in next st, ch 4* around to create very tall arcs that will define the open web panels. (8 dtr, 8 ch-4 spaces)
Round 18 :
Work into each ch-4 space: ch 1, [1 sc, ch 8, 1 sc]; this creates long chain lines across the panel for the 'web ribs'. (8 long chain ribs)
Round 19 :
Between each pair of long chain ribs work: [sl st, ch 2, 3 tr in chain, ch 2, sl st] to form a decorative vertical bridging cluster. Repeat around to define panel edges. (8 bridging clusters)
Info :
If your motifs begin to cup, block the motif flat before continuing; lace should be flat before joining to keep final runner even. Use pins and gentle steam.
Round 20 :
Ch 1, sc in each st/cluster around to compress the tall ribs into a neat ring; aim for approx 72 sc around. Join with sl st. (approx 72 sc)
Round 21 :
Ch 5 (tr + ch2), *tr in next 4 sts, ch 2, skip 2 sts* around—this creates a systematic repeat that prepares the motif for the outer fan points. (approx 36 tr, 18 ch-2 spaces)
Round 22 :
Into each ch-2 space work: [sl st, ch 3, 3 dc, ch 3, sl st] to form pronounced fans around the circumference. Repeat for all ch-2 spaces. (18 fans)
Round 23 :
Ch 1, sc around across fan bases to give a string foundation for later triangular points; approx 96 sc around. Join. (approx 96 sc)
Round 24 :
Work point foundation: *ch 6, skip 6 sts, sc in next st* around to create 18 point bases. Finish with sl st. (18 ch-6 points)
Round 25 :
Into each ch-6 point base: sl st, ch 1, [1 sc, ch 3, 1 sc, ch 3, 1 sc] to form layered triangular points that will later be detailed into scallops. (18 triangular point bases)
Info :
At rounds 24–25 you are forming the scalloped outer points. Keep counts exact—these will match when you join motifs and when you add the black edging.
Round 26 :
Ch 1, work sc evenly across the bases and into each triangular point to prepare for a decorative picot row: aim for 110 sc around (approx). Join. (approx 110 sc)
Round 27 :
Picot round: *sc in 3 sts, picot (ch3, sl st in 3rd ch), sc in 3 sts* across each point base to create lacy edging. Repeat for all 18 points. (picot clusters x 18)
Round 28 :
Ch 3, dc around the outer rim, working 4 dc into each triangular point base and 1 dc between points to evenly distribute the stitches; approximately 150 dc total. Join. (approx 150 dc)
Round 29 :
Ch 1, sc in each dc around to stabilize the rim: approximately 150 sc. Join. (approx 150 sc)
Round 30 :
Decorative rope: *ch 7, skip 3 sts, sc in next st* around, forming 18 outer loops to be embellished with the final scallop. Join. (18 ch-7 loops)
Round 31 :
Into each ch-7 loop work: sl st, ch 1, [1 sc, ch 5, 1 sc, ch 5, 1 sc], sl st to next loop—this creates double-lace arches along the rim. Repeat for all loops. (18 lace arches)
Round 32 :
Ch 1, sc around across the new arches to tidy edges; approx 180 sc. Join. (approx 180 sc)
Info :
Finish motifs by weaving in ends leaving a 15–25 cm tail for join-as-you-go if you plan to assemble motifs later. Block motifs individually to precise measurements before joining.
Round 33 :
Optional ornamental round: *ch 4, dc in next 2 sts, ch 4, sl st to next* around to strengthen outer arches; only if you desire a stronger rim. (repeat as needed)
Round 34 :
Final motif tidy: sc evenly around in a smaller hook if you want crisper edges; place approx 200 sc if required to maintain shape. Fasten off. (approx 200 sc)
Info :
Make three identical motifs. Check that the scalloped points align in count and spacing—these will be the join points. Use blocking pins to pin all three motifs to identical shapes and sizes before joining.
Round 36 :
Make 3 motifs total. Lay them in a row (end-to-end) with scallop points touching—this layout will create the long runner. Adjust spacing during pinning so adjacent scallop points meet exactly at the same angle. (3 motifs)
— Spoke Extension & Repeat Rounds (Expand each motif slightly for better join) :
Round 37 :
With RS facing, rejoin color A at any outer scallop point. Ch 1, sc into same st, ch 8, sc into next scallop base around until you have extended each of the 18 outer points with one ch-8 loop. (18 ch-8 extensions)
Round 38 :
Into each ch-8 extension work: [sl st, ch 1, 3 dc, ch 1, sl st] to create pronounced outer ribs to help joining. Repeat for all 18 loops. (18 rib motifs)
Round 39 :
Ch 1, sc evenly around across rib motifs to add stability; aim to maintain stitch counts by placing increases where necessary to keep the rim flat. (approx +20 sc from previous round depending on tension)
Info :
These extensions help the motifs interlock cleanly. If your motif edges are already wide enough, skip rounds 37–38. That will slightly reduce runner width.
Round 40 :
Work a light decorative filet between each pair of outer ribs: *ch 6, dc into rim, ch 6, sl st into next rim* around—this prepares a consistent join edge. (18 filet arches)
Round 41 :
Ch 1, sc around confirming you have exact sequences of arch bases aligning with corresponding points on neighboring motif—recount and adjust if necessary. (finalize alignment)
Info :
Before joining, block all motifs and ensure the arch count and points are consistent (for example, each motif should show 18 scallop points). Mark the points on opposing motifs with small pins to ensure join symmetry when working join-as-you-go rounds.
— Join-As-You-Go: Connecting Motif 1 to Motif 2 :
Round 43 :
Place Motif A and Motif B RS facing up, overlapping edges so scallop points of each meet. Join color A at the designated starting scallop point of Motif A. Ch 1, sc in same st, ch 3, sl st into the corresponding stitch on Motif B (through front loop only), ch 3, sc in next st on Motif A; repeat this join sequence across 6 adjacent scallop points to secure a clean seam. (approx 6 join points)
Round 44 :
Continue the join: work a chain bridge across the next set of arches: sc in Motif A, ch 4, sl st into corresponding arch on Motif B, ch 4, sc in Motif A. Repeat until two motifs are joined across the entire edge. (full seam)
Round 45 :
Ch 1, sc along the seam on the RS to tidy the join—work through both motif rims to make the seam flush; approx 24 sc across seam depending on motif size. Fasten off and weave in ends. (tidy seam)
Info :
Join-as-you-go keeps seams invisible and flat. Work slowly; pin motifs first and test the seam placement with a few stitches before committing. Weave tails through seam for added strength.
Round 46 :
Repeat joining process to attach Motif B to Motif C in identical fashion so you have three motifs joined in a row. Ensure orientation is consistent so web spokes align along the runner. (3 motifs joined)
Round 47 :
Once motifs are joined, check the runner for any gaps; if you find small gaps between arch points, fill them with sc bridges: *sc in A, ch 3, sc in B* to tidy open spaces. (gap filling)
Info :
After joining, give the runner another gentle blocking to set the seam. Pin across the seam region and spray lightly, then allow to dry. This helps the seam relax and become nearly invisible.
— Main Runner Body Stabilizing Rounds :
Round 49 :
With RS facing up and color A, rejoin at the center of motif seam. Ch 1, sc around the entire runner rim (including the joined seams) to create a uniform foundation row. Keep stitch counts even; aim for approx 350 sc around the full runner. Join with sl st. (foundation sc round)
Round 50 :
Ch 4 (counts as tr + ch1), *tr in next 5 sts, ch 1* around to create a slightly lifted rib row that helps re-shape the runner into an elongated rectangle. Finish with sl st. (repeat pattern around)
Round 51 :
Ch 1, sc in each st around to flatten the rib row and prepare for the rectangular net fill; approx 360 sc. Join. (approx 360 sc)
Info :
If your runner edges pucker, work these rounds with a slightly larger hook to relax the fabric, then re-block. Conversely, if edges sag, use a slightly smaller hook to tighten.
Round 52 :
Begin rectangular mesh fill: *ch 6, skip 5 sts, sc in next st* around to define a grid pattern across the runner surface that connects the three motifs and fills the negative space. Repeat evenly. (mesh established)
Round 53 :
Ch 3, dc in each sc across and into chain spaces to build a stable net: [dc in sc, dc in ch-6 center, dc in next sc] around to create rhythmic bands across the runner. Join. (mesh reinforcement)
Round 54 :
Ch 1, sc evenly across the dc band—this evens out the surface and anchors the mesh. Aim to maintain even counts; approximate stitch count will likely increase to near 420 sc depending on motif size. Join. (anchor round)
Info :
At this point the runner begins to look unified. You can lengthen the runner by making additional motifs and joining them using the same join-as-you-go method; otherwise continue to edge finishing.
Round 55 :
Ch 7, *skip 4 sts, sc in next st, ch 7* around to create ornamental elongated loops along both long sides of the runner—these loops will be the foundation for the black lace edging. Repeat for both long edges by working continuous rounds across the whole perimeter. (long edge loops)
Round 56 :
Ch 1, sc around to tidy the long-edge loop foundations; place 2 sc in corner spaces to maintain a straight edge. Join. (prepares for color change)
Info :
We will change to color B (black) for the lace edging. Fasten off color A neatly, leaving a 20 cm tail to weave in, and reattach color B at any long-edge foundation loop using a sl st. Carry color A inside if you'd like to keep a hidden tail for later weaving, otherwise weave and trim.
— Black Lace Scallop Edge (Color B) :
Round 58 :
With color B, join at any long edge ch-7 loop. Ch 1, sc in same loop, *ch 6, 7 dc in next loop, ch 6, sc in next loop* across to form the basis of sculpted scallops; repeat along both long sides and the short ends for a continuous scalloped border. (scallop foundations x as needed)
Round 59 :
Into each 7-dc scallop work: sl st, ch 3, [3 dc, ch 2, 3 dc] (shell) to expand the scallop into a lace fan. Repeat across all scallops. (expanded scallops)
Round 60 :
Ch 1, sc around the shell bases to stabilize; place 2 sc in the seam corners for crisp corner shaping. Join with sl st. (stabilize scallops)
Info :
Black edging will visually shrink edges due to contrast. If you want a wider scallop, add an extra ch-2 picot round before the fan shell in Round 59. Work a sample scallop and block to verify the look before proceeding along the entire perimeter.
Round 62 :
Ch 4, *tr in center dc of fan, ch 3, sl st in next fan center* around—this forms a raised decorative ridge across each scallop tip. Repeat for all scallops. (decorative ridge)
Round 63 :
Picot flourish: Into each fan tip work: sl st, ch 3, picot (ch3, sl st in 3rd ch), sl st back to fan tip, ch 1, sc to next fan base. Repeat around. (picot flourishes)
Round 64 :
Ch 1, sc across entire black border to tidy seams; weave in ends or leave long tail for final finishing. Fasten off and weave ends securely. (final tidy round)
Info :
Keep tension even on black rounds to avoid curling. The black edging should lie flat after blocking. If you notice scallop 'standing up', add a sc foundation row between motif rim and first black round and re-block.
— Optional Decorative Accent Rows (Color A or Accent Color) :
Round 65 :
Option: Add a light decorative ladder row inside the runner across the join seams. With color A rejoined at center seam: *ch 10, sl st into seam stitch, ch 10, sl st into next seam stitch* forming small ladder bridges across the seam line. Repeat as desired. (decorative ladder bridges)
Round 66 :
Ch 1, sc into each sl st and across bridges to anchor them; join. (anchor decorative bridges)
Info :
These decorative bridges are optional but add visual continuity along the runner's center line. They are particularly helpful if your three motifs show visible seams and you prefer a stronger visual link.
— Final Structural Rounds & Fine-Tuning :
Round 68 :
Work one final sc round all around the runner using color A to reinforce any joins that have gaps: sc through both motif rims and the black edging base where practical; aim for total stitch count to even out across entire perimeter so the runner lays flat. (final reinforcement round)
Round 69 :
Ch 5, *dc in next 4 sts, ch 1, skip 1 st* around to create a subtle raised decorative ridge one stitch in from the edge. Join and fasten off. (decorative ridge)
Info :
Weave in all tails, making sure to pass yarn needle through several interior threads to hide ends and prevent pulling. If you left long tails for assembly reinforcement, weave them through the seam line for longevity.
Round 71 :
Optional bead or accent: If desired, use a fine needle to add small black seed beads to each scallop tip by threading beads onto a fine sewing thread and stitching through the picot tips. This step is purely decorative. (bead accents optional)
Round 72 :
Press & final finishing: Lay runner flat on blocking mat, pin all scallops and edges to dimension (for example 38 cm × 105 cm depending on motif size), spray gently with water or steam lightly and allow to dry completely before unpinning. Final runner will hold shape after blocking. (blocking)
Info :
Blocking is the most important finishing step for lacework—take time to pin each scallop to ensure symmetrical points. Use rust-proof pins and allow to dry fully before removing pins.
— Measurements & Scaling Tips :
Info :
Each motif (unblocked) measures approximately 13–14 cm across; blocked motifs measure about 18–22 cm depending on how far you extend the scallops. Three motifs joined produce a runner roughly 90–110 cm long and 30–35 cm wide after blocking. To make a longer runner, add more motifs and repeat the same join sequence, ensuring each added motif aligns with the scallop count of the neighbors.
Info :
If you choose to use a thicker thread or cotton DK yarn for a more robust runner, switch to a 2.5–3 mm hook. Expect the final runner to be significantly larger and the lace holes smaller relative to motif size; adjust decorative chain lengths (reduce by 2–4 chains) to maintain scale.
This spider web table runner is a gorgeous seasonal statement that blends old-fashioned lace technique with modern Halloween style. Each motif is a small meditative project and the join-as-you-go method brings them together beautifully. Blocking and the contrasting black edge make the design sing—it's rewarding to watch the runner transform as you pin and steam it flat. 🖤🕸️ I'm excited for you to display it as a centerpiece or give it as a handmade gift. Happy crocheting!