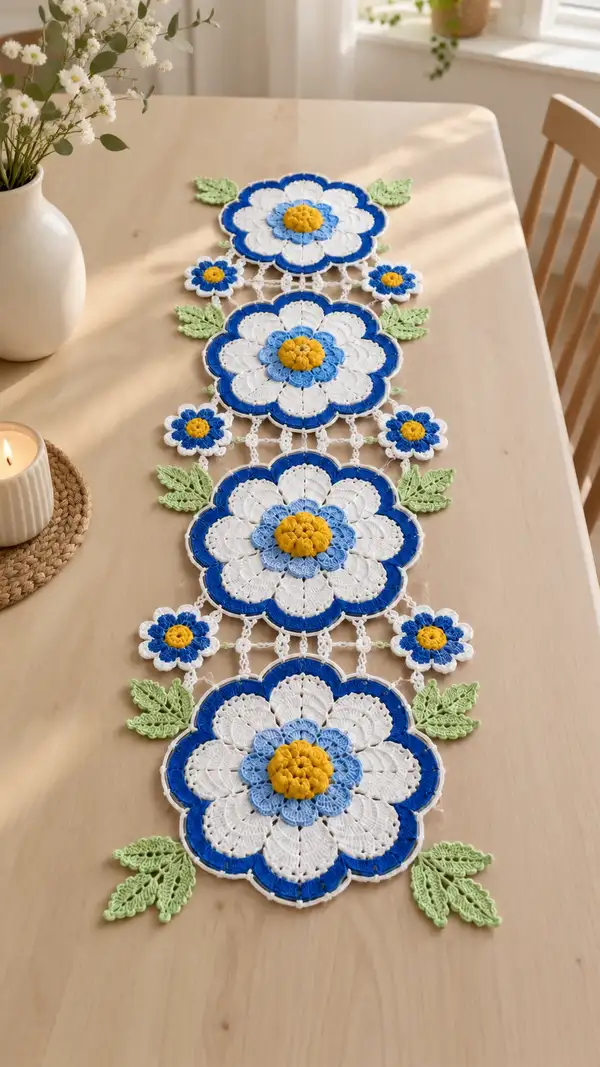
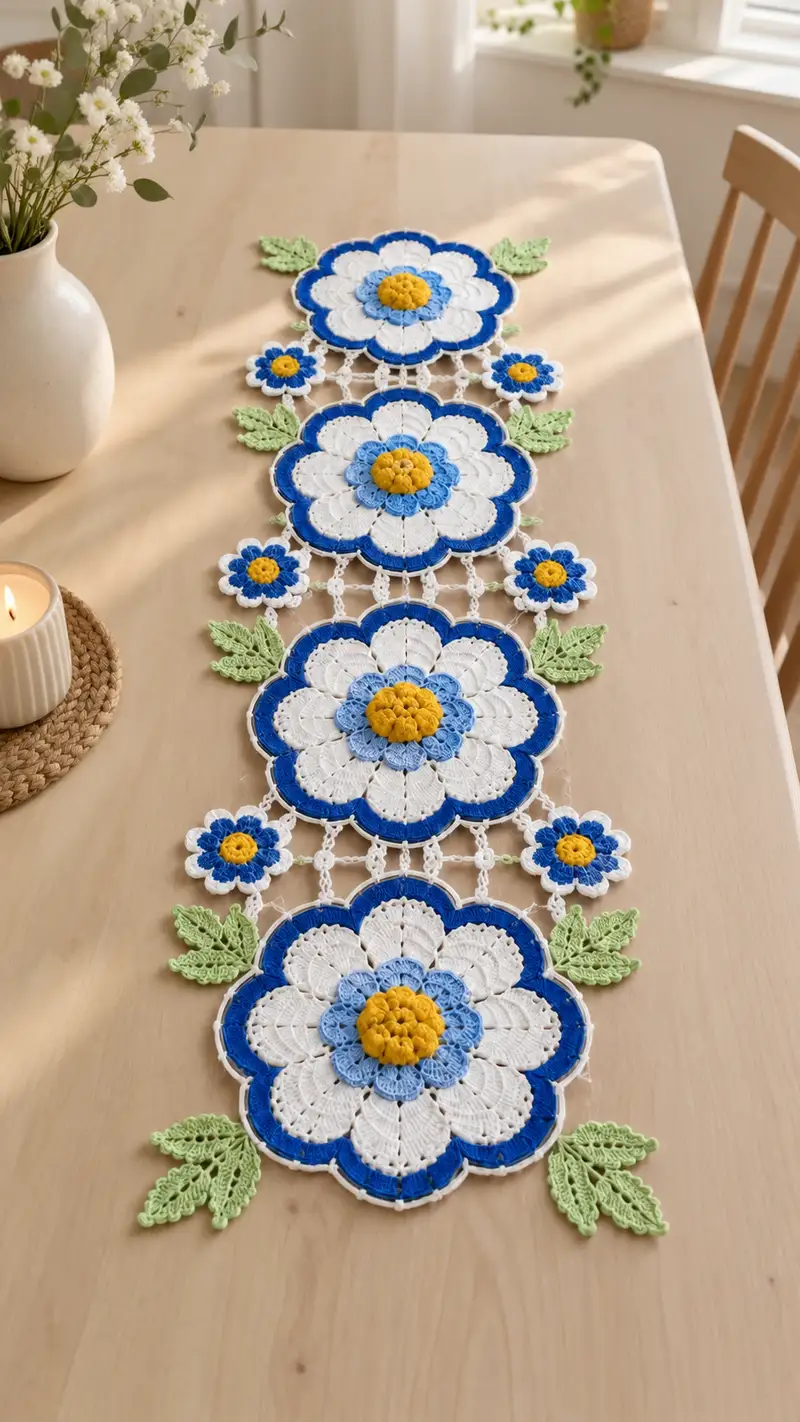
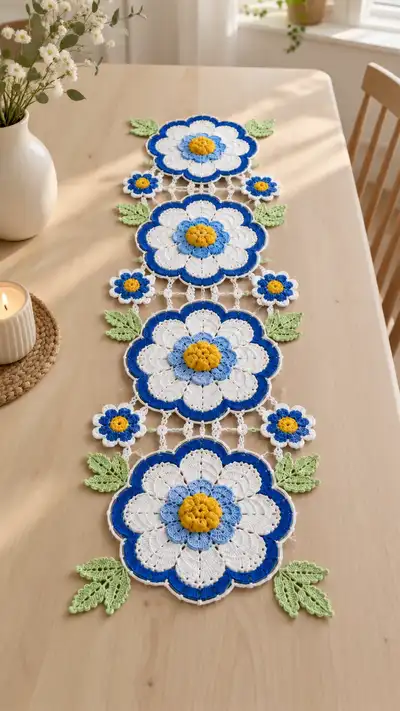
A delicate, hand-crocheted floral table runner made of linked large daisy-like motifs, small accent flowers and leafy sprigs. Features bright yellow puff centers, sky-blue inner petals, crisp white outer petals and vivid cobalt edging. Finished with airy white connecting mesh for a lightweight, elegant look — perfect for a dining table or dresser. Clear, step-by-step instructions guide you through motif construction, leaf shaping and joining for a polished handmade accent.
Progress Tracker
0% Complete
— Materials & Notes :
Info :
Gauge is not critical for this decorative runner, but use a consistent hook to produce firm stitches. Block each motif before joining for neat edges. Work tightly for petals to avoid visible gaps; for the mesh joins you may prefer a slightly smaller hook for finer control.
Info :
Pattern builds one Large Flower Motif, one Small Flower, one Leaf and a Connector Mesh section — make quantities as stated in the project notes. You will make 4 large motifs, 3 small daisies and 8 leaves as pictured (adjust for runner length).
— Large Flower Motif (Make 4) :
Round 1 :
With Mustard Yellow, 6 sc in mr (6)
Round 3 :
(1 sc, inc) x 6 (18)
Round 4 :
(2 sc, inc) x 6 (24)
Info :
These first rounds form the small base for densely packed puff stitches. Keep tension a touch tighter than normal so puffs sit closely together.
Round 5 :
(3 sc, inc) x 6 (30)
Round 6 :
1 sc in each st (30)
Round 7 :
Change to Mustard Yellow puff technique: *yo, insert, pull up loop* repeat 5 times in same st, yo and draw through all loops, ch1 to close puff. Puff in each st around (30 puffs). Join with sl st to first puff top.
Info :
Option: lightly stuff the center with a tiny bit of fiberfill before closing the puff round for a pronounced dome. If stuffing, add a small amount — do not overstuff.
Round 8 :
Ch1, sl st in each puff top around to prepare for the inner petal base (30)
Round 9 :
Change to Sky Blue. Ch3 (counts as dc), (2 dc, ch2, 3 dc) in next st (first petal shell made). *Sk 2 sts, (3 dc, ch2, 3 dc) in next st* repeat to form 10 shells total (10 shells; counts vary by spacing). Join with sl st to top of starting ch3.
Info :
We are creating an anchored ring of small scallop shells to form inner petals; make 10-12 shells based on your tension. If you have 10 shells the stitch count will be consistent with next rounds; adjust evenly if you end with 11 shells but maintain symmetry.
Round 10 :
Ch1, sc in same st and around shells: work 3 sc across each shell (one sc in each dc and one in ch2 sp), producing approximately 30 sc (30)
Round 11 :
(2 sc, inc) x 10 (40)
Round 12 :
1 sc in each st (40)
Round 13 :
Change to White. Ch3 (counts as dc), dc in next 6 sts, *(ch2, skip 1 st, dc in next 7 sts)* repeat around to form foundation for outer petals — expect 5-6 petal anchors (40-42 dc depending on shells)
Info :
At this stage you'll see the inner petal circle and start the layout for the larger outer petals. Keep counts even; if you have an extra stitch, distribute by adding one more dc into one petal base to maintain symmetry.
Round 14 :
Ch1, sc in each st to tidy (40)
Round 15 :
Petal shaping begins: *in designated petal base: (ch2, 2 tr, 2 dc, 3 hdc, 2 dc, 2 tr, ch2) in base* repeat for each petal base (10 large petals). After each petal, sl st to next base. Petals are tall and layered to create deep shaping.
Info :
Work petals evenly. Each petal is built over a set number of stitches — if your petal count differs, maintain the same petal stitch sequence but distribute bases evenly around the circle.
Round 16 :
Ch1, sc around entire motif working 1 sc into the top of each tr/h dc/h dc cluster and placing 2 sc in the ch2 spaces between petals to stabilize (approx 60 sc).
Round 17 :
(3 sc, inc) x 15 (75)
Round 18 :
1 sc in each st (75)
Round 19 :
Change to Cobalt Blue. *Work shell: (5 dc) across the top of each petal, sl st to next petal top to anchor* — this creates a bold scalloped ring (10 shells, approximately 60-70 dc total).
Info :
The cobalt shell will define the visual border. Use even tension so shells sit flush against petal edges. If your shells feel loose, switch to the 2.5mm hook for this round only.
Round 20 :
Ch1, sc in each st around to even the cobalt shells (st count matches previous sc round ~75)
Round 21 :
Work decorative popcorn edging in Cobalt: *popcorn (5 dc in same st, remove hook from loop, insert hook into first dc of the group, pull loop through to form popcorn), sl st in next 3 sc* repeat around to create small raised edge popcorns (approx 15-20 popcorns depending on spacing).
Info :
Popcorns add texture and help motif stand out on the table. If unfamiliar, practice on scrap yarn; you can substitute bobble or cluster stitch for a smoother look.
Round 22 :
Switch to White. Ch1, sc in each st around to create a tidy white outline (approx 75)
Round 23 :
Working in FLO: 1 sc in each st FLO (approx 75) — this creates a slight ridge and a defined join surface for the connecting mesh.
Info :
The ridge created by BLO/FLO gives a defined lip for joining. Mark the five joining points that will connect to the mesh evenly around the motif (we will use 5 joining points along the left and right per motif, and 4 along the top/bottom when joining motifs in a row).
Round 24 :
Ch1, sc around maintaining marker positions (75). Fasten off leaving long tail for final blocking and last-minute adjustments.
Info :
Make 4 of these Large Flower Motifs. Block each motif to a 23-25cm diameter (or the size produced by your yarn/hook). Pin edges evenly with slight steam or wet-block for cotton yarns. Blocking makes joining much easier and results more even.
— Small Daisy Motif (Make 3) :
Round 1 :
With Mustard Yellow, 6 sc in mr (6)
Round 2 :
Inc in each st (12)
Round 3 :
Change to Cobalt Blue. Ch3, (2 dc, ch1, 3 dc) in next st to form first small petal shell. *Sk 1 st, (3 dc, ch1, 3 dc) in next st* repeat to create 6 small petals (6 shells). Join. (approx 36 dc)
Round 4 :
Change to White. Ch1, sc in each st around and sc in each ch1 space to create tidy edge (approx 30 sc)
Round 5 :
Ch2, (hdc, dc, hdc) in each petal top to create a small raised petal texture; sl st to join. Fasten off leaving tail for sewing. (Make 3)
Info :
Small daisies are used as connectors between large motifs. Position them symmetrically; we will join them with short chain spacers in the Connector Mesh section.
— Leaf (Make 8) :
Round 1 :
With Leaf Green, ch6, sc in 2nd ch from hook, hdc, dc, hdc, sc into last chain; rotate to work along opposite side of foundation chain: sc, hdc, dc, hdc, sc into starting chain (10 sts total, worked around foundation). Join with sl st to first sc.
Round 2 :
Ch1, sc in first 2 sts, (hdc, dc, tr, dtr, tr, dc, hdc) across the top point to create a pointed shape, then sc in last 2 sts along other side (approx 14 sts)
Round 3 :
Ch1, 1 sc in each st around, placing 3 sc in the tip st to round the point (approx 16 sc)
Round 4 :
Vine detail: Ch4, sl st in second ch from hook, sc in next ch, join with sl st to base; repeat small picot-like veins 3 times along the leaf body, spacing evenly. Fasten off leaving long tail for sewing.
Info :
Leaves are slightly cupped; block flat with a bit of steam to open vein stitches and hold shape. Make 8 leaves; two leaves are attached near each large motif as shown in the photo.
— Connector Mesh & Joining Motifs :
Info :
All joins are worked in white. The mesh uses ladder-like chain arches and small ring connectors to create an airy link between large motifs and to anchor small daisies. Position motifs blocked and flat in final layout before joining.
Round 1 :
With White, join yarn at marked join point on large motif A with sl st. Ch10 (counts as arch), sl st into the opposite marked point on large motif B creating a 10-ch arch. Repeat to form 5 arches across the join between the two large motifs spaced evenly. This creates a ladder with 5 arches linking the two motifs.
Round 2 :
Between arches, work vertical connectors: at each arch top ch5, sl st into middle of the corresponding arch on opposite motif to form a small chain bridge. Continue across all arches to form 5 short bridges. Fasten off and weave tails.
Round 3 :
To attach a small daisy in the central arch: rejoin White at the center arch base, ch3, sl st through the small daisy outer edge (use the white sc round on small flower), then ch3 and sl st to the opposite base — repeat two more spins to secure small daisy in place (3 attachment points). Repeat for other small daisies.
Info :
Spacing is crucial: measure the distance between motif edges when blocked and adjust ch lengths accordingly so daisies sit centered in the mesh. If your motifs are slightly larger, increase arch length by ch2 for each extra 1 cm of diameter.
Round 4 :
After all central bridges are in place, tidy each arch by working 1 sc into each chain along the arch; in the center of each bridge work a small ring (ch5, sl st to form ring) to add stability. This will produce a neat, stable mesh for the runner.
Round 5 :
Weave the cobalt thread in small detached chain loops across selected arch joins (optional): with Cobalt, work small picot ch6, sl st into the ring center for a decorative tie. Fasten off.
Info :
Work the mesh consistently for each motif pair. Between motif 1 and 2, motif 2 and 3, motif 3 and 4 use the same sequence so the runner remains uniform. If adding or removing motif repeats to adjust length, maintain the same arch count across joins for visual continuity.
— Edging & Final Border :
Round 1 :
After all motifs are joined, with White, work a unifying border around the entire outer edge: attach to any outermost sc and ch5, sk 2 sts, sl st in next st; repeat around the entire runner to create scallop loops that visually tie motifs together.
Round 2 :
Change to Cobalt. In each ch5 loop, work (sc, hdc, 3 dc, hdc, sc) to build a bold scallop border; this will follow the existing motif outlines to emphasize shape. Fasten off.
Round 3 :
Change to White. Work 1 sc around inside edge where motifs meet the mesh to make joins neat (work through both motif ridges and mesh rings for secure attachments).
Info :
Weave in all remaining ends. Block the entire runner flat after all joins are made: pin to a long blocking board, keeping a slight curve to leaves and petals if desired. Steam lightly or wet block, then allow to dry completely.
— Alternative Details and Troubleshooting Rounds :
Info :
If any motif appears small or large relative to others, add or remove a sc round in the white tidy rounds (Rounds 14 or 22 in the Large Motif) to bring diameter into balance. Always add or subtract evenly around the motif to maintain symmetry.
Extra Round A :
Optional strengthening: Work an extra round in White using 1 sc, ch1, skip 1 around the join to add small picots that visually connect motif edges (counts depend on circumference).
Extra Round B :
For more texture on leaves: after basic leaf rounds, work 1 round of (sc, ch2, sc) in each vein space to create tiny leaf lacy holes.
Info :
Always test any extra rounds on a single motif before applying to all pieces to ensure proportion and alignment remain pleasing.
— Finishing Touches :
Info :
Carefully weave all tails through multiple stitches on the reverse side of motifs and clip close. If any joints feel loose, reinforce with running stitches through both layers of motif and mesh. Lightly steam the final piece one last time for a smooth, crisp appearance.
Round 1 :
Optional embroidered highlights: Use a single strand of cobalt to add small satin stitch accents on outer petals or tiny French knots in centers of small daisies for extra texture. Secure and weave ends thoroughly.
Completing this runner is such a satisfying experience — the layered petals, bold cobalt edging and textured mustard centers come together to create a lively, handmade table statement. Each motif is a small celebration of color and stitchwork, and the modular design means you can personalize size and layout. Whether for the dining table or a long dresser, this runner brings cheer and craftsmanship to your home. 🧶🌼