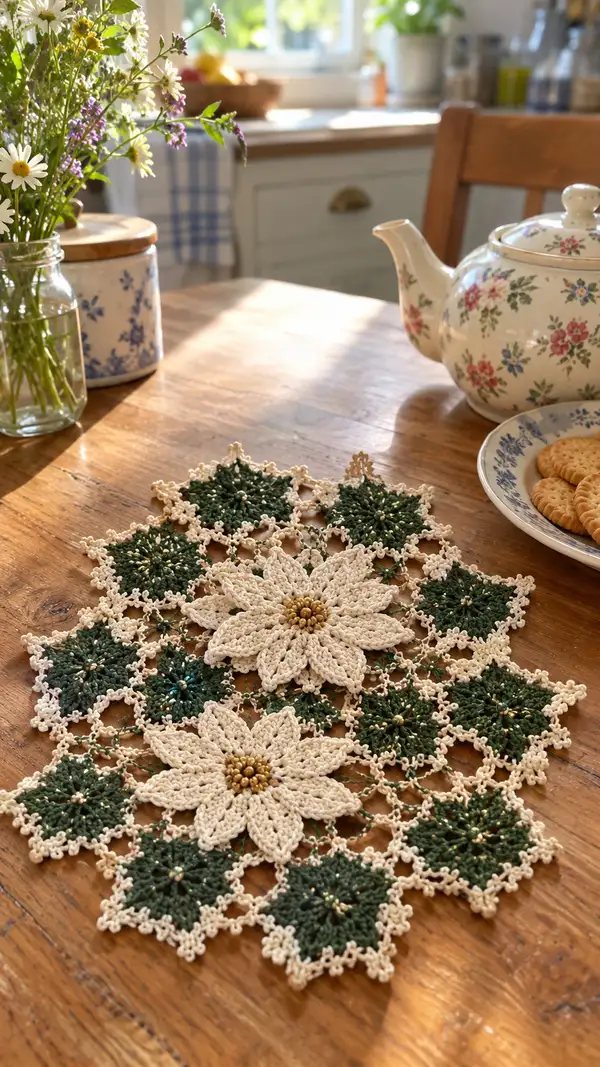
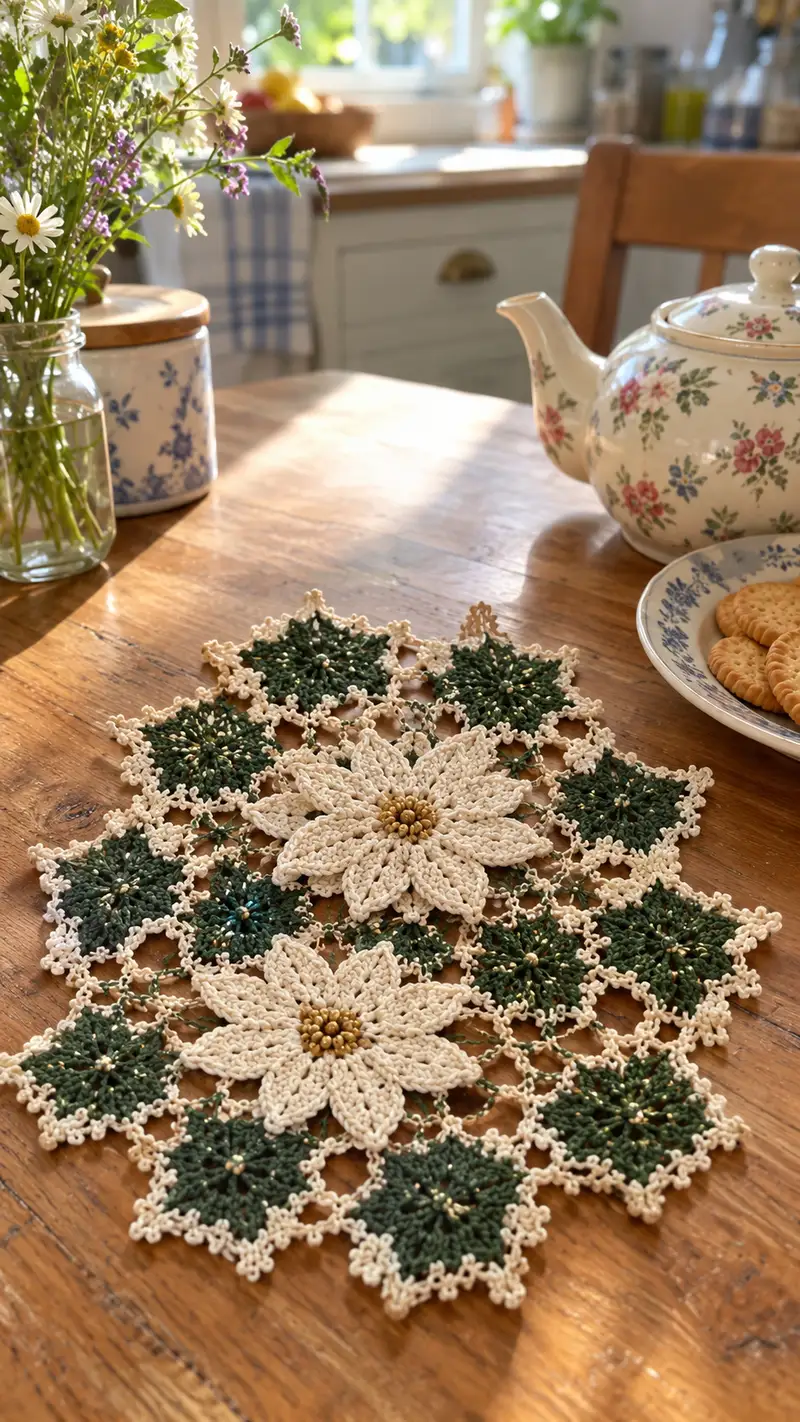
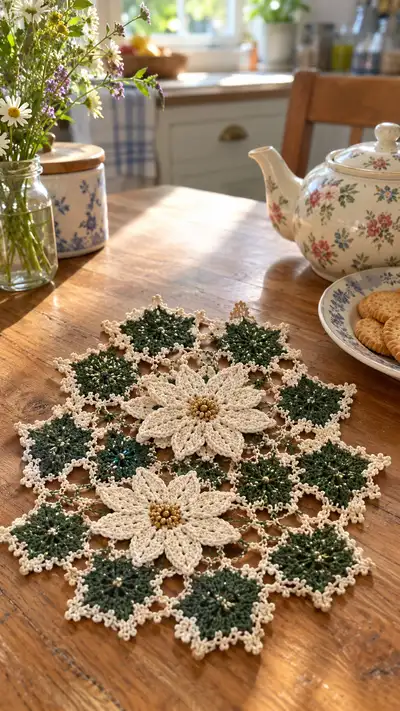
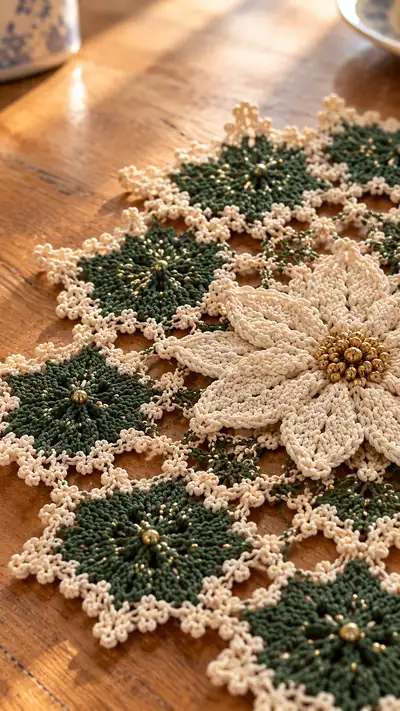
A vintage-inspired poinsettia table runner featuring two layered cream poinsettias set among deep forest-green star motifs and delicate picot lace. Hand-crocheted in mercerized cotton with tiny gold beads threaded through the centers and spokes for subtle sparkle. This elegant runner looks beautiful on a wooden table, adding seasonal charm and timeless craftsmanship. Designed to be crocheted motif-by-motif and joined-as-you-go, the finished piece is both decorative and durable.
Progress Tracker
0% Complete
— Materials and Special Notes :
Info :
This pattern is written in US terms. Work with mercerized cotton DK for a crisp, lace-like look. Pre-load gold seed beads onto the yarn or use a small beading needle to stitch beads into place after completing rounds. Gauge is not strict for this accessory, but consistent tension between motifs is essential for a flat runner. Blocking each motif to the same diameter makes joining easier and improves finished appearance.
— Central Poinsettia (Make 2 identical large flowers) :
Round 1 :
Work a magic ring. Ch1, 8 sc into ring. Pull tight. (8)
Round 2 :
Inc in each st around (2 sc in each st). (16)
Round 3 :
(1 sc, inc) x8 around. (24)
Round 4 :
(2 sc, inc) x8 around. (32)
Round 5 :
(3 sc, inc) x8 around. (40)
Info :
At this point you have a firm circular base for the petals. Keep tension even so the base lays flat. For neat central beadwork, count and mark the eight equal sectors—every 5 stitches marks a sector if you have 40 sts.
Round 6 :
*Ch5, sl st into next marked stitch; rep from * around to form 8 chain loops. Join with sl st to first loop. (8 loops)
Round 7 :
Working into each chain-5 loop: sl st into loop, ch2 (counts as hdc), 3 dc, ch2, sl st into same loop to make a small petal base. Repeat in each loop (8 petals). (Each petal: sl st, ch2, 3 dc, ch2, sl st)
Info :
Change to a slightly larger hook (optional) for petal shaping if you prefer more relaxed petals. At the end of Round 7 rotate work so petals sit comfortably pointing outward. Pre-thread 24 small gold beads onto yarn for the central cluster if you want bead centers pre-loaded.
Round 8 :
In front of Round 7 petals create a raised petal: join with sl st at base of first petal, ch1, (sc, hdc, 3 dc, hdc, sc) all worked into the next chain space to form a fuller first-layer petal. Skip to next base and repeat around for 8 fuller petals. (8 petals; work counts variable per petal)
Round 9 :
Ch3, sl st at petal base between petals to create connecting arches: (ch3, sl st between petals) x8. This forms small arches to anchor second layer. (8 arches)
Round 10 :
Join yarn at tip of each first layer petal to form outer petal edging: *into the tip of a petal work (hdc, 2 dc, 2 dc clustered as puff, 2 dc, hdc), sl st at next arch; rep from * around. This creates sculpted petal edges and a slightly pointy outer shape. (8 textured petals)
Info :
Work puff stitches lightly so they sit elevated but not bulky. If using a multi-strand or thicker cotton, reduce puff size to 3 loops; for fine thread increase to 5 loops for a full puff. Keep each petal symmetrical; counting the same number of stitches per petal ensures even petals.
Round 11 :
For petal definition, on the back side work a 1-row slip-stitch ridge around base: turn work to back, sl st evenly around the base of each petal (about 4–6 sl sts per petal) to create a neat foundation for the second (top) layer. Join and fasten off. (This row has no central count target)
Info :
Begin the top petals (layer two) that sit between the first layer petals. These will be slightly smaller and raised. Attach yarn at center front between two petals from Round 10 to begin top layer pattern.
Round 12 :
Ch1, sc into center space, ch5, sl st into the next center space to form 8 small top-layer loops. (8 loops)
Round 13 :
Into each ch-5 loop: sl st, ch2, 3 dc, ch2, sl st (creating little pointed petals). Repeat around for 8 top-layer petals. This produces a second, raised layer of eight smaller petals which overlap the lower petals.
Round 14 :
From the top of each small petal create an elongated point: join yarn at tip, ch1, (hdc, 2 dc, puff (3-loop) centered, 2 dc, hdc), sl st to base between petals. Repeat around for 8 pointed top petals. Fasten off and weave ends to the back neatly.
Info :
For the most accurate shape, block the finished large poinsettia flat, pinning petal tips into a gentle point and letting the center beads be slightly domed. Blocking evens stitches and makes joining easier.
Round 15 :
Central bead cluster: Using beading needle or pre-loaded beads, sew a tight cluster of 12–16 gold beads into the central circle so they form a small raised boss. Secure thread back through several stitches and knot on the back, weaving tail across multiple stitches to secure.
— Small Star Motif (Make 12 - deep forest green) :
Round 1 :
With forest green yarn work a magic ring. Ch1, 6 sc into ring. (6)
Round 2 :
Inc in each st around (12). (12)
Round 3 :
(1 sc, inc) x6 around. (18)
Round 4 :
*(2 sc, inc) x6 around. (24)
Round 5 :
Ch4, sl st into next marked stitch to form eight (ch4) loops around the ring (use every 3 stitches to place a loop). You should form 8 loops. (8 loops)
Round 6 :
Into each ch-4 loop work: sl st, ch1, 5 dc, ch1, sl st. This forms a small petal/star arm. Repeat around to make 8 star arms. (8 arms)
Info :
Small star motifs are intentionally slightly domed; they will be flattened when blocked and joined. If you prefer a flatter look, use a smaller hook by half size for these motifs.
Round 7 :
Ch3, sl st between star arms to create small connecting arches: (ch3, sl st between arms) x8. Join. (8 arches)
Round 8 :
Using gold seed bead: slide one bead up the yarn and drop it to the center. Anchor with a sl st through the bead base and secure with an extra sl st. Repeat for each motif center. Fasten off and weave tails to the back. (Bead per motif)
Info :
If you prefer more pronounced spokes, work an extra round of long slip-stitch spokes: join yarn at center, (ch6, sl st at base between arms) x8 to add length for decorative beaded spokes later during joining.
Round 9 :
Optional border: With cream yarn, sl st evenly around the star outer edges placing picots at the tip of each arm (picot = ch3, sl st into first ch). This creates the tiny cream edging seen around each green star in the photo. Fasten off and weave in ends.
— Joining Motifs: Join-As-You-Go Mesh (Cream joining yarn) :
Info :
Arrange motifs on a flat surface as in photo: two large poinsettias centered lengthwise with small star motifs surrounding them in an offset grid. The pattern below assumes 2 large flowers and 12 small stars: six on each side alternating. You may add or remove motifs to change runner length.
Round 1 :
Attach cream yarn to the perimeter of the first green star motif at any picot point with sl st. Ch5, sl st into next picot to create a small chain-arch. Continue around the motif placing chain-arches between every star arm tip. Make 8 chain-arches total around each star. Fasten off or keep working to join to neighbor motif.
Round 2 :
To join a second star: Place the second motif adjacent such that two arches align. Work into the joining arch: sl st through ark on first motif, sl st through corresponding picot on second motif, ch5, sl st back into first motif. This creates a small bridge that secures the two motifs together. Repeat for all touching pairs. (Use 2–3 sl sts per join for stability)
Info :
Work slowly on join-as-you-go to ensure lattice is even. Use pins to hold motifs in place during joining. When joining a green star to the outer round of a poinsettia, join to the Round 11 connecting arches or the picot edging of the large flower.
Round 3 :
Forming connecting diamonds: After joining direct neighbors, work chain loops between triangular gaps: attach cream yarn at a bridge point, ch7, sl st into bridge on opposite motif forming a diagonal connection. Repeat to create open diamond shapes between motifs. These diamonds form the pale cream diamonds seen between green stars in the photo. (Work each diamond with ch7 loops on four sides)
Round 4 :
Along the inner edges adjacent to the main poinsettias, create slightly larger connecting arches to support the heavier flower weight: from the inner join, ch9, sl st around the inner petal base of the poinsettia (insert sl st into the slip-stitch ridge created in the poinsettia Round 11). This secures the large flower to the lattice with four evenly spaced anchors.
Info :
Beadwork during joining: when crossing spokes between motifs, add gold seed beads on the chain before pulling loop tight — slide 1–3 beads onto the working yarn then work chain; when the chain is tightened and anchored, beads will sit along the spoke. This creates the subtle radiating gold lines on the green stars.
Round 5 :
Work a stabilizing row of single crochet around the outer perimeter of the assembled motifs to even the edges: sc evenly into every chain-arch and the outermost picot tips, placing a picot (ch3, sl st into base) every 6 sc to mimic the delicate picot edging shown. This gives a framed look and evens motif heights for final blocking.
— Decorative Beaded Spokes (Applied During Joining) :
Info :
Thread beads onto yarn before making the spokes. For each green star motif, create 8 short spokes from center to petal tips. Slide 2–4 seed beads per spoke before forming a small sl st chain: bring a bead up close to hook, ch3 (with beads nestled on chain), sl st into corresponding outer region; secure with extra sl st and a small knot on the back side. Repeat 8 times per motif.
Round 1 :
Pick up cream yarn at center back of a green star, bring yarn to the front and slide 3 seed beads up. Ch4 and sl st into outer join point to secure the beaded spoke. Repeat evenly around all motifs. (8 beaded spokes per motif)
Info :
Bead placement affects drape; test one motif first. Use very small seed beads to avoid stiffening the runner. If beads are heavy, reduce the number per motif.
— Outer Lace Edging and Picot Finish :
Round 1 :
With cream yarn and 2.5mm hook, join at any outermost picot. Ch1, sc evenly along the outer border of joined motifs (approx 3 sc per green star arm outer scallop and 6–8 sc around each outer petal of the poinsettia). Count as you go to maintain symmetry.
Round 2 :
Work a decorative picot scallop row: *(sc in next 3 sts, (ch3, sl st into first ch to make picot), sc in next 3 sts, picot)*/repeat around. This creates the tiny clustered picot border visible in the photograph giving that delicate eyelet feeling.
Round 3 :
For additional refinement work 1 round of crab stitch (reverse sc) around the very edge if you want a twisted rope border. This step is optional and gives a neat finished edge. Fasten off and weave ends thoroughly into back side.
Info :
Block entire runner flat: pin the runner to required dimensions on blocking board, gently spritz with water, and let dry fully. Use rust-proof pins and ensure points are evenly stretched to match the natural shape created by the motifs.
— Alternate Decorative Elements (Optional) :
Info :
Add small cream bead clusters at each diamond center in the mesh for extra shimmer, or attach a few larger accent beads to the very center of each large poinsettia to increase visual interest. Consider an embroidered vein on petals using matching cream-colored cotton or metallic thread for subtle sheen.
— Finishing Touches :
Round 1 :
Carefully weave all tails back into motifs with a tapestry needle. Clip close but not into a knot. If any beads feel loose, stitch through several times securing from back to front and knot on the back.
Round 2 :
Lightly steam-block or wet-block again after final weaving if motifs pulled in during sewing. Re-pin and let dry. Store flat or rolled in acid-free tissue to preserve bead shine.
Info :
To resize: make more small star motifs and add them symmetrically along the runner sides or length; add more poinsettias for longer centerpieces. Maintain motif count parity for balanced look.
This table runner is a beautiful blend of lacework and sculpted floral texture—perfect for holiday centerpieces or vintage-inspired decor. The raised poinsettia petals and tiny gold bead accents catch light and attention, while the delicate lace connections keep the piece airy and elegant. Enjoy the meditative process of working motifs, and the extra satisfaction of seeing each motif join seamlessly into the final runner. 🧶✨ Add your own colorway for a fresh seasonal twist or gift one to a friend who appreciates handmade heirlooms. 🎁