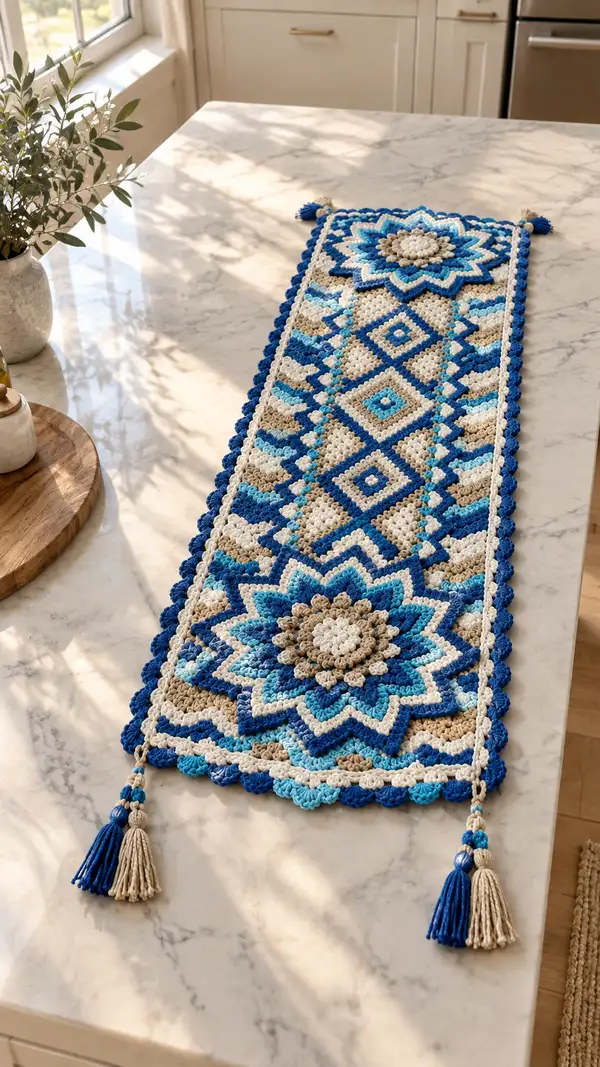
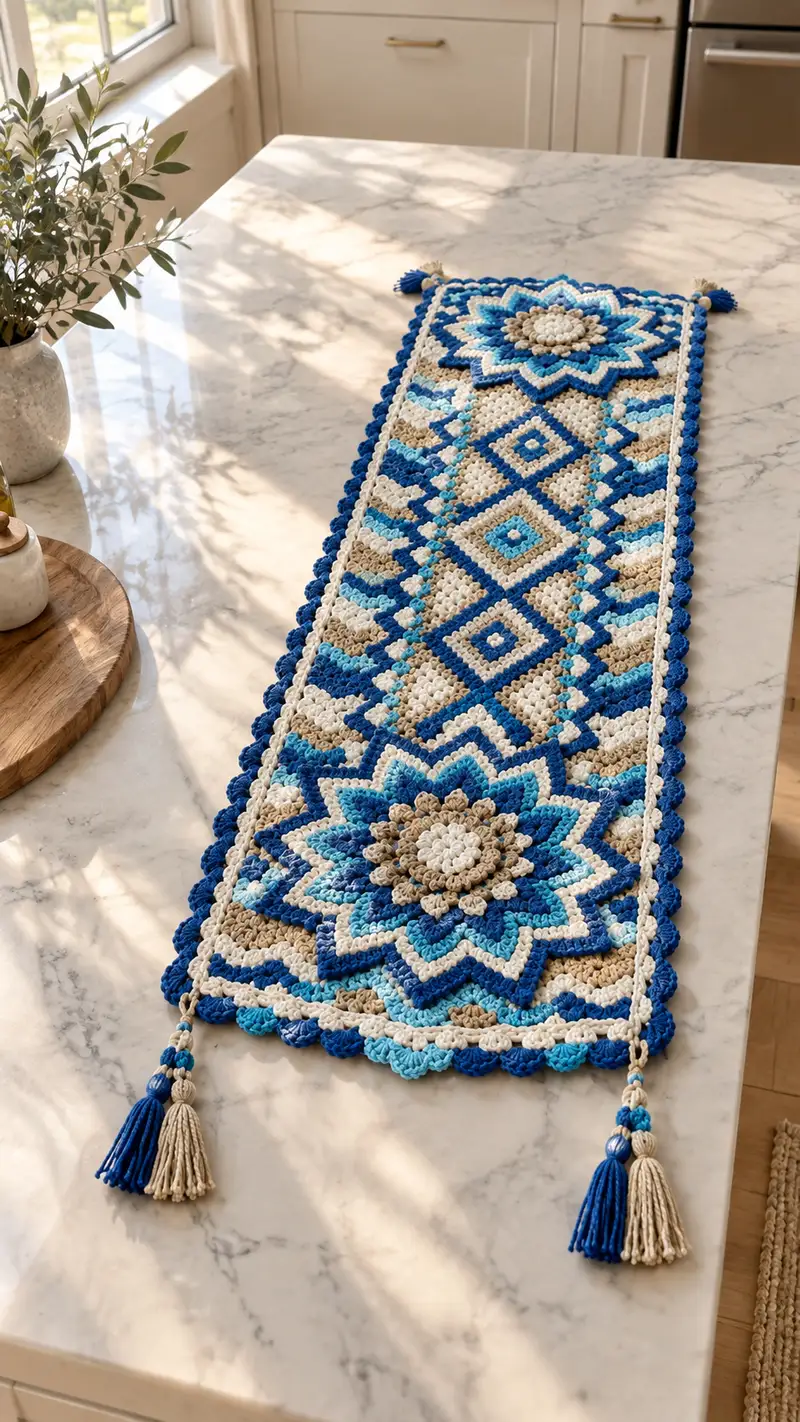
This elegant crochet table runner features two large layered floral medallions at each end, a textured mosaic diamond center panel, scalloped picot borders and coordinating tassels. Worked in blues, cream and warm tan, the runner showcases layered puff clusters and contrasting colorwork to create depth and a hand-stitched heirloom look. The pattern uses worsted weight yarn and structured joining so it lays flat and presents beautifully on a dining or kitchen surface.
Progress Tracker
0% Complete
— Materials & Gauge :
Info :
Use worsted weight yarn (#4) and a 4.0mm hook to achieve a fabric similar to the sample photo. Gauge is not critical for appearance but is important for medallion-to-panel fit. Sample gauge: 14 sts x 16 rows = 10 cm in sc. Adjust hook size if needed.
— Notes on Techniques :
Info :
This pattern uses puff and popcorn clusters to create the layered flowers, mosaic-style color changes across rows for the diamonds and alternating cluster rows for texture. Puff stitch: yarn over, insert, yarn over and pull up loop (repeat 3 times to have 7 loops on hook), yarn over and pull through all loops, ch1 to close puff. Popcorn stitch: 5 dc in same stitch, remove hook from last loop, insert into first dc, pull loop through to close, ch1 to secure.
— Medallion (Make 2) :
Round 1 :
6 sc in magic ring (6)
Round 3 :
(1 sc, inc) x 6 (18)
Round 4 :
(2 sc, inc) x 6 (24)
Round 5 :
(3 sc, inc) x 6 (30)
Info :
Change to cream/ivory for the first layered round if you want the small center contrast. If keeping same color, continue. Press floats to inside if carrying color.
Round 6 :
1 sc in each st around (30)
Round 7 :
(4 sc, inc) x 6 (36)
Round 8 :
1 sc in each st around (36)
Round 9 :
(5 sc, inc) x 6 (42)
Round 10 :
1 sc in each st around (42)
Info :
Rounds 6-10 establish the small circular base which will support puff petal rounds. Keep tension even; do not stuff medallion base — medallion remains flat and lightly textured.
Round 11 :
Change to warm tan. *ch1, skip next sc, 7 dc cluster (pop) into next st, ch1, skip next sc, sc in next st* repeat around to make 14 petal foundations. (42 fronts of petals including sc anchors)
Round 12 :
Change to deep blue. Working into the ch1 spaces: *(ch2, puff stitch in same sp, ch2, sl st into next sc anchor)* repeat around to surround each tan petal with a textured blue petal edge. Maintain 14 petals (42 counting anchors)
Info :
Puff stitches in this round are worked into chain spaces to create a pronounced petal. Keep puffs slightly loose compared to surrounding sc so petals lie flat without pulling the base in.
Round 13 :
Change to aqua. Work 1 sc in each st and in each sl st from previous round (approx 42 sc) to create a tidy join and define the petal base (42)
Round 14 :
(6 sc, inc) x 6 (48)
Round 15 :
1 sc in each st around (48)
Round 16 :
Working into designated petal tops: *ch1, (puff, ch1, slip into next sc) across each of the 14 major petals to create a raised petal ring* Finish round with sl st to join. Count remains 48
Info :
At this stage you should see three concentric layers of texture: inner tan clusters, a blue petal layer, and an aqua ring. If petals appear twisted, gently press them with fingers and adjust puff tension on the next round.
Round 17 :
Change to cream. 1 sc in each st around (48)
Round 18 :
(7 sc, inc) x 6 (54)
Round 19 :
1 sc in each st around (54)
Round 20 :
Change to deep blue. *Work 3 dc bobble into every 4th stitch across to form pointed outer petal bases* (54)
Round 21 :
1 sc in each st around (54)
Info :
Begin shaping the star points now: guide the stitches so that points are evenly spaced. Use stitch markers at each point apex to keep even spacing for later joins to the runner panel.
Round 22 :
*(5 sc, dec) x repeat to create gentle scallops around each point - (5 sc, sc2tog) x 9 across alternately to shape petals* (48)
Round 23 :
Change to aqua. 1 sc in each st around (48)
Round 24 :
In FLO: (2 sc, inc) x 12 (60)
Round 25 :
Change to cream. 1 sc in each st around (60)
Round 26 :
*(3 sc, puff in next st) x across petal tops to deepen texture, anchor with sc between puffs* maintain 60 sts
Info :
If you prefer the medallion to lay flatter, omit some puffs or work them more loosely. Light blocking after assembly will also flatten and set the petals.
Round 27 :
Change to deep blue. 1 sc in each st around (60)
Round 28 :
(4 sc, dec) x 12 (48) — begin refinement of outer ring so medallion matches panel width
Round 29 :
1 sc in each st around (48)
Round 30 :
Slip stitch evenly around the last round to create a neat edge; fasten off leaving 30 cm tail for sewing to panel. (48)
Info :
Make two identical medallions. When making the second medallion, ensure color sequence is mirrored if you want symmetry. Weave ends loosely to the wrong side and trim after blocking.
— Central Panel (Worked flat in rows) :
Row 1 :
Using cream yarn make foundation chain 121 (this will yield approx 20-22 cm width matching medallion diameter). Turn. Count should create a panel length that, with medallions attached, equals desired runner length.
Row 2 :
Ch1, sc in 2nd ch from hook and in each ch across (120 sc). Turn.
Row 3 :
Ch2 (counts as hdc), hdc in each st across (120 hdc). Turn.
Info :
These first rows create a stable base for the mosaic cluster rows. Keep edges neat by working the first and last stitch of each row into the turning chain if needed for straight sides.
Row 4 :
Change to warm tan. Ch1, sc in each st across (120 sc). Turn.
Row 5 :
Change to deep blue. Mosaic row: Ch1, sc in first 4 sts, *pop (5 dc pop) in next st, sc in next 6 sts* repeat across to create dotted vertical accents. Count remains 120 sc anchors plus popped clusters seated in designated sts. Turn.
Row 6 :
Change to cream. Ch2, hdc in each st across, treating popped clusters as single stitch anchors (120 hdc).
Row 7 :
Change to aqua. Ch1, sc across but in pattern: sc in first 3, *(sc, ch1, sc) in next st (creates small eyelet), sc in next 5* repeat to form the small alternating chevrons that later become the diamond interior. (120 sc)
Info :
Mosaic patterning is created by color placement rather than counting complex stitches. Keep detailed notes of which rows are your motif-anchor rows (we recommend marking every 10th row to avoid losing track).
Row 8 :
Return to cream. Ch1, sc in each st across. Turn (120 sc)
Row 9 :
Change to deep blue. Row designed to create diamond outlines: Working sc and hdc mixture: ch2, (hdc in next 4 sts, sc in next 2 sts) repeat to place stronger vertical definition. End with hdc in last stitch. (120)
Row 10 :
Change to warm tan. Ch1, sc across in cream-like texture - sc 120. Turn.
Info :
From row 5 to row 20 you will establish a repeating 8-row mosaic stripe that when staggered creates the diamond lattice. Photograph or chart the first full repeat so you can duplicate it along the full runner length.
Rows 11-20 :
Repeat Rows 5-10 x1 (six-row pattern continues): include scattered popped clusters in deep blue and alternating small eyelet chains in aqua to build up diamond centers; always return to cream for grounding rows. Maintain 120 sts each row; treat multi-stitch clusters as occupying the original anchor stitch.
Row 21 :
Change to deep blue. Ch1, sc in each st across (120). Turn.
Row 22 :
Change to cream. Ch2, hdc across (120). Turn.
Info :
After each 10-row segment, check panel width against medallions. The panel should match medallion edge to edge; if panel is too narrow or too wide adjust starting chain by increments of 2 stitches before continuing the full length.
Rows 23-60 :
Continue the established mosaic sequence to reach desired runner length. The photo shows approximately 38-44 patterned repeats between medallions; for an average runner aim for 36 repeats (approx 120 rows including base rows). Count and chart your repeats: make sure the central diamonds sit centered in the panel. Maintain 120 sts per row.
Info :
When working color changes across rows, you can carry colors up the side or fasten off and reattach to avoid long floats. Carry if the color band runs less than 6 sts; otherwise fasten off and weave in ends neatly later. Use a tapestry needle to tuck ends into textured gaps.
Final Rows (Panel finishing) :
Work 4-6 rows of cream sc to create a neat frame for attaching medallions: Row X: ch1, sc 120 across x4. Fasten off leaving long tails both ends to sew medallions.
Info :
Trim panel to desired length before joining medallions — remember medallions will add approximately 12-15 cm each to runner length. Block panel flat before attaching for ease of assembly.
— Border & Scalloped Edge :
Round 1 :
With deep blue, join yarn at any corner, ch1, sc evenly around perimeter working 1 sc in each row end and 1 sc in each side stitch (approx 240 sts around depending on panel length). Join with sl st. Count will vary with panel length.
Round 2 :
Change to cream. Ch2, hdc in same st, (hdc in next 3 sts, 2 hdc in next) repeat around to create slight puffed border (increase evenly approximately 10% to allow scalloping). Join with sl st.
Info :
This round adds structure for the scalloped edge. If your panel length created too many or too few stitches, minor adjustments now will keep scallops even. Use stitch markers at corners to divide evenly into quarters.
Round 3 :
Change to deep blue. Ch1, *(sc in next 2 sts, 5 dc shell in next st, sc in next 2 sts)* repeat around to form shells. Each shell occupies 5 sts plus anchors; space shells evenly around perimeter. Join with sl st.
Round 4 :
Change to aqua. Working into shell centers: *sl st into shell center, (ch1, puff, ch1) in shell center, sl st into outer point between shells* repeat. This creates subtle three-dimensional scallop peaks. Join and fasten off, weave ends.
Info :
For a more pronounced scallop, work two rounds of shells, one larger (7 dc) and one smaller (5 dc), alternating deep blue and aqua. The photo shows a pronounced deep-blue scallop with alternating lighter blue touches.
— Joining Medallions to Panel :
Info :
Pin medallions to each short end of the panel so that their outer petals extend just beyond the scalloped border edge. The medallion center should align with the panel center width-wise. Use lots of pins to hold petals flat and symmetrical.
Round 1 :
With long tail from medallion, whip stitch medallion edge to panel cream border through back loops only of the panel edge and the inner sc of medallion to create a blunt, nearly invisible join. Sew 6-8 evenly spaced anchor points first, then fill in between. Go around entire medallion; then weave the tail into wrong side and trim. Repeat for opposite medallion. (Number of stitches sewn depends on medallion perimeter.)
Info :
Do not overstretch medallion when sewing. Insert needle through the post or back loop of panel edge to create a flatter join. If medallions show slight puckering, block assembled runner to even out tension.
— Tassels (Make 4) :
Info :
Tassels in the photo are two-tone with beaded bands and wrapped necks. Make matching tassels using deep blue and cream. Each tassel measures approx 8-10 cm finished (excluding bead). Use approx 20-30 strands folded double for a full tassel.
Round 1 :
Wrap yarn 30 times around a 9 cm cardboard template with deep blue and cream alternating for desired banding. Cut along one side to release tassel. Tie a firm knot near the fold to form the head. Trim ends evenly.
Round 2 :
Create a neck wrap by taking 6 strands of cream, wrap them tightly around the tassel head approx 1.5 cm down from the top, secure with a knot and weave the ends into the head. Add a bead above the neck if desired and knot the loop above bead for hanging.
Info :
For the two-tone stacked bead look, use a small wooden or glass bead then tie a double knot above it to secure. Attach tassel loop to medallion outer point with a few tight whip stitches using matching yarn through the knot loop. Trim evenly and comb with a fine-toothed comb if desired.
— Final Embellishment Rounds (Edge refinement) :
Round 1 :
With deep blue, work sc around medallion-panel seam to tidy visible stitches: sc in each join stitch and around petals where medallion meets panel. Use smaller hook if stitches appear loose. Count will vary.
Round 2 :
Change to cream. Ch1, sc evenly around the scalloped border outer edge to neaten points and unify color contrast. Join and fasten off. Weave all tails and hide them behind medallions or under the scallop by threading them through the existing fabric.
Info :
At this point the runner should be fully assembled. Lay flat and block gently: mist with warm water and pin to a flat surface to set the medallion points and scallops. Allow to dry completely before use.
— Optional - Padding & Light Stuffing :
Info :
If you prefer the medallions to have more sculptural lift, insert a very light layer of polyester fill between the medallion back and the panel prior to final sewing, placing the stuffing into the medallion center only. Do not overstuff or medallion edges will pucker.
— Troubleshooting & Tips :
Info :
If your runner waves at the edges, block with more pins and allow a longer drying time. If diamonds shift off-center, unpick medallion slightly and re-position. Keep note of full-row color counts to easily mirror the second half of the runner for perfect symmetry.
Completing this crochet table runner is a truly rewarding experience — every puff, cluster and scallop comes together to create a bold, tactile statement piece for your home. The layered medallions and geometric diamonds give a handcrafted sophistication while the tassels add playful movement. Enjoy the satisfaction of laying it on your table and seeing how the texture and color catch the light. 🧶✨ Display with care and share your finished piece to inspire friends and family! 🌿