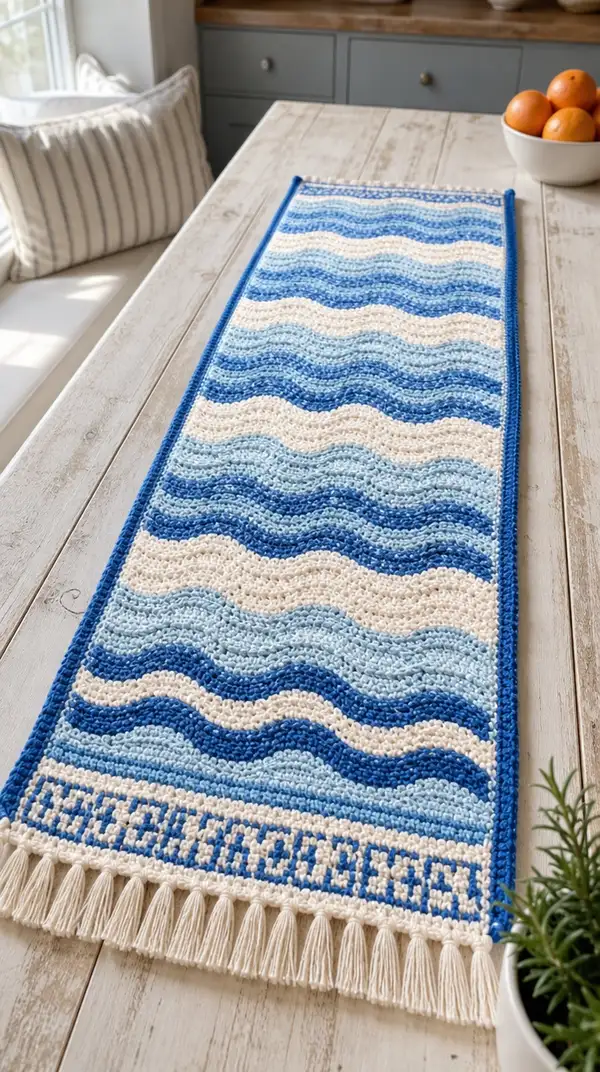
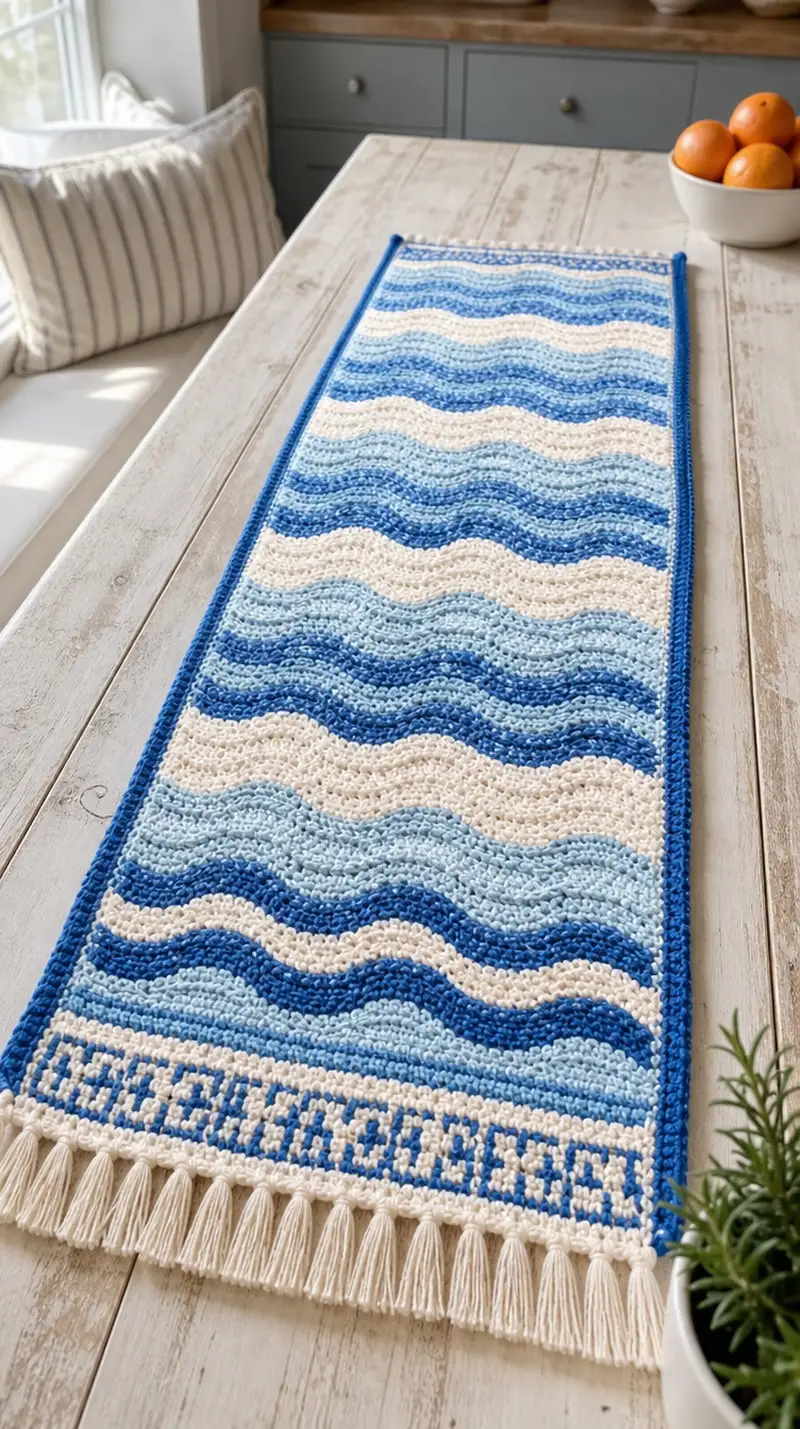
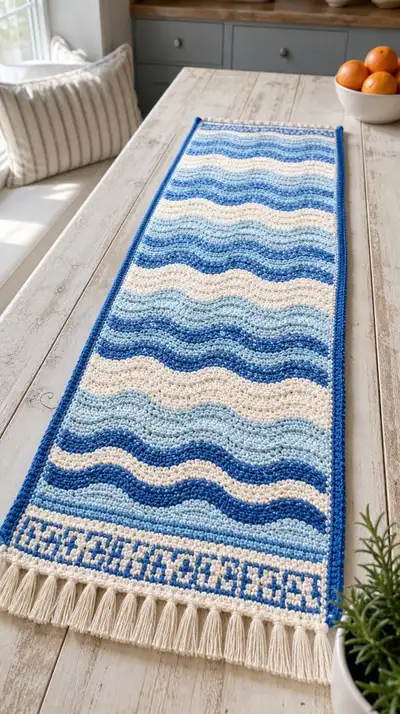
A calming coastal-inspired table runner featuring undulating wave bands in three shades of blue and a creamy sand accent. Textured front- and back-post stitches create the gentle ripple seen across the length, and a neat single crochet border with tasseled fringe finishes each short end. This pattern includes step-by-step row instructions, color-change tips, finishing notes, and full assembly for a polished runner that looks handwoven but works up with simple, repeatable motifs.
Progress Tracker
0% Complete
— Gauge & Notes :
Info :
Gauge: 18 sts and 12 rows = 4 inches (10 cm) measured in the wave repeat pattern using a 4.0 mm hook with worsted weight yarn. Adjust hook size if needed to match gauge. Width in this pattern is based on a multiple of 9 stitches. The sample runner is made with a foundation chain of 81 stitches (9 repeats across). Work right side rows from right to left and wrong side rows from left to right. Carry unused color only for short distances; fasten off when changing color every 6 rows for tidy joins. Use stitch markers at row ends for accurate counts.
Info :
Abbreviations used in row instructions: sc, hdc, dc, fpdc, bpdc, ch, sl st. Each stitch placeholder counts as one stitch toward the row total. All rows across the main body maintain 81 stitches (for the width of 81-chain foundation). Maintain consistent tension especially when working fpdc/bpdc to avoid waves that are too pronounced or too flat.
— Foundation :
Row 0 :
Ch 81. (This is the foundation chain. You may work a foundation single crochet chain or a classical chain depending on your preference.)
Row 1 :
RS: Starting in 2nd ch from hook, 1 sc in each ch across, turn. (81)
Info :
Row 1 creates a stable base for the textured wave pattern. If you prefer a slightly firmer base, use hdc across instead of sc; adjust following rows accordingly. Place a stitch marker in the last stitch to mark the top edge for the first row if helpful.
— Wave Pattern Overview :
Info :
The wavy texture is produced across a 9-stitch repeat: (3 sc, 3 post double crochets, 3 sc). Post double crochets are worked as groups of 3 stitches: when we write 3 fpdc we mean 3 front post double crochets worked into three consecutive stitches, not a cluster. The group position shifts every row in a 6-row cycle to create the undulating wave. Each row maintains 81 stitches. Color bands are 6 rows each; change color at the end of Row 6 for the first stripe, Row 12 for the second stripe, and so on.
Info :
Terminology for the post stitches: fpdc (front post double crochet) - yarn over, insert hook from front to back around the post of the stitch indicated, complete the dc. bpdc (back post double crochet) - yarn over, insert hook from back to front around post, complete the dc. These maintain the stitch count; a fpdc counts as a single stitch for the row.
— Wave Panel (Rows 2-169) :
Info :
We will work 168 rows of wave pattern in total for the runner body after the foundation row, forming 28 color bands of 6 rows each (alternating colors: Cream, Sky Blue, Ocean Blue, Deep Sea Blue, repeating). If you prefer a shorter runner, work fewer repeats by dividing the number of stripes proportionally. Keep the width at 81 stitches or any multiple of 9.
Row 2 :
WS: Ch 2 (counts as hdc), turn. *3 sc, 3 fpdc, 3 sc* across repeating the 9-stitch repeat 9 times. End with 1 hdc in top of turning ch-2. (81)
Row 3 :
RS: Ch 2, turn. *Starting the 9-stitch repeat shifted right by 1 stitch: 1 sc, 3 sc, 3 fpdc, 2 sc*—but simplified to practical terms: work *3 sc, 3 fpdc, 3 sc* across, shifting the fpdc group by starting the first group one stitch later than the previous row by working the first sc(s) to align. Maintain 81 sts. (81)
Info :
To shift the post group, you will work the first few stitches as sc until you reach the position where the fpdc group needs to begin. Visually line up the fpdc groups so they slowly move to the right across rows. If you prefer a written shifting method, count the stitches and relocate fpdc groups by starting each group at stitches: Row 2 starts groups at st 4, Row 3 at st 5, Row 4 at st 6, Row 5 at st 7, Row 6 at st 8, Row 7 at st 1 (wrap-around), continuing the cycle.
Row 4 :
WS: Ch 2, turn. Work the same 9-stitch repeat but shift the fpdc group one stitch to the right again: *3 sc, 3 fpdc, 3 sc* with groups beginning one stitch later than Row 3. Keep 81 sts. (81)
Row 5 :
RS: Ch 2, turn. Continue shifting the 3-finger fpdc groups through the 9-stitch repeats by one stitch again. Pattern across: *3 sc, 3 fpdc, 3 sc* (81)
Row 6 :
WS: Ch 2, turn. Final row of the 6-row wave cycle for the current color. Shift fpdc group once more to complete the wave bulge, working *3 sc, 3 fpdc, 3 sc* across. (81)
Info :
Change color at the end of Row 6 if following the color stripe plan. Fasten off cream (or current color) and join next color with a slip stitch in the last stitch of Row 6, chain 2 to start Row 7. We recommend weaving in the color change tail across the wrong side and trapping it between stitches for a neat finish.
Rows 7-12 :
Repeat Rows 2-6 in Color B (Sky Blue). Maintain the same shifting of fpdc groups across the 6-row cycle to create the next ripple band. (81)
Info :
When changing colors every 6 rows, pull the new color through on the last yarn over of the final stitch of the preceding row to create an invisible join, or fasten off and join with a sl st for crisper band edges. Carry short tails along the WS and catch them under the post stitches when possible for minimal weaving later.
Rows 13-18 :
Repeat Rows 2-6 in Color C (Ocean Blue). (81)
Rows 19-24 :
Repeat Rows 2-6 in Color D (Deep Sea Blue). (81)
Info :
You have now completed four color bands (24 rows). Check your width and edges. If the runner is cupping or ruffling, block lightly before continuing further to relax stitches. Note that blocking mid-project is allowed; be sure to use the same tension when resuming so pattern remains consistent.
Rows 25-168 :
Repeat the 24-row color rotation (Cream, Sky Blue, Ocean Blue, Deep Sea Blue) seven more times to reach a total of 168 body rows, or repeat until your runner reaches your desired length. For the pictured runner we complete 168 rows of wave pattern (28 bands of six rows each). Each six-row wave repeat is worked exactly like Rows 2-7 with shifting fpdc groups to create the ripples across the width. (81 per row)
Info :
Keep track of the number of completed stripes using a tally or row counter. If you wish to add or subtract stripes, do so in multiples of 6 rows to keep the color bands even. If you change width from a multiple of 9, the repeat will no longer align correctly; always choose multiples of 9 for consistent patterning.
— Final Body Rows & Edge Stabilization :
Info :
Once you complete the last wave row (Row 169 if you used 168 body rows plus foundation), work one even stabilizing row in the final color: Ch 2, turn, 1 hdc in each st across (81). This evens the top edge prior to the border. Fasten off and weave in ends for the body colors at this stage if you prefer to finish them before edging.
Row 169 :
Stabilizing row: Ch 2, hdc in each st across, turn, fasten off. (81)
Info :
Weave in the long tails from color changes every 2-3 bands to avoid an overwhelming number of tails at the end. Use the tapestry needle to weave along the back of the post stitches so tails are hidden within texture ridges.
— Border (worked around entire rectangle) :
Info :
Join border color (Deep Ocean Blue used in photo) in any corner stitch with a sl st. Work single crochet evenly around the runner, placing 3 sc in each corner to turn smoothly. Suggested border has 6 rounds for a defined frame; the first two rounds are worked in sc, rounds 3-5 in hdc BLO for a raised frame, and round 6 a final sc for neat finishing. Use a 4.0 mm hook for body and switch to 3.5 mm hook for the final round if you prefer a tighter edge.
Border Round 1 :
Join yarn in corner, ch 1, work 1 sc in same st and 1 sc across each row-end stitch along the side edges (working 1 sc in the turning ch of the row counts as a stitch), placing 3 sc in each corner stitch to turn. Continue across entire perimeter and join with sl st to first sc. (Number of sts will vary by the number of edge spaces; weave 1 sc into each row-end to maintain an even border.)
Border Round 2 :
Ch 1, 1 sc in each sc around, 3 sc in each corner stitch. Join with sl st. This round evens the border. Keep tension loose enough to avoid puckering. Fasten off and change hook if desired. (Same stitch count as Round 1)
Border Round 3 :
Join same color or a contrasting piped color, ch 2 (counts as hdc), work 1 hdc in each sc around in BLO to create a raised ridge. Work 3 hdc in each corner. Join with sl st. (Same approximate stitch count)
Border Round 4 :
Repeat Round 3 in same color to deepen the ridge. Join with sl st.
Border Round 5 :
Switch back to single crochet for the final finishing round: ch 1, 1 sc in each st around, 3 sc in each corner. Join with sl st and fasten off. Weave in ends on the WS using a tapestry needle. This final sc round creates a clean edge that frames the wave panel. (Number of sts will be approximately number of rows along side + number of stitches along top and bottom.)
Info :
If you prefer a decorative edge, substitute a crab stitch (reverse sc) for the final round to create a slightly twisted, neat rope edge. Work moderately loose or use a 0.25–0.5 mm larger hook than used for border round 4.
— Tassel Fringe (Both Short Ends) :
Info :
Tassels are attached along both short ends of the runner. For an 81-st wide runner, we recommend 20 tassels evenly spaced across the width (about every 4 stitches). If you prefer a denser fringe, increase tassel number to 24–26. Use cream/sand yarn for tassels as shown in the photograph.
Tassel Prep :
Using a cardboard that measures 3.5 inches (9 cm) tall, wrap cream yarn 16 times (looping yields tassels roughly 7 inches before folding; final length will be half that when folded and attached). Cut one looped bundle and tie securely with a short piece of yarn about 1/2 inch from the top to create the tassel head. Trim the bottom evenly with scissors to desired length. Repeat for 20 tassels per short end (40 total for both ends).
Tassel Attachment :
Fold tassel head in half, insert fold under the final border row between two sc, pull ends through loop and tighten to create a lark's head knot. Space tassels evenly: mark 20 equally spaced positions along the short edge using stitch markers or pins. Attach tassels at each marker. After attaching all tassels, trim to uniform length and gently comb or fluff tassel strands with fingers.
Info :
To create a fuller fringe, use 24 wraps instead of 16 when preparing tassels. For a lighter fringe, use 12 wraps. Keep the fold knot tight and hide the top knot within the border to avoid visible bulk.
— Finishing & Blocking :
Info :
Weave in all tails on the wrong side, particularly the tails from color changes. Trim any stray fibers. Blocking: wet-block the runner or lightly steam-block it to flatten and set the waves. Pin the runner to the desired final dimensions (e.g., 12 x 48 inches) using rustproof pins on a blocking mat. Let dry completely before removing pins. Gently shape tassels after blocking if necessary.
Info :
Final check: ensure that the border lays flat along all four edges and tassel spacing is even. If the border puckers slightly, unpick last border round and rework with a slightly larger hook for a relaxed finish. If the border is too loose, rework with a smaller hook or add an extra sc round.
— Variations & Customization Tips :
Info :
Change stripe widths: use 4, 6, or 8-row bands to alter visual weight of colors. Change wave amplitude: increase or decrease the shift cycle from 6 rows to 8 rows to soften or lengthen the wave. Alternate center motif: replace post double crochets with tr clusters for a chunkier wave. For a narrower runner, reduce width by subtracting multiples of 9 stitches while keeping the number of rows proportional.
Info :
To make a table runner with a fringed long edge rather than short ends, attach tassels along the long edges after the final border rounds. For a more contemporary look, omit tassels and add small pom-poms instead spaced every 6-8 stitches.
You did it — your Coastal Wave Table Runner is complete and ready to create a tranquil, beachy accent in your home! The textured waves and clean border come together for a polished, handmade look that’s both cozy and refined. Add this runner to a breakfast nook, console table, or mantel to bring a touch of coastal calm to your space. 🧶🌊 Enjoy the satisfaction of a large, color-rich crochet project — and don't forget to take a photo and show it off! ✨