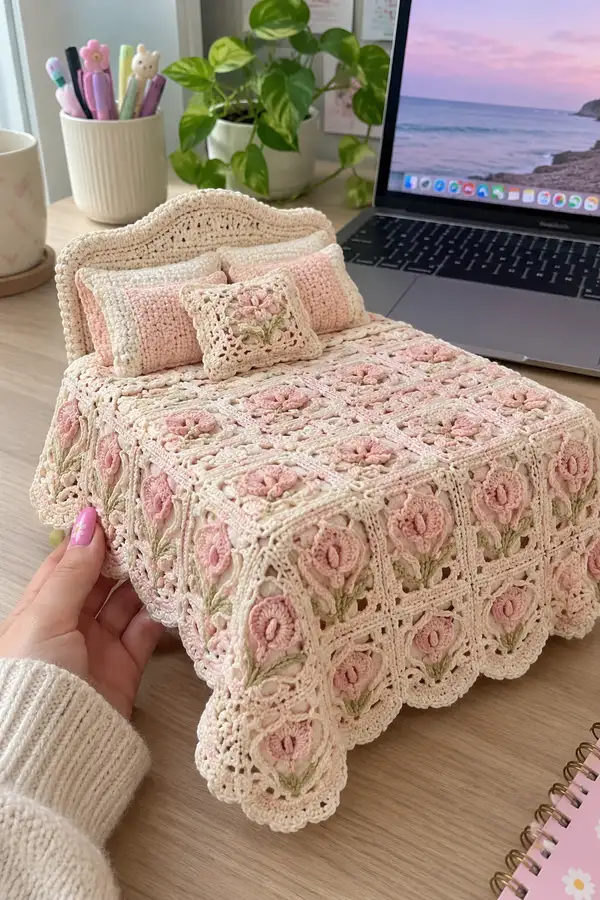
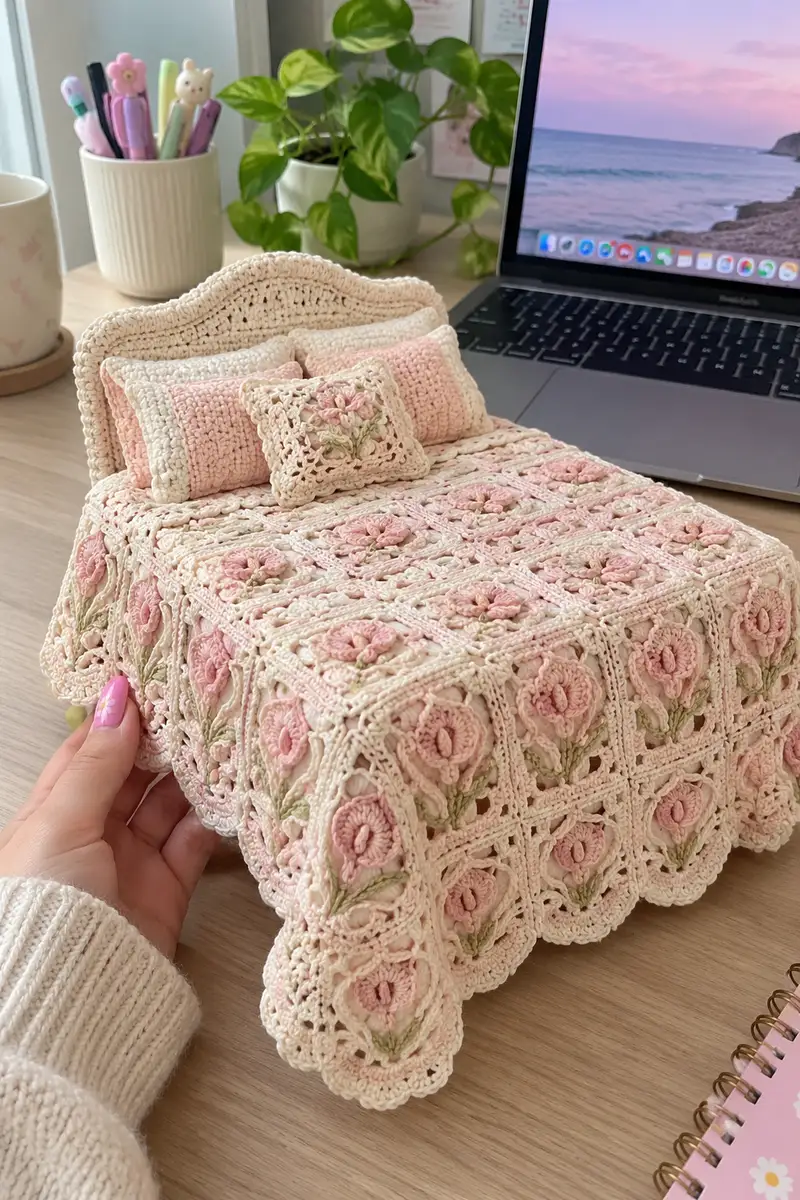
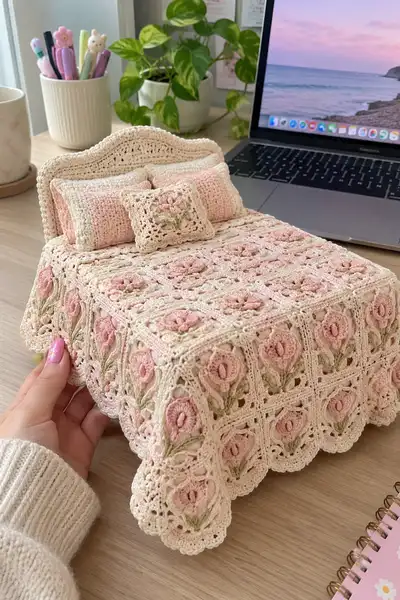
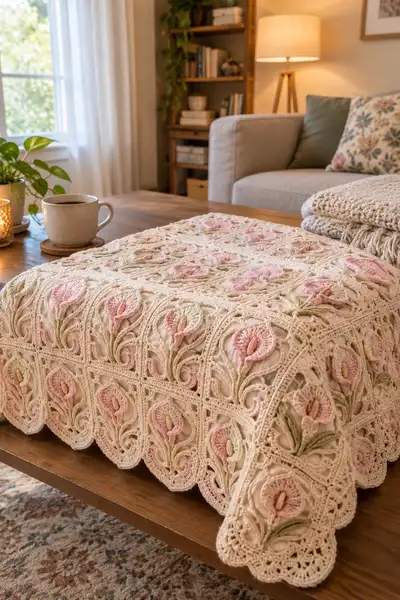
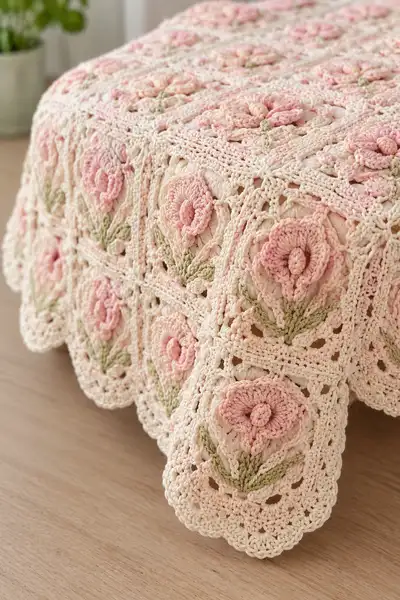
A romantic, vintage-inspired bedspread made from textured floral square motifs in blush pink, cream and soft sage. Each square features raised petals and embroidered leaves, joined into a scalloped-edge spread that drapes beautifully over a bed. The pattern uses overlay crochet and layered puff stitches to create dimensional botanical curves and delicate lace-like joins.
Progress Tracker
0% Complete
— Overview :
Info :
This pattern is written to create individual botanical square motifs which are then joined into a bedspread. The sample bedspread uses 9 squares across by 12 squares down for a generous queen/king coverage; you can increase or decrease the number of squares to suit your bed. A single motif measures approximately 13 x 13 cm (5 x 5 in) using recommended yarn and hooks. Adjust hook size to obtain the gauge and keep yarn consistent across the project.
Info :
Techniques used: magic ring, puff stitches for raised petals, layered overlay work, surface slip-stitch embroidery for stems and leaves, open lacy joins and scalloped final border. This pattern includes many Info sections—read them as you work.
— Motif Center & Foundation :
Round 3 :
(1 sc, inc) x 6 (18)
Round 4 :
(2 sc, inc) x 6 (24)
Round 5 :
(3 sc, inc) x 6 (30)
Round 6 :
(4 sc, inc) x 6 (36)
Round 7 :
(5 sc, inc) x 6 (42)
Round 8 :
(6 sc, inc) x 6 (48)
Info :
Maintain an even tension in these foundation rounds. This circular expansion creates a stable, slightly domed center that will receive the raised petals. If you prefer a flatter center, use a slightly smaller hook for the first 4 rounds.
Round 9 :
1 sc in each st (48)
Round 10 :
1 sc in each st (48)
Round 11 :
1 sc in each st (48)
Info :
Work three even rounds to stabilize the center and create a round canvas for petal placement. The next rounds will provide anchor points spaced every 6 stitches (48/8 = 6), so count stitches carefully and mark every 6th stitch with a removable marker for petal placement reference.
— Raised Petal Layer (three-dimensional petals) :
Round 12 :
*(ch1, sk 2 sts, 1 dc in next st) repeat across to create small arches* — work 48 sts evenly to create 16 arches spaced for petals (48)
Info :
We are creating small arches that act as anchor points for each petal. Place a stitch marker at the top of each arch if that helps with counting. The motif will have 8 primary petals and 8 secondary petals depending on how you shape them; we will create 8 larger petals evenly spaced around the center.
Round 13 :
At each marked anchor point make petal foundation: ch2, (puff5, ch1, sc in top of arch) — form 8 petal foundations spaced evenly (8 clusters + anchors)
Round 14 :
Work into each petal foundation: join blush pink yarn. For each petal: (ch2, puff7 leaving last loop on hook each puff, pull through all loops, ch1, sc in base) — forming deep puff petals (8 petals)
Info :
To form a pronounced petal, use puff stitches made from 7 yarn-overs (puff7) or 5 for less bulk. Keep the first and last loops of each puff slightly loose to shape. After forming puffs, gently pull the center of the puff outward with your finger to create a curved petal shape.
Round 15 :
Working around the petals, sc evenly between petals to maintain 48 sts count across the round: sc in each st and sc in each ch1 between petal clusters (48)
Round 16 :
*In the space behind each petal make a small supporting row: (ch1, sc, ch1, sc) anchoring the petal back to the center* — repeat around (48)
Round 17 :
Optional color swap: join pale peach at top center of each petal and work 1 sc around the top-most loops of the puff to add a soft center highlight (8 small sc clusters)
Info :
If you prefer a two-tone petal (a darker core and lighter edge), carry the second color up behind the petals or join it later and slip-stitch the core. Keep loose ends to be woven into the back of the square.
Round 18 :
1 sc in each st (48) — work evenly to bring the round back to a stable circumference
Round 19 :
FLO 1 sc in each st (48) — front loop only to create a ridge that will frame the petals
Round 20 :
1 sc in each st (48)
Info :
These rounds lock the petals into place and create a visible ridge that separates the raised petal area from the square frame that follows. If petals seem loose, add a few invisible stitches at their base to anchor them deeper into the motif.
— Leaf & Stem Surface Embroidery :
Info :
We will add stems and two leaves below each petal using surface slip stitch and short, elongated sl-stem stitches in sage green. These are worked on the right side across the next rounds — treat them as surface embroidery that is anchored into the square frame.
Round 21 :
Join sage green yarn at the bottom of the motif where a petal sits; surface slip-stitch up toward the petal center to create a stem (approx 6 surface sl-sts). Repeat for each petal location (8 stems)
Round 22 :
For each stem, create two mirror leaves: using a small elongated sl-stitch technique, work 3 sl-sts outward on each side of the stem forming a leaf shape; fasten off and weave ends (16 leaf shapes total)
Info :
To make an elongated slip stitch leaf: insert hook slightly ahead of your last sl-st, pull up a longer loop about 1.5x standard loop, then complete a sl-st to anchor it. Repeat 2-3 times and finish with a small sc at the tip to anchor the leaf base. Stagger leaf placement for a natural look.
Round 23 :
1 sc around motif (48) to re-establish the working round after surface embroidery
Round 24 :
1 sc in each st (48)
Info :
Weave in loose ends from the surface embroidery at the back of the square, using a yarn needle. Do not trim too short—you may want to hide ends while joining squares later.
— Square Frame and Corner Shaping :
Round 25 :
Change to Cream yarn. (ch3 [counts as dc], dc in same st, *sk 5 sts, (3 dc, ch2, 3 dc) in next st (corner shell), sk 5 sts, dc in next 6 sts across*) repeat to form 4 corner shells — this round converts circle into rounded square with visible corner shells. Count pattern to end with 4 corner shells spaced evenly around motif.
Info :
This round is crucial: it uses corner shells (3 dc, ch2, 3 dc) to begin the square formation. The exact stitch spacing depends on your previous round count — if your spacing differs slightly, adjust the number of skipped stitches between shells to keep 4 evenly placed corner shells.
Round 26 :
Work 1 sc in each dc and 1 sc in each skipped top stitch across, making 4 sc into each corner ch2 space (total will vary; aim for ~64 sts depending on spacing)
Round 27 :
(ch3, dc in next 5 sts, *dc cluster across edge until corner, (3 dc, ch2, 3 dc) in corner, repeat*) — build a more angular square edge by working dc across edge arches
Round 28 :
1 sc in each st (approx 64) — tidy up edges
Info :
At the end of round 28 your motif should read as a square with rounded corners and a centered raised petal with stems. If the motif looks slightly rectangular, adjust tension before proceeding to the decorative outer lacework.
Round 29 :
*(ch4, sk 2, sc) repeat along each side to create small openwork loops; at corners work (sc, ch4, sc) into corner space* — creating 8-10 open loops per side depending on stitch count
Round 30 :
1 sc around to stabilize loops (approx 64)
Info :
These open loops will create the lacy frame that ties into the join-motif pattern. Keep counts consistent across all squares to make joining easier. If you need to adjust counts to match neighboring squares, do it here before finishing this square.
Round 31 :
Work BLO sc for two rounds to create a raised frame ridge: 1 sc BLO in each st (approx 64)
Round 32 :
1 sc in each st (approx 64)
Info :
These rounds form a defined picture-frame around the centre motif which helps the lacy join sit flush and gives a sculpted look to the bedspread squares.
— Decorative Outer Lace & Scalloped Corner Tabs :
Round 33 :
*In each loop from Round 29 work: (sc, ch3, 3 dc) anchored into loop; in corner loops work (sc, ch5, 5 dc) to create a deeper scallop at corners* — repeat around
Round 34 :
1 sc around anchoring each scallop (approx 80) — tidy scallop bases
Round 35 :
Work puff-shell edging: into each scallop work (puff3, ch2, puff3) then sc between scallops (creates textured outer border around square)
Round 36 :
1 sc around to finish outer scalloped loop (approx 96)
Round 37 :
Finish motif round with 1 sl st to join then fasten off leaving 20-30 cm tail for joining adjacent squares (weave tail into join later)
Info :
Fasten off carefully and weave the tail back into the motif so that the tail lives on the right side of the square where you plan to join. For squares that will be on the outer edge of the spread, leave a shorter tail and plan to attach border pieces directly.
— Finishing Individual Motifs :
Info :
Make as many motifs as needed for your bedspread layout. The sample spread pictured uses 9 x 12 = 108 squares. Assemble a swatch to confirm gauge and motif size before committing to full spread. Blocking each motif before joining will improve edge regularity and ease joining.
Info :
Blocking tip: dampen motifs lightly, pin to desired square shape on a blocking board, and steam or wet-block until dry. Use pins at each scallop peak to open scallops evenly.
— Joining Motifs (Lacy Join Method) :
Round 38 :
Lay two motifs right sides together aligning scallop edges. Using cream yarn and a tapestry needle, whip-stitch through the back loop only of the final round scallops to begin joining. Work an even whip-stitch every 3-4 mm to create a firm join.
Info :
Alternate method: you can use a join-as-you-go (JAYG) method by leaving one motif active and slip-stitching into corresponding scallop loops of the second motif to join them, producing a seamless join. Both methods are valid; JAYG requires careful alignment.
Round 39 :
Join motifs in horizontal rows first: join each motif to its neighbor along one edge leaving the corner scallops free until row assembly is complete. Repeat for all rows.
Round 40 :
Once horizontal rows are complete, join rows to each other by aligning vertical seams and sewing through corresponding scallop peaks. For each join, use 2 passes of whip-stitch for security (use tapestry needle).
Info :
If using JAYG, join motifs by slip-stitching into corner ch5 spaces and scallop ch3 loops to form strong yet decorative joins. The lacy join leaves little negative space for a cohesive blanket surface.
Round 41 :
When joining three or more corners, weave ends from the joined motifs across the seam on the wrong side for extra strength. Tie knots only if necessary; otherwise weave ends securely for an invisible finish.
Info :
As you join, periodically check your bedspread on the bed to ensure alignment and avoid a twist. If a row looks slightly shorter or longer, block and steam the problematic row to ease tension differences before final joining.
— Edge Planning & Final Border Setup :
Round 42 :
Once all motif squares are joined, prepare to work a unifying border around the entire spread. Use cream yarn and begin by working 1 sc along the entire outer edge of the joined spread to create a uniform edge. Make 3 sc into each corner scallop to maintain the scalloped silhouette (st count varies by spread size).
Info :
Walk around the whole spread and mark corner points and midpoints to maintain even border shaping. The outer border will emphasize the scalloped edges; do not over-tighten border rounds to preserve drape.
Round 43 :
Work 1 sc around entire edge (including along straight edges and scallops) to tidy and prepare for decorative scallops (approx counts will depend on spread dimensions)
Round 44 :
*In each scallop space work (ch5, 5 dc) then sl st in next few sts between scallops to set scallop spacing* — repeat around perimeter
Round 45 :
1 sc around to anchor scallops (approx count varies)
Info :
At this point, decide how deep you want the outer scallop. The sample uses a two-round scallop with puff-shell texture for vintage appeal. If you want a gentler edge, stop after Round 45 and finish with a single neat sc round and block.
— Decorative Border: Puff-Shell Scallops :
Round 46 :
Work puff-shells into each scallop: (puff5, ch2, puff5) into each scallop top, sl st between scallops to anchor (creates deep textured scallops)
Round 47 :
1 sc around anchoring each puff-shell (ensure each puff has 2 sc anchors on either side) (count varies)
Round 48 :
For extra lacework, *ch3, sk 2, sc* across straight edges and into puff-shell bases work (sc, ch3, sc) to create small picot-like arches between puff-shells
Round 49 :
1 sc around to tidy the edge and finish securing border (count varies)
Round 50 :
Optional: add picot edging: *sc, ch3, sl st in 3rd ch, sc next 3 sts* around scallops to create tiny decorative points
Info :
Use a lighter touch on the final rounds of the border—working too tight will pull in the scallops and alter the spread's drape. After the final round, gently steam-block the entire spread to relax stitches and settle scallops.
— Corner & Side Reinforcement Rounds :
Round 51 :
Work 2 rounds of 1 hdc around the entire bedspread to give weight and a finished look (hdc in each st, 3 hdc in corner scallops)
Round 52 :
1 hdc around (second reinforcement round) — tidy any irregular areas
Info :
Hdc reinforcement adds subtle weight to the edge and helps maintain smooth hanging on sides. If you prefer a lighter edge, skip to Round 53 after the puff-shell anchoring.
— Extended Decorative Options (Optional Rows) :
Round 53 :
If you want a wider fringe-like finishing, work mesh rounds: *ch5, sk 3, sl st* across the edge to create tall looped spaces that will accept a fringe or tassel. Repeat for 2-4 rows depending on desired fringe height.
Round 54 :
Finish mesh anchor round: 1 sc in each loop-anchor to stabilize before adding fringe/tassels
Info :
Adding fringe or tassels is a lovely finishing touch for a boho or cottage look. For a classic look, keep the scalloped border without fringe. If adding tassels, plan even spacing—typically 8-10 tassels per long side for a queen-sized spread.
— Final Blocking & Care :
Round 55 :
Final blocking: pin spread to desired dimensions, paying careful attention to scallops. Steam-block lightly or wet-block and leave to dry fully. This evens stitches, opens lacy joins, and sets the scalloped edge.
Info :
Care instructions: hand wash gently in cool water with mild detergent; reshape and dry flat. Cotton-blend yarn may be tumble-dried on low if the manufacturer permits, but blocking each season restores scallop shape.
Round 56 :
Trim any remaining loose ends and, using a yarn needle, weave tails in along seams and edges for a neat finish. Check all join seams for stability and reinforce with small whip-stitches if needed.
Info :
Congratulations — your bedspread is complete. Display proudly and consider making matching cushion covers or a throw using the same motif for a coordinated bedroom set.
Finishing this blush pink botanical bedspread is such a rewarding experience — each tiny square blossoms into a full, romantic panel that flows beautifully across your bed. The combination of raised petals, subtle sage-green leaves and a soft cream lace frame gives the spread a delicate, heirloom-quality charm. Take your time with blocking and joining — the results are worth every patient stitch. 🧶🌸✨