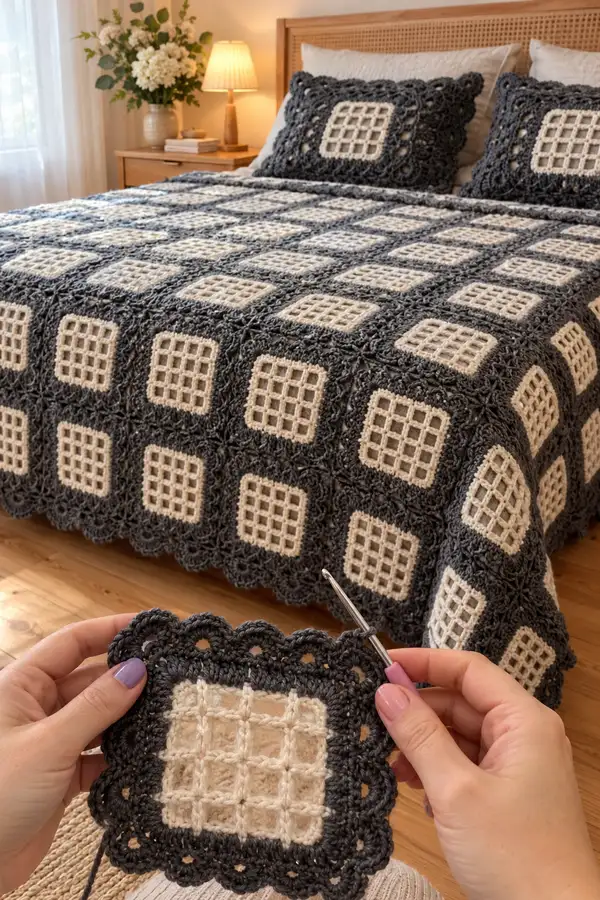
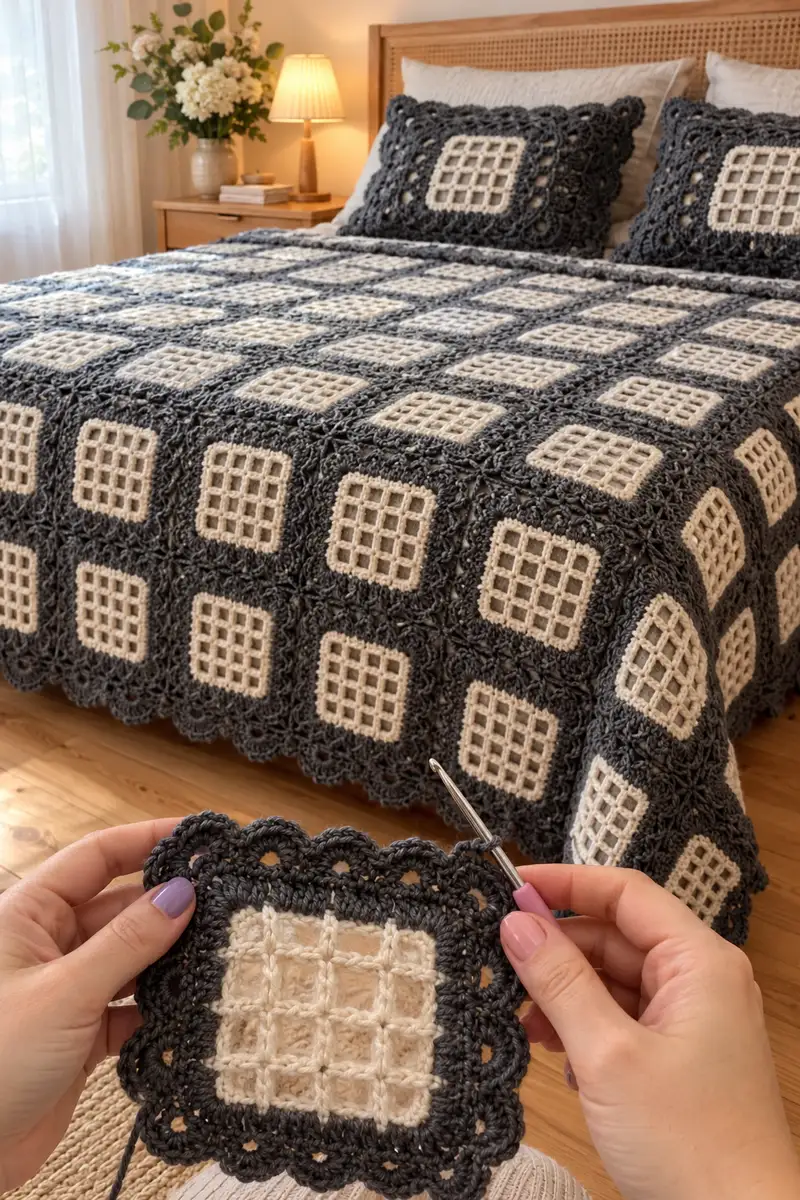
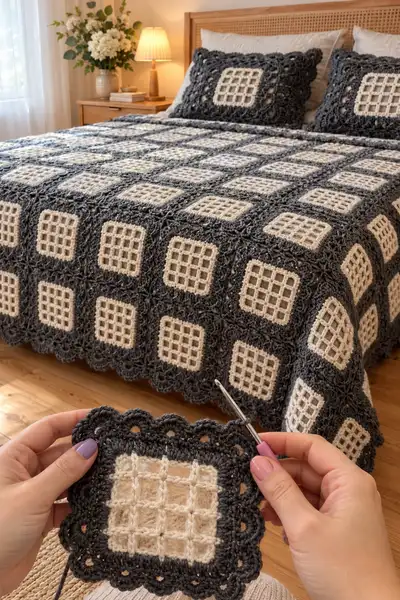
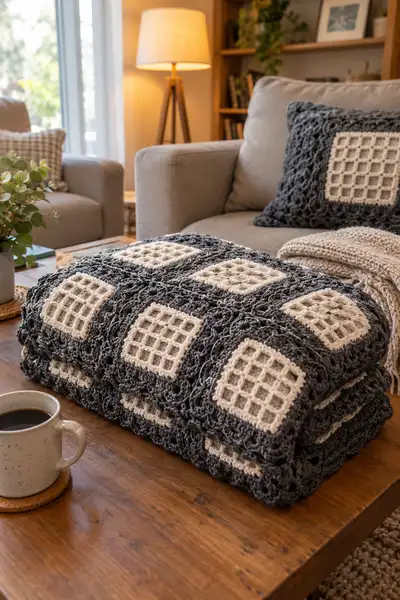
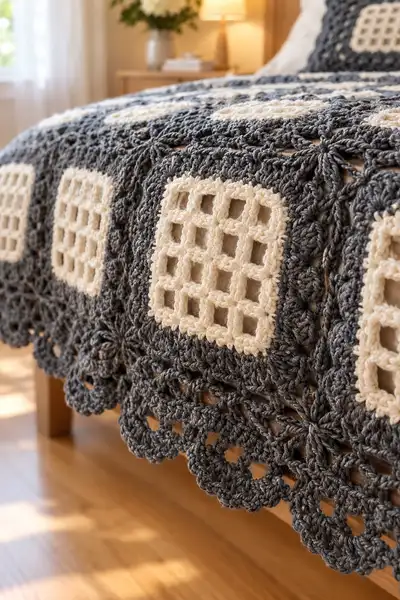
A modern rustic bedspread made from elegant two-tone square motifs with an airy lattice center and a scalloped outer border. Each square combines a raised cream grid inside a deep charcoal frame finished with a decorative shell edge. The pattern includes motif construction, join-as-you-go and edged finishing to create a cozy, sophisticated coverlet for bed or sofa.
Progress Tracker
0% Complete
— Notes, Gauge & Overview :
Info :
This pattern constructs a bedspread from identical square motifs. Each motif is worked in rounds and features a raised lattice center in cream and a textured charcoal frame with scalloped edging. Squares are joined as you go across rows, then rows are joined to each other; finally a scalloped outer border is worked around the whole bedspread. Sample motif (blocked) measures approximately 9.5cm / 3.75in square with recommended yarn and 4.5mm hook; adjust hook if necessary.
Info :
Gauge (blocked): One completed motif (center cream + charcoal frame + outer shell rounds) = about 9.5cm / 3.75in. To estimate finished size, count motifs across and down. Example queen sample used 7 motifs across x 9 motifs down (approximately 67cm x 85cm before blocking per motif counts – final bedspread approximately 190cm x 230cm depending on layout and blocking).
— Motif (Make X motifs for desired size) :
Materials :
Use cream yarn for center (Color A) and charcoal for frame (Color B). Start with Color A.
Round 1 :
Start with magic ring. 6 sc in MR (6)
Round 3 :
(1 sc, 1 inc) x 6 (18)
Round 4 :
(2 sc, 1 inc) x 6 (24)
Round 5 :
(3 sc, 1 inc) x 6 (30)
Round 6 :
(4 sc, 1 inc) x 6 (36)
Round 7 :
(5 sc, 1 inc) x 6 (42)
Round 8 :
(6 sc, 1 inc) x 6 (48)
Info :
Rounds 1–8 produce a small round/flat disc. We will convert this base into a compact square-like center by using surface/post stitches for the lattice. The stitch count is 48 and will be used as the foundation for all lattice and frame work. Keep tension even.
Round 9 :
1 sc in each st around (48). Join with sl st to first sc. Fasten off Color A, weave in a short tail but keep long tail if you prefer to carry color for the joining rows. The surface lattice will be worked with Color A using surface crochet and front post stitches over the existing round foundation.
Info :
Surface lattice method: You will create a raised grid using surface slip stitch and front post trebles worked into the round-9 foundation. Work directly onto the face (RS) of the motif so the cream yarn forms vertical and horizontal raised bars. Keep surface stitches slightly loose so they lie proudly on top of the background.
Round 10 (Surface vertical bars) :
Attach Color A with a standing sl st at a point that will be the left-most top of the lattice. Working on the RS, surface-sl st across 4 sts, then *ch 6, skip 6 sts (on base), surface sl st on next st* to create a vertical loop placement. Repeat across to create 3 vertical loop positions (this forms 4 columns of potential grid bars). End with surface sl st into the joining point. (Work remains surface on face; counts remain 48 surface sl sts placed, but the base has 48 stitches.)
Round 11 (Front post bars - vertical) :
Using Color A: For each vertical loop position, work a tall bar made of 3 tr (US = tr) worked around the post of the base stitch indicated by the surface sl st under it: *yarn over twice, insert hook from front to back to front around the post of the anchored stitch, complete tr; repeat to make 3 tr cluster for a raised bar; secure with a sl st at top into the base row*. Perform this for each vertical loop location along motif front. This creates 4 raised vertical bars visually; stitch count of base remains 48.
Info :
When working these front-post tall bars, keep the top loops loose (do not pull tight) so the bars sit proud. Space bars evenly across the motif face. You should now have vertical ribs across the cream center representing columns of the grid. The base stitch count is unchanged at 48.
Round 12 (Surface horizontal placement) :
Turn the motif if needed to work left-to-right. Using Color A, surface sl st across to start of first horizontal placement, then *ch 6, surface sl st on the base stitch under the next planned bar intersection*. Repeat to create three horizontal loop positions; these will align with the vertical bars to form the 4x4 grid of openings (4 columns x 4 rows). Counts remain base 48.
Round 13 (Front post bars - horizontal) :
Using Color A, work 3 tr bars into the posts along the base row positions defined by Round 12 to intersect with the vertical bars. Make sure to anchor bars so they cross over the vertical bars—this will create the raised grid. After completing horizontal bars, fasten off Color A and weave ends carefully on the WS. The base still has 48 stitches.
Info :
If you prefer a very tidy grid, you can perform these bars by working surface slip stitches and then tying them with a small overcast stitch on the backside rather than fully crocheting posts. The goal is to have raised cream bars creating a 4x4 lattice of small square openings in the center.
Round 14 :
Join Color B (charcoal) with standing sc into any stitch on the base round-9. Ch1, 1 sc in same st, work 1 sc in each of next 11 sts, [corner] (1 sc, ch2, 1 sc) in next st to build a square corner; work 1 sc in each of next 11 sts; [corner] (1 sc, ch2, 1 sc) in next st; continue around until you have placed four corners total. This round produces small corners converting the round into a square layout. Count: Because we used ch2 corners and otherwise sc in each stitch, the round total equals base 48 sc plus 4 ch2 corners that don't add stitch count but create corner spaces; list the working stitches as 48 sc with 4 ch2 corner spaces.
Info :
By introducing ch2 corners at equal intervals we begin forming a square outline. Ensure corners are aligned at 90 degrees by placing them after every 12 worked stitches (48/4 = 12). This gives evenly spaced corners: after working 12 sc, place a corner (1 sc, ch2, 1 sc).
Round 15 :
1 sc in each sc and ch sp around, placing (1 sc, ch2, 1 sc) in each ch2 corner from previous round. (Counts: sc remain 48; corner ch2 spaces preserved). Join with sl st to first sc.
Round 16 :
Change to Color B if not already in it. 1 sc in each st around in BLO for one round to create a neat ridge between lattice and frame. (48 sc)
Info :
Working in BLO will push the ridge outward and shade the lattice. This gives a visually crisp frame line between the cream center and the charcoal frame. Keep counts accurate: 48 sc.
Round 17 :
(3 sc, 1 inc) x 12 across the sides to begin widening the frame evenly (72)
Round 18 :
1 sc in each st around (72)
Round 19 :
(4 sc, 1 inc) x 12 (84)
Info :
Rounds 17–19 build the frame so that the cream center sits neatly within a substantial charcoal border. At this stage the motif is broad enough to form the bedspread matrix. Count accuracy: each 'x 12' group equals the number of repeats needed to match the current round layout — we are repeating a 5-stitch group plus an inc across the circumference; mathematically: previous 72 stitches with (4 sc, inc) x12 adds 12 stitches resulting in 84 total.
Round 20 :
1 sc in each st around (84)
Round 21 :
(5 sc, 1 inc) x 12 (96)
Round 22 :
1 sc in each st around (96)
Info :
At this point you have a substantial framed square. Take time to block this motif before working the outer decorative scallops — blocking will square the corners and make joins easier and more accurate.
Round 23 :
Switch to shell-stitch texture rounds to prepare scalloped edging: *skip 2 sts, 5 dc in next st, skip 2 sts, sl st in next st* repeat around, placing shells centered on each side; adjust spacing so shells fall evenly across sides. Count remains 96 base positions with shells built into side spacing.
Round 24 :
1 sc in each st and in top of each shell to tidy (96)
Round 25 :
Work decorative scalloped round: *(ch1, sl st in next st, ch3, sl st back into same st) repeated across shell peaks to create small poppet loops*. Join and weave ends. Final motif fringe ready for join-as-you-go. The motif edge should measure approximately 9.5cm blocked.
Info :
After Round 25, fasten off and block motif. Make the desired number of motifs: for a queen bedspread you will need approximately 7 motifs across by 9 down (63 motifs). Make extras for pillows and border continuity. Motifs are identical; keep yarn tails long for joining or use join-as-you-go method explained next.
— Join-as-you-go (JAYG) Method & Row Assembly :
Info :
We recommend joining motifs as you complete the final scalloped round so you can build rows. Join-as-you-go is done by substituting sl st or sc in edge spaces of the new motif with sl st/sc into corresponding edge spaces on the earlier motif to create a flat seam. Use the same Color B (charcoal) for joins so seams blend into the frame.
Round 26 (JAYG join for first adjacent motif) :
Work motif Rounds 1–24 as usual. On Round 25 (scallop round), when you reach a scallop that corresponds to a scallop on an already-made motif, replace the sl st you would normally make into the motif with *sl st into next sl st of finished motif (through both loops)*, then continue scallop. This attaches the two motifs with one continuous edge. Continue until joining full side of motif. For outside free edges keep working normal scallops.
Info :
JAYG tip: Pin motifs in place first to ensure scallops line up. If you prefer, you can join with invisible ladder stitch using a tapestry needle and yarn after all motifs are made. JAYG is faster and gives a continuous look when done carefully.
Round 27 :
Continue joining adjacent motifs along the row using same method until you complete a row of motifs (e.g., make 7 motifs joined across equals one row). Fasten off and weave ends after each row if you prefer to avoid long carried tails; otherwise carry Color B loosely along the inside to pick up later. (No change to counts per motif.)
Round 28 (Joining rows vertically) :
When joining rows together, work the JAYG method on the top/bottom scalloped edges: match scallop-to-scallop and work sl st through both scallops to anchor. For strong seams, work sc in each sl st and sl st together through both layers rather than simple sl st. This reinforces the seam for a bedspread that will be used frequently.
Info :
Counts remain based on motif stitch counts; when joining two motifs, you replace about 6–8 scallop stitches per side with joining stitches — fabric remains stable. Keep the seam flat by using a blunt tapestry needle to help align scallops as you join.
— Whole Bedspread Assembly & Seam Finishing :
Round 29 :
After joining all motifs in grid to desired layout, check outer edges for continuity of shells. You may need to remove or add small filler stitches into the last motif(s) along the edges to ensure scallops align and the outer border will flow smoothly. This is a short corrective round where you replace isolated sl st joins with sc or hdc to flatten mismatched corners.
Info :
At this stage, block the entire assembled bedspread on a large blocking board or towels on the floor. Pin scallops to a smooth curve for consistent scallop size. Let dry fully; blocking transforms the motif grid from slightly rounded to crisp square edges and smooth flat joins.
Round 30 (Outer border preparatory round) :
With Color B, work 1 sc along every outer round stitch around the entire assembled bedspread to even the edge (work 1 sc in each st and 1 sc in each scallop peak/valley as needed); keep stitches even and consistent. This creates a uniform foundation for the final scalloped outer edging. Counts vary with motif number; no strict global count — work evenly along entire edge.
Round 31 :
Working in BLO around the entire bedspread, 1 sc in each st to reinforce edge. This prepares a neat ledge for shell scallops. (Counts as per previous foundational stitch counts.)
Round 32 (Scalloped outer border round 1) :
*(sk 3, 7 dc in next st, sk 3, sl st in next st)* Repeat around the bedspread, placing shells evenly and adjusting number of skipped stitches so shells are distributed symmetrically on all four sides and corners. Use marker to find center of each side and space shells outward. After final round join with sl st and fasten off.
Round 33 (Scalloped outer border round 2) :
To finish the scallops and tidy peaks: 1 sc in each st across the scallop shells and in between to give neat edges; where shells meet corners work (3 sc, ch2, 3 sc) into corner spaces to help the bedspread lie flat. Fasten off and weave in ends.
Info :
Because the bedspread is large, you may wish to reinforce the seam line behind the scallops by weaving in a length of yarn along the last sc round with a tapestry needle, pulling slightly to shape scallops. This helps scallops remain shaped with use and washing.
— Pillow Cover (Make 2 or 4) :
Info :
Pillow covers are made from 1 large motif or 4 motifs joined to make a square front. The pictured pillows use a single enlarged motif with deeper frame. Use same motif recipe but add extra frame rounds to reach the pillow size required.
Pillow Round 1 :
Make motif Rounds 1–22 as above, then add extra frame rounds: Round P23: 1 sc in each st around (96); Round P24: (6 sc, 1 inc) x 12 (108); Round P25: 1 sc in each st around (108). Continue until motif measures the pillow front (e.g., 45cm / 18in for a 45cm pillow). Then join a backing panel of your choice by whip stitch or create a fold-over envelope backing using simple dc rows in Color B.
Info :
Make two identical motif fronts and one backing panel larger than the front by about 2.5cm to create an overlap envelope closing. Sew edges with invisible ladder stitch and insert cushion form.
— Alternate Joining & Decorative Options :
Info :
If you prefer a visible join, work a contrasting color join round after assembling motifs: sc through both loops of adjacent motif edges in a bright color to create a grid frame look. Alternatively, you can join with slip stitches in B for a low-profile seam, or join motifs with a thin cord sewn into the seam for extra durability in a heavy-use bedspread.
Round 34 :
Optional decorative join round in cream (Color A): With RS facing, work sc through both layers of seam every 2 stitches to create a dotted stitch line along joins. This adds visual interest but is optional.
Info :
When adding optional rows or color bands around the full bedspread, ensure the number of stitches around each side divides evenly by your repeat to avoid awkward spacing. Use stitch counts to plan: total stitches around each side should be divisible by the number of shells or clusters you plan.
— Finishing :
Round 35 :
Weave in all ends on the WS with a yarn needle. Use careful, long weaves across several stitches to secure ends and clip short. Damp-block entire bedspread and shape scallops with pins; allow to dry completely before use.
Info :
Washing: Hand wash or gentle machine wash in a mesh bag on gentle cycle if yarn label permits; reshape and re-block while damp. Always follow yarn care instructions for longevity.
Round 36 :
Lightly steam iron on low setting over a towel to further flatten and square motifs if needed. Avoid direct heat on synthetic blends that can melt — test on a scrap piece first.
Info :
Optional: Add a lightweight backing fabric sewn to the inside (WS) of the bedspread to reduce abrasion and keep dust from collecting in joins. Use upholstery pins to hold fabric in place and sew by machine or hand through tapestry-weight yarn at 1-inch intervals.
Round 37 :
Final quality-check pass: inspect every seam and corner, re-sew any area that gaps. Trim stray fibers and enjoy your finished bedspread!
Creating this modern rustic bedspread is such a reward — each square motif feels like a mini project, and watching them join into a full spread is deeply satisfying. The raised cream lattice against the charcoal frame creates a beautiful, tactile contrast that works in any bedroom or living room. Take your time blocking and joining; the effort shows in the clean lines and scalloped finish. 🧶 Cozy up with a cup of tea and enjoy the rhythmic process — your handmade heirloom is worth every stitch! 🌿✨