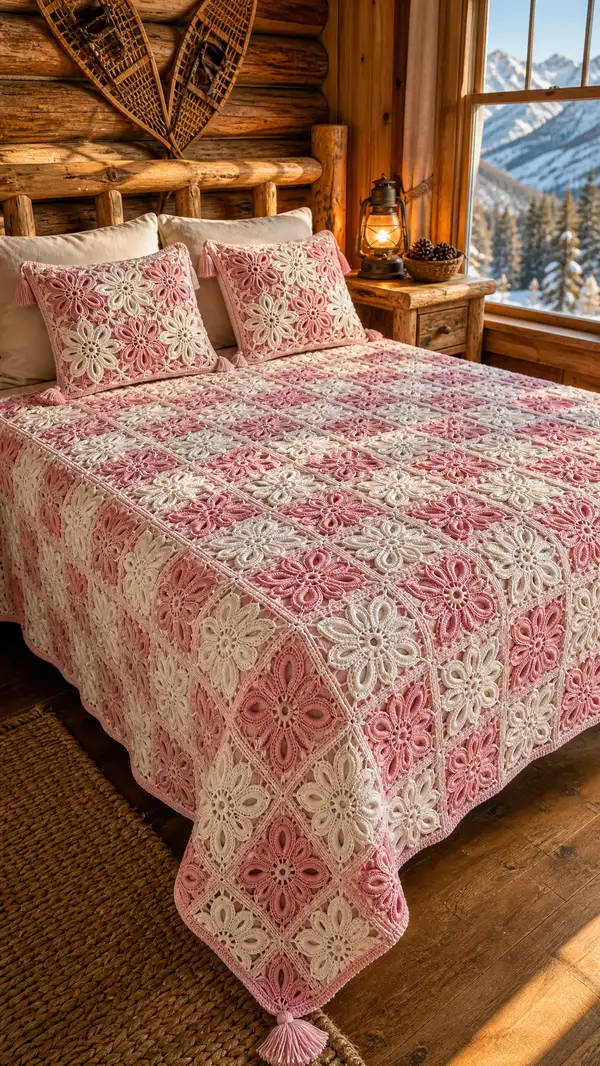
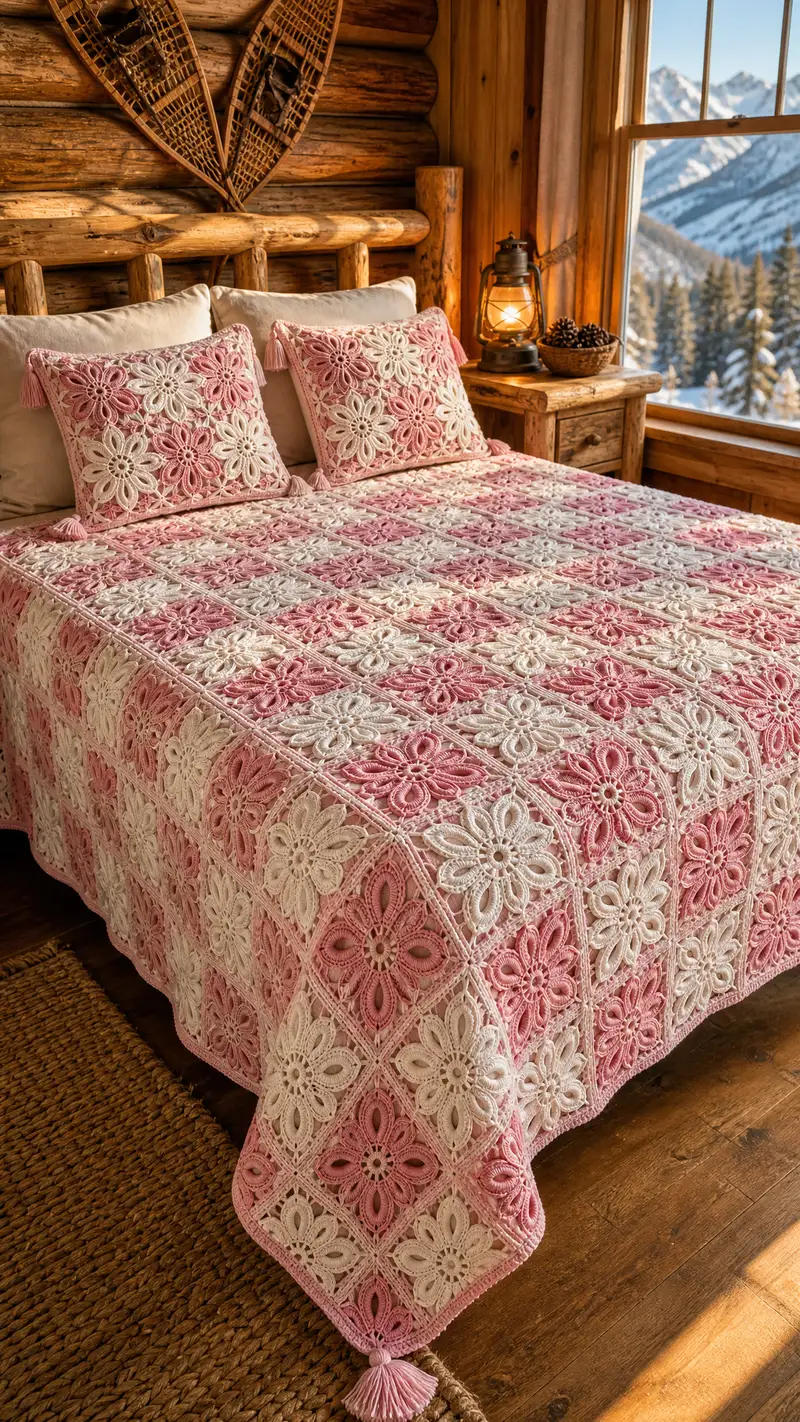
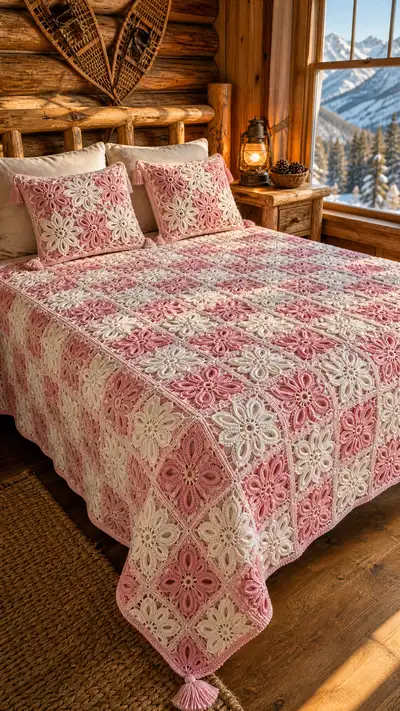
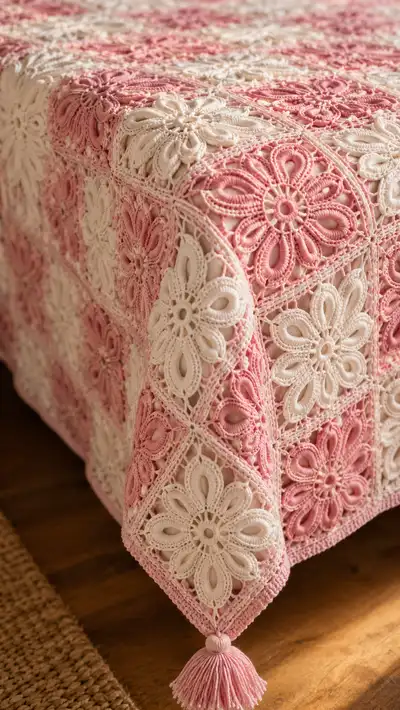
A romantic blush rose floral granny bedspread made from interconnected lacy floral squares in alternating soft pink and cream. This pattern recreates the raised, petal-relief motifs, delicate openwork joins, and scalloped border with tassel corners for a luxurious, vintage-inspired bedspread. Detailed instructions guide you through motif construction, join-as-you-go assembly, and finishing touches for an heirloom-quality throw.
Progress Tracker
0% Complete
— Overview :
Info :
This pattern is modular; one floral square motif is worked in full and repeated in alternating colors to create the bedspread. Instructions describe one complete motif (including inner ring, petal relief, and square framing), join-as-you-go rounds for connecting motifs into rows, instructions for assembling rows into the full bedspread, and a finishing scalloped border with tasseled corners. Gauge and blocking are critical for consistent joins—block each square to the measurements given before joining. Measurements given approximate a queen-size layout with 7 x 9 squares (adjust number of squares for different bed sizes).
— Motif (One Floral Square) :
Info :
Work motif in two colors: Color A = Blush Pink, Color B = Cream. Each motif is worked in layers: a dense center, an 8-petal raised layer, a petal shaping round, and a square frame with mesh joins. Use the 3.5mm hook for main work; switch to 3.0mm if petals feel loose. Block each completed square to 17cm (6.7") before joining.
Round 1 :
With Color A, make a magic ring. Ch1, 8 sc in ring. Pull ring closed. (8)
Round 2 :
Ch2 (does not count as st here), *fpdc around next sc (front post dc), ch3; rep from * around into each sc (8 fpdc, 8 ch-3 loops). This creates a raised base for petals.
Info :
Front post stitches lift the next round so petals sit above the center. Keep posts neat and maintain consistent tension—use your hook tip to fully complete fpdc height for uniform petals.
Round 3 :
Work petals into ch-3 loops. Sl st into first ch-3 loop, ch3 (counts as first dc), (3 dc, ch2, 3 dc) in same ch-3 loop to form a petal cluster, sl st into next ch-3 loop to anchor; rep around to make 8 petals. Sl st to join at base of first cluster. (8 petals)
Round 4 :
Ch1, sc in the top of first petal cluster, *ch5, sc between next two petals (in space between clusters); rep from * around making 8 ch-5 loops to sit between petals. Sl st to first sc to finish. (8 sc base plus 8 ch-5 loops)
Info :
These ch-5 loops are elongated chain spaces designed to accept the next layer of raised petals. If your loops are too tight, your next petal row will sit distorted—make chains loose but not sloppy.
Round 5 :
Into each ch-5 loop: sl st, ch3 (counts as dc), 9 dc in loop (work slightly taller double crochets for fullness), ch2, 10 dc in same loop; sl st to sc between petals. Repeat around to build tall petal lobes (8 tall lobes). (8 tall lobes)
Round 6 :
Ch1, sc in each dc around each tall petal lobe working evenly across the top of the cluster (approximately 20 sc per petal region depending on tension). Fasten off Color A and join Color B with a sl st into the top of a petal to create contrast for the lace framing round.
Info :
For a two-tone look, change to Color B here. Carry the unused Color A behind work if you plan to use color A for joining; otherwise fasten off and weave ends. Blocking now will set petal shape; lightly pin petals outward when wet blocking.
Round 7 :
With Color B, ch1, *sc in next 6 sts along petal top, ch4, sk 5 sts (to create an open scallop), sc in next 6 sts across next petal top; rep from * around making 8 ch-4 picot-like arches between petals. Join with sl st. (8 sc groupings per petal)
Round 8 :
Ch3 (counts as dc), 2 dc in same st, *into ch-4 arch work (3 dc, ch2, 3 dc) to create decorative arches linking petals; into next petal top work 3 dc; rep around. End with sl st to top of starting ch3. (This round forms a decorative ring tying petal tops together)
Info :
Use elongated dc clusters (3dc-ch2-3dc) into chain arches to form a petal-lacing. Keep counts even so each of the 8 arches is identical.
Round 9 :
Ch1, sc evenly around the entire motif into dc spaces and petal tops—work precisely 64 sc total (8 petals x 8 sc per segment) to create a regular base for square framing. (64)
Info :
Ensure you have 64 sc; adjust slightly by adding or skipping an sc in a seam area if a stitch count discrepancy appears—this count is key to spacing the following corner formations.
Round 10 :
Ch4 (counts as tr), *sk 7 sc, tr in next sc, ch3, tr in same sc (creates a corner loop between petal groups), rep around to make 8 tr+corner loops. Sl st to join. (8 corner loops)
Round 11 :
Into each corner loop: (ch3, 4 tr, ch3, sl st) to form a slightly raised corner shell. Between corners, work 7 sc to shape the sides of the square. After completing all 8 corner shells and side sc groups, you will have formed an octagonal-to-square transition. (8 corner shells + 8 side groups)
Info :
This round begins the gradual shaping of the motif into a square. Petal centers remain visible; keep shells symmetrical across the motif. If using different yarn weights, adjust number of sc between corners to maintain a square shape.
Round 12 :
Ch2, hdc in each st around for two full rounds to thicken the frame and create a ridge for the join. Work exactly 88 hdc on this round (adjust if needed to keep counts even across sides). (88)
Round 13 :
Ch1, *sc in next 10 sts, (sc, ch5, sc) into next corner shell top to form corner loop; rep from * 4 times to complete a square with 4 corner loops for classic joining (sc groups form sides). Aim for 4 side groups so pattern reads as 4-sided square. (This round establishes the 4-corner square frame)
Info :
At this stage you should have a square outline; the petals still read above the frame. Blocking with pins at the 4 corner points will shape the motif to a precise square, making join-as-you-go easier.
Round 14 :
Ch1, sc in each st for one round (work evenly across the top of corners and sides). Count should be consistent with previous round total—approximately 96 sc depending on exact counts. (approx. 96)
Round 15 :
Switch to Color A for a slightly raised square lattice. Work 1 sc in each st BLO (back loops only) around to create a ridge that will act as the join surface. (96 BLO)
Info :
Working BLO creates a ridge and defined edge to join squares invisibly. Ensure each square's BLO round is worked with consistent tension and blocked flat before joining to neighbors.
Round 16 :
Ch1, *sc in next 12 sts, ch3, sk 2 sts, sc in next 12 sts to refine the side mesh and form small open spaces for join-as-you-go; rep around. This tightening gives an even grid to match adjacent squares. (maintain even stitch count across sides)
Round 17 :
For a decorative inside-lace: into each side sc group work (sc, ch7, sc) centered to create lofted side loops—these will later be used for join sl st connections to neighboring motifs. Work evenly around making 4 side loops per square. (4 side loops)
Info :
At completion, weave in all ends from motif using a tapestry needle, but leave the edge tail if you prefer to use whipstitch for extra strength. Block motif again to final square measurement—recommended 17 x 17 cm (6.7" x 6.7"). Label squares A or B (color) and lay out your color plan before joining.
— Motif Notes & Variation Rounds :
Round 18 :
Optional contrast round: With Color B, work a delicate picot edging around petals using (sc, ch3, sl st) in top loops where desired to add extra lace detail. Work evenly around on petal rim. (This round is aesthetic only)
Round 19 :
Optional raised cord: With Color A, use slip stitch rope across two rounds of the square to create a defined gridline between motifs that will give the bedspread a quilted look. Work sl st in back bump around 2 full rounds. (This is optional and requires extra yarn)
Info :
Because motifs must align, keep consistent counts in the final two rounds so each square measures the same after blocking. Measure repeatedly across a sample of four squares to confirm repeatability before mass-producing squares.
— Join-As-You-Go (JAYG) — Joining Motifs into Rows :
Info :
We recommend using a join-as-you-go technique starting when you have the first row of motifs laid out. Use Color A for joins to make seams subtle. The method below describes joining each new motif along two adjacent sides to already assembled motifs (right and top). Ensure motifs are pinned and blocked, edges aligned precisely before joining.
Round 1 (Join) :
With the new motif on your hook and Color A, attach with a sl st at the middle of a side sc group. Ch1, sc in same st, *sc in next 6 sts; when you reach a side loop that aligns with neighbor, instead of sc into chain loop, sl st into corresponding loop of neighboring motif to join; continue sc across side, repeating sl st joins at every side loop alignment. Complete side; finish corner with (sc, ch3, sc) into corner, then continue around next side repeating join process where motifs are present. (Perform joins on sides that meet existing motifs only)
Info :
To keep joins flat, maintain an even tension on sl st connections; do not pull tightly. Pin motifs frequently while joining to prevent skew. For the first joined motif, you will only be able to join two sides; subsequent motifs will join up to three sides as rows grow.
Round 2 (Secure Join) :
Ch1, sc in each st across all sides working BLO where you previously joined with sl st to create a defined ridge. This round secures sl st joins and results in a neat, continuous seam. Work across entire motif perimeter—approximately the same number of sc as final motif round (about 96). (approx. 96)
Info :
If small gaps remain at join points, use a tapestry needle and matching yarn to mattress stitch across the hole from the back and weave ends back into the seam for invisibility.
Round 3 (Reinforce) :
Optional reinforcement: sc in each st around with 1 sc in each stitched join and 2 sc in corner ch3 if you prefer a slightly thicker join line. This also helps stabilize large bedspread weight. (approx. 96-100)
Info :
Continue joining motifs row by row. For the queen-size arrangement shown, make 63 motifs arranged in 7 columns x 9 rows (7 across width x 9 down length). Adjust the motif count to your bed size. Tip: assemble rows flat on the floor to confirm layout before final joins.
— Assembling Rows into the Full Bedspread :
Round 1 :
Once you have joined all motifs into rows, join rows to one another using the same JAYG method: attach a new motif to the edge motifs of the completed row by sl st into aligned side loops. Complete sl st joins across entire seam between two rows, then secure with 1 round of sc BLO to define the seam. Repeat until all rows are joined. (Seam rounds per seam)
Info :
For long seams, work on a table or floor and have a helping hand pin pieces flat to prevent sagging while you join. Alternately, partial join (two-thirds) then block and finish for better alignment.
Round 2 :
After all motifs are joined into the full grid, work one continuous round of sc all around the entire perimeter to even edges and prepare for the border. Work with Color A to make border subtle. Keep counts consistent on long sides and short sides: count sc along each edge and use increases at corners to keep edges flat. (Edge sc count will vary with motif numbers)
Info :
Measure the assembled spread across width and length to verify final coverage. If the bedspread has gaps or is too small, you can add an extra row of motifs or create a narrower border to enhance coverage. Blocking the full assembled spread (if space permits) will dramatically improve drape and appearance.
— Scalloped Border and Edging :
Round 1 :
With Color B, work one round of sc evenly around the entire assembled bedspread edge to create a uniform frame. Place 3 sc into each corner ch3 to keep corners rounded. (Even sc round)
Round 2 :
Ch3, *5 dc in next 6 sc (create shells), sk 2 sc, sl st in next sc to anchor; rep around to form a scalloped shell pattern. At corners, work 8 dc to produce a larger corner shell. Continue around until border meets. (Shells all around)
Info :
Work shells loosely enough to drape but firm enough to maintain scallop shape. If the scallops ripple, experiment by adding 1-2 sc between shells to ease tension.
Round 3 :
Ch1, sc in each dc and sc around, placing 3 sc into the center of each shell to further define scallops. Work evenly to maintain balance. Repeat this sc round twice for a neat finish. (Final sc rounds)
Round 4 (Optional Lace Trim) :
Switch to Color A and work a delicate picot lace: *ch5, sl st into 3rd chain from hook to create a loop, sc into top of next sc; rep around to create small picot arches. This is optional and adds extra vintage-lace feel. (Optional)
Info :
Finish by weaving in ends neatly on the wrong side and blocking the entire spread for final drape. Use steam or damp blocking depending on yarn care instructions.
— Tassel Corners :
Step :
Make 4 tassels using Color A or alternating colors. Wrap yarn around a 9cm (3.5") template 80-100 times for a full tassel. Tie securely at the top, fold, and attach to each corner with strong hand stitching. Trim to even length (approx. 10cm long). Secure with yarn end woven into tassel head. (4 tassels)
Info :
For a neat tassel head, wrap a small piece of yarn around the top several times and secure with a knot, then sew to corner. Tassels add charm and weight helping the bedspread to sit nicely over mattress edges.
— Pillow Covers (Set of 2, Matching Motifs) :
Info :
Create two square pillow fronts by joining 3 x 3 motifs each (9 motifs per pillow) in the same color layout. Back each pillow front with a plain square of single-color fabric or a crocheted panel worked in sc. The finished pillow cover measures approximately 50 x 50cm (20" x 20").
Round 1 :
Make 9 motifs as per motif instructions; block and layout 3 x 3. Join motifs using the same JAYG rounds described above, joining sides and rows to form the front panel.
Round 2 :
For the back panel, ch 68 (approx), 1 sc in each ch for 68 sts across, turn and sc in each row for 34 rows to create a 50cm square (gauge dependent). Seam back and front together with hidden whip stitch leaving a small opening for insert, then finish. Optionally add a zipper or envelope closure. (Back panel)
Info :
Add a single round of sc around the assembled pillow edges to tidy the seam before finishing. Tassels may be attached to pillow corners for coordinated styling as in the photo.
— Finishing & Care :
Info :
Weave in all tails with a tapestry needle, trimming close. Lightly steam press or block the finished spread to shape scallops. For washing, hand-wash in cool water with mild detergent and lay flat to dry, reshaping tassels and scallops. If using cotton yarn, pre-wash motifs if you anticipate shrinkage.
— Troubleshooting & Tips :
Info :
If motifs cup up, block more aggressively and add an extra sc round to flatten. If joins look too tight, reduce tension on sl st joins or use the optional sc reinforcement to even the seam. Keep a small sample swatch of one motif and join to test the final border and gauge before committing to full production.
Completing this blush rose floral granny bedspread is such a satisfying, slow-crafted achievement — every motif is a little floral masterpiece that comes together into a romantic statement piece! The raised petals and soft scalloped border add tactile charm, while the tassel corners lend a cosy finishing touch. Whether made for a special gift or your own bedroom, this heirloom-style bedspread is sure to be treasured for years. 🧶💕🌸