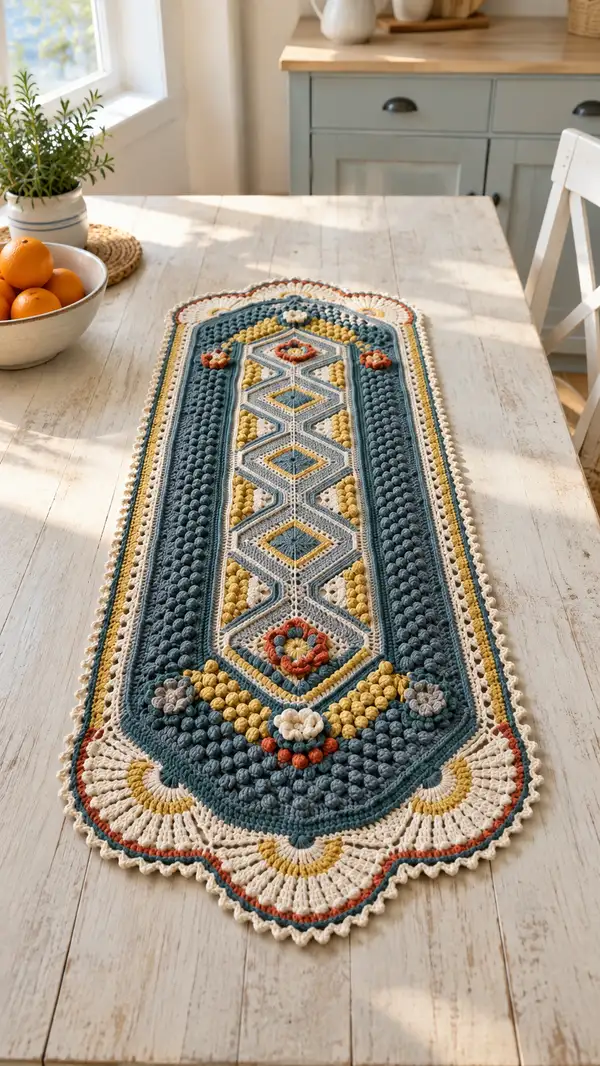
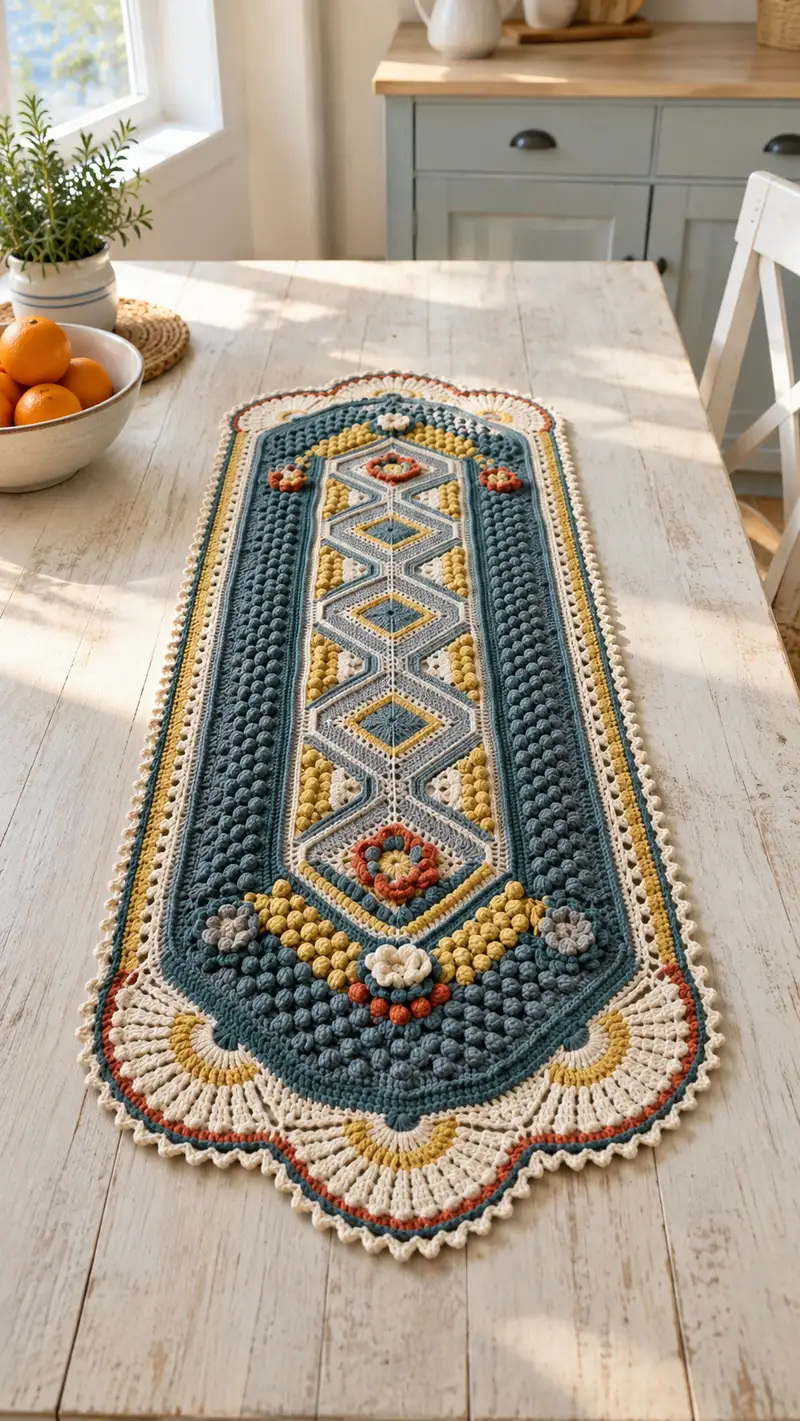
A vintage-inspired boho table runner featuring raised bobbles, geometric diamond motifs, and scalloped fan ends. Worked in warm denim blue, mustard yellow, cream and terracotta accents, this runner adds handcrafted texture and color to any table. The design combines mosaic-style diamonds, clustered bobble panels, and floral appliques with a lacy scalloped edge for a striking, layered finish. Detailed join-as-you-go instructions and edging tips guide you through every decorative round.
Progress Tracker
0% Complete
— Pattern Overview :
Info :
This runner is constructed as a long central medallion panel with mirrored bobble panels, four floral appliques, and scalloped fan ends joined and edged with a lacy border. Work in rounds and rows as directed; join-as-you-go (JAYG) is used for diamonds into the center panel. Use slate blue as Main Color A, mustard yellow Color B, cream Color C, terracotta Color D, and gray Color E.
Info :
Gauge: 14 sts and 10 rows = 10 cm in sc (after blocking). Finished size as shown approximately 12 x 48 inches; exact size depends on tension and blocking.
— Center Medallion (work flat in rounds, creates elongated central panel) :
Round 1 :
Using Color A, make a magic ring, ch1, 8 sc into ring, pull tight (8)
Round 2 :
Inc in each st around (16)
Round 3 :
(1 sc, inc) x8 (24)
Round 4 :
(2 sc, inc) x8 (32)
Round 5 :
(3 sc, inc) x8 (40)
Info :
These first rounds create a slightly rounded central disk to anchor the diamonds. Keep tension consistent and block lightly after completing center medallion before attaching diamonds.
Round 6 :
1 sc in each st around (40)
Round 7 :
1 sc in each st around BLO to create a subtle ridge (40)
Round 8 :
Change to Color C. 1 sc in each st around (40)
Info :
Change to cream (Color C) for a defined outline around the central disk. Carry Color A up the inside if you plan to avoid finishing tails for now.
Round 9 :
(4 sc, inc) x8 (48)
Round 10 :
1 sc in each st around (48)
Round 11 :
(5 sc, inc) x8 (56)
Round 12 :
1 sc in each st around (56)
Round 13 :
Change to Color B. 2 sc, 1 bobble, (6 sc, 1 bobble) x6, 6 sc, 2 sc (56)
Info :
Bobble stitch: Yarn over, insert hook, pull up loop, yarn over, pull through two loops, repeat 4 times total on same st, yarn over and pull through all loops on hook to complete bobble. Counts treat each bobble as one stitch.
Round 14 :
1 sc in each st around (56)
Round 15 :
(7 sc, inc) x7 + (6 sc, inc) at end to equal (64)
Round 16 :
1 sc in each st BLO (64)
Info :
Working BLO here creates a subtle channel to guide later diamond joins; it also helps the central panel visually step down into the long runner body.
Round 17 :
Change to Color A. (8 sc, inc) x8 (72)
Round 18 :
1 sc in each st around (72)
Round 19 :
(9 sc, inc) x8 (80)
Round 20 :
1 sc in each st around (80)
Info :
We are building a broad, slightly oval medallion to anchor six diamond motifs down the center. Make small color changes now to work diamonds into the structure.
Round 21 :
Change to Color C. *sc 6, ch6, skip 6 sts, sc 6* repeat across entire round creating chain loops for later diamond join spacers (80)
Round 22 :
1 sc in each st and ch space around (80)
Round 23 :
Change to Color A. (10 sc, inc) x8 (88)
Round 24 :
1 sc in each st around (88)
Round 25 :
(11 sc, inc) x8 (96)
Round 26 :
1 sc in each st BLO (96)
Info :
At this point the center medallion is wide enough to visually support the diamond chain-down center. Block lightly if motifs feel slightly warped before attaching diamonds.
Round 27 :
Change to Color B. 1 sc in each st around (96)
Round 28 :
Work a decorative ridged round: *sc 2 in next st, sl st 1 in next st* repeat across (96)
Round 29 :
Change to Color C. 1 sc in each st around (96)
Round 30 :
Fasten off Color C leaving tail for joining diamonds. Prepare to work Diamond Motifs separately and JAYG them into the chain loops made earlier.
Info :
Begin Diamond Motifs now. Each diamond is worked flat in rounds from a small square and joined to the central medallion with slip stitch joins into the ch6 loops. Make 6 diamonds total to run down the center.
— Diamond Motifs (make 6 identical; join-as-you-go into central medallion) :
Diamond Round 1 :
With Color C, mr, ch1, 6 sc into ring, pull tight (6)
Diamond Round 2 :
Inc in each st (12)
Diamond Round 3 :
(1 sc, inc) x6 (18)
Diamond Round 4 :
(2 sc, inc) x6 (24)
Diamond Round 5 :
Change to Color A. 1 sc around (24)
Info :
Switch to main slate blue for the diamond body to echo the runner background. You will now work elongated rounds to shape the diamond into an octagon and then into a diamond by adding selective increases.
Diamond Round 6 :
(3 sc, inc) x6 (30)
Diamond Round 7 :
1 sc in each st around (30)
Diamond Round 8 :
Change to Color B. (4 sc, inc) x6 (36)
Diamond Round 9 :
1 sc in each st around (36)
Diamond Round 10 :
Change to Color C. *Work 6 sc across one side, ch2, turn to work across next side forming a point* Work shaping to form pointed tips: sc decrease 3 sts at each tip in next round to make diamond points. (36)
Diamond Round 11 :
(5 sc, inc) x6 (42)
Diamond Round 12 :
1 sc in each st around (42)
Diamond Round 13 :
Change to Color A. 1 sc in each st around (42)
Info :
Now place diamond over the ch6 loop on the center medallion and JAYG: align diamond edge with ch6 spacer, sl st through diamond edge st and the ch6 loop, then continue around to secure. Make sure diamonds are centered and evenly spaced along central medallion.
Diamond Round 14 :
Join: Using Color A, JAYG sl st 6 times across one side into ch6 loops of medallion, then sc remaining rounds to complete diamond edge (42)
Diamond Round 15 :
Fasten off leaving tail for weaving. Make 6 diamonds and JAYG each into corresponding ch6 spaces created in Center Round 21. Space diamonds evenly to form central vertical chain.
Info :
When joining subsequent diamonds, overlap the diamond points slightly so that the chain reads as connected geometric shapes. Block diamonds flat before final joins to reduce puckering.
— Bobble Panels (Left and Right, worked in long strip rounds) :
Panel Setup Round 1 :
With Color A, join to medallion outer round at marked position and ch1, work 40 sc across the side to establish panel width (40)
Panel Round 2 :
Change to Color B. 1 sc in each st across (40)
Panel Round 3 :
Change to Color A. *1 sc, bobble in next st* repeat across to create staggered bobble row (40)
Info :
Bobble rows are worked in clusters that span multiple rounds. Ensure bobbles in adjacent rows are offset for a pebble-like texture. Keep bobbles counted as single stitch units in math.
Panel Round 4 :
1 sc in each st around (40)
Panel Round 5 :
Change to Color B. *bobble, 2 sc* repeat across (40)
Panel Round 6 :
1 sc in each st around (40)
Panel Round 7 :
Change to Color A. *2 sc, bobble* repeat across (40)
Panel Round 8 :
1 sc in each st around (40)
Panel Round 9 :
Repeat Panel Rounds 3-8 three more times to build height (40)
Info :
Continue building bobble panels in mirrored pairs down both sides of center medallion. Keep counts identical for left and right panels to retain symmetry.
Panel Round 10 :
Change to Color C. 1 sc in each st across (40)
Panel Round 11 :
Dec shaping to taper slightly toward the fan end: *(5 sc, dec) x6 + 4 sc at end to make (34)
Panel Round 12 :
1 sc in each st around (34)
Panel Round 13 :
Change to Color A. 1 sc in each st (34)
Panel Round 14 :
Fasten off and prepare for Fan End join. Make both left and right panels identical and pin to medallion edges matching Round 21 ch6 spacers and outer ragged edge points.
Info :
If your panels are shorter or longer, add/remove repeat sets of Panel Rounds 3-8 to match length of central diamonds so the runner remains balanced.
— Floral Appliques (Make 4 small layered flowers) :
Flower Round 1 :
With Color D, mr, ch1, 6 sc into ring, pull tight (6)
Flower Round 2 :
(inc) x6 (12)
Flower Round 3 :
Change to Color C. *ch2, (3 dc) in next st, ch2, sl st in next st* repeat 6 petals (12)
Info :
Make 4 flowers to place at central medallion endpoints and at center diamond intersections. Use Color E as small buds behind main flowers for depth.
Flower Round 4 :
With Color A, small cluster: make 6 sc around flower base to create slight cup (12)
Flower Round 5 :
Fasten off leaving long tail for sewing. Pin flower into position and sew securely using hidden whip stitch through base and medallion fabric.
Info :
Arrange flowers aesthetically: one at each narrow point near fan ends and two small ones flanking a center diamond. Sew firmly; add surface slip-stitch stems if desired for extra detail.
— Fan End Panels (work two identical ends to create rounded scalloped termini) :
Fan Base Round 1 :
Join to the end of the center panel with Color C, ch1, 24 sc across the end arc to establish foundation (24)
Fan Round 2 :
Change to Color A. (sc 1, ch3, skip 1) across to form shell anchors (24)
Fan Round 3 :
Work 12 large shells: into each ch3 space work (3 tr, ch2, 3 tr) to create big shells (12 shells)
Info :
Shell height creates the fan scallop. Use taller stitches (tr) for lacy fan appearance. Adjust tension to keep shells uniform.
Fan Round 4 :
Change to Color B. Work sc across shell tops to stabilize: *sl st into shell center, sc 6 across* repeat around (24)
Fan Round 5 :
Change to Color C. Work a decorative inserted mesh row: *ch4, skip 2, sc 1* repeat across (24)
Fan Round 6 :
Change to Color A. Into each shell top work picot edged chain: *(5 dc in shell top, ch3, sl st in 3rd ch for picot)* repeat (12)
Fan Round 7 :
Fasten off, weave ends, block fan ends to open shells and shape to match runner width. Repeat for the opposite end.
Info :
Blocking is essential for fans to lay flat and create the graceful rounded end displayed. Pin shells to exact curve and steam or spray lightly.
— Joining Panels and Final Top Panel Rounds :
Join Round 1 :
With Color A, align left and right bobble panels to central medallion. Using mattress or whip stitch join along the long seam, inserting needle through corresponding sc rounds every 6 stitches to prevent gaps (join length approx 96 sts total each side)
Join Round 2 :
After sewing, on right side of work, crochet 1 sc into each visible join stitch across entire left seam and right seam to tidy joins (estimate 192 sc across both seams)
Info :
Use pins to secure panels before sewing. Sew gently at first, check alignment, then secure with multiple passes for stability. Keep tension of seams snug but not pulling.
Top Round 3 :
Change to Color C. With runner lying flat, sc around perimeter evenly placing 1 sc in each row edge to create a foundation for the decorative border (estimate 420 sc around total perimeter)
Top Round 4 :
1 sc in each st BLO around to create a ridge for border (420)
Info :
Count your edge stitches and adjust to reach a multiple needed for the border repeat (the sample border uses multiples of 10 for scallop placement). Add or skip small numbers of sc evenly to achieve that multiple before proceeding.
— Decorative Scalloped Border (worked in repeated motif rounds) :
Border Round 1 :
Change to Color A. *sc 2, ch3, skip 3, sc 1* repeat around to mark scallop centers (repeat count based on adjusted total)
Border Round 2 :
Into each ch3 space work fan: (5 dc, ch2, 5 dc) to make large scallop arcs (repeat)
Border Round 3 :
Change to Color D. Work overlay rounds to create accent ring: sl st into fan center, ch1, 8 sc around arc, sl st into next fan center (repeat)
Info :
Adding an accent ring in terracotta ties the floral details into the border. Carry the accent color along the inside if you prefer fewer tails; otherwise fasten off and weave in.
Border Round 4 :
Change to Color C. Work a picot edge: *sc 3, picot (ch3, sl st in 3rd ch), sc 3* repeat around
Border Round 5 :
Change to Color A. Work final decorative ridge: 1 sc in each st around, tighten any loose scallops with additional sl sts as needed (final count will vary by size)
Info :
Finish by weaving all ends to the wrong side and blocking the entire runner flat. Use pins around the scallops to keep their shape while drying.
— Finishing Touches and Surface Details :
Surface Detail 1 :
With Color E, embroider small straight stitch veins along diamond centers and flower stems between motifs to add subtle definition.
Surface Detail 2 :
Optional: work a slip-stitch outline in Color C around each diamond to accentuate geometry: sl st evenly spaced around the diamond perimeter.
Info :
Take time to lightly steam-block the runner after surface embroidery so the thread settles into stitches. Avoid heavy steam near bobbles to maintain fullness.
Care :
Hand wash gently in cool water with mild detergent, reshape while damp, and lay flat to dry. Avoid high heat when ironing; use steam or low iron through a cloth.
This boho geometric table runner combines texture, color and vintage-inspired motifs to create a truly special accent for your home. Each bobble and scallop is a small moment of handmade charm that, when joined together, becomes a gorgeous heirloom piece. I hope you enjoy the rhythmic flow of working the diamond centers, the satisfying pop of each bobble, and the graceful fan ends as much as I do. 🧶 Lay it down, style with a simple vase, and enjoy the warmth it brings to your table. 🌿✨