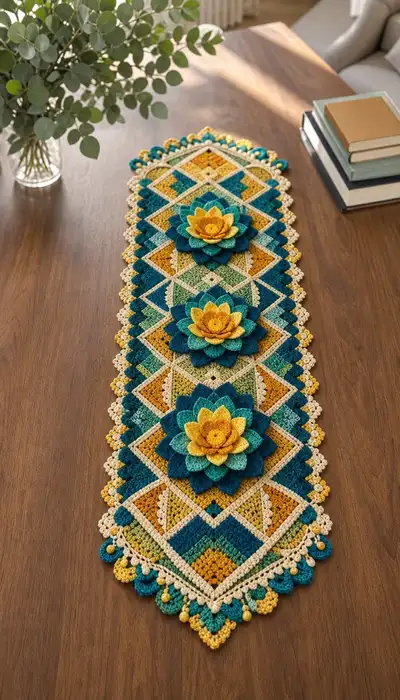
🧢 Beautiful ✨ Detailed πŸ’ Adorable

Geometric Lotus Table Runner Pattern

Geometric Lotus Table Runner Pattern
4.4β˜… Rating
8-10 Hours Time Needed
2.2K Made This
βœ‚οΈ

Advanced Level

Designed for experienced crocheters, these patterns involve intricate designs and complex techniques to challenge and inspire.

⏱️

All-Day Adventure

Requires 8-10 hours, ideal for a full day of immersive crocheting.

🏑

Cozy Accent

A warm touch for your space that transforms ordinary corners into inviting nooks filled with handmade charm.

🧢 Jump to Pattern ↓

About This Geometric Lotus Table Runner Pattern

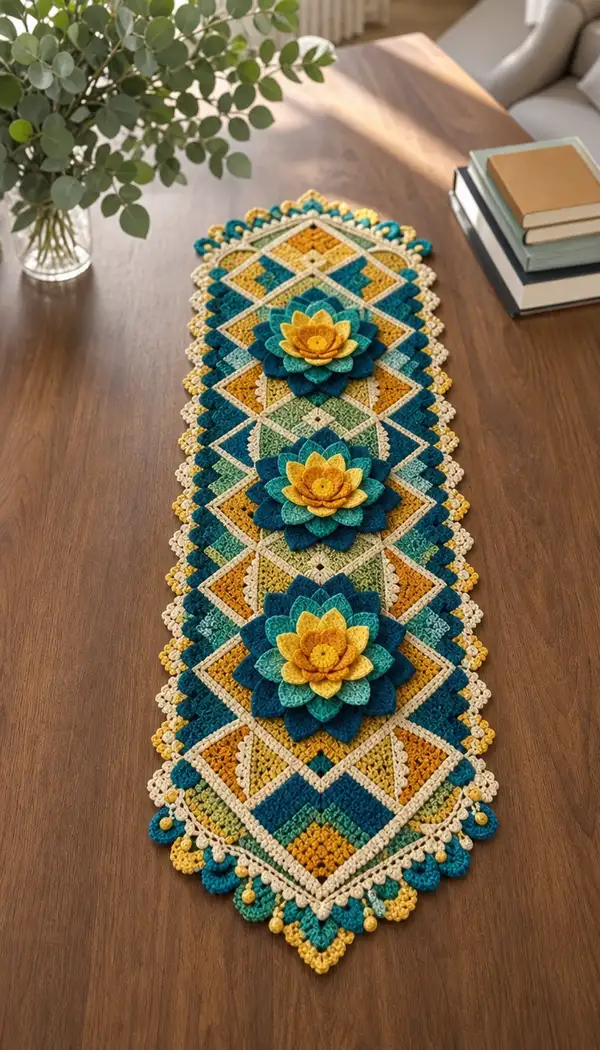
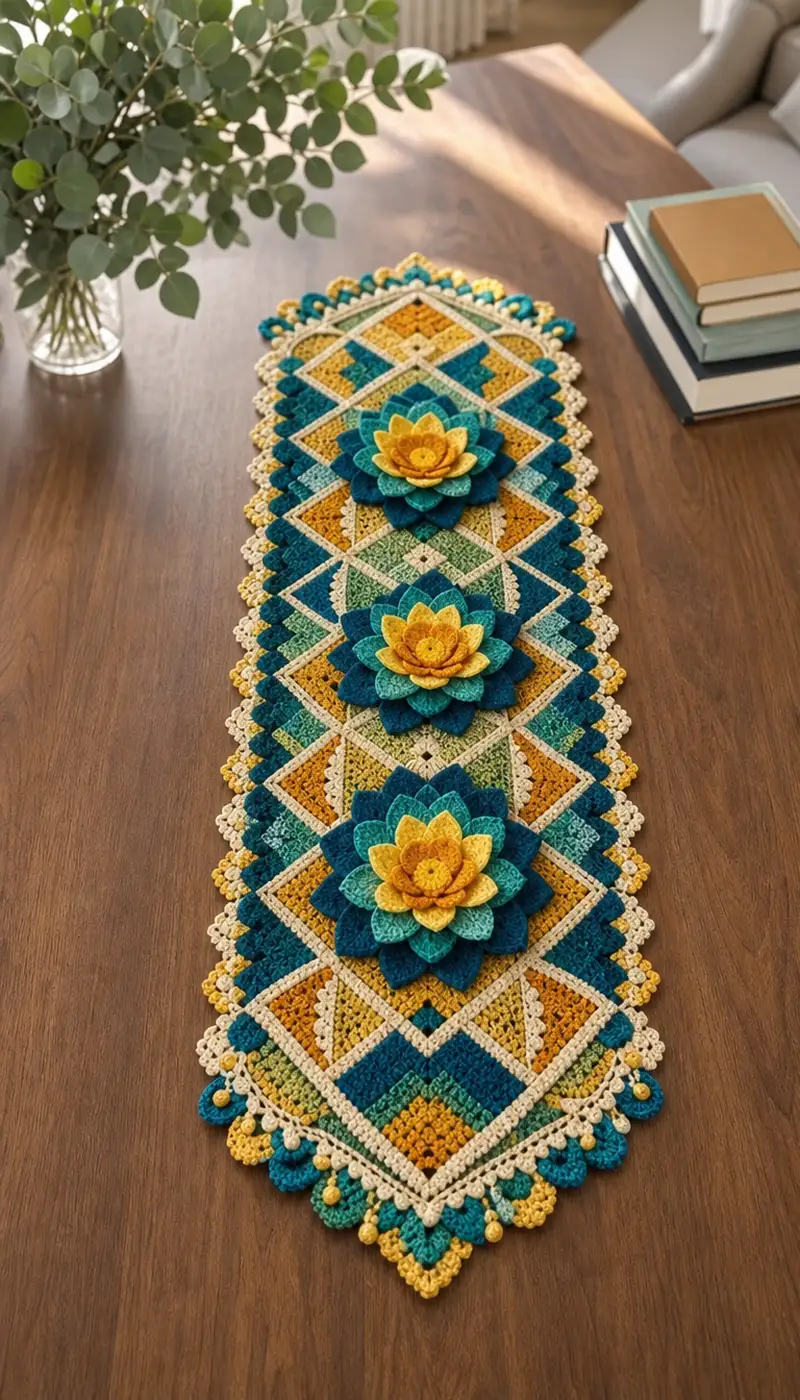
This table runner is built from repeating diamond motif units in a harmonious palette of teal, turquoise, gold and cream. Each diamond is worked as a small square-on-point then joined into a long runner. The design is finished with a scalloped, beaded edge and three dramatic layered lotus appliques in graduated sizes stacked down the center.

Geometric Lotus Table Runner Pattern crochet pattern - detailed view of completed project

The pattern includes full round-by-round instructions for motifs, layered 3D lotus flowers, leaves, joining and an ornate border. Color changes are integrated within rounds for sharp geometric lines.

Why You'll Love This Geometric Lotus Table Runner Pattern

I love this pattern because it blends structured geometry with organic floral shapes in a way that's both bold and elegant. The layered lotus appliques give the runner dramatic depth that feels handmade and sophisticated. Working modular motifs and then joining them lets me control placement and color balance precisely, and the scalloped bead edge is my favorite finishing flourish.

Geometric Lotus Table Runner Pattern step 1 - construction progress Geometric Lotus Table Runner Pattern step 2 - assembly progress Geometric Lotus Table Runner Pattern step 3 - details and accessories Geometric Lotus Table Runner Pattern step 4 - final assembly and finishing

Switch Things Up

I absolutely loved creating variations of this runner because the modular motifs let me play with color and layout easily. Try repeating a single color for a more graphic look, or alternate two accent colors for a chevron feel.

I would experiment with different flower sizes and placements: a single large central lotus for a bold focal point, or five small evenly spaced flowers for a delicate effect. Using heavier yarn and a larger hook will create a thicker, more rustic runner perfect for casual tables.

For a washable, kid-friendly version, replace wooden beads with crocheted beads and embroider the flower centers instead of sewing on small hardware. Small changes make this pattern feel entirely new each time.

Common Mistakes & How to Fix Them

βœ— Skipping stitch markers at round starts can cause misaligned motifs and uneven joins; always mark the first stitch of each round βœ— Not changing colors exactly at the stitch indicated will shift the diamond lines; carry colors or fasten off as instructed βœ— Overstuffing crochet flowers makes them stiff and flat; stuff lightly and shape petals gently by hand βœ— Using too large a hook for the specified yarn results in loose fabric and visible gaps; use a slightly smaller hook for dense work βœ— Joining motifs without pinning first can produce a wavy runner; pin or clip pieces flat before permanent sewing βœ— Failing to weave in ends as you go creates a tangle of tails later; finish ends for each motif and applique as you complete it

Geometric Lotus Table Runner Pattern

A long, elegant table runner featuring geometric diamond motifs framed by a delicate scalloped border and topped with three layered lotus appliques. Warm golds, teal and cream accents create a rich, modern boho look. Detailed motif assembly and 3D flower instructions make this a statement centerpiece for dining, console or coffee tables.

Advanced 8-10 Hours

Materials Needed for Geometric Lotus Table Runner Pattern

β€” Main Fabric

  • 01
    Worsted weight yarn (#4), approximately 300-350g in Teal (deep teal seen)
  • 02
    150-200g in Turquoise (mid teal/turquoise seen)
  • 03
    150-200g in Mustard/Gold (warm yellow/gold seen)
  • 04
    250-300g in Cream/Ivory (neutral accent and join color seen)
  • 05
    Small amounts (20-40g) in Leaf Green and Dark Teal for subtle gradient tones

β€” Tools Required

  • 01
    3.5mm (E) crochet hook for main work
  • 02
    3.0mm (D) hook for tighter flower centers and edging
  • 03
    Yarn needle for sewing and weaving ends
  • 04
    Stitch markers (at least 6)
  • 05
    Scissors
  • 06
    Blocking mat and pins
  • 07
    Polyester fiberfill stuffing (small amount for each flower center and petals)
  • 08
    Optional: small round wooden beads or crocheted bead embellishments (as shown)
  • 09
    Optional: fabric glue for securing beads

Progress Tracker

0% Complete

β€” Overview :

Info :

This pattern builds the runner from modular square-on-point motifs joined into a long runner, topped with three layered lotus appliques, leaves and a scalloped beaded border. Work each motif and applique completely, weave ends, then block motifs flat and join. Use color changes exactly where indicated for crisp diamond lines.

β€” Diamond Square Motif (Make 12) :

Round 1 :

MR, 4 sc into ring, pull ring closed (4)

Round 2 :

Inc in each st around (4 inc) (8)

Round 3 :

(1 sc, inc) x 4 (12)

Round 4 :

(2 sc, inc) x 4 (16)

Info :

Change to contrasting color now for the first color block if following the pictured palette. Carry the unused yarn along the center back and catch with a loop every 4-6 sts if working stripes; otherwise fasten off and join new color.

Round 5 :

(3 sc, inc) x 4 (20)

Round 6 :

(4 sc, inc) x 4 (24)

Round 7 :

1 sc in each st around (24)

Round 8 :

(4 sc, inc) x 4 (28)

Info :

At rounds 7-8 you will have a small square base. To make the square read as a diamond later, we will work corner shaping in the next rounds. Keep tension even to ensure flatness.

Round 9 :

(5 sc, inc) x 4 (32)

Round 10 :

1 sc in each st around (32)

Round 11 :

(6 sc, inc) x 4 (36)

Round 12 :

1 sc in each st around (36)

Round 13 :

(7 sc, inc) x 4 (40)

Info :

If you prefer a slightly larger diamond, continue increases in the same pattern for one or two extra rounds. The pictured runner uses motifs ending at this size (40 sts) then is shaped with decorative rounds to create a subtle diamond impression.

Round 14 :

1 sc in each st around (40)

Round 15 :

Switch to cream/accent color. 1 sc in each st BLO around to create a defined ridge (40)

Info :

Working the round in BLO creates a small ridge that reads as the diamond frame line once motifs are joined. Carry the color if continuing immediately into join rounds or fasten off leaving a 20cm tail for joining.

Round 16 :

(3 sc, 1 ch 2, skip next 2 sts) around to create small ch-spaces along edges while maintaining 40 sc evenly, ending with sl st to first sc (40 including ch-sps)

Round 17 :

Fasten off and weave in ends. Block motif square-on-point so that it reads as a diamond; pin the corners gently and steam/block to shape.

β€” Accent Corner Triangle Filler (Make 6) :

Round 1 :

MR, 3 sc into ring, pull tight (3)

Round 2 :

Inc in each st (3 inc) (6)

Round 3 :

(1 sc, inc) x 3 (9)

Round 4 :

(2 sc, inc) x 3 (12)

Round 5 :

1 sc in each st around (12)

Info :

These small triangular fillers are worked to nest into diamond corners to create the chevron / diamond interior seen in the runner. Use gold or turquoise as accents and block gently.

Round 6 :

Fasten off leaving 20cm tail for joining.

β€” Joining Motifs Into Runner Body :

Info :

Layout the 12 diamond motifs in a single long column with a motif at each end pointing as shown in the photo. Insert corner triangle fillers where interior diamonds require color definition (6 fillers across the runner). Use the cream/accent ridge round as the join point.

Round 1 :

With cream yarn and a 3.5mm hook, pick up a motif and join to next motif along the ridge round by slip stitching through both ridges along one side: sl st evenly through 10-12 contact points to create a stable seam. Work across all adjacent motifs until a full column is created.

Info :

Use mattress stitch or whip stitch with a yarn needle if you prefer a flatter, invisible join. Pin motifs first to check alignment and keep diamond points centered.

Round 2 :

Once all motifs are joined into a long column, go back to the seam edges and sc around the outer edge of the entire column in cream: 1 sc in each stitch around, working 3 sc in each corner point to keep corners flat and pointed. Maintain stitch counts consistent with the number of edge stitches (work approximately 220-240 sc total around the runner depending on tension and motif size).

Info :

At this stage you have created the basic runner length and stabilized the seams. Blocking the whole runner flat helps the border and flowers sit evenly. Use pins to make edges straight before continuing.

β€” Large Layered Lotus Flower (Make 3 β€” 1 large, 1 medium, 1 small by scale adjustments) :

Center Round 1 :

With mustard/gold yarn, MR, 6 sc into ring (6)

Round 2 :

Inc in each st around (6 inc) (12)

Round 3 :

(1 sc, inc) x 6 (18)

Round 4 :

1 sc in each st around (18)

Info :

These first rounds form the sturdy center disk that the petals will sew to. Fasten off leaving long tail for sewing. For medium and small flowers work fewer petal rounds or use smaller hooks as noted below.

β€” Petal Layer A (Inner Petals, Make 8 for large flower) :

Round 1 :

Make a foundation chain 6, join with sl st to form a loop for each petal, or make petals individually: ch6, 1 sc in 2nd ch from hook, 1 hdc, 2 dc, 1 hdc, 1 sc in last ch, sl st to center disk edge. Repeat to make 8 petals evenly spaced around center (petal base occupies 1 st on disk).

Round 2 :

On each petal: at the top of the petal work 2 dc, ch1, 2 dc to broaden the tip for a fuller shape. This finishes each inner petal.

Info :

Sew each petal base to the center disk with a neat whip stitch. Space petals evenlyβ€”use pins to hold before sewing. Lightly stuff the base of each petal with a small amount of fiberfill for depth if desired.

β€” Petal Layer B (Middle Petals, Make 8) :

Round 1 :

Using turquoise/teal, ch7 for each petal, join to disk just behind layer A (work at base of each previous petal): 1 sc in 2nd ch from hook, 1 hdc, 3 dc, 1 hdc, 1 sc, sl st to disk. Make 8 petals.

Round 2 :

Top of each middle petal: 3 dc, ch2, 3 dc to make a broader, taller petal tip. This creates a layered look where middle petals peek from below the inner petals.

Info :

Stitch the middle layer slightly offset from inner petals to create a staggered look. Do not overstuff; the petals should be soft with a gentle curve.

β€” Petal Layer C (Outer Petals, Make 8) :

Round 1 :

Using deep teal (outermost color), ch8 for each petal and join to disk behind middle petals: 1 sc in 2nd ch, 1 hdc, 4 dc, 1 hdc, 1 sc, sl st to disk. Make 8 petals.

Round 2 :

On each petal top: 4 dc, ch3, 4 dc to make a pronounced outer petal. Fasten off and weave tail through the base to cinch slightly if you want the outer petals to cup upward.

Info :

For the medium and small lotus, make 6 petals per layer and reduce chain lengths by 1–2 to scale: medium (ch5/6/7), small (ch4/5/6). Block petals slightly with steam and shape by cupping edges toward center for realistic flower form.

Round Finish :

Sew the completed flower to the runner center points: position the three flowers along the runner column spaced evenlyβ€”approx 16-18 cm between flower centers depending on motif count and table length. Secure with matched yarn and a sturdy ladder stitch through the cream join round for stability.

β€” Leaf Accent (Make 6) :

Round 1 :

With leaf green, ch11, 1 sc in 2nd ch from hook, 1 hdc, 3 dc, 1 hdc, 1 sc, 1 sl st into next ch to create pointed teardrop shape; turn and work along opposite side of foundation chain: 1 sc, 1 hdc, 3 dc, 1 hdc, 1 sc. Sl st to join at base. Fasten off. (approx 20 sts per leaf)

Info :

Sew two leaves under each lotus (one on each side) to frame the flower, or cluster three leaves around the base for a fuller botanical look.

β€” Decorative Runner Border β€” Scallop Foundation :

Round 1 :

With cream yarn, join at one corner point of runner with sl st. Work 1 sc in each st around runner edge, working 3 sc in each outer diamond point to maintain shape. Maintain approximately even stitch count; you should work around the entire runner in approximately 240–260 sc depending on motif density.

Round 2 :

Once the sc round is complete, chain 1, *skip 2 sts, 5 dc in next st (scallop), skip 2 sts, sc in next st; rep from * around to form scallops. Work 1 sc in the corner sts to keep edges flat. End with sl st to first sc.

Info :

Adjust spacing between scallops if your stitch count differs; you want consistent scallops without bunching. If you encounter extra space at corners, increase to 7 dc for that scallop and reduce a sc elsewhere to compensate.

Round 3 :

Switch to mustard/gold for bead accents. In each scallop work: (sl st to center of scallop, ch3, dc, ch3, sl st) to create a small loop for attaching beads later. Fasten off and weave ends.

Info :

Optionally crochet a small round bead or use wooden beads. To attach crocheted beads: make a small MR 6 sc, close and leave a 10cm tail for sewing; sew bead to center of scallop loops and secure thoroughly with yarn needle and extra backstitches.

β€” Final Edge Embellishment β€” Picot & Bead Fringe :

Round 1 :

With 3.0mm hook and cream yarn, join in between scallops and work (sc, ch4, picot: ch3, sl st in 3rd ch from hook, sl st back to base), sc in next gap. Repeat between each scallop creating neat picot loops. This will yield approximately 30–36 picot loops around the runner depending on size.

Round 2 :

Using mustard/gold yarn, attach a small crocheted bead or wooden bead to every second picot: insert tail from the crocheted bead through the picot center and secure on the WS with tight stitches. Reinforce with a small drop of fabric glue if using wooden beads.

Info :

The picot and bead fringe is what gives the runner its lively finish. Ensure beads are balanced and not too heavy to avoid pulling the scallops out of shape. Block final piece flat after attaching beads and weaving in ends.

β€” Alternative Border Variation (Optional) :

Round 1 :

If you prefer a lacey border, after the sc round work *ch5, dc in 3rd sc ahead, ch5, sl st* to create open chains forming a lacy frame. Fasten off and weave ends. This yields a lighter, airier edge for smaller tables.

Info :

Choose this variation for summer decor or when using lighter yarns; maintain consistent tension to keep the runner from puckering.

β€” Additional Decorative Square Inserts (Optional, Make 6) :

Round 1 :

MR, 6 sc into ring, pull tight (6)

Round 2 :

Inc in each st around (6 inc) (12)

Round 3 :

(1 sc, inc) x 6 (18)

Round 4 :

Chain 1, turn and work 1 sc in next 9 sts, ch6, turn and work back along ch to create a small vertical bar; this creates a textured insert that nests in motif centers. Fasten off. Sew into selected diamond centers before final border rounds.

Info :

Textured inserts add depth to the runner interior. Make them in contrasting color for emphasis or in cream to read as subtle highlights.

β€” Assembly and Placement of Flowers :

Info :

Determine the final placement of the three lotus flowers by laying the runner on your work surface or table: center flower roughly at 1/2 length, two others spaced evenly above and below. Pin the flowers to the runner at the cream ridge round so the join is concealed.

Round 1 :

Sew large flower first: using matching deep teal yarn and tapestry needle, sew around the base of the center disk to the cream ridge, working ladder stitch through the ridge round and the flower base. Use approximately 12 secure stitches then continue around until the flower is firmly attached. Tie secure knots and weave ends to the WS.

Round 2 :

Repeat for medium and small flowers. Place two leaves beneath each flower and sew leaves in place with small whip stitches. Add extra reinforcing stitches at the flower center to ensure they stay against daily handling and light cleaning.

Info :

If you want removable flowers (for washing the runner), sew small snap fasteners or sew buttons to the runner and create coordinating looped yarn tabs on the flower backs to snap into place.

β€” Blocking and Finishing :

Info :

Lay the assembled runner on a blocking mat and pin to the exact finished dimensions. Use a steam iron held above the fabric to relax fibers or spray lightly with water for wet blocking if yarn is washable. Allow to dry fully. Trim any visible ends on the WS. Re-check bead security and reinforce if needed.

Round 1 :

Final check: Inspect all joins and reinforce any seam areas that feel loose. Lightly press the flower petals into shape and trim stray fibers.

Info :

When washing in future, remove any wooden beads first if possible and hand wash the runner flat to maintain shape. If machine washing, use a lingerie bag and gentle cycle with cold water, then re-block while damp.

Assembly Instructions

  • Attach head to body by inserting the neck portion into the body opening. Pin in place first, then sew securely using whip stitch all around, ensuring even attachment
  • Position arms on sides of body at rounds 20-22 for natural look. Sew through both arm and body using ladder stitch for invisible seam
  • Attach legs to bottom of body at rounds 1-3, spacing them evenly. Sew securely, adding extra stitches for stability if character will be posed
  • Sew ears to top of head at rounds 5-8, spacing them 12-15 stitches apart. Curve slightly forward for natural appearance
  • If applicable, attach tail to back center of body at round 10. Sew securely in spiral pattern
  • Add any facial embroidery: nose, mouth, eyebrows using yarn needle and matching colors
  • Secure any loose ends by weaving through several stitches and trimming close to work
  • Optional: Add blush to cheeks using fabric paint or makeup for extra cuteness

Important Notes

  • πŸ’‘Use stitch markers consistently at the beginning of each round to avoid counting errors and maintain proper shaping
  • πŸ’‘Stuff body parts gradually as you work rather than waiting until the end, especially for narrow openings like arms and legs
  • πŸ’‘For safety eyes, position and secure before stuffing head fully - they cannot be repositioned once locked in place
  • πŸ’‘Maintain consistent tension throughout the project; too tight creates stiff, small pieces, too loose creates floppy, holey fabric
  • πŸ’‘When sewing pieces together, use yarn slightly thinner than working yarn for neater, less visible seams
  • πŸ’‘Pin all pieces in position before final sewing to ensure proper placement and symmetry
  • πŸ’‘For amigurumi, work tightly enough that stuffing doesn't show through stitches
  • πŸ’‘Keep a row counter or notepad to track rounds, especially in long even-stitch sections

Completing this geometric lotus table runner is such a satisfying projectβ€”every motif, petal and scallop comes together to make a show-stopping centerpiece. The layered lotus appliques add beautiful texture and depth, while the contrasting colors pop against wooden surfaces. πŸ§ΆπŸ’› Blocking and careful sewing make the final piece look polished and professional. Share your finished runner to brighten a dining or console table and enjoy a handmade heirloom you'll love displaying! ✨
You ask,

we answer.

FAQs

What is the finished size of this runner?

Based on the specified motifs and worsted yarn, the finished runner measures approximately 120-140 cm (47-55 in) long and 25-30 cm (10-12 in) wide. Exact size will vary with tension and blocking.

Can I use different yarn weights for this pattern?

Yes! You can use any yarn weight, but adjust hook size and expect the final size to scale proportionally. For a denser look, use the same hook size or one smaller than recommended for the yarn.

Do I need to sew the flowers permanently?

No β€” you can sew them permanently for a fixed look or add buttons/snaps to make the flowers removable for easier washing and storage.

How much yarn will I need in total?

Approximately 1.0–1.2 kg total worsted weight yarn across all colors for a runner of the shown size, divided across the color breakdown in the materials section. Exact amounts vary with tension and optional embellishments.

Can I make the runner shorter or longer?

Yes β€” simply reduce or increase the number of diamond motifs in the column. Add or remove full motifs and adjust flower placement proportionally for balanced spacing.

How should I care for the finished runner?

Hand wash in cold water and lay flat to dry, or use a gentle machine cycle in a laundry bag. Remove any wooden beads prior to washing if possible; re-block while damp.

Can I change the color palette?

Absolutely β€” this modular pattern lends itself well to color experimentation. Try autumnal hues, pastels or monochrome palettes to match your decor.

Are the petals stuffed?

Add a small amount of lightweight polyester filler only to the base of each petal for structure; avoid overstuffing to maintain a natural petal curve.