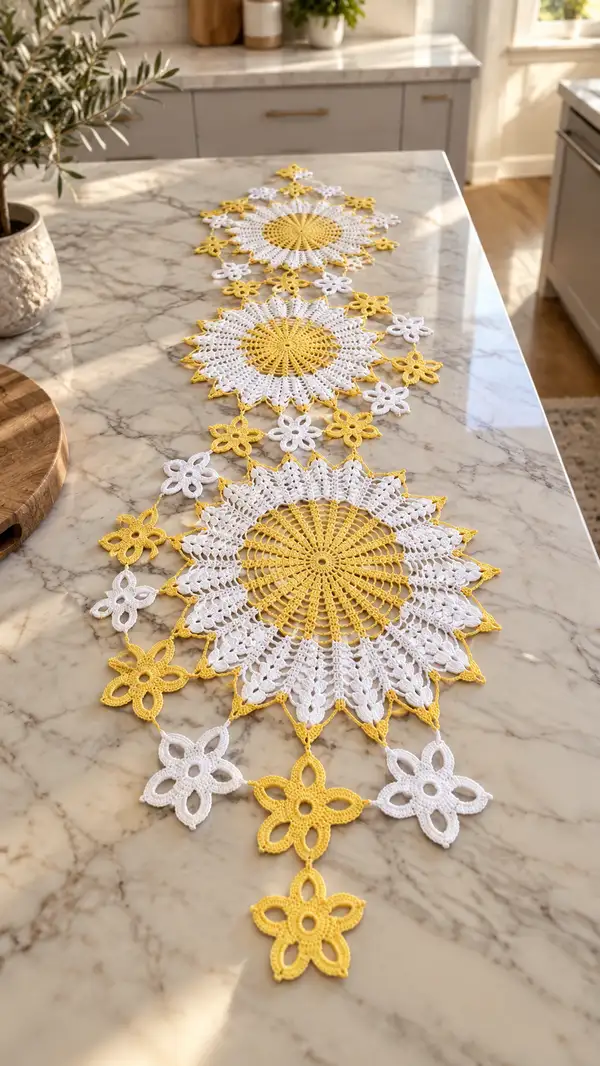
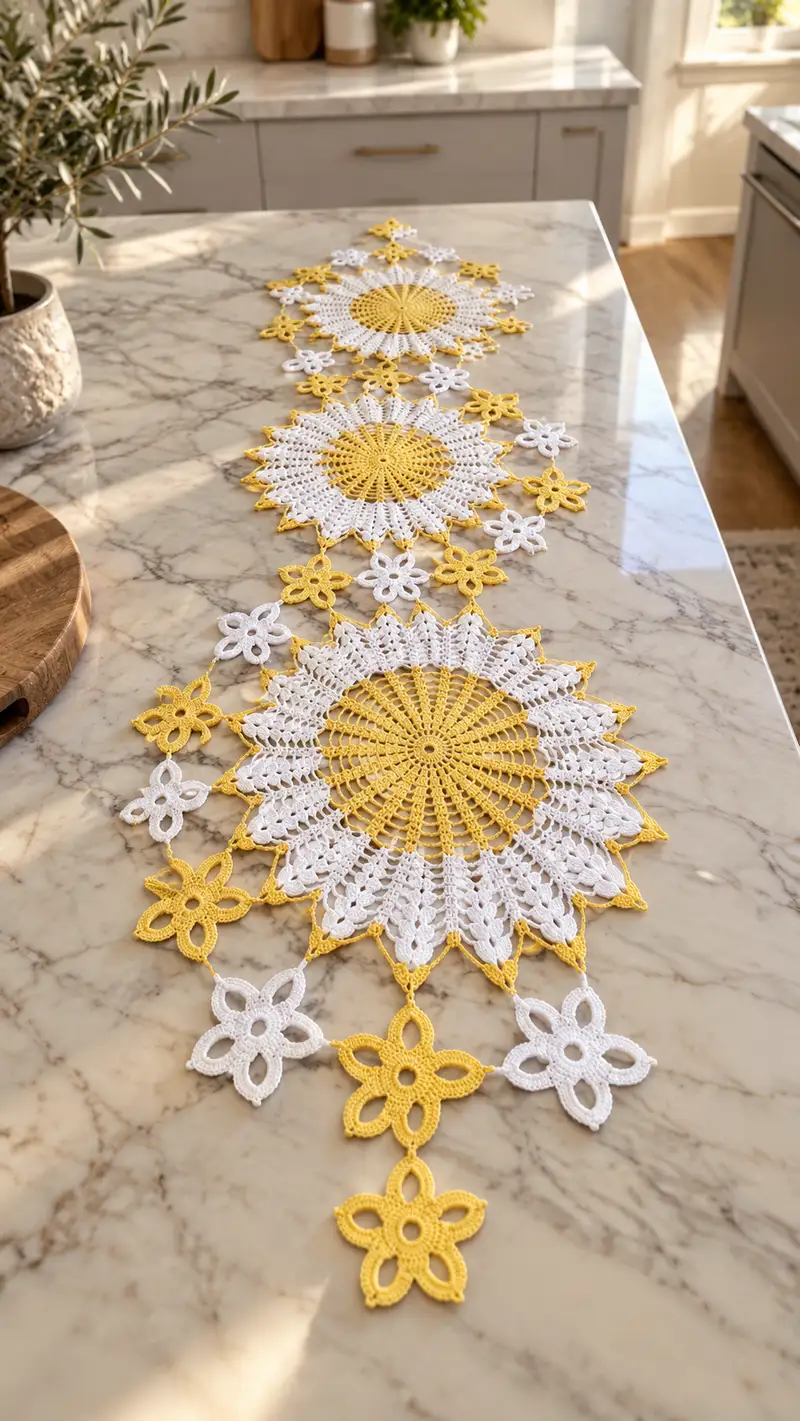
A delicate sunburst lace table runner worked in alternating sunny yellow and crisp white. This design features three large circular sunflower motifs connected by a string of small floral motifs for a trailing, openwork look. Lightweight and decorative, it sits beautifully on a marble or wood surface and brings bright, handmade charm to any table setting.
Progress Tracker
0% Complete
— Notes :
Info :
This runner is worked as modular motifs: Large Sunburst Motif (make 3), Small Connector Flower (make 26 total in alternating colors for pictured length) and short joining chains. Work each motif and block flat before joining for best results. Pattern uses US crochet terms. Gauge is not critical but use a small hook for crisp lace; a 2.25mm hook with sport cotton yielded motifs approx 11-12 in (28-30cm) across for large medallions.
Info :
I recommend marking segment starts with a removable stitch marker for the first pass of petals to keep repeat counts accurate. Carrying color will create bulk; instead finish and weave ends between motifs.
— Large Sunburst Motif (make 3 identical motifs) :
Round 1 :
With Yellow: 8 sc in magic ring (8)
Round 3 :
(1 sc, inc) x 8 (24)
Round 4 :
(2 sc, inc) x 8 (32)
Round 5 :
(3 sc, inc) x 8 (40)
Round 6 :
(4 sc, inc) x 8 (48)
Round 7 :
(5 sc, inc) x 8 (56)
Round 8 :
(6 sc, inc) x 8 (64)
Info :
These rounds form a dense center for the sunflower. Keep tension even and do not over-tighten the magic ring; you want a smooth flat central disc.
Round 9 :
1 sc in each st around (64)
Round 10 :
1 sc in each st around (64)
Round 11 :
1 sc in each st around (64)
Info :
Work 3 even rounds to build a raised central disc. If you prefer a slightly domed center, you may add an extra round of sc (Round 12) — do not overstuff or it will distort later lace.
Round 12 :
Change to White. (1 sc, ch5, sk 2) x 16 (arrange repeats evenly to create 16 ch-5 arches) (64)
Info :
We changed to white for the petal body. Each arch will become one petal. Mark the first arch with a marker to keep track of rounds that build petals.
Round 13 :
Into each ch-5 sp: sc, hdc, 3 dc, hdc, sc (7 sts worked into each ch-5 sp) x16 = 112 total sts worked (112)
Info :
Petal shape is formed on these arch bases. Keep your dc sets even and use turning of the wrist to form slightly raised petals.
Round 14 :
1 sc in each st around (112)
Round 15 :
(2 sc, ch3, sk 2, sc in next 3) x 28 to create smaller arches between dc clusters (112)
Round 16 :
In each ch-3 sp: sc, 5 dc, sc (7 sts per ch-3 sp) x28 = 196 (196)
Info :
The stitch count increases as additional decorative shells are added; keep careful count every few repeats to avoid drift. This round begins the fuller outer lace that forms each broad petal tip.
Round 17 :
1 sc in each st around (196)
Round 18 :
(3 sc, ch5, sc in next 5) x 28 to form larger arches ready for pointed edging (196)
Round 19 :
In each ch-5 sp: sc, hdc, 7 dc, hdc, sc (11 sts per ch-5 sp) x28 = 308 total (308)
Info :
This round gives each petal body its full volume. At this stage your motif is wide and lacy — block it flat before proceeding if you prefer precise petals. Leave it slightly flexible for edge shaping.
Round 20 :
1 sc in each st around (308)
Round 21 :
(4 sc, dec) x 44 (264)
Info :
Begin a subtle shaping to tighten toward the petal tips so points can be created without excess fullness. The visible motif in the photo has distinct pointed tips — we create those in the next rounds.
Round 22 :
1 sc in each st around (264)
Round 23 :
(5 sc, dec) x 36 (216)
Round 24 :
1 sc in each st around (216)
Round 25 :
Switch to Yellow. (1 sc, ch7, sl st into 7th sc ahead to anchor) x 16 — this round forms long chain loops at petal points placed every 13-14 stitches depending on spacing (16 loops)
Info :
These long chain loops mark the points of each petal and are worked in contrasting yellow to mimic the subtle tipped points in the photo. Count your stitches so that there are 16 evenly spaced loops around the motif.
Round 26 :
In each ch-7 loop: sl st, sc, hdc, 5 dc cluster, hdc, sc, sl st (work entirely into loop to form pointed petal tip) x16 (each loop is closed; overall resulting stitches are worked in loop spaces, maintain symmetry)
Round 27 :
1 sc in each available stitch around, working into spaces created by petal tips where necessary so that motifs remain flat (approx 256-288 depending on tension)
Info :
At this stage counts vary slightly by tension. The important element is that each petal tip is distinct and sits flat. Block motif now with pins to open the points evenly before adding the finishing picot-edge.
Round 28 :
With White: (sc, ch3, picot, sc) in each petal valley to create delicate scalloped lace between points. Work evenly around to create 16 picot scallops. (maintain even spacing)
Round 29 :
Change to Yellow. Working in the tip of each petal point: sc, picot, sc to produce tiny decorative point highlights (16 small points)
Round 30 :
Fasten off and weave in ends. Block motif flat and pin points evenly; motifs should measure approx 11-12 in (28-30cm) across after blocking depending on yarn and tension.
Info :
Make 3 large sunburst motifs total in the same color order (center yellow, body white, tips yellow). Allow each motif to dry completely from blocking before joining. The rest of the runner is assembled using small connector flowers and short chain links.
— Small Connector Flower (make 26; alternate colors Yellow/White as shown) :
Round 1 :
With chosen color: 6 sc in magic ring (6)
Round 3 :
(1 sc, inc) x 6 (18)
Round 4 :
(2 sc, inc) x 6 (24)
Info :
These small flowers are built to be lightweight and flat so they sit cleanly along the runner. Use the same hook as large motifs for consistency.
Round 5 :
(sc in next 2, ch5, sl st in next st) x 6 to create six ch-5 loops around (24)
Round 6 :
In each ch-5 loop: (sc, hdc, 5 dc, hdc, sc) to make a petal (7 sts per petal) x6 = 42 sts worked into loops (42)
Round 7 :
1 sc in each st around and into the small gaps to blend petals (42)
Round 8 :
(sc, picot, sc) at tip of each petal (6 picot tips). Fasten off leaving a long tail for joining (do not weave in yet).
Info :
Make small connector flowers in alternating colors so the runner mirrors the image: start with Yellow near one end, then White, and alternate as you make each connecting chain between large motifs. Leave tails for sewing so you can join easily with a tapestry needle.
— Joining Flower Chains and Placement :
Info :
Arrange the runner by placing the three large motifs on a flat surface in the order you want (photo shows three aligned along the narrow length of a table). Between each pair of large motifs you will attach a vertical column of small flowers and small lateral connectors to produce an open, trailing lace. Count placements before sewing: between motifs use 8 connector flowers (4 each side symmetrically) and 2 longer vertical chains of 3 flowers down the center connecting the final tip. The pattern pictured uses 26 small flowers total; adjust quantity for desired runner length.
Info :
Join small flowers to large motifs by using the long tail left when fastening off. Use mattress or whip stitch through the back loops of the flower center and the outer round of the large motif where loops meet. Pin before sewing for even spacing.
Step :
Lay first large motif flat. Mark 8 equally spaced outer loops where connector flowers will attach (4 on each side alternating near petal tips). Lightly baste one small flower to each marked spot using contrasting thread so you can visually confirm placement before stitching with matching yarn.
Step :
Sew each connector flower using the long tail: align the center of the connector over a corresponding petal valley on the large motif, use small whip stitches around the back loops only and pull evenly — do not draw the pieces tight or they will pucker the larger motif.
Info :
When attaching the small vertical columns of three flowers between motifs, attach the top connector flower to the first large motif, then chain 8-12 (ch 10 recommended) from the bottom of that flower to reach and attach the middle small flower, then repeat chain to the bottom flower and then to the next large motif — see chaining details below.
Joining Chain (single link) :
When connecting two small flowers vertically or connecting small flower to large motif, use: attach yarn at join point, ch10, sl st to center of next flower (use desired chain length to control drop). Fasten off and weave in the short ends behind elements. For tighter joins reduce chain to ch6-8.
Info :
Alternate connecting distances were used in the pictured runner to produce staggered floral trails, so adjust chain lengths slightly for asymmetry if desired. Keep chain lengths even on each side to maintain a balanced look.
— Finishing Edge & Optional Extra Points :
Round 1 :
With Yellow, once all motifs are joined and secure: pick up at any petal point and sc evenly around the outermost edges of the assembled runner connecting the edges of the large motifs and the small flowers. Work 1 sc per available stitch or space, smoothing the joins (maintain tension so the runner lays flat).
Round 2 :
(sc, picot, sk 2) across scalloped edges to create tiny points and unify the entire runner's edging. Work carefully around small flowers and between joins — adjust sk numbers to maintain even spacing.
Round 3 :
Optional: Add a final decorative chain fringe at the pointed tips by attaching yarn and working ch6-10 loops, fasten off and secure each with a sl st to base of tip. Repeat at desired points only so the fringe remains delicate.
Info :
Weave in all ends by threading tails through the back of adjacent lace rows and trim close. Block entire runner gently again to ensure all joins lie flat and the lace opens evenly. Use rust-proof pins and steam-block or wet-block depending on fiber instructions.
Info :
For a stiffer presentation (table centerpiece use), lightly starch and press following cotton yarn care guidelines. For a softer hand, skip starching. Always follow care instructions for your chosen yarn when laundering.
Completing this Sunburst Lace Table Runner is a joyful process — each sun-like medallion and tiny connector flower builds into a luminous, airy centerpiece that brings handmade warmth to your home. The combination of bright yellow centers and crisp white lace petals makes the runner both cheerful and elegant. Enjoy blocking and joining the motifs — the transformation from individual pieces to a graceful, connected runner is so satisfying! 🧶🌞🌼