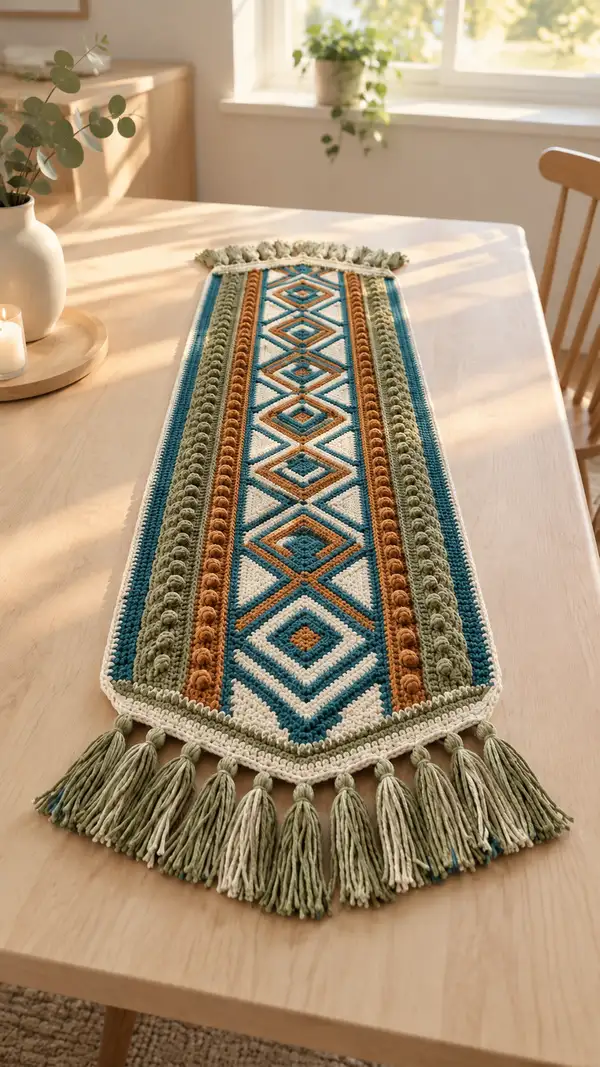
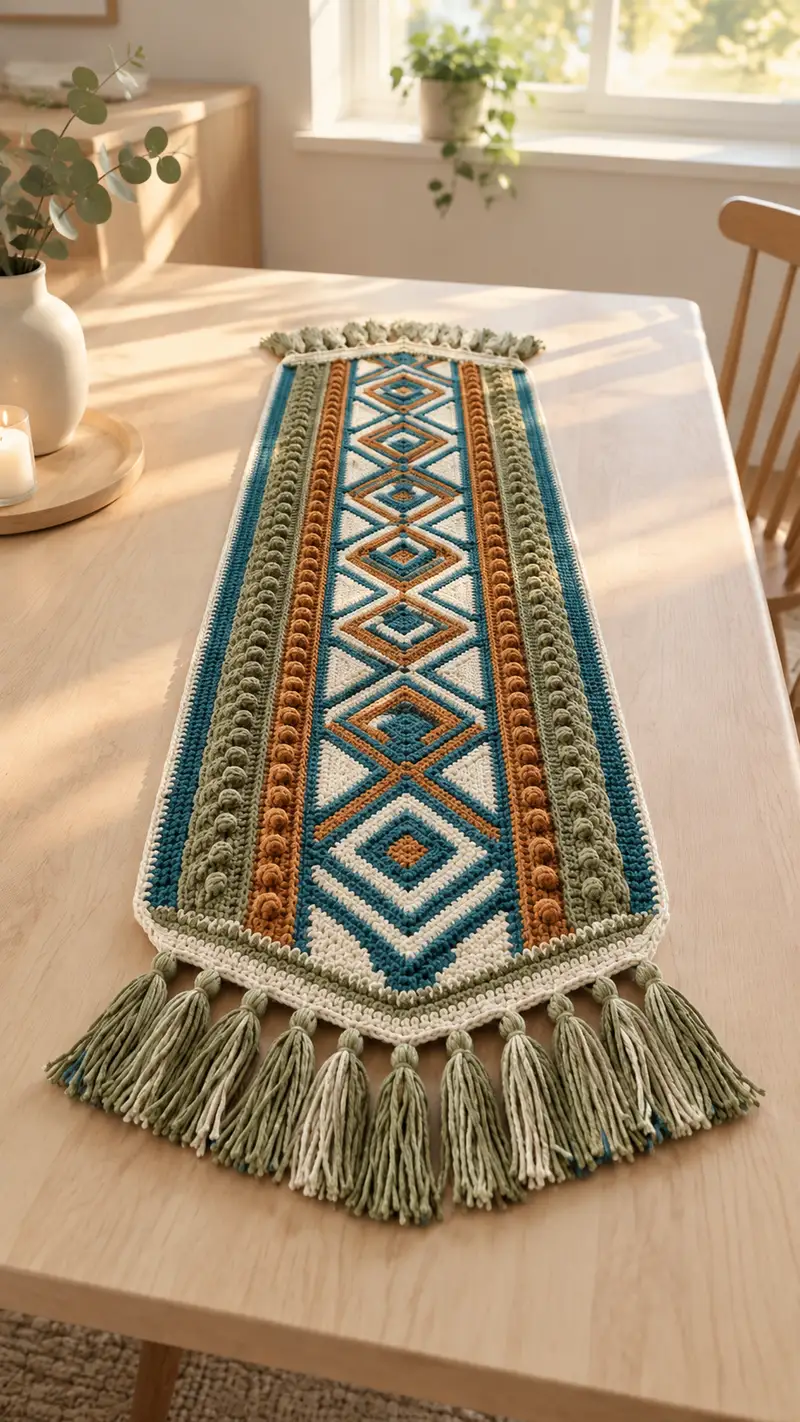
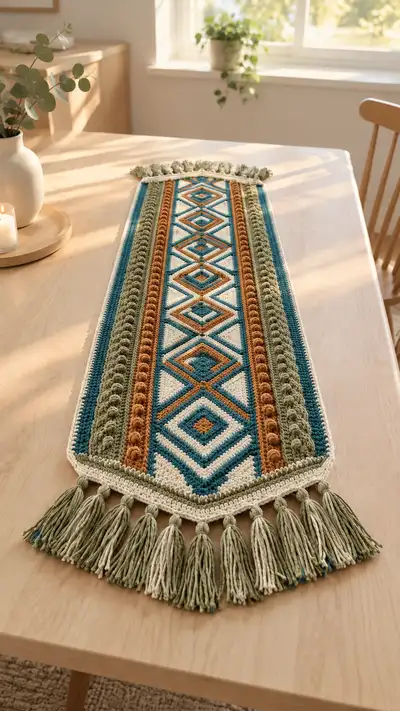
A long boho-inspired geometric table runner featuring diamond mosaic panels, raised bobble columns and chunky tassels. Rich teal, olive green, rust and cream combine in a textured, layered design. The runner uses simple stitches, color changes and post-stitch texture to create a modern handcrafted accent piece for dining tables or sideboards. Detailed row-by-row instructions and assembly tips make this an achievable project for adventurous crocheters.
Progress Tracker
0% Complete
— Overview :
Info :
This runner is worked flat in rows as one long panel (main body), then two pointed end panels are crocheted separately and sewn on. The main body width is 121 sts. Work with worsted weight yarn and a 4.0mm hook for a firm fabric that shows texture well. Maintain consistent tension. All rows are worked right side up when noted; turn at the end of every row unless otherwise instructed.
— Foundation and Base Rows (establishing width 121 sts) :
Round 1 :
Ch 122 (this yields 121 foundation sts). 1 sc in 2nd ch from hook and in each ch across. Turn. (121)
Round 2 :
Ch 1, 1 sc in each st across. Turn. (121)
Round 3 :
Ch 1, 1 sc in each st across. Turn. (121)
Round 4 :
Ch 1, 1 sc in each st across. Turn. (121)
Info :
Place stitch markers in the first and last stitch of the row to help maintain even edges. The runner is worked in rows; always count at intervals to confirm 121 sts. If your fabric stretches, try a 3.5mm hook for a firmer texture.
Round 5-10 :
Ch 1, 1 sc in each st across. Turn. (121) Work these rounds in Cream to form a stable base before starting the central motif.
Info :
We will establish three vertical design bands across the width: left texture column, central diamond mosaic, and right texture column. For clarity, stitch positions across 121 sts are distributed like this: left border & texture 1 = sts 1-18, left bobble column = sts 19-30, central mosaic = sts 31-91 (61 sts wide), right bobble column = sts 92-103, right texture & border = sts 104-121. Keep these divisions in mind for color changes and special stitches.
— Main Body: Central Diamond Mosaic and Flanking Texture Columns (Rows 11-80) :
Round 11 :
Ch 1, 1 sc in each st across in Cream. Turn. (121)
Round 12 :
Ch 1, change to Deep Teal on final yarn over of last sc, 1 sc in each st across. Turn. (121)
Info :
The central diamond panel (sts 31-91) will be worked using tapestry-style single crochet color changes, working each sc in the color required for that stitch and carrying unused colors across the back of the work. Keep floats no longer than 6 sts; catch them every 6 rows by crocheting over the yarn tail.
Round 13 :
Ch 1, Row pattern: sts 1-18 (left border) 1 sc Cream, sts 19-30 (left bobble column) 1 sc Olive on rows that form the bobble background, sts 31-91 (central mosaic) follow mosaic chart row A (see chart substitute in Info) using Deep Teal, Cream and Rust as indicated, sts 92-103 (right bobble column) mirror left bobble coloring, sts 104-121 (right border) 1 sc Cream. Turn. (121)
Info :
Because this is written without an image chart included, use the following written substitute for the central 61-st mosaic repeat: Each 8-row diamond repeat across the 61 sts uses a symmetrical sequence where the center of the diamond aligns at the center stitch (st 61 of the center area). Keep counts by grouping the 61 sts into 7 diamond columns across the length. If following a chart, each row still totals 121 sts.
Round 14 :
Ch 1, 1 sc in each st across following colorwork plan. Turn. (121)
Round 15 :
Ch 1, 1 sc in each st across. Turn. (121)
Round 16 :
Ch 1, 1 sc in each st across. Turn. (121)
Info :
Begin the first full diamond repeat now. For the mosaic: work the first 4 rows of the 8-row diamond shaping across the 61-st center area, changing colors at the exact stitch indicated by the written diamond sequence. On odd-numbered rows you will primarily lay the darker outline (Deep Teal) and on even-numbered rows fill with Cream and Rust accents.
Round 17-24 :
Ch 1, 1 sc in each st across following the 8-row diamond repeat rows 1-8 for center mosaic; keep side columns in their color backgrounds (Olive for bobble base rows, Cream or Teal for other rows). Turn. (121)
Info :
At the start of round 17 and at the start of every 8-row repeat, reposition stitch markers at the beginning and end of the central 61-st section (sts 31 and 91) to help count and ensure color changes land exactly at the edges of the motif.
Round 25-32 :
Ch 1, repeat the next 8 rows of the diamond repeat, following color placement to build the diamond centers. Continue to work side texture columns in their color background. Turn. (121)
Info :
The central diamond repeat is 8 rows high and will be repeated down the length. Each full diamond motif from point to point is 8 rows; stack 7 diamonds to create a long panel for the visual proportions you see. Keep the centermost stitch of the 61-st block as your vertical symmetry point for each diamond.
Round 33-56 :
Ch 1, continue repeating the 8-row diamond motif sequence to form 7 full diamonds down the center of the runner. Maintain 121 sts each row, adjusting color as necessary for each diamond row. Turn after each row. (121)
Info :
When changing colors within a row for mosaic work, complete the last yarn over of the previous sc with the new color to create a seamless color change. Carry unused colors along the back, catching them every 4-6 sts to keep floats tidy. If you prefer, carry only two colors at a time and weave in the rest later.
Round 57-64 :
Ch 1, Begin to add contrast rows: after the last full diamond repeat, work 8 rows of alternating Cream and Deep Teal single crochet to create a visual buffer before textural columns begin. Continue side column colors as before. Turn. (121)
Round 65 :
Ch 1, change to Olive for the left texture column and to Olive for right texture column where directed. 1 sc in each st across. Turn. (121)
Info :
We will now establish the raised textural columns: a bobble stripe (bobble stitch) adjacent to the central mosaic and a raised ridge column (fpdc/bpdc rows) nearer the outer edge. The bobble stripe sits on an Olive background and the ridge column uses Olive stitches worked in post stitches to create rounded ridges.
— Raised Bobble Stripe and Ridge Column (Rows 66-100) :
Round 66 :
Ch 1, sts 1-18 left border 1 sc Cream; sts 19-30 left bobble column: 1 sc Olive; sts 31-91 center mosaic 1 sc following last color of mosaic buffer; sts 92-103 right bobble column 1 sc Olive; sts 104-121 right border 1 sc Cream. Turn. (121)
Round 67 :
Ch 1, start bobble shaping: Work to left bobble column sts 19-30: for each bobble placement row, work 'bobble' in designated stitch every other row as follows - bobble st: (yarn over, insert hook, pull up loop, yarn over, pull through 2 loops) repeat 4 times in same st, yarn over and pull through all loops, ch 1 to close bobble. Continue 1 sc across remaining sts. Turn. (121)
Info :
Bobble stitch definition: For our yarn and hook, create a 5-loop bobble: (yo, insert, pull up loop)x4 then yo and pull through all loops, ch1 to close. The ch1 sits at the top of the bobble and will be worked into on the next row. Keep tension slightly looser when forming the bobble to avoid splitting yarn.
Round 68 :
Ch 1, 1 sc in each st across, working into the ch-1 of the bobble where applicable to lock the bobble into place. Turn. (121)
Round 69 :
Ch 1, Repeat Round 67 for bobble placement in the right bobble column sts 92-103, and repeat for left column so both columns alternate bobble rows such that each bobble column is staggered by one row. Turn. (121)
Round 70-74 :
Ch 1, Repeat the bobble-forming rounds 66-69, creating four more textured rows. The bobble columns will result in a dense vertical line of rounded shapes while the center mosaic remains flat. Turn each row. (121)
Info :
Keep the bobbles aligned vertically by creating them in the same stitch positions within the column across repeats. If bobbles shift, place a stitch marker in the bottom loop of the bobble stitch position to ensure alignment on subsequent rows.
Round 75 :
Ch 1, Now establish ridge column: for sts 1-18 left border remain in Cream sc; sts 19-30 left texture column work 1 fpdc in each st across (front post double crochet) on this row to create a raised ridge; sts 31-91 center mosaic 1 sc in each st; sts 92-103 right texture column work 1 fpdc each; sts 104-121 right border 1 sc Cream. Turn. (121)
Round 76 :
Ch 1, work 1 sc in each st across, working around the posts where fpdc were made to create contrast and lock the ridges in place. Turn. (121)
Round 77-84 :
Ch 1, repeat the ridge row (fpdc) every third row and sc rows between to build a raised rib texture of olive columns. Continue to maintain center mosaic color pattern across the central 61 sts. Turn. (121)
Info :
Alternate fpdc and sc rows in a 1-in-3 rhythm (for example: Row 75 fpdc, Row 76 sc, Row 77 sc, Row 78 fpdc) to create a regular textured ribbing. Use bpdc (back post double crochet) on alternate columns if you prefer the ridges to face the opposite direction.
Round 85-96 :
Ch 1, Continue building the bobble and ridge textures in their respective columns, repeating the bobble formation rows and fpdc rib rows as established. Maintain central mosaic repeats as neutral background when not changing color for diamonds. Turn after each row. (121)
Round 97-100 :
Ch 1, Finish the last bobble/ridge sequence with four rows: two sc rows in Cream (buffer), then one row of Olive fpdc for final ridge, then one sc row. Turn. (121)
Info :
At the end of Round 100 you have completed the main textured panel. The piece should measure approximately the desired length minus the two pointed end panels. Keep your work flat and even — if a side looks shorter, gently block before attaching end panels.
— Creating Pointed End Panels (make 2 identical panels) :
Info :
The pointed end panels are worked separately in a triangular shape and sewn to the center panel's ends to create the tapered pointed finish seen in the image. Each panel is 61 sts at its widest matching the central 61 sts of the main body; they taper to a point over 20 rows. Make two panels, one for each end, with the same colorwork as the runner end: central diamond continuation and border color in Cream and Olive.
Round 1 :
For end panel: Ch 62 (gives 61 foundation sts). 1 sc in 2nd ch from hook and in each ch across. Turn. (61)
Round 2 :
Ch 1, 1 sc in each st across. Turn. (61)
Info :
We will decrease both edges gradually to create a symmetrical triangle. Each decrease row reduces 2 sts (one at each end). Over 20 decrease rows you will reduce the work from 61 sts down to 21 sts (61 - (2 x 20) = 21). Continue until tip width is to your taste; 20 rows results in a gentle point that matches the runner proportions.
Round 3 :
Ch 1, sc2tog at beg, 1 sc in each st across until last two sts, sc2tog. Turn. (59)
Round 4 :
Ch 1, sc2tog at beg, 1 sc in each across until last two sts, sc2tog. Turn. (57)
Round 5 :
Ch 1, sc2tog at beg, 1 sc in each across until last two sts, sc2tog. Turn. (55)
Round 6 :
Ch 1, sc2tog at beg, 1 sc in each across until last two sts, sc2tog. Turn. (53)
Info :
Keep the same central mosaic or diamond colors on the remaining middle stitches as you decrease; allow the color pattern to taper naturally. If a stitch color ends up at the edge where you normally changed color, shift the color change to the next appropriate stitch so the diamond pattern reads correctly when attached.
Round 7 :
Ch 1, sc2tog, 1 sc across, sc2tog. Turn. (51)
Round 8 :
Ch 1, sc2tog, 1 sc across, sc2tog. Turn. (49)
Round 9 :
Ch 1, sc2tog, 1 sc across, sc2tog. Turn. (47)
Round 10 :
Ch 1, sc2tog, 1 sc across, sc2tog. Turn. (45)
Info :
At the narrow part of the panel you may switch to a 3.5mm hook for neater shaping; this contracts the stitches slightly and gives a sharper point. Keep the same yarn colors; do not cut color changes—carry them behind the work if short distances are needed.
Round 11 :
Ch 1, sc2tog, 1 sc across, sc2tog. Turn. (43)
Round 12 :
Ch 1, sc2tog, 1 sc across, sc2tog. Turn. (41)
Round 13 :
Ch 1, sc2tog, 1 sc across, sc2tog. Turn. (39)
Round 14 :
Ch 1, sc2tog, 1 sc across, sc2tog. Turn. (37)
Round 15 :
Ch 1, sc2tog, 1 sc across, sc2tog. Turn. (35)
Info :
Check that the narrow tip lines up visually with the center diamond axis of the main runner before finishing. If you prefer a sharper point, continue decreasing an extra 2-4 rows until the tip meets your desired look.
Round 16 :
Ch 1, sc2tog, 1 sc across, sc2tog. Turn. (33)
Round 17 :
Ch 1, sc2tog, 1 sc across, sc2tog. Turn. (31)
Round 18 :
Ch 1, sc2tog, 1 sc across, sc2tog. Turn. (29)
Round 19 :
Ch 1, sc2tog, 1 sc across, sc2tog. Turn. (27)
Round 20 :
Ch 1, sc2tog, 1 sc across, sc2tog. Turn. (25)
Info :
Fasten off leaving a 40-50cm tail for sewing the end panel securely to the main body, and a shorter 15-20cm tail to weave in at the tip if needed. Make a second identical panel for the opposite end of the runner.
— Attaching End Panels :
Info :
Block the main panel and both end panels lightly to square them and align stitch counts. Pin the first triangular panel to the pointed end of the main body aligning the center 61 sts of the main body to the base of the triangle (the widest edge). Begin sewing at one corner and work across with a whip stitch or mattress stitch for a neat join.
Round 1 :
With right sides together, match the base of the triangle (61 sts) to the center 61 sts of the main runner end. Use the long tail to sew through matching stitches, taking care to keep tension consistent so the seam lies flat. Weave in tail securely. Repeat for the other end. (Visual alignment)
Info :
When sewing, use a yarn needle and the same color yarn as the edge to minimize visible seams. Make small, even stitches and avoid pulling too tight; the join should be firm but not puckered. Once both panels are attached, block the whole runner again to even the joins.
— Edging and Final Border Rows :
Round 101 :
With Cream, work 1 sc evenly around the entire perimeter of the runner, working 3 sc in each outer point corner to allow for the 90-degree turn and across the triangle points work 1 sc in each end stitch. Be careful to place 3 sc in the seam join stitches so edges lie flat. Join with sl st to first sc. (Perimeter sc count will vary slightly by join; aim for even spacing.)
Round 102 :
Ch 1, 1 sc in each st around. Place 3 sc at each corner and each tassel knot space to keep edge flat. Join with sl st. (Even spacing)
Round 103 :
Ch 2 (counts as hdc), hdc in each st around working 2 hdc in corner stitches for a neat rounded finish. Join with sl st and fasten off. Weave in ends. (Perimeter finished)
Info :
The edging helps hold the runner's shape and integrates the end panels seamlessly. Blocking after edging will help the runner lie flat and accentuate the diamond pattern. Measure your finished perimeter and adjust tassel spacing accordingly.
— Tassels (Make 16-18 for both ends) :
Info :
Tassels are made by wrapping yarn around a 10cm cardboard or book to create full, even tassels. Each tassel is composed of layered strands using Olive, Cream and occasional Deep Teal accents for depth. The image shows 9 tassels across each pointed end base; count your base width and space tassels evenly, roughly every 6-8 sts along the base edge.
Round 1 :
Wrap 20-24 strands of Olive yarn 10-12 times around a 10cm guide, cut one end to release, fold strands in half and tie tightly at the fold with a small strand of Cream. Trim ends evenly to 12-14cm length. Repeat to make desired number of tassels. Use 2-3 strands of Deep Teal woven through for contrast if desired. (Tassel)
Round 2 :
Attach tassels to the base of each triangular panel by threading the loop through the edge and pulling the tails through, then cinch tight and knot. Space evenly and secure with an extra stitch on the back for stability. (Attachment)
Info :
Layer tassels so the outermost ones have a mix of Olive/Cream while a Deep Teal accent tassel sits at the center point for visual pop. Comb lightly and trim to uniform length after all tassels are attached.
— Finishing Touches :
Round 1 :
Weave in all tails using a yarn needle. Secure any carried color ends by weaving them back into the fabric for at least 5 cm. Trim all ends flush. Block the finished runner to shape, pinning pointed ends and easing the edges. Allow to dry completely. (Finishing)
Info :
For extra longevity, consider adding a thin non-slip pad beneath the runner on dining tables. Spot clean stains promptly; hand wash gently in cool water if necessary and reblock to retain shape.
This boho geometric table runner pattern blends colorwork, texture and finishing details for a standout handmade accent. The diamond mosaic and raised bobble columns make a bold, tactile centerpiece full of cozy charm. With careful color changes and simple finishing steps, the runner will become a treasured piece on your dining table or console. Enjoy the meditative rhythm of mosaic rows and tassel-making — your home will thank you! 🧶✨