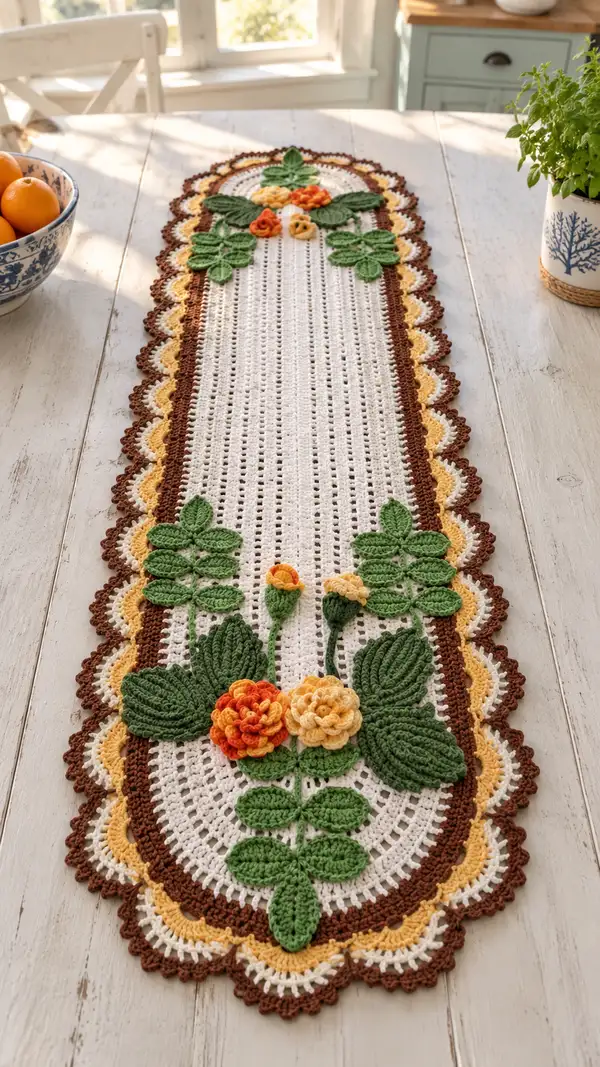
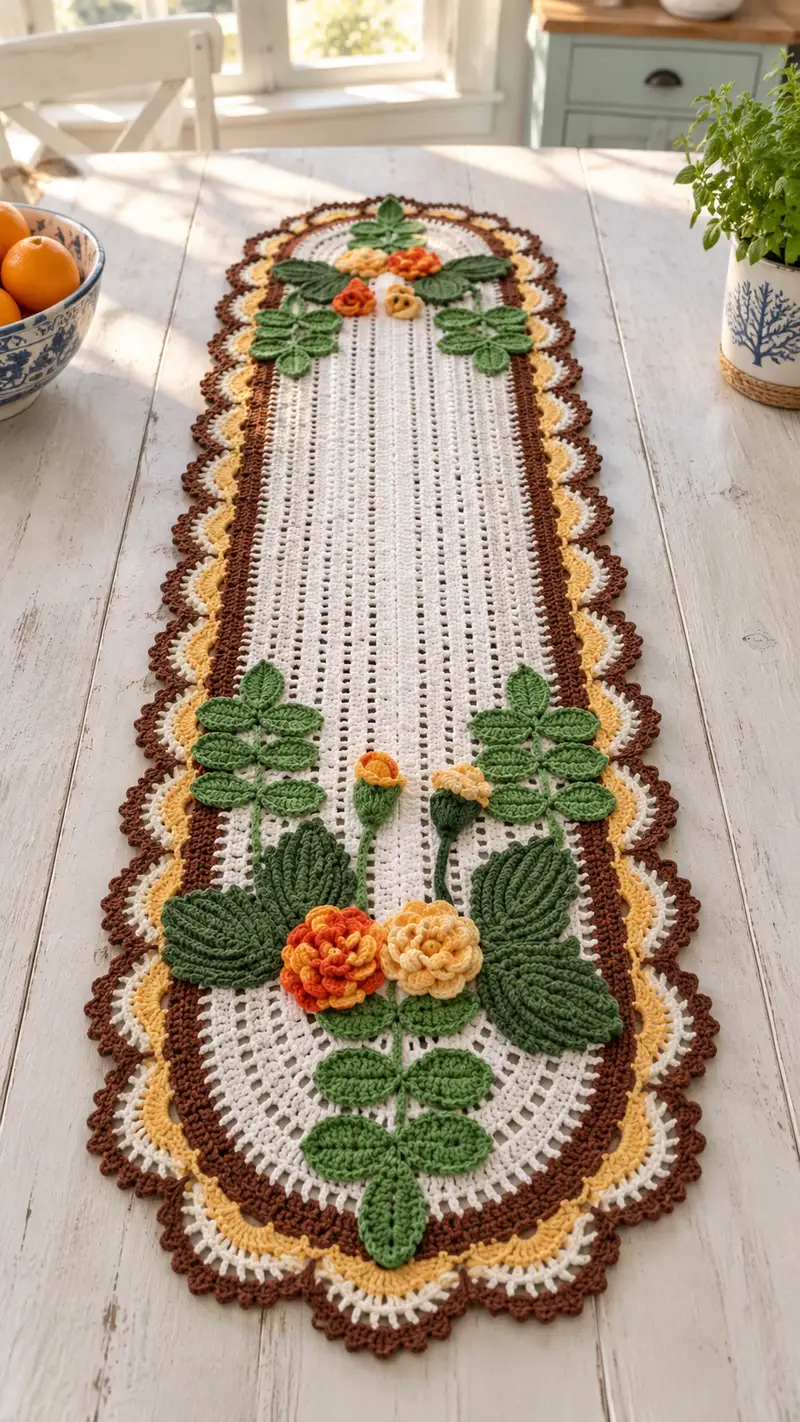
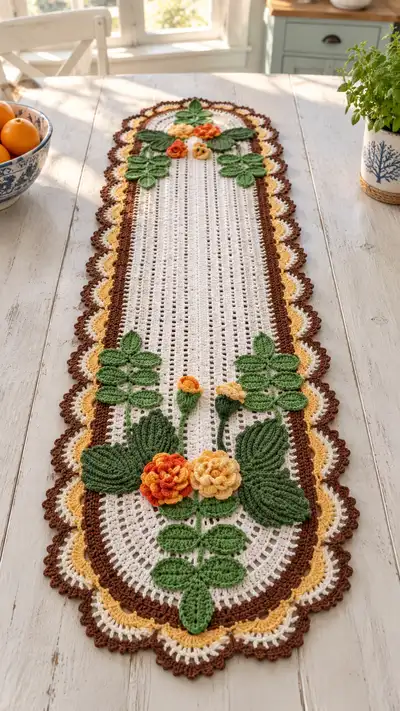
This elegant crochet table runner features a long white mesh center, scalloped brown-and-gold borders, and layered 3D floral appliques in green, gold and orange. The runner has oval ends and a delicate picnic-lace vibe, perfect for a dining table or console. The combination of openwork mesh and dimensional leaves and roses creates a refined, vintage-inspired centerpiece that layers beautifully under a vase or candle arrangement.
Progress Tracker
0% Complete
— Center Panel (worked in rounds from an oval center) :
Round 1 :
Make a magic ring. Ch3 (counts as dc), 7 dc into ring, pull ring tight and join with sl st to top of ch3 (8 dc total) (8)
Round 2 :
Ch3, 1 dc in same st, 2 dc in each dc around, join with sl st to top of ch3 (16)
Round 3 :
Ch3, 1 dc in same st, *dc in next st, 2 dc in next st; rep from * around, join (24)
Round 4 :
Ch3, 1 dc in same st, *dc in each of next 2 sts, 2 dc in next st; rep from * around, join (32)
Round 5 :
Ch3, 1 dc in same st, *dc in each of next 3 sts, 2 dc in next st; rep from * around, join (40)
Round 6 :
Ch3, 1 dc in same st, *dc in each of next 4 sts, 2 dc in next st; rep from * around, join (48)
Info :
These first increasing rounds create an elongated oval base. Keep tension even and count increases; place a stitch marker at the join to mark round starts
Round 7 :
Ch3, 1 dc in same st, *dc in each of next 5 sts, 2 dc in next st; rep from * around, join (56)
Round 8 :
Ch3, 1 dc in same st, *dc in each of next 6 sts, 2 dc in next st; rep from * around, join (64)
Round 9 :
Ch3, 1 dc in same st, *dc in each of next 7 sts, 2 dc in next st; rep from * around, join (72)
Round 10 :
Ch3, 1 dc in same st, *dc in each of next 8 sts, 2 dc in next st; rep from * around, join (80)
Info :
By round 10 you should have a comfortably shaped oval. Block or straighten if necessary. From here we will begin a mesh pattern that creates the long vertical stripes visible in the photo
Round 11 :
Ch3 (counts as dc), 1 dc in same st, *ch1, sk 1 st, dc in next 3 sts, ch1, sk 1 st, dc in next 4 sts; rep across curve and sides, maintain even spacing around rounded ends by working (dc, ch1, dc) clusters at the eventual corners; join (80)
Round 12 :
Ch3, 1 dc in same st, *dc in next st, ch1, sk next st, dc in next st, dc in next st; rep around to create the beginning of vertical bar alternation; join (80)
Round 13 :
Ch3, dc in same st, *ch1, sk 1 st, dc in next 3 sts; rep around working pattern to align vertical open spaces into even columns (80)
Round 14-20 :
Repeat Round 13 for 7 rounds (80). Maintain consistent tension. Use stitch markers every 10-12 sts to help count. This creates the white mesh center with visible vertical bars
Info :
If you prefer a tighter center for less openness, on these rounds substitute (ch1, sk1) with (ch1, sk1) but use hdc instead of dc in the worked clusters to reduce hole size
Round 21-34 :
Continue repeating the established mesh (Ch3, align dc clusters and ch1 spaces) for 14 rounds (80) to reach the desired runner length. For the pictured runner this center mesh continues for a long stretch — add or subtract repeats to match your table length. Keep the stitch count consistent so shaping at the oval end remains even.
Info :
Measure your runner now. If you need to lengthen, work additional even mesh rounds in multiples of the mesh repeat (each round adds approx 0.25-0.5 inch depending on yarn)
Round 35 :
Begin transition round for shaping the opposite oval end: Ch3, 1 dc in same st, *dc in next 8 sts, 2 dc in next st; rep around (88). This creates gentle expansion before repeating the mirror increases used at the start of the runner to close the oval
Round 36 :
Ch3, 1 dc in same st, *dc in next 9 sts, 2 dc in next st; rep around (96)
Round 37 :
Ch3, 1 dc in same st, *dc in next 10 sts, 2 dc in next st; rep around (104)
Info :
The increases here mirror the initial increases to form the rounded end. Keep track of where each increase falls so both ends match perfectly
Round 38 :
Ch1, sc evenly around this outer edge for 1 round to create a sturdy base for the inner border (104)
Info :
Fasten off white if you prefer to change colors for the inner border now; otherwise carry the white. We recommend fastening off and weaving ends for a clean color join
— Inner Brown Border :
Round 1 :
Join Dark Brown to any sc at the outer edge. Ch2 (counts as hdc), hdc in same st, hdc in each st around, working 2 hdc in rounded end increases where necessary to keep edge flat (approx 104 hdc) (104)
Round 2 :
Ch2, 1 hdc in each st around (104)
Round 3 :
Ch1, sc in each st around to create a firmer ridge before the scallop (104)
Info :
Work tightly in these rounds to define the brown band. If the brown band pulls in slightly, block later or adjust hook size for the following rounds
Round 4 :
Ch1, *sk next 2 sts, 7 dc in next st (shell), sk next 2 sts, sc in next st; rep across the long sides. At rounded ends, space shells evenly by shifting sc placement; join and fasten off brown (creates shell base for gold scallops)
— Golden Scallop Row :
Info :
Join Soft Gold into the center dc of each shell created in the brown round. These gold shells form the visible scallop layer
Round 1 :
Join gold in center stitch of brown shell: ch1, sc in same st, *ch3, 5 dc in next shell center, ch3, sc in next sc; rep across; join (creates small scallops) (approx 36 scallops)
Round 2 :
Ch1, sc in same st, *ch2, 3 dc in top of gold shell, ch2, sc in next sc; rep; join. Fasten off gold leaving tails for weaving (these form the middle layer)
Info :
Count scallops and ensure equal spacing at both rounded ends. Adjust by adding an extra sc between shells if necessary
— Outer Brown Picot Edge :
Round 1 :
Re-join Dark Brown to the outermost gold picot base. Ch1, sc in each st around; join (approx 104)
Round 2 :
Ch3, skip 2 sts, sc in next st; rep around to create a picot spacing; join (creates even spacing for final scallop)
Round 3 :
Ch1, *5 dc in ch3 space, sl st in next sc; rep around. At ends adjust to keep shell symmetry. Fasten off and weave ends (final decorative picot scallop in dark brown)
Info :
Block the entire runner flat after finishing the border to open scallops and even edges. Use pins to shape the scallops so they are symmetrical
— Large Leaves (Make 6 large leaves and 8 small leaves) :
Round 1 :
Using leaf green, ch8. Row 1 (foundation): sc in 2nd ch from hook, sc across (7 sc). Turn (7)
Round 2 :
Ch1, sc in first st, hdc in next, dc in next 3, hdc in next, sc in last (7)
Round 3 :
Ch2, 2 dc in first st, dc in next, hdc in next, dc in next, 2 dc in last st, turn work to work along opposite side of foundation chain: dc in next, hdc in next, dc in next, 2 dc in final st; sl st to first st. Total stitches increase; counts vary by shaping (approx 14)
Round 4 :
Ch1, sc evenly around leaf working 3 sc in each point (2-dc points) to create rounded lobes; join and fasten off leaving long tail for sewing. (This gives ribbed leaf outline)
Info :
To create the prominent central vein visible in the photo, use surface slip stitch or work a center ridge: before fastening off, work 6-8 rows of hdc along the center line in BLO to form a raised rib. Alternatively, sew a line of contrasting yarn as a vein.
Round 5 :
Optional: Rejoin yarn at leaf base and work FLO (front loops only) sl st ribbing up the center: ch1, sl st in each st along center for 1-2 rows to create definition; fasten off (leaf complete)
Info :
Make 6 large leaves for the clusters at each end and center, and 8 small oval leaves (use ch6 foundation and mirror shaping across) for the vertical vine motifs. Block leaves lightly to shape and press the central ridges
— Small Oval Leaves / Vine Motifs (Make 12 pairs) :
Round 1 :
Ch6, sc in 2nd ch from hook and across (5 sc). Turn
Round 2 :
Ch1, sc 2, hdc 1, sc 2; turn
Round 3 :
Work sc evenly around both sides of foundation chain: (sc, 2 sc in point) at ends to round off; join and fasten off leaving tail (approx 12 stitches total)
Info :
Make 12 pairs (24 small leaves total) to be arranged along the runner as in the photo: vertical vine groups at both ends and a mirrored pair at the center
— Stems and Tendrils :
Round 1 :
Using leaf green, ch30 (or desired stem length), 1 sc in 2nd ch from hook and each ch across to create a narrow cord; fasten off and leave long tail for sewing. For curved stems, use chain loops and slip stitches: ch20, sl st back along the chain to create a twisted cord
Info :
Create stems in various lengths; two long stems run up the center cluster and attach to buds. Use a tighter hook (3.25mm) for stems to keep them sturdy
— Rolled Roses (Make 4 large and 4 small) :
Round 1 :
For large rose: Using orange, ch50. Row 1: sc in 2nd ch from hook, hdc in next, dc in next 3, tr in next 3, dc in next 3, hdc in next, sc in next - repeat pattern of increasing cluster sizes until end (creates graduated petals). Fasten off leaving long tail
Round 2 :
Roll foundation strip tightly from one end to form a spiral rose; use a yarn needle and the long tail to whip stitch through the base of the spiral, catching every 3-4 layers to secure. For a larger rosette add an additional strip and continue wrapping (rose measures approx 2.25-3 in across)
Round 3 :
For small rose: ch30 and follow smaller petal gradation (sc, hdc, dc, tr clusters) then roll and sew similarly (approx 1.25-1.75 in across)
Info :
Work roses in two tones for depth: one in Burnt Orange for contrast and one in Golden Yellow. Slightly stuff the center with a tiny bit of fiberfill before finishing the base if you want a fuller bloom
— Buds (Make 6 small buds) :
Round 1 :
Ch6, join to form a loop. Rnd 1: Ch1, 8 sc into loop, join (8)
Round 2 :
Ch1, sc in same st, *inc in next st; rep around (16)
Round 3 :
Ch1, sc in each st around for 2 rounds to build a small rounded bud, do not stuff or stuff minimally, fasten off and leave long tail for sewing
Info :
Attach buds to ends of slender stems by sewing through the base and wrapping the stem tail around the base for a neat finish
— Assembly Prep (positioning appliques) :
Info :
Lay the blocked runner flat. Arrange the appliques to mirror the photo: clusters at each rounded end and one small cluster centered along the long axis. Use pins to hold pieces in place and photograph or mark positions for sewing reference
Info :
Place the two large leaves at each end slightly overlapping the brown band and gold scallop. Add small paired leaves along the vertical vine at approx 1.5-2 inch intervals. Cluster two roses with a bud near each large leaf group
Info :
Sew appliques using a whip stitch or ladder stitch for an invisible join. Use the leftover tails to secure the backside with small hidden knots and weave ends through several stitches
— Final Finishing Touches :
Round 1 :
After sewing appliques, add small decorative French knots using a yarn needle and short lengths of yarn to the rose centers or leaf bases for more texture. Use embroidery floss or soft yarn for subtle contrast
Round 2 :
Steam-block or wet-block the entire runner, pinning the scallops and appliques into shape. Allow to dry fully under weight or pins to set the shape
Info :
Trim any visible ends and use a tiny drop of fabric glue under appliques if sewing alone doesn't keep them flat long-term. Avoid glue on visible edges
Info :
Optional: Add a thin lining or non-slip mat underneath if placing on a shiny table surface to prevent sliding
This floral table runner brings a handcrafted touch to any table, combining airy mesh with lush, dimensional appliques for a charming centerpiece. The layered scallop border and rosette clusters create an elegant vintage look that’s perfect for gatherings or daily charm. Enjoy the satisfaction of assembling the runner piece by piece—each stitched leaf and rose adds personality and warmth to your home. 🧶🌼 Take pride in your finished piece and display it proudly on your favorite table. ✨