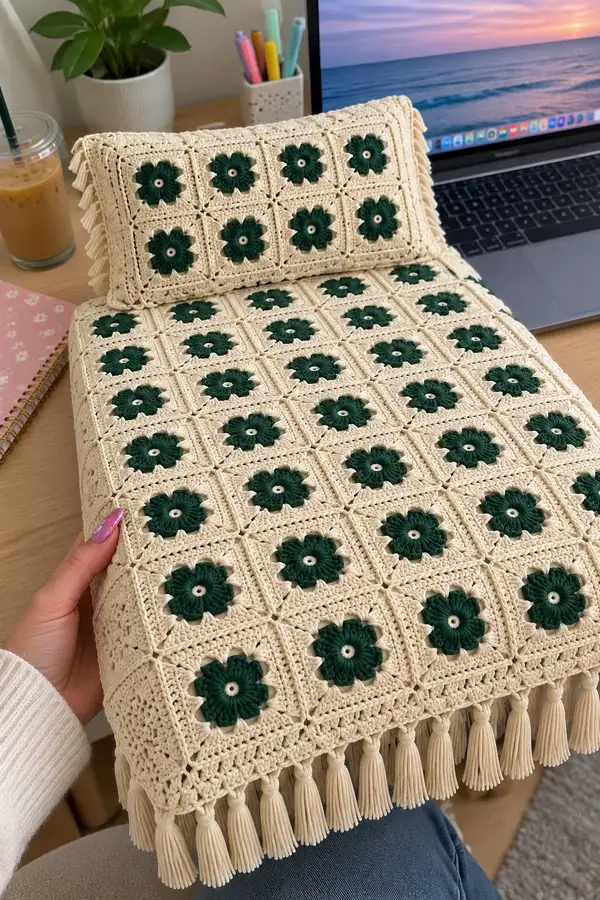
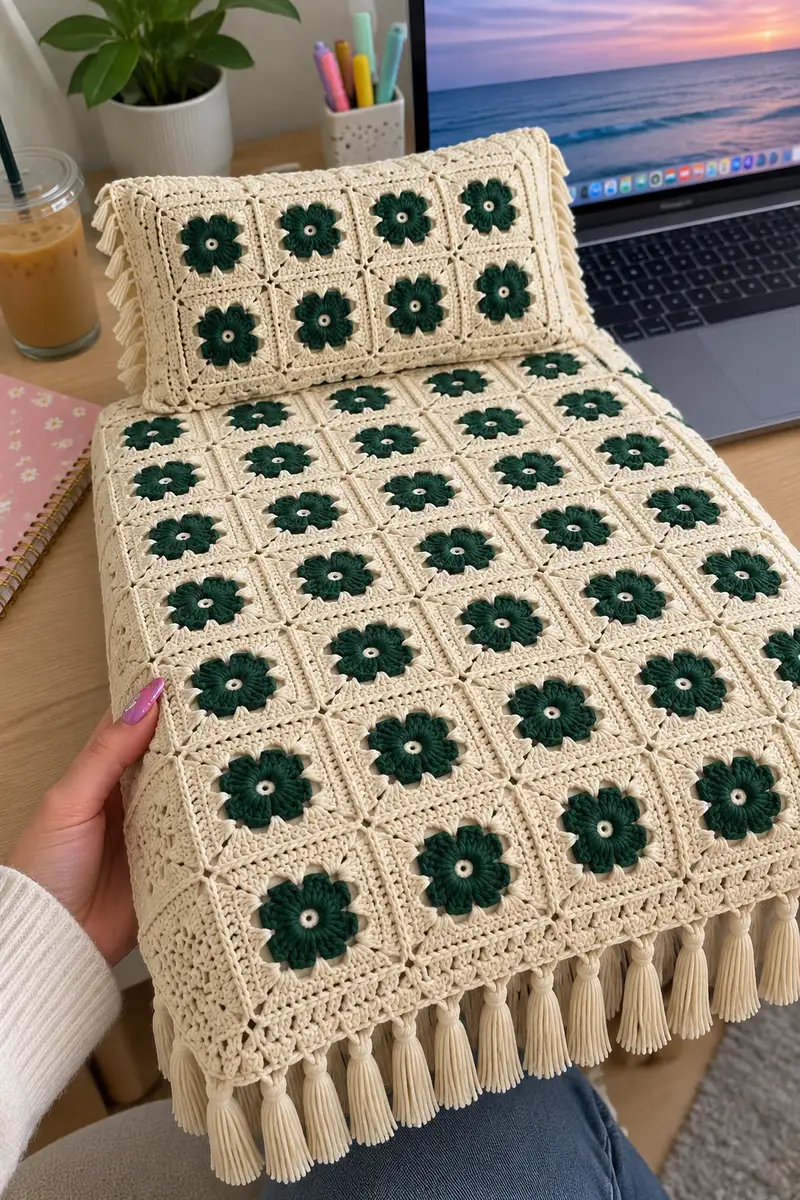
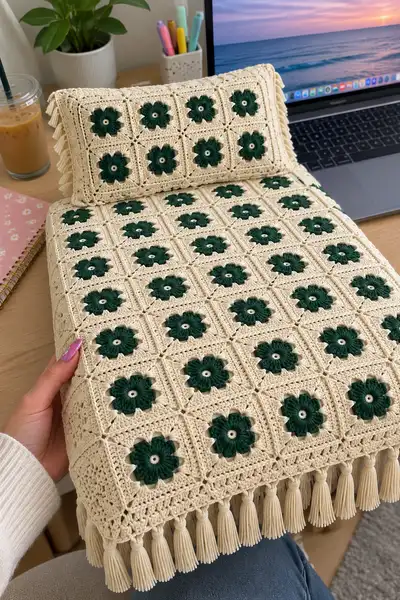
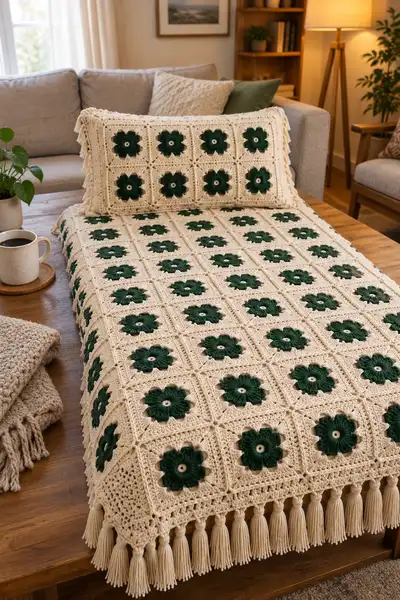
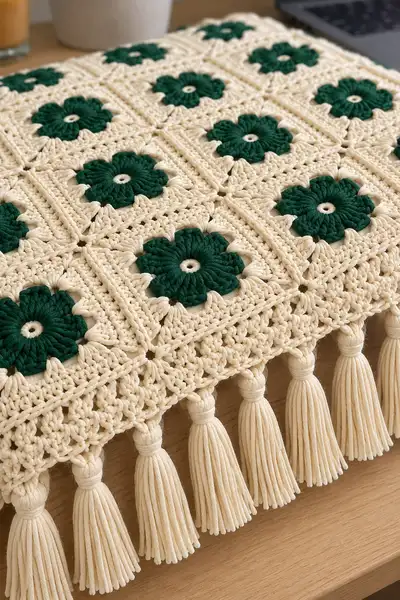
Bring botanical elegance to your home with this cozy floral bedspread pattern. The design features handcrafted square motifs with raised dark-green puff petals framed in a soft cream background, joined into a full bedspread with a textured scalloped border and dramatic tassels. The same motif is used to make a matching rectangular pillow with a fringed edge. Detailed stitch-by-stitch instructions make this a rewarding project for crocheters who love texture and classic botanical style.
Progress Tracker
0% Complete
— Overview & Gauge :
Info :
This pattern uses a chunky/bulky cotton rope for a dense, textured fabric. Finished bedspread size in photos is approximately 70" x 90" (twin/throw) composed of 8 x 11 squares; adjust number of squares to fit your bed. Gauge: one finished motif (including the framing rounds up to before joining) measures approximately 7" square when blocked using the yarn and 6.5mm hook shown. If your gauge differs, change hook size or yarn to match desired motif size.
— Special Stitches & Techniques :
Info :
Puff stitch (for petals) used throughout: Yarn over, insert hook into indicated stitch, yarn over and pull loop up (3 loops on hook), repeat this step 3 more times in the same stitch (you now have 7 loops on hook), yarn over and pull through all loops, ch1 to close puff (counts as one stitch). For taller puff petals, use 4 partial loops instead of 3 — instructions below build 4-loop puffs. Use the same tension each time for uniform petals.
— Motif — Floral Center & Petals (Make X squares) :
Round 1 :
With cream yarn, make a magic ring. Ch1, work 8 sc into magic ring. Pull ring closed and join with sl st to first sc. (8)
Info :
Keep your center tight so the cream dot remains small. We will change to green for petals. If your yarn splits on the change, weave the tail in later on WS.
Round 2 :
Join dark green in any stitch or at the top of any sc. *Ch2 (does not count as a stitch here), work a 4-loop puff into the next sc: (yo, insert hook, pull up loop) 4 times total, yo and draw through all loops, ch1 to close puff, sl st into next sc to secure petal.* Rep from * to * around to create 8 puff petals. After final sl st, fasten off green and join cream with a sl st into the top of the sc that follows the last sl st. (8 petals)
Info :
Each puff is worked into one of the 8 centre sc stitches. Work the sl st into the next sc to anchor petals and create a small space between petals. Keep puffs consistent in height — practice a swatch of 4 puffs if needed.
Round 3 :
With cream, ch3 (counts as dc), *ch1, dc in the top of next sc (the stitch immediately after each sl st from Round 2), ch1, sk next sc; rep from * around so that there are 8 dc petals framed by ch-1 spaces. Join with sl st to top of starting ch3. (8 dc, 8 ch-1 sps)
Info :
Round 3 frames the puff petals and builds a small ring of double crochet around the flower. Keep your ch-1 spaces loose enough so the following round can be worked into them.
Round 4 :
Ch1, sc into same st, *ch3, (sk next dc, sc into ch-1 space) repeat from * around to form 8 ch-3 loops. Join with sl st to first sc. (8 sc, 8 ch-3 sps)
Round 5 :
Work into each ch-3 space as follows: sl st into ch-3 space, ch3 (counts as dc), 2 dc, ch3, 3 dc all into same ch-3 space to create a small petal shell, sl st into next sc to secure. Rep in each ch-3 space around (8 shells). Join with sl st and fasten off cream. (8 shells)
Info :
These shells create a small raised ring that gives petals a fuller look when the square frame is added. Keep shells consistent; do not stretch stitches — maintain relaxed tension.
Round 6 :
Join cream in any ch-3 top of a shell. Ch1, sc in same top, *ch3, sc in next shell top; rep from * around to make 8 ch-3 corner markers where petals meet. Join with sl st. (8 sc, 8 ch-3 sps)
Round 7 :
Change to cream completely if any green tails remain. Ch1, sc in same st, *work (2 dc, ch2, 2 dc) into next ch-3 space to begin squaring (corner), ch1, sc between shells; rep from * around to form 8 partial corner clusters. Join with sl st. (8 corners started)
Info :
From this round we'll turn the circular flower into the base for a square. The corner clusters will expand with the next rounds to produce a proper square. Use stitch markers at each corner to keep track.
Round 8 :
Ch2 (counts as hdc), hdc in same st, *hdc in next ch-1 space, (hdc, ch2, hdc) in corner ch-3 space, hdc in next ch-1 space, hdc in shell top; rep from * around, placing a (hdc, ch2, hdc) cluster at each of the 4 expanding corners to begin square shaping. Join with sl st. (total approx. 28 hdc including corner ch-2 loops)
Round 9 :
Ch2, hdc in same st, hdc in each hdc across until you reach a ch-2 corner space, (hdc, ch2, hdc) in ch-2, continue across; rep around to expand square. Join with sl st. (st count will be proportional to motif size; count approx. 36 hdc)
Info :
At this point, your motif should look like a small rounded square with the flower centered. Block motifs now or later, but blocking after Round 10 will help squares align when joining.
Round 10 :
Ch3 (counts as dc), dc in same st, dc in each hdc across until corner ch-2, (2 dc, ch2, 2 dc) in corner ch-2, continue; join with sl st. (approx. 48 dc)
Round 11 :
Ch1, sc in same st, *ch3, sk 2 dc, sc in next dc; rep from * around to create a lacy spacer row. Join with sl st. (keeps stitch count approx. 48)
Round 12 :
Ch2, (dc, ch1, dc) into each ch-3 space from previous round to square up the motif and create a visible diamond mesh. At corners work (dc, ch2, dc). Join with sl st. (approx. 56 sts including corner ch-2)
Info :
Rounds 8-12 are the square-building rounds — adjust as necessary to achieve a flat square. If one side pulls in, add an extra dc in that side on subsequent rounds to even out tension.
Round 13 :
Ch1, sc in each st around working 3 sc in each corner (in the ch-2 space) to reinforce corners. Join with sl st. (approx. 60 sc)
Round 14 :
Optional textured round: Ch2, *fpdc (front post double crochet) around next dc, dc in next st; rep from * around to create a raised rib effect on the square face. Join with sl st. Fasten off and weave ends. (same stitch count)
Info :
One completed motif equals one square. Make the required number of motifs for your bedspread. In the pictured blanket there are 8 columns by 11 rows = 88 motifs. For a twin throw you might make 6x9 (54) motifs. Adjust counts to fit target dimensions.
— Join-As-You-Go & Assembly of Motifs :
Info :
We recommend joining motifs as you go to avoid a long seaming step. The following rounds (15–26) describe a reliable join-as-you-go method that creates a visible seam ridge similar to the sample. If you prefer whipstitch seams, work motifs flat and seam later using mattress stitch.
Round 15 :
With RS of two motifs together (motif A already completed and motif B you are finishing), join cream in the corner ch-2 of motif B, ch1, sc into corner, ch1, sc into next st. When you reach the side that will meet an already-made motif, instead of chain or sc, insert hook through corresponding stitch on adjacent motif and sl st to join, then continue sc along motif B. Continue around motif B, joining to neighboring motifs when you reach matching sides. Join B to up to two neighbors on its left and top as you go. Fasten off. (seam points as required)
Info :
Always pin motifs in position before joining to ensure alignment. When joining at corner-to-corner, align corner ch-2 spaces and join through both spaces so joins nest neatly.
Round 16 :
After the first round of joins, work one round of sc around the entire joined section (working through both layers where joins are required) to even out the edges. Ch1, sc in each st around, working 3 sc in corner spaces. Join with sl st. This round locks joins and creates a uniform edge. (st count depends on total joined area)
Info :
If you have gaps at joins, work sc or hdc in the flap spaces to fill and secure. Keep tension even so the joined area does not pucker.
Round 17 :
Work a decorative ridge round: ch3 (counts as dc), *sk next st, dc in next st, fpdc around the dc below (on previous row) to create texture, rep from * around joining corners as needed. Join with sl st. This round starts building the visible ridge lines shown in the photos. (texture round)
Round 18 :
Ch1, sc in same st, *ch5, sc into next seam space (this creates a small loopy space used later for a subtle lace effect), rep around. Ensure ch-5 loops are consistent. Join with sl st. (equal number of ch-5 loops to sides/joins)
Round 19 :
Work a stabilizing round: ch2, hdc in each sc across, (hdc, ch2, hdc) in corner; join with sl st. This evens the join area and square edge. Fasten off if comfortable; otherwise continue joining next motifs in the same way.
Info :
If you are doing full assembly later, leave motifs unjoined and seam all pieces using a mattress stitch. Join-as-you-go provides a neater look for continuous seam lines like those in the sample bedspread.
Round 20 :
Repeat Rounds 15–19 for each additional motif as you add them to your grid until all rows and columns are joined. When all motifs are attached, work a full round of sc around the entire assembled rectangle to prepare for border rounds. (edge is smoothed and corners reinforced)
Info :
At completion of motif joining, measure your piece and adjust number of border rounds to achieve desired finished size. Blocking the entire rectangle before borders helps border rows lay flat.
— Border Rounds (worked around entire assembled bedspread) :
Round 21 :
With RS facing, join cream in any stitch along the assembly edge. Ch1, sc evenly around entire rectangle working 3 sc in each corner to round corners. Join with sl st. (edge count will equal total perimeter sts)
Round 22 :
Ch3 (counts as dc), dc in each sc around, place (2 dc, ch2, 2 dc) in each corner. Join with sl st. This creates a sturdy base for lacy rows. (approx. perimeter dc count)
Info :
If you wish to add extra width to the border, add extra dc rounds before continuing with the lace pattern. Keep counts even so corners remain square.
Round 23 :
Ch1, *sc in next 3 dc, ch3, sk next 3 dc; rep across to create even ch-3 loops for a lacy outer border. At corners work sc in corner ch-2 space then continue pattern. Join with sl st.
Round 24 :
Work into each ch-3 loop: sl st into loop, ch3, 4 dc, ch3, sl st into same loop to form a shell; sc between shells along the straight edges and work (sc, ch3, sc) at corners as corner shells. Join with sl st. (shell count dependent on perimeter)
Round 25 :
Ch2, *(dc, ch1, dc) into top of shell center, sc in space between shells; rep around for a deep textural lace. Join with sl st.
Round 26 :
Ch1, sc in each st across but work a picot accent every 6 sts as follows: sc in next 5 sts, picot (ch3, sl st into 3rd ch from hook), continue. This produces the small pointed lacy trim just before the tassel row. Join with sl st.
Info :
Picots add a delicate but firm edge to which tassels can be attached. If picots cause too much stiffness, omit them and attach tassels directly to sc spaces at even intervals instead.
Round 27 :
Ch1, work one final round of sc around the entire edge placing a sc into each picot or sc space. This round creates the loop base for tassel attachment. Join and fasten off. Weave ends neatly to WS.
Info :
At this stage you have completed borders; measure the perimeter and calculate spacing for tassels. For the sample bedspread, tassels were placed every 3 inches (approx. every 6–8 stitches depending on gauge).
— Tassels & Fringe :
Round 28 :
Info : Make tassels by winding 30–40 strands (depending on desired fullness and finished tassel length) of cream yarn around a 6" piece of cardboard or your hand. Slip a short piece of yarn through top to tie tightly, then loop the top into the base sc loop and secure by tying and wrapping the top with yarn to create a knotted head. Trim tassel ends evenly.
Round 29 :
Info : Attach tassels evenly around the perimeter by inserting the tie through the sc loop on the final border round and pulling tight. Space tassels consistently; sample used one tassel per every 3" giving a full fringe. Ensure tassel heads face outward and hang freely.
Round 30 :
Info : For extra security, use a needle to weave the loose ends of the tassel tie into the underside of the border and knot on the inside. Trim any stray fibers and steam-press lightly if necessary to relax fringe.
— Matching Rectangular Pillow Cover (Front) :
Round 31 :
Make motifs identical to the bedspread for the pillow front. For the sample lumbar pillow (approx. 20" x 14") the front uses 4 columns by 2 rows = 8 motifs arranged 4 x 2. Use the same motif rounds 1–14 from above for a matching look.
Round 32 :
Join the motifs for the pillow using the same join-as-you-go sequence described in Rounds 15–20. After joining, work two rounds of sc around the pillow front: first round sc evenly, second round ch3 & shell pattern to match the bedspread border style. Fasten off and weave ends.
Info :
If you prefer an envelope pillow back, leave a gap on the back rounds for insertion. Alternatively, create a full pillow back and seam edges with mattress stitch for a removable cover with a zipper or button closure.
— Pillow Back (Option A: Matching Motifs) :
Round 33 :
Make 8 motifs for back (or create a solid panel). Join motifs as per Rounds 15–20. Work identical border rounds 21–27 scaled down to pillow perimeter. This keeps both sides consistent and reversible. Finish with tassels only on the front edge if you prefer.
Round 34 :
Info : If using a single panel for the back, work a large rectangle of DC or half-double rows to match the pillow front dimensions, then attach using whipstitch or mattress stitch, leaving one short side open for insert.
Round 35 :
Info : For a neat look, block both pillow front and back before assembly. Use pins and a damp cloth to shape edges, then assemble while damp for tidy seams.
— Optional Extra Decorative Border Rounds for Bedspread (Add as many as needed) :
Round 36 :
Ch1, sc in each st around to reset the edge before decorative rounds. Join.
Round 37 :
Ch3, *dc in next 2 sts, tr in next, dc in next 2 sts, ch1, sk 1; rep around to create raised shell pattern. Join with sl st. (texture building)
Round 38 :
Ch1, sc in each st around. Join.
Round 39 :
Ch4 (counts as tr), *tr in next 3 sts, ch2, sk next 2 sts; rep round for airy scallop. Join with sl st. (scallop row)
Round 40 :
Ch1, sc in each st around; make 3 sc in each scallop peak to define the edge. Join and fasten off.
Info :
Add these rounds if you want extra depth to border. For a bedspread with tassels, 2-4 decorative rounds beyond the base border are usually sufficient.
— Finishing Touches & Weaving Ends :
Round 41 :
Info : Weave in all loose ends on WS using a tapestry needle in a few directions so they do not slip out. Trim excess tails close to fabric surface. For thicker cord yarn, tuck ends into the rope plies and weave under several stitches for invisible finish.
Round 42 :
Info : Block assembled bedspread flat: pin to measurements on a blocking board or on towels pinned to the floor. Lightly mist with water and allow to dry completely. Blocking evens motif edges and helps border sit flat.
Round 43 :
Info : If you find slight mismatches in square size after blocking, add an extra sc or hdc in the border to even the tension instead of unpicking motif seams.
Round 44 :
Info : For machine-washable finished piece, choose cotton rope yarns that are labelled machine-washable. Always test wash a swatch first to ensure no color bleeding from the green petals into cream.
Round 45 :
Info : Store the finished bedspread folded with acid-free tissue when not in use to prevent crushing tassels; reshape fringe as necessary after storage.
Congratulations — you've made a delightful botanical bedspread! The raised dark-green petals beside the cream frames create a cozy, vintage-meets-modern look that makes any bed or sofa feel inviting. Every motif you complete brings you closer to a warm textured statement piece — and the matching cushion ties the whole room together beautifully. Enjoy the tactile joy of the tassel fringe and the calm repetition of floral squares. 🎋🧶