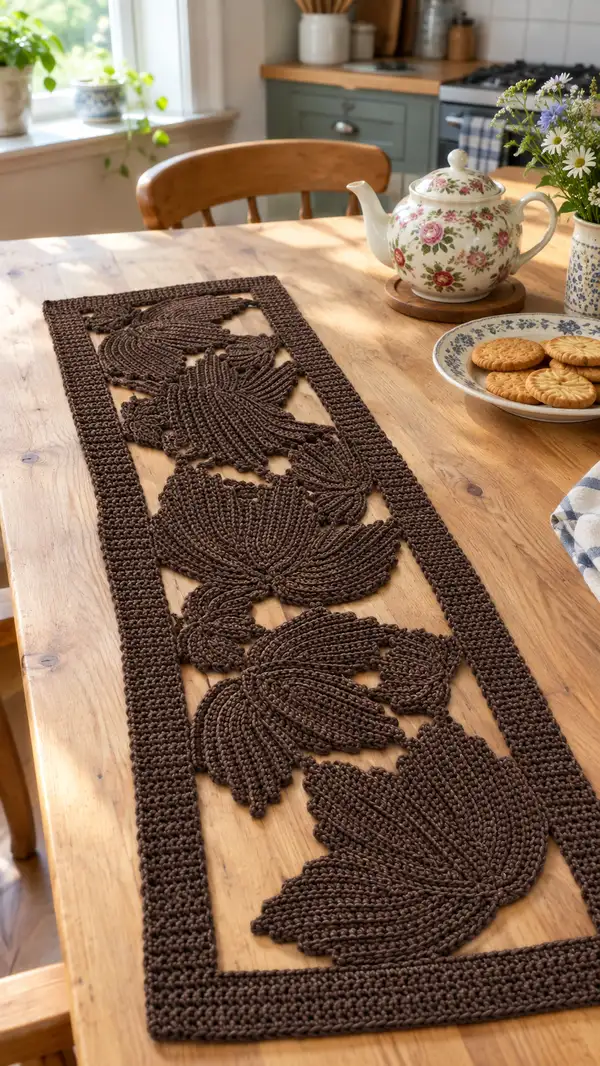
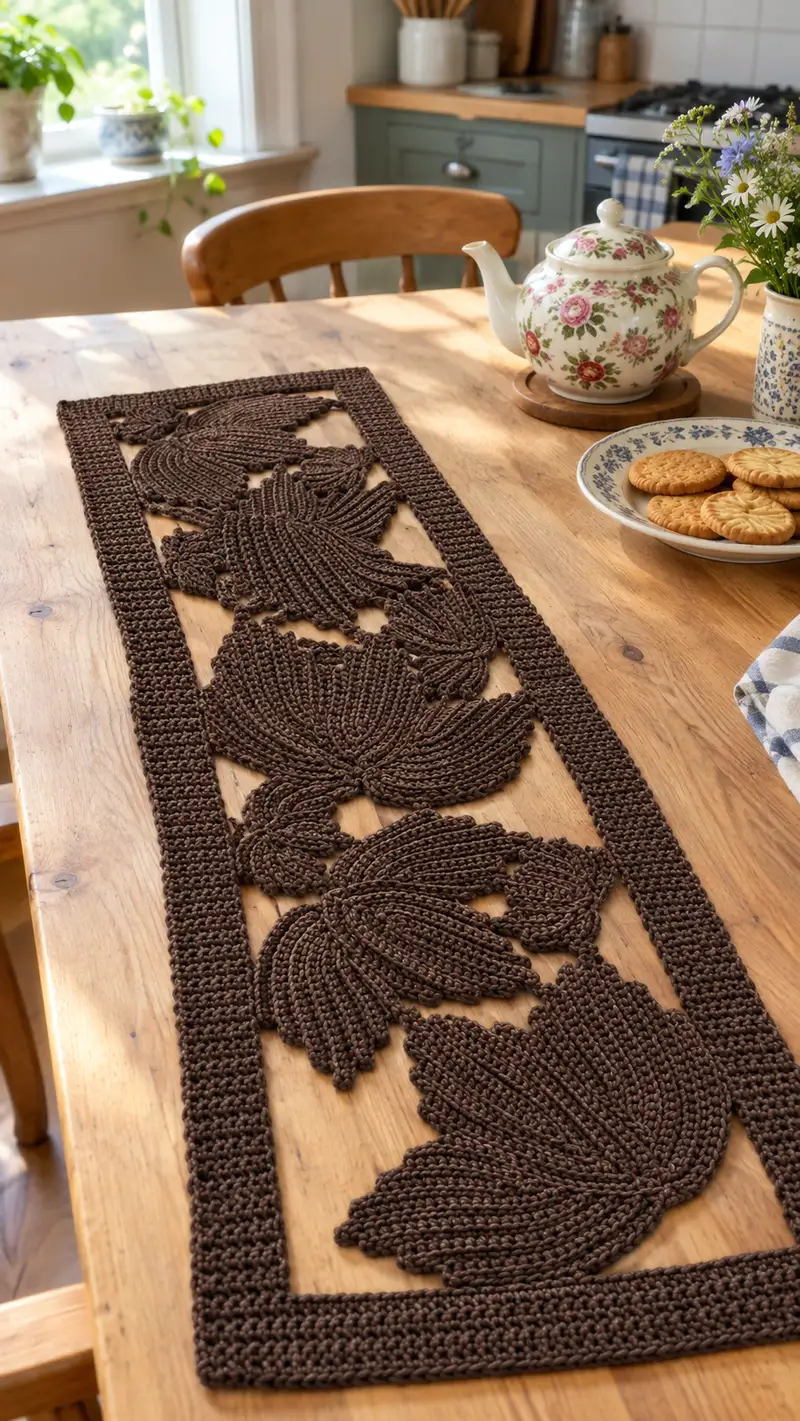
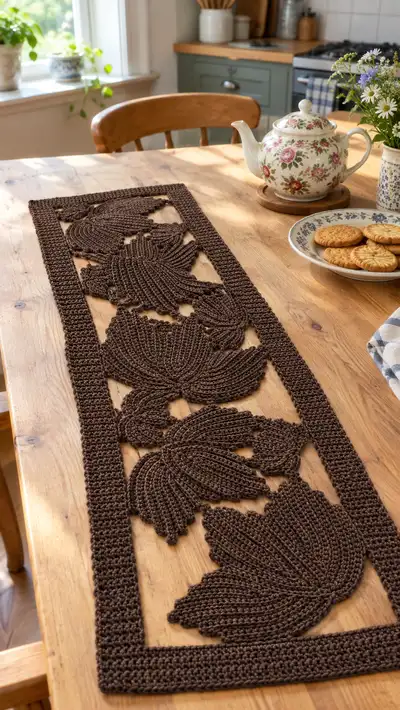
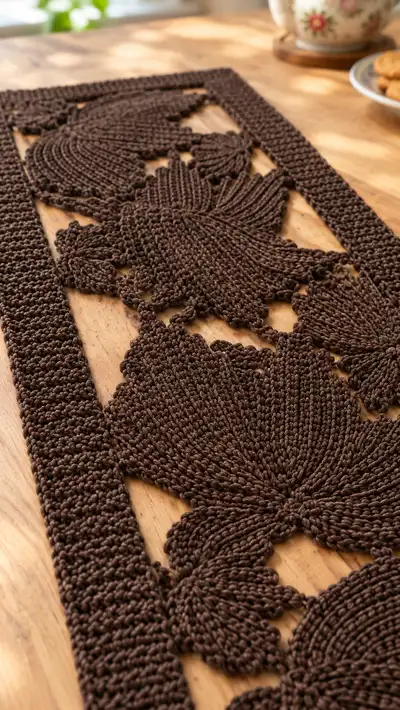
A long, elegant table runner featuring oversized botanical leaf motifs worked in deep chocolate cotton yarn. The design uses flat petal panels joined into an openwork central strip with a neat single-crochet border to frame the runner. Perfect for a dining table or console, this runner shows rich texture and sculptural leaf forms that sit beautifully on wood surfaces.
Progress Tracker
0% Complete
— Pattern Overview :
Info :
This runner is constructed from repeat leaf motifs (make 4 for pictured length), joined by slim connecting panels and finished with a single-crochet border. The leaf motif is worked flat in rows and shaped with increases and decreases to create the petal-like lobes and ribbed texture. All motif rows are worked from the WS or RS as noted; the outer border is worked in continuous rounds. If you prefer a wider runner, add additional motifs and adjust joining strips accordingly.
Info :
Gauge is not critical for this decorative runner, but if you change yarn weight, keep stitch definition and choose a hook that yields a firm fabric. If you prefer more sculptural ribs, try Tunisian Simple Stitch for the petal rows (special instructions provided in Advanced Tips section).
— Leaf Motif (make 4) :
Info :
Each leaf motif is one large central medallion with six shaped petals worked from a circular center. The pattern below shows one motif in full. Work one motif completely, wet-block flat, then make remaining motifs identical. Petal counts and shaping are mathematically consistent—follow the repeats carefully.
Round 1 :
Make a magic ring, 6 sc into ring (6)
Round 3 :
(1 sc, inc) x 6 (18)
Round 4 :
(2 sc, inc) x 6 (24)
Round 5 :
(3 sc, inc) x 6 (30)
Round 6 :
(4 sc, inc) x 6 (36)
Round 7 :
(5 sc, inc) x 6 (42)
Round 8 :
(6 sc, inc) x 6 (48)
Info :
The circular center now has 48 stitches. These 48 base stitches provide anchor points for 6 petals (approximately 8 base points per petal). For even spacing, allocate 8 adjacent stitches of the round to each petal base.
Info :
Attach a marker at the join to indicate the first of the 48 stitches; mark every 8 stitches thereafter to show petal base boundaries. This will help you place the foundation chains for each petal evenly around the circle.
Petal 1 — Round 9 (Foundation) :
From the last completed round slip-stitch to the marked stitch #1 (first base stitch of petal 1). Ch 16, sl st into the next base stitch on the circle to form a closed loop foundation for petal (this forms a ch-16 loop anchored to circle)
Petal 1 — Round 10 :
Working around the ch-16 loop: sc in 2nd ch from hook and across to end (15). Sl st into the anchor stitch on the center circle at the base to finish round (15)
Petal 1 — Round 11 :
Ch1, turn. (1 sc, inc) x 5 across the 15 sts (rep: 1 sc then 2 sc in next st) → (20)
Petal 1 — Round 12 :
Ch1, turn. (2 sc, inc) x 5 → (25)
Petal 1 — Round 13 :
Ch1, turn. (3 sc, inc) x 5 → (30)
Petal 1 — Round 14 :
Ch1, turn. (4 sc, inc) x 5 → (35)
Petal 1 — Round 15 :
Ch1, turn. (5 sc, inc) x 5 → (40)
Info :
At the end of Round 15 the petal has widened to 40 stitches. Keep tension steady to form a smooth curved edge. If you prefer a more ribbed look, on every odd-numbered petal row you may work in BLO to create a slight ridge (optional).
Petal 1 — Round 16 :
Ch1, turn. (6 sc, inc) x 5 → (45)
Petal 1 — Round 17 :
Ch1, turn. (7 sc, inc) x 5 → (50)
Petal 1 — Round 18 :
Ch1, turn. (8 sc, inc) x 5 → (55)
Petal 1 — Round 19 :
Ch1, turn. (9 sc, inc) x 5 → (60)
Petal 1 — Round 20-23 :
Work 4 even rows: 1 sc in each st (60) — these rows build the length of the petal and form prominent ribs when worked in consistent tension
Info :
If you are using Tunisian Simple Stitch for an even stronger rib, substitute the 4 even rows with 4 TSS rows (pick up loop across, return pass to close). Adjust hook and technique only if comfortable with Tunisian.
Petal 1 — Round 24 :
Ch1, turn. (9 sc, dec) x 5 → (55)
Petal 1 — Round 25 :
Ch1, turn. (8 sc, dec) x 5 → (50)
Petal 1 — Round 26 :
Ch1, turn. (7 sc, dec) x 5 → (45)
Petal 1 — Round 27 :
Ch1, turn. (6 sc, dec) x 5 → (40)
Petal 1 — Round 28 :
Ch1, turn. (5 sc, dec) x 5 → (35)
Petal 1 — Round 29 :
Ch1, turn. (4 sc, dec) x 5 → (30)
Petal 1 — Round 30 :
Ch1, turn. (3 sc, dec) x 5 → (25)
Petal 1 — Round 31 :
Ch1, turn. (2 sc, dec) x 5 → (20)
Petal 1 — Round 32 :
Ch1, turn. (1 sc, dec) x 5 → (15)
Petal 1 — Round 33 :
Ch1, turn. 6 dec across to shape base → (9) Note: Aim to reduce back near the original foundation width while leaving a neat base to join to the center
Petal 1 — Round 34 :
Sl st into the anchor stitch on the center circle, cut yarn and weave in tail. Petal 1 complete.
Info :
When you return to attach Petal 2, work into the next marked group of 8 base stitches on the center circle so petals are evenly spaced. Use the same procedure for Petals 2–6. Wet-block each finished petal panel flat (pinning edges gently) to set shape before assembly.
Petals 2-6 :
Repeat Petal 1 rounds 9–34 for Petals 2 through 6, anchoring each foundation ch loop into its allocated 8-stitch sector on center round. Maintain consistency in tension and wet-block each petal to the same size before joining.
Info :
At completion of six petals the motif will be roughly circular with deep lobes. Check that each petal's maximum width (Row 19: 60 sts) matches across petals; if a petal is slightly larger, block to match, or frog and redo to keep uniformity.
Finishing Motif :
Weave in all loose ends and trim. Wet-block motif flat: center to measure approximately 18–20cm across each motif (measurement will vary with yarn/hook). Allow to dry fully before assembly.
— Joining Strips (spacers between motifs) :
Info :
The runner in the photo uses narrow spacer panels between motifs to create the open rectangular field. Each spacer is worked as a simple rectangular strip in sc worked in rows. Make 3 spacer strips (one between motifs) plus two end spacer panels to place ledger-like gaps at each end.
Strip 1 — Row 1 :
Ch 40 (adjust length to match motif spacing). Row1: sc in 2nd ch from hook and across (39)
Strip 1 — Row 2-18 :
Ch1, turn. 1 sc in each st (39) — work 17 more rows to build the height of the spacer (total rows 18). This yields a slim band approximately 2–3 cm tall depending on tension.
Info :
Make three long strips sized to the visible spacing in your layout. You may join strips together lengthwise to create longer spacer lengths if your runner is wider or to create framing gaps.
— Long Inner Panel (optional continuous strip) :
Info :
Instead of many short strips, you can also work one long inner panel that connects all motifs in a long open rectangle. The panel should have the same width as the interior open area shown in the picture; measure your motifs and add seam allowances when planning the length.
Row 1 :
Ch (motif width + seam allowances) as required. Work sc foundation row across. Repeat even rows 2–20 (or until panel height equals motif center height) in 1 sc in each st.
Info :
When using one long panel, mark placement for each motif with pins and sew motifs to the long panel with matched perimeter stitches for a neat and secure join.
— Assembly (joining motifs to spacers and panel) :
Info :
Before sewing, lay out all motifs and spacer strips on a flat surface in final order (motif-spacer-motif-spacer-...-motif). Pin each motif in place so the bases of adjacent petals slightly overlap the spacer edges for visual continuity.
Join Step 1 :
Using a yarn needle and a length of yarn, whip-stitch the base rounds of each petal into the edge stitches of the adjacent spacer or inner panel. Work through both layers, catching the back loops only on the motif to create a neat seam (sew every 4–6 stitches to avoid puckering).
Join Step 2 :
Once all motifs are stitched to spacers/panel, press gently under a damp cloth and allow to dry for a flat finished surface.
Info :
If you prefer less visible joining, use an invisible ladder stitch, inserting the needle between rows on both pieces and pulling snug before knotting. Secure ends and weave in tails into the runner body.
— Outer Border (worked in rounds) :
Info :
The border frames the openwork central field. Work single crochet rounds evenly around the entire assembled runner. For corners, work 3 sc in the corner stitch to create square corners that lie flat.
Round 1 :
Attach yarn at a corner seam with a sl st, ch1, work 1 sc in the same stitch and continue working 1 sc in each edge stitch evenly around. In corners: (sc, ch1, sc) to form a neat corner. Join with sl st to first sc.
Round 2 :
Ch1, turn, 1 sc in each st around, working 3 sc in each corner stitch to maintain square corners. Join with sl st.
Round 3 :
Ch1, turn. 1 sc in each st BLO (this creates a neat inner ridge) around; 3 sc in corner sts. Join with sl st.
Round 4-6 :
Ch1, turn. 1 hdc in each st around to add thickness to the border (hdc gives a dense, rope-like edge). Work 3 hdc in each corner. Join and fasten off after final round. Weave in ends tightly.
Info :
For a more sculptural raised edge, alternate rounds of sc and hdc or add a final round in reverse single crochet (crab stitch) for a twisted rope effect.
— Final Finishing :
Info :
Wet-block the entire runner after assembly: pin it neatly on a flat surface, shape outer border to be square and even, and allow to dry fully. This step equalizes tension and sets the final shape of leaves and border.
Info :
Trim any stray fibers and weave in ends. If you used cotton rope yarn, consider a light starch spray if you want extra crispness for display use (test on a scrap first).
— Advanced Tips and Alternate Techniques :
Info :
If you prefer sharper vertical ribs on the petals, substitute the sc rows on the petals with Tunisian Simple Stitch rows: pick up loops across the petal foundation, then work return pass to complete each row. This will create consistent vertical ridges that resemble the photographed texture. Use a Tunisian hook and practice tension on a sample petal first.
Info :
To make the runner longer, simply make additional motifs and spacer strips then join in the same manner. For a wider runner, scale motif count across instead of lengthwise and add additional side spacer panels before working the outer border.
Info :
Optional decorative loops between petals: if you want to mimic the small loop details seen near petal joins, work 5–7 ch loops using sl st anchors between finished petals before final blocking.
Info :
Storage: store flat rather than folded to avoid permanent creases in the sculpted leaf ribs.
Finishing this botanical runner is so satisfying—the large sculpted leaves add instant character to any table and the deep chocolate yarn gives it a warm, handmade feel. Each motif is a mini project in itself, and joining them into a long, elegant runner is where the design comes together. I love seeing the texture catch the light on wooden surfaces; it makes everyday dining feel extra special. 🧶🌿✨