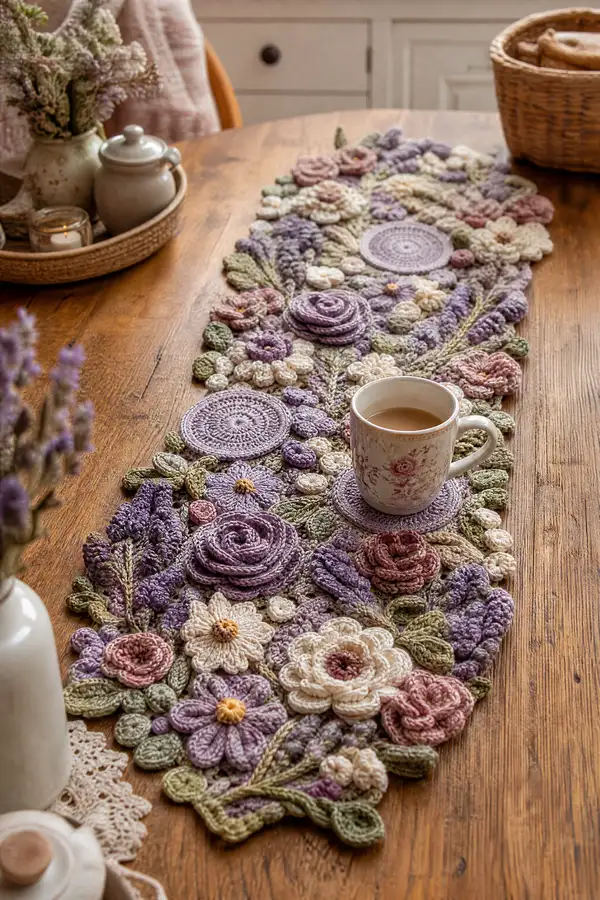
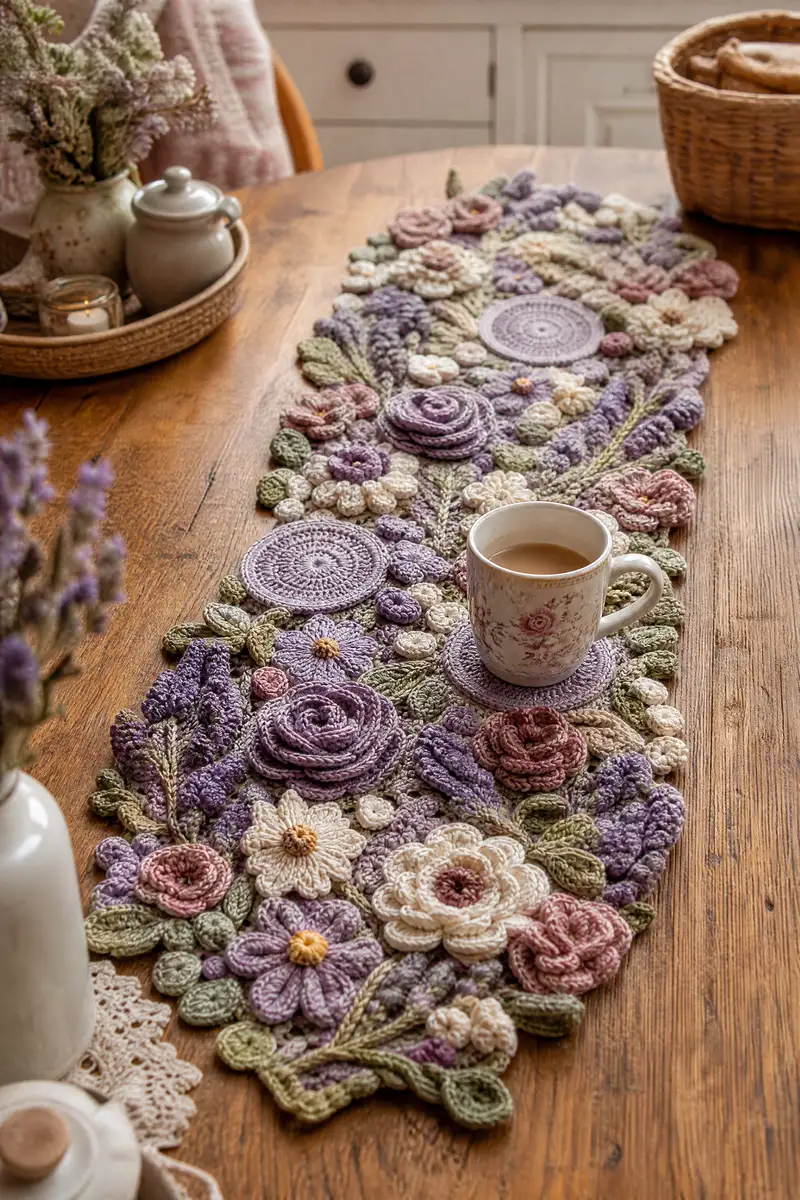
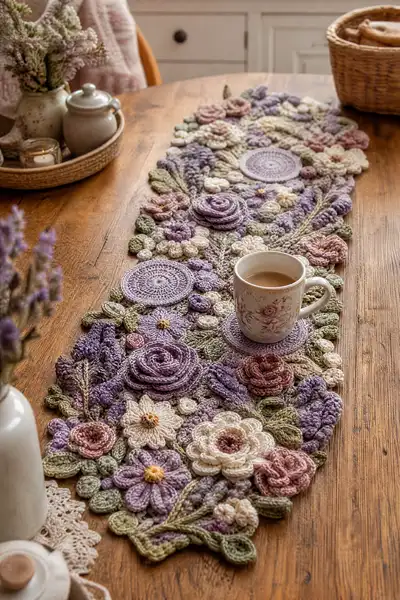
Create a romantic lavender-inspired floral table runner made from layered crochet motifs. This pattern includes large medallions, spiral roses, daisies, lavender sprigs and textured leaves in soft purples, dusty rose, cream and sage greens. The finished runner is richly dimensional and perfect as a centerpiece or seasonal table accent. Detailed motif instructions and joining guidance let you assemble a beautiful heirloom-style runner.
Progress Tracker
0% Complete
— Pattern Overview :
Info :
This pattern is built from a suite of repeatable motifs: Large Medallion, Small Round Medallion, Spiral Rosette, Rolled Rose, Daisy, Small Puff Flower, Small 5-Petal Flower, Leaf (small and large), Lavender Spike and Sprig. Make motifs in the stated quantities, block to shape and then assemble by layering and sewing with small stitches. Use stitch markers for round starts and pin layouts heavily before sewing. Work flat motifs with a 3.5mm hook unless otherwise noted. Match your tension across all motifs.
— Central Large Medallion (make 3) :
Round 1 :
6 sc in magic ring (6)
Round 3 :
(1 sc, inc) x 6 (18)
Round 4 :
(2 sc, inc) x 6 (24)
Round 5 :
(3 sc, inc) x 6 (30)
Info :
Use main lavender color. Keep tension even so the medallion lies flat. If it cups, switch to a slightly larger hook next medallion; if it ruffles, go down a hook size.
Round 6 :
(4 sc, inc) x 6 (36)
Round 7 :
(5 sc, inc) x 6 (42)
Round 8 :
(6 sc, inc) x 6 (48)
Round 9-11 :
1 sc in each st (48)
Info :
Change to a paler lavender or soft cream for rounds 12-14 if you want a concentric ring look. Carry unused yarn along the back neatly or fasten off and weave in ends.
Round 12 :
1 sc in each st BLO (48) - creates a subtle ridge toward the inner ring (48)
Round 13 :
1 sc in each st FLO (48)
Round 14 :
*(fpdc around next st), sc next st* repeat around to produce textured spokes (48)
Info :
Use front-post stitches gently to add low relief. Practice on a spare disc to get even tension on the post stitches.
Round 15 :
(3 sc, picot) x 12 (48) - creates small picot edging (48)
Round 16 :
Sl st into picot space, ch 3, 2 dc into same picot, ch 3, sl st into next picot to form tiny shell decoration, repeat around (12 shells)
Round 17 :
Round of 1 sc in each st and in spaces created by shells to even edge. Count should be approximately (48) depending on spacing.
Round 18 :
Optional: work 1 round of hdc in back loops only for a flatter base for sewing (48)
Round 19 :
Fasten off leaving long tail for sewing. Block to a diameter of about 10-12 cm depending on gauge.
Info :
Make three of these medallions. They act as focal anchors for the runner layout. Block flat and pin to correct diameter.
— Small Round Motif / Coaster-Style Circle (make 10-12) :
Round 1 :
6 sc in magic ring (6)
Round 3 :
(1 sc, inc) x 6 (18)
Round 4 :
(2 sc, inc) x 6 (24)
Round 5-6 :
1 sc in each st (24)
Info :
Optional color change for a concentric look. These small circles are used under cups, to layer and to fill gaps. Block to approximately 6-8 cm diameter.
Round 7 :
1 sc in each st BLO (24) to create a slight ridge (24)
Round 8 :
(2 sc, picot) x 6 (24) - small scalloped edge
Round 9 :
Fasten off and weave in ends. Make 10-12 motifs for balanced placement.
— Spiral Rosette (large rolled rose, make 6) :
Round 1 :
Ch 41, sl st to form a ring being careful not to twist (41 ch ring)
Round 2 :
Ch 1, sc across chain in back bumps: 1 sc in each ch (41)
Round 3 :
Ch 1, (hdc, dc, tr) in next stitch, ch 1, skip 1 stitch, *(hdc, dc, tr) in next stitch, ch 1, skip 1* rep to end to create a ruffled strip (approx 21 ruffles)
Info :
This strip will be coiled to form a rosette. You can increase the chain length to make larger roses. Keep your strip even and block lightly if desired before rolling.
Round 4 :
Fasten off leaving a long tail for coiling. Optionally, work a slip stitch border along the outer edge to give structure before coiling.
Round 5 :
To assemble: start at one end, coil the strip onto itself, using the long tail to whip stitch the layers together from the underside. Secure firmly at every 0.5-1 cm to keep spiral shape.
Info :
Make 6 rosettes in varying lavender/dusty-rose shades. Pin rolled roses into layout to judge sizes before stitching them to the runner.
— Rolled Rose (small concentric rose, make 8-10) :
Round 1 :
Ch 21, sl st to form ring (21)
Round 2 :
Ch 1, sc in each ch back bump (21)
Round 3 :
*(sc, hdc, dc, hdc) in next st, sc next st* repeat across to create slight ruffle (approx 10 ruffles)
Round 4 :
Fasten off leaving long tail. Coil and sew as in Spiral Rosette but on a smaller scale. Use small stitches to keep the interior neat.
Info :
Use dusty rose and cream yarns to create contrast roses. Lightly starch or spray-block if you want a firmer rose that holds its coils more openly.
— Daisy (large 8-petal, make 6-8) :
Round 1 :
6 sc in magic ring (6)
Round 2 :
Ch 1, (sl st, ch 6, sl st) into same st to form first petal base, *(sl st into next st, ch 6, sl st into same st)* x 5 (6 petals)
Round 3 :
Work petals: into each ch-6 loop work (sc, hdc, dc, tr, dc, hdc, sc) making a full petal. Repeat for all 6 loops creating 6 large petals.
Round 4 :
In center: join cream yarn, ch 1, 12 sc in center ring made by the original 6 stitches, tighten ring (12)
Info :
For a fuller daisy, you can work petals twice (two rows per petal) using FLO on the inner row for a layered effect. Block with pins to shape petal curve.
Round 5 :
Optional: Work picot edging on petal tips: sl st to petal tip, picot, sl st back to base. Fasten off and weave in ends.
— Small 5-Petal Flower (make 20-30) :
Round 1 :
6 sc in magic ring (6)
Round 2 :
*Ch 4, sl st into next st* around to make 5 loops (5 loops)
Round 3 :
In each loop work (sc, hdc, dc, hdc, sc) to make small rounded petals (5 petals)
Info :
These tiny flowers are excellent fillers between larger motifs. Use cream, pale lavender or soft pink; make many to fill gaps for a dense look.
Round 4 :
Fasten off and weave ends. If desired, add small yellow French knot or tiny yarn embroidery for center.
— Puff Cluster (make many small clusters) :
Round 1 :
6 sc in magic ring (6)
Round 2 :
Ch 1, into same st do 5x puff: *(yarn over, insert hook, pull up loop) repeat 4 times to have 9 loops on hook, yarn over and pull through all loops, ch 1, sl st into next st* repeat to form 5 puffs around
Round 3 :
Fasten off leaving tail to sew cluster to runner. Make clusters in small sizes (3-6 puff clusters) to create textured gravel between blooms.
Info :
Puff stitches take more yarn and are three-dimensional; work them tightly so they stay compact. Secure each puff on the underside when attaching.
— Leaf (small) (make 30-40) :
Round 2 :
Sc in 2nd ch from hook, hdc, dc, tr, dc, hdc, sc across other side of chain to form symmetrical leaf, sl st into base to close (14 stitches across both sides)
Round 3 :
Ch 1, turn, 1 sc in each stitch around the outside edge working evenly to hide chain base (approx 14 sc) - creates neat edge
Info :
Make these in sage or moss green. Block flat with pins to create a curved, natural leaf shape by pinning the center slightly raised.
Round 4 :
Optionally work a central vein: using contrasting green, embroider a line of sl st or surface hdc down the center of the leaf after blocking.
— Leaf (large) (make 12-16) :
Round 2 :
Sc in 2nd ch from hook, hdc in next, dc in next 3, tr in next 3, dc in next 3, hdc in next, sc in last; continue around on opposite side of chain mirroring to base (approx 26 sts)
Round 3 :
Work 1 round sc around edge, placing 2 sc in tip to round it smoothly (approx 28 sc)
Info :
Large leaves give structure and flow. Work some in FLO to create textured ribs that will catch light when the runner is finished.
Round 4 :
Fasten off leaving long tail for sewing. Add surface embroidery veins with a darker green if desired.
— Lavender Spike (make 20-30) :
Round 2 :
Starting in 2nd ch from hook: sc, sc, puff stitch in next ch, sc, sc, puff, sc, sc, sl st into base to form an elongated chain cluster that resembles a lavender spike
Round 3 :
Optional: Add a small stem by chaining 8 from base and sl st into main runner or onto a leaf. Fasten off leaving tail for sewing.
Info :
Use two shades of purple to make lavender spikes with tonal depth. Make more spikes where you want vertical texture along the runner edges.
— Sprig / Stem (make many to link motifs) :
Round 1 :
Ch desired length (10-30 ch depending on sprig length)
Round 2 :
Work 1 sc in each ch across to create a narrow, flat strip, or work a chain with slip stitches for a thin stem. Alternatively use foundation sc in 8-20 sts to create a slightly wider stem.
Info :
Use sage green. Create multiple lengths and pieces to weave between flowers; surface slip stitch or sew stems down onto the base groundwork to control direction.
— Base Grounding Circles (work many to connect, make 20-30) :
Round 1 :
6 sc in magic ring (6)
Round 3 :
(1 sc, inc) x 6 (18)
Round 4 :
(2 sc, inc) x 6 (24)
Info :
These small grounding circles fill spaces and provide points to sew contrasting motifs. Work them in cream or pale lavender for subtle anchors.
Round 5 :
1 sc in each st (24)
Round 6 :
Optional: Work 1 round of sc in BLO to create a neat ledge for layering other motifs (24)
Round 7 :
Fasten off and block flat.
— Joining & Flexible Mesh Base :
Info :
Rather than working a full continuous fabric base, this runner is assembled by joining motifs edge-to-edge and sewing small stems and leaves to anchor points. Make all motifs first and block them. Layout motifs on a flat surface to experiment with composition: place large medallions roughly evenly spaced, cluster roses and daisies, then fill with small flowers, puff clusters and leaves. Use the grounding circles and small rounds to bridge gaps.
Step :
Pin placement heavily. Start from one end and work toward the other for a consistent flow. Layer motifs slightly overlapping so that sewing can be done through multiple motif layers for stability.
Step :
Sew motifs together using a matching yarn and a small tapestry needle. Use a whip stitch or invisible ladder stitch along the edges that overlap. Sew through 2-3 layers where possible so attachments are strong.
Info :
When joining circular medallions to a leaf or rosette, bring the leaf edge under the medallion by about 3-4 mm and stitch through both layers for a natural layered look. Keep stitches small and close together to hide them in the textured surface.
Step :
For slender stems, secure one end to a base circle or medallion then tack along its length to leaves and small flowers with tiny stitches. Conceal the stitches by taking them through the underside of the stem and into the underside of the motif you are anchoring to.
Info :
Edge irregularities are part of the hand-made charm. Aim for an organic silhouette rather than a perfectly straight edge. If you prefer a straighter runner, trim edges by repositioning motifs before final sewing or add a subtle border to even the edge.
— Edge Finishing and Decorative Border (optional) :
Round 1 :
Work a round of sc along the exposed edges of the entire runner after assembly by crocheting through the back loops of the outer motifs to create a continuous edge. Use a medium green or soft lavender for a gentle frame.
Round 2 :
*(1 sc in next 3 sts, picot) repeat around to give a slight scalloped edge. Adjust frequency of picots to match your aesthetic. Fasten off and weave ends.
Info :
Alternatively you can add an outer row of small leaves worked as you go: ch 8 leaf motif, attach to edge, continue. This produces a decorative leafy edge that echoes the runner motifs.
— Assembly Order Suggestion and Layout Tips :
Info :
1) Block everything. 2) Lay out medallions first as anchors; place one near each end and one central. 3) Arrange spiral rosettes and rolled roses clustered around medallions. 4) Fill large gaps with daisies and small round motifs. 5) Add puff clusters and small 5-petal flowers to create texture. 6) Position leaves and lavender spikes to create movement and direction. 7) Pin all pieces and adjust until visually pleasing. 8) Begin sewing from one end, attaching overlapping pieces together into small stable groups, then sew groups together into the full runner.
Info :
Sew groups securely with matching yarn. Work with good lighting because many stitches are hidden in textured surfaces. If your runner will be walked around or used heavily, add extra securing stitches through multiple motif layers to increase durability.
— Blocking, Pressing and Final Touches :
Info :
Steam blocking or wet-block each motif separately to the dimensions suggested. Pin petals into a gentle curve for a natural look. Let dry fully before removing pins. After assembly, lay the runner flat and check for any loose motifs; reinforce as needed.
Info :
Weave in all ends into the underside of the runner. If you have small tails left, secure with a small dab of fabric glue hidden between layers. For a finishing flourish, add a few embroidered flower centres with small yarn or seed beads if desired.
This delicate lavender wildflower runner blends romantic colors and layered texture into a truly special table centerpiece. Every dainty petal and spiral rose comes together in a dreamy composition that adds charm to any room. Take your time placing and sewing the motifs — the process is as rewarding as the finished piece! 🧶🌸 Enjoy the slow, meditative stitches and treasure the handmade result. Share a photo when you're done — your table will look enchanting! ✨