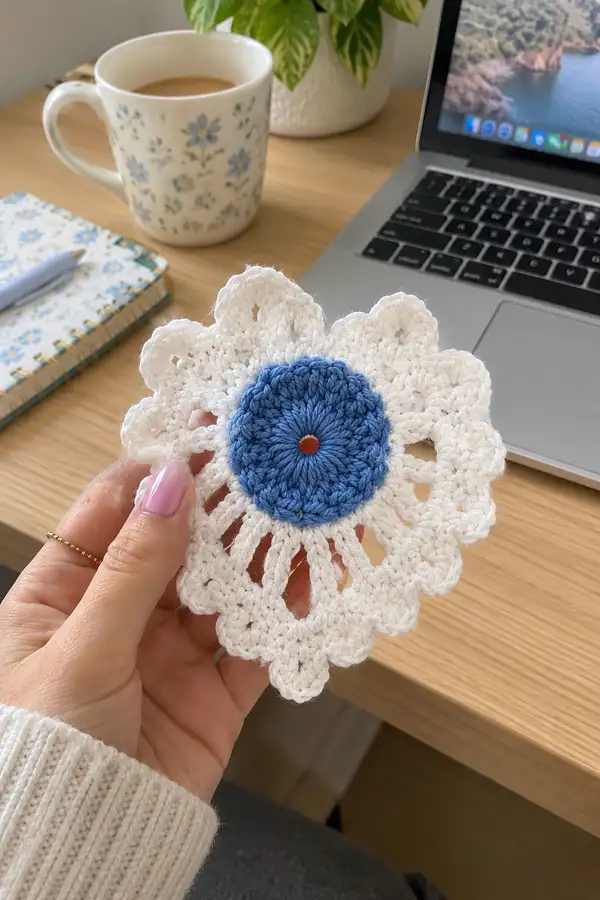
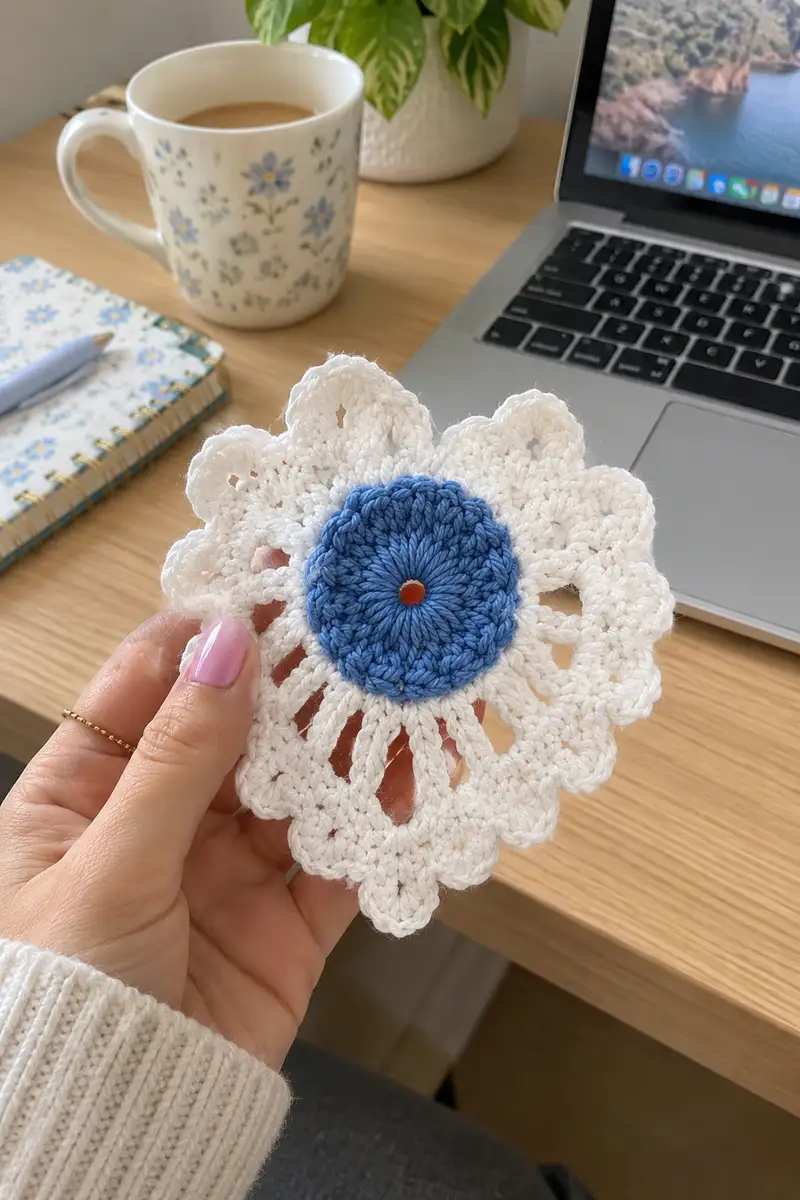
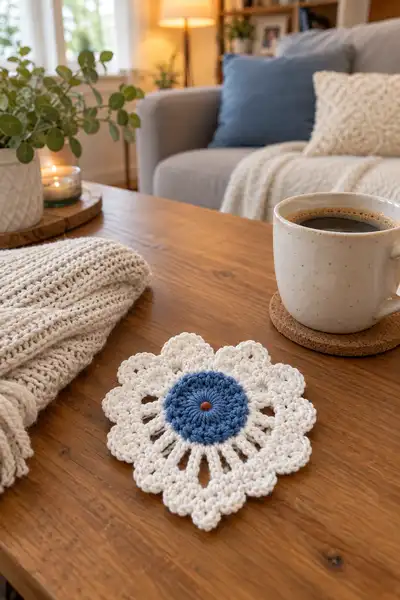
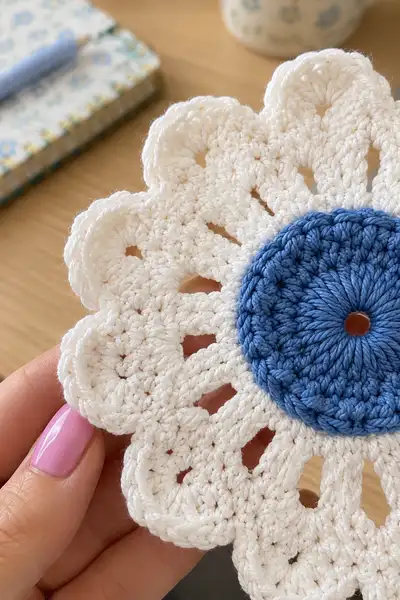
A classic daisy-inspired motif that joins into a breezy, vintage-style bedspread. This pattern features a dense blue center, open spoke stitches, and a scalloped white petal edge—perfect for a light, airy throw or full bedspread. Clear, detailed instructions guide you through motif construction, joining, and finishing for a beautiful heirloom piece.
Progress Tracker
0% Complete
— Center Disc (Blue) :
Round 1 :
Start with blue yarn. Make a magic ring. Ch2 (counts as first hdc), work 11 hdc into ring; pull ring closed (12 hdc). Join with sl st to top of first ch2 (12).
Round 2 :
Ch2, hdc in same st, *2 hdc in next st; rep from * around (24 hdc). Join with sl st to top of ch2 (24).
Round 3 :
Ch2, hdc in same st, *hdc in next st, 2 hdc in next st; rep from * around (36 hdc). Join with sl st (36).
Info :
The blue center formed of hdc rounds creates a slightly raised disk. Keep tension even; do not overtighten the magic ring so the center retains a gentle dome.
Round 4 :
Ch3 (counts as dc), dc in same st, *dc in next 2 sts, 2 dc in next st; rep from * around (48 dc). Join with sl st to top of ch3 (48).
Round 5 :
Ch1, sc in same st, *ch3, skip 2 sts, sc in next st; rep from * around to create small picot-like chain loops anchored to the blue disc (16 ch-3 spaces). End with sl st to first sc.
Info :
Round 5 creates tidy anchor points for transitioning to white spokes. Fasten off blue and weave tail to wrong side. Keep a tail ~20cm if you plan to sew on a contrasting center bead later.
— Spokes / Openwork Radial Round :
Round 1 :
Join white yarn to any ch-3 loop from blue Round 5 with a sl st. Ch6 (counts as tr + ch3), tr into same anchor loop, *skip next anchor loop, sl st into next anchor loop, ch6, tr into same anchor loop; rep from * around to create 8 tall spoke loops. End sl st into beginning sl st.
Info :
We are creating tall spokes that will become the open slots between petals. Count spokes: when you created 16 ch-3 spaces earlier, you'll work into every second one to make 8 spokes. If your motif has a different count, work a spoke into every second anchor to get evenly spaced spokes.
Round 2 :
Sl st into first ch-6 loop space, ch3 (counts as dc), work 11 dc evenly into the ch-6 loop (11 dc across the loop). Sl st to base to close loop (12 dc total including ch3). Repeat into each ch-6 loop around (8 loops x 12 dc = 96 dc). Join and fasten off white if desired or continue without fastening.
Info :
Work stitches evenly across the ch-6 arc; aim for consistent stitch count per loop so the motif lies flat. If a loop feels tight, use fewer dc and compensate in outer rounds.
— Petal Body (First Petal Layer) :
Round 1 :
With white yarn and working into the dc round of spokes, join with sl st at the midpoint between two dc clusters, ch3 (counts as dc), dc in same st, *skip 1 st, 3 dc in next st (cluster), ch1, 3 dc in next st; repeat across the midpoint of each spoke loop to create clusters forming the petal bases. You will work 16 clusters total around (16 clusters of 3 dc each), interspersed with ch1 spaces (approx stitch count 96 + clusters).
Round 2 :
Ch1, sc into the top of the first 3-dc cluster, ch3, sc into top of next cluster; repeat around (16 ch-3 arches created). Join with sl st.
Info :
These arches form the inner scalloped petal bases. Keep your stitches centered on cluster tops to make symmetrical petals.
Round 3 :
Into each ch-3 arch: sl st to arch, ch3 (counts as dc), 2 dc, ch2, 3 dc in same arch; sl st into base to secure and move to next arch. This creates small puffed petals (16 petals). Join with sl st to top of beginning ch3.
Info :
Work petals with even tension; if the petals curl in, slightly loosen the final dc pairs or block after finishing. This round begins shaping the flower silhouette.
— Petal Elongation (Tall Lacy Slots) :
Round 1 :
Ch1, sc in same st, *ch7, sc in next petal top (between petals); rep from * around to create long chain spaces (16 ch-7 loops). Join with sl st.
Info :
These long chain loops produce the airy gaps seen between the center and the outer scallops. Adjust chain length (5-9) to change openness: ch7 matches the sample photos.
Round 2 :
Sl st into first ch-7 loop, ch3 (counts as dc), work 11 dc evenly across the ch-7 loop, sl st to base (12 dc). Repeat into each ch-7 loop around (16 x 12 dc = 192 dc). Join with sl st and do not fasten off.
Info :
This round creates a larger ring around the motif - keep counts even so the outer scallop rounds will land smoothly.
— Outer Petal Scallops (Layered Edge) :
Round 1 :
Ch1, sc in same st, *ch3, skip 2 sts, 5 dc in next st, skip 2 sts, ch3, sc in next st; rep from * around to create tall clustered scallops. You should have 16 scallops that align with the inner petal clusters.
Round 2 :
Into each 5-dc shell: sl st to shell center, ch3 (counts as dc), 4 dc in same shell, ch2, 5 dc in same shell; sl st to join and move to next shell to create a puffier scallop (creates large rounded petals). Join with sl st.
Info :
Make sure shells are evenly placed; if shells pucker, gently block the motif. The layered shells produce the distinct rounded flower edge seen in the photos.
Round 3 :
Ch1, sc in same st, *ch5, sl st into top of next scallop peak (making a tiny picot between petals), sc into base between shells; rep from * around. Join with sl st. Fasten off, weave ends to wrong side.
Info :
Round 3 reinforces scallop peaks and creates a neat picot-like divider between petals. Use this to create a crisp edge for blocking later.
— Motif Finishing Touches :
Info :
Weave in all tails neatly to the back. If you want a small contrasting dot at the very center (terracotta/tan), use a tapestry needle and a small running stitch to make a tiny fabric-covered button look or embroider a dot. Block each motif flat, pinning scallops evenly and misting or steam-blocking to hold shape.
Note :
Motif diameter unblocked should be approx 11-13 cm depending on yarn and tension. After blocking motifs will relax to a slightly larger diameter and scallops will flatten for joining.
— Joining Motifs: Assembly Overview :
Info :
The bedspread in the photos uses motifs joined at scallop tips and some slip-stitch join-as-you-go options. Two primary joining methods are provided: Method A - Join-as-you-go (JAYG) while working the final scallop round; Method B - Sew-together after making motifs. Choose one depending on your preferences.
Joining Method A (JAYG) - Setup :
Work motifs individually through Outer Petal Scallops Round 2 but do not finish the final picot round. When you reach the final scallop for the current motif, align it with the corresponding scallop on a previously made motif and join with sl st into both motif loops as you complete the final shell sequence. Repeat for each neighbor.
Info :
JAYG creates a neat, integrated seam and tight join. It is slightly more advanced because you must hold two motifs together while crocheting; use pins to hold alignment and count carefully.
— Joining Method B (Sewing) - Setup :
Info :
Make motifs separately and block all motifs. Arrange motifs on a flat surface in your desired layout. Use a yarn needle and matching yarn to whip stitch scallop peaks together through the back loops of the outermost round to keep seams invisible from the right side.
Tip :
Sewing allows you to fix mistakes and reposition motifs easily but is slower. Use ladder stitch or mattress stitch for flatter joins, and catch only the back loops of each scallop to keep the front clean.
— Bedspread Layout, Counts and Gauge :
Info :
Measure your motif after blocking (sample approx 12-14 cm). For a twin bedspread you will need approximately 63-77 motifs depending on motif size and desired coverage. Example layout: 7 motifs across by 9 motifs down = 63 motifs. For full/double, increase to 9 x 9 or larger. Calculate motifs = (bed width / motif width) x (bed length / motif width) rounding up to cover edges.
Tip :
Make a small layout on the floor or table before joining to ensure you like placement and any rotated motifs for pattern variety.
— Joining Sequence Rounds (Step-by-Step JAYG Example) :
Round Join 1 :
Start by making a full row of motifs. For the second row, when working the final scallop round on the second-row motif, join the scallop peak to the corresponding peak on the motif above by replacing the sl st that would normally be worked into the motif with: sl st through the edge loop of the previously completed motif, then into the current motif shell peak. Continue across the row to join every scallop that meets the motif above.
Info :
When joining horizontally, you will typically join 2 or 3 scallop peaks per adjacent motif depending on spacing. The sample motif uses one primary seam per touch point in a staggered pattern to preserve the airy gaps.
Round Join 2 :
After completing horizontal joins, return to motifs at the ends of rows and join vertically by aligning scallops and using sl st to join into both motifs at each contact point. Continue filling the grid, row by row, using the same technique.
Info :
Work slowly the first few motifs to establish rhythm—pin motifs before joining if needed. For a neater finish, use a contrasting joining thread for decorative effect or matching white for invisible joins.
— Large Border & Edge Rounds (for completed bedspread) :
Border Round 1 :
When all motifs are joined into the main field, walk a continuous round of single crochet around the whole bedspread: join white at any outermost scallop seam, ch1, sc evenly into each stitch around the outer edge, working 3 sc in each scallop peak to keep the edge flat. Join with sl st. This will create a firm base for further border rounds.
Border Round 2 :
Ch3 (counts as dc), *dc in next 6 sts, ch2, skip 2 sts; rep around. Join with sl st. This round begins smoothing the transition between scallops and the straight border edge.
Info :
Keep counts even around corners. For a rectangular bedspread you will work extra dc-space tension adjustments at the corners to preserve shape (work 2 extra dc or 1 extra ch2 at corners as needed).
Border Round 3 :
Ch1, sc in each dc across to corner; at corners (if rectangular) work (sc, ch4, sc) to create a soft corner loop; continue for all corners. Join with sl st.
Border Round 4 :
Into each corner loop: (5 dc, ch2, 5 dc) to create large rounded corners. Repeat across all corners and join with sl st. This gives a rounded finished corner that echoes motif scallops.
Border Round 5 :
Ch1, sc across all sides into each dc, and in each 5-dc shell work sc across the shell peaks. Join. This evens the border and prepares for decorative outer rounds.
Border Round 6 :
Ch3, *2 tr in next st, ch1, skip 1 st; rep around to add texture. Join.
Border Round 7 :
Ch1, sc into each stitch across, working a picot (ch3, sl st into top of sc) every 6 sts for a light lacy edge. Join and fasten off.
Info :
For a fuller border do additional rounds: repeat a set of shell rounds (5 dc shells) and 1 or 2 rounds of sc between to create a heavy, framed border. The sample bedspread uses a light 6-7 round border to keep it airy.
— Optional Decorative Surface Embellishments :
Info :
Add embroidered veins or French knots on petal centers using contrasting thread for extra depth. Use a small blunt needle and matching yarn to stitch a small chain at petal midlines. Be sure to anchor stitches to the motif backs to maintain a smooth right side.
— Blocking & Final Finishing :
Info :
Block each motif flat by pinning scallops evenly on a blocking board at the correct diameter, misting with water, and allowing to dry fully. For the completed bedspread, pin the assembled spread on a large blocking surface and steam from a distance or spritz lightly to smooth joins and ensure all scallops lie consistently.
Round :
After blocking, weave in all remaining ends from join threads. Trim any uneven threads close to fabric but do not cut too near the knot. Press lightly if fabric allows (follow yarn care guidelines).
— Troubleshooting & Tips Throughout :
Info :
If motifs pucker in the center, reduce dc counts in the spoke ring by removing 1-2 dc per loop and redistribute to outer rounds. If edges ripple, add one more sc round to stabilize before the decorative border. Keep your hook consistent; switching hooks mid-run will change motif sizes noticeably.
Info :
Use a stitch gauge before beginning large quantities: make 3 motifs, block them, measure, then calculate total motif count for desired bed size. Keep a record of yarn used per motif to estimate total yarn requirement accurately.
This Breezy Bedspread motif pattern transforms small, delicate daisy motifs into a stunning full-size bedspread full of texture and charm. Each motif works up quickly and joins neatly into a graceful grid for a vintage-inspired look. The combination of a bold blue center and airy white petals creates a beautiful contrast that brightens any bedroom. Enjoy the rhythmic process of making motif after motif—it's relaxing and deeply rewarding. 🧶🌼✨