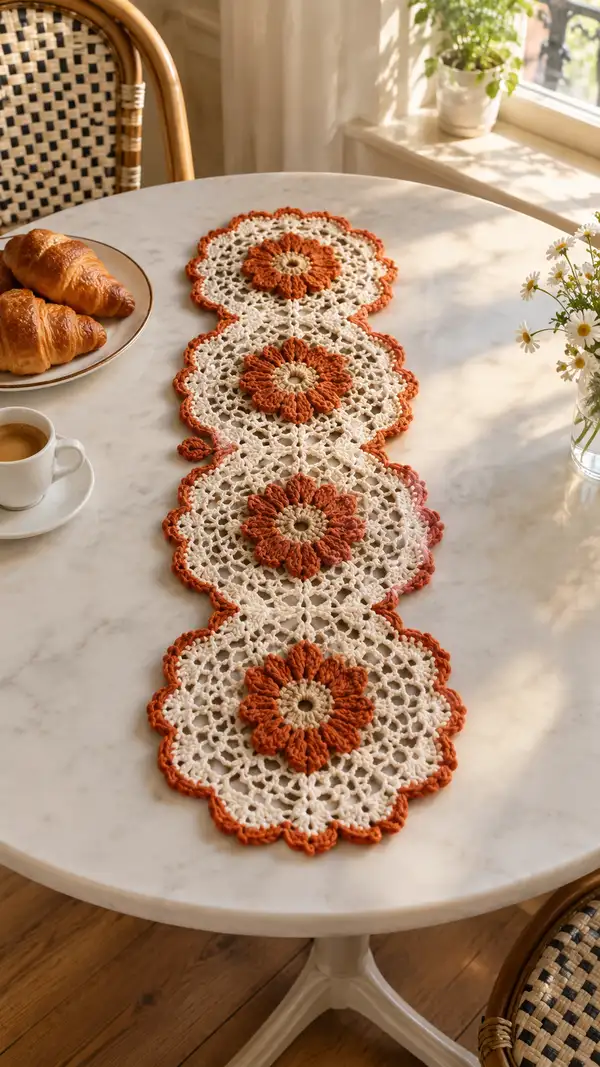
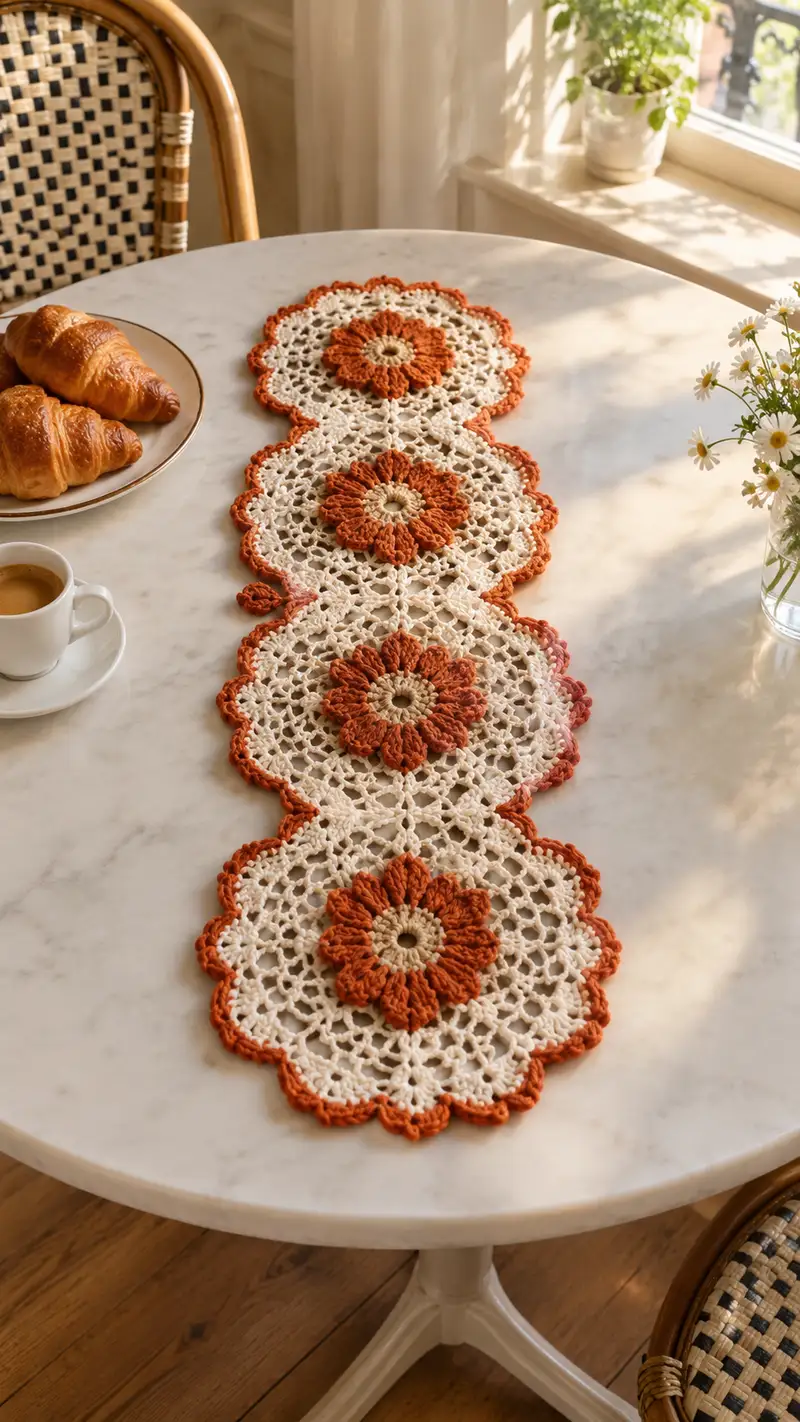
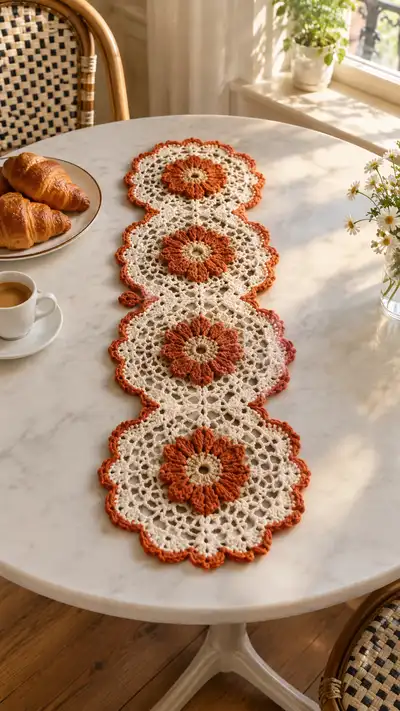
A warm, vintage-inspired table runner featuring four linked daisy motifs in burnt orange and cream. Each medallion showcases a raised puff-petal flower center with a delicate lacy body and scalloped edge, connected into a long runner perfect for an entry table or breakfast nook. Finished with an orange scalloped border to frame the runner and tie the colors together. This pattern includes detailed motif rounds, joining instructions, and finishing tips to recreate the exact look.
Progress Tracker
0% Complete
— Notes & Gauge :
Info :
This pattern makes a runner of four daisy medallions linked end-to-end; finished size approximately 10-12in wide x 36-40in long depending on yarn and blocking. Use worsted cotton (#4) and a 3.5mm hook to reproduce the photographed scale. Gauge is flexible for lace pieces, but a motif should measure about 9-10in across after blocking. Block each motif flat before joining for best results.
Info :
Puff stitch: Yarn over, insert hook into indicated stitch, yarn over and pull up a loop (repeat yarn over and pull up loop a total of 4 times on this pattern to create a full petal puff), yarn over and pull through all 5 loops, ch1 to close the puff (counts as one stitch for spacing). Keep loops loose enough to close neatly but not so loose that the puff collapses.
— Daisy Motif (Make 4 identical motifs) :
Round 1 :
With tan/beige (center color). Make a magic ring. 6 sc in magic ring (6)
Info :
We will use these 12 sts as anchor points for 12 petals in the next round. Fasten off tan and join burnt orange for petal formation by finishing final yarn-over of last st with orange.
Round 3 :
Join burnt orange in first st. *ch2, puff into next st (see Info: puff details below), ch2, sl st into same base st to secure petal base; sl st into next base st to move*; rep from * to * around until you have made 12 petals. At the end, sl st to join to first petal base (12 petal anchors plus 12 sl st moves)
Info :
Puff detail for this pattern: Yarn over, insert hook in indicated stitch, yarn over and pull up loop (repeat 3 more times so there are 5 loops on hook), yarn over and draw through all loops, ch1 to secure. For a fuller petal, use 5 partial yarn-overs (5 loops); for a slimmer petal use 4 partial yarn-overs.
Round 4 :
Working around petals to shape them: *(sl st) into next ch2 space behind petal, ch3 (counts as first dc), 2 dc into same space, ch1, 3 dc into next ch2 space (creates a small shell behind each petal), sl st around petal tip to maintain petal stand; move to next petal base by sl st into next base stitch*; rep around. After last shell, sl st to join (12 shells). Count: 12 shells of 3 dc each = 36 dc plus 12 ch1 spaces.
Info :
Keep petals pointing outward while making Round 4; a few gentle finger-positioning motions will help shells sit behind petals creating the raised effect shown in the photo.
Round 5 :
Change to cream (main lace color). Join in first ch1 space between shells. *ch4 (counts as dc+ch1), skip to next shell and work sc in the space between shells, ch3, sc between next shell, ch1*; rep around to create a small ring of chains linking shells. Sl st to join. You should have a ring of chain spaces creating openwork (approx 12 chain-arches).
Round 6 :
1 sc in same st, *ch5, sc in next ch1 space (from previous round), ch5, sc in next sc (moving across a shell), rep around creating 12 larger arches; sl st to join (12 arches)
Info :
This alternation of sc and chain-arches establishes the lacy field. Keep counts precise: every shell from Round 4 corresponds to two connecting positions in these chain rounds.
Round 7 :
In each ch5 arch: *(sc, ch3, (2 dc, ch2, 2 dc) ; this forms a petal-like little shell within the arch, ch3, sc)* across each arch. Work evenly to keep stitches balanced. End with sl st to join. Total shells created = 12.
Round 8 :
*Ch4, skip next small-shell, sl st into center ch2 of the big-shell from previous round, ch4; repeat to form a circular lattice of elongated loops around the motif*; rep around and sl st to join. This round increases openness - count loops to match 24 loops around (2 loops per original arch).
Info :
At this stage, the motif reads as a flower with a lacy surrounding field. Gently flatten motif on table between rounds to maintain even shaping; do not block yet—finish motif before wet/blocking for best results.
Round 9 :
1 sc in each sl st and in each ch-space around to build a slightly firmer foundation: 1 sc in each of 48 worked positions (estimate 48 sts). Sl st to join. (48)
Round 10 :
*Ch3 (counts as dc), 2 dc into next st, ch2, skip 1, (3 dc into next st), ch3, sl st into next sc*; rep around making scalloped lobes of shell clusters; aim for 24 shell positions (each shell cluster uses 3-dc groups) (24 shells)
Info :
This round begins to expand into the larger motif body. Maintain even tension and count shells carefully so the lace remains symmetrical. If you end with +/− stitches adjust with single crochet evenly spaced to maintain round closure.
Round 11 :
Switch to a mix of dc and chain spaces to open the lace: *ch5, sc into the center ch2 of the shell two shells over, ch3, sc in same center; rep to form a mesh; sl st to join.* You will create roughly 24 chain mesh openings connecting shells into a lace ring.
Round 12 :
1 sc in each sc and ch-space around to stabilize pattern (approx 72 sc depending on count). Sl st to join. (72)
Info :
Count your stitches at the end of this round. Minor variations are acceptable, but keep each motif consistent so joins line up later. Use stitch markers at 4 cardinal points (top, bottom, sides) to help alignment when joining motifs.
Round 13 :
*Ch3 (dc), skip ch-space, (2 dc, ch2, 2 dc) into next open space to create larger shells, ch3, sc in the top of the next shell center*; rep around to produce 12 large shells. Sl st to join. (12 large shells)
Round 14 :
Ch1, sc in same st, *ch7, sc into the center of the next large shell (work through top loops from previous round), ch7, sc in next, rep around to create long arches for motif joining later*. Sl st to join (24 long arches approx)
Info :
These long arches that surround the motif will be the points used for joining motifs together later. Make sure to have even arch counts and mark arch positions that will join to the next motif (we will join every other arch to connect motifs in a neat chain).
Round 15 :
1 sc in each stitch and across each chain-space around to firm up the joining arch row (approx 96 sc). Place 12 visible sc markers at the top of each large shell - these are your join points. Sl st to join. (96)
Info :
Fasten off cream if you prefer to change the border color; otherwise stay with cream for a subtler edge. The photograph shows the scalloped edging in burnt orange, so change to burnt orange now before continuing to edging rounds.
Round 16 :
Join burnt orange in a marked join-point (we will use this round to begin outer scalloped edge). *Ch1, sc in same st, ch3, 5 dc shell into next long-arch apex, ch3, sc into the next marked join-point*; rep around creating 12 prominent outer scallops. Sl st to join. Count: 12 shells x5dc = 60 dc plus ch-spaces.
Round 17 :
In each 5-dc shell: *(sl st into next 2 dc, ch2, 2 tr into center dc, ch2, sl st into next 2 dc)*; this creates a picot-laced scallop top. Sl st to join. (12 scallop tops)
Info :
Finish with a neat picot edge: in between each scallop, work (ch1, sc) into the foundation round to tidy the edge if needed. Fasten off and weave ends long for blocking.
Round 18 :
Finishing round for motif: Work a reverse loop sc in the back loops of the final round around (BLO) to create a subtle ridge that helps motifs sit flat when joined. 1 sc BLO in each st around (approx 120 sc). Sl st to join and fasten off. Weave in ends. (120)
Info :
Block each motif flat on blocking mats to approximately 9-10in diameter: pin scallops evenly and mist with water or spritz with steam. Allow to fully dry before unpinning. Blocking opens the lace and evens motif shapes which is essential for neat joins.
— Repeat Motifs :
Info :
Make a total of four identical daisy motifs using the rounds above. Use stitch markers at the cardinal points of each motif (12 join arches marked on Round 14 and the marked join-points on Round 15) so that motifs will align perfectly when joining along the long chain of arch points.
Info :
If you want a longer runner, make 5 or 6 motifs instead, and adjust yardage proportionally. If you want a shorter runner reduce motifs. The joining method below remains identical regardless of motif count.
— Joining Motifs (connect 1 to 2, 2 to 3, 3 to 4) :
Info :
We will join motifs using slip-stitch joins through the ch7 long-arches created in Round 14. Each motif has 24 long arches; join motifs by connecting every other long arch so motifs form a continuous chain of interlocked arches. Before joining, pin two motifs in alignment on blocking mats to ensure scallops and petals line up correctly.
Round 1 (Joining Step 1) :
Place Motif A face-up and Motif B face-up with the edges to be joined overlapping slightly. Join burnt orange at the first predetermined join-arch on Motif A. Sl st into the arch apex on Motif A, then sl st into the corresponding arch apex on Motif B, ch3, sl st into the next arch apex on Motif A, sl st into the corresponding apex on Motif B; rep across the span of the join to connect 6 pairs of arches (every other arch). End with sl st and fasten off. The motifs are now linked by 6 slip-stitch connectors.
Info :
Sewing option: Instead of slip-stitch joining, you may mattress-sew motifs through the back loops of the final motif round using a yarn needle for a less visible join. Slip-stitch join shows a neat connecting chain on the surface and is authentic to the photographed runner.
Round 2 (Joining Step 2) :
After joining two motifs, go back with cream yarn and work 1 sc in each st across the seam row on the interior side to reinforce the join and close any small gaps. Work evenly to blend the join into the lace pattern. Approx 30 sc across each joined seam depending on motif stitch count.
Info :
For the runner you will make three joined seams: Motif1–Motif2, Motif2–Motif3, Motif3–Motif4. Reinforce each join with a reinforcement sc row in cream for stability on tabletops and to accommodate slight movement during use.
Round 3 (Centering and tension) :
With cream, work a decorative chain mesh bridging the seam gaps along the inside of the runner: *sc into seam, ch5, sc into seam 3 stitches over*; rep along each joined seam to create a slight connecting lace panel. This creates the eyelet texture visible in the runner photo between motifs.
Info :
When joining Motif B to C and C to D, repeat the same joining steps, always pin motifs carefully so petals line up and scallops touch gently without overlapping. This ensures a consistent continuous runner look with evenly spaced daisies.
— Runner Body Edging & Final Scallop Border :
Round 1 :
With burnt orange, join at any outer scallop on the runner edge. We will work around the entire runner perimeter including where motifs meet. *Ch1, sc in the seam at the base of each scallop, ch3, 7 dc shell into next outer scallop edge (work around scallop curve), ch3, sc into seam between scallops*; rep around all outer scallops to maintain rhythm and shape. You should create shells around every scallop across the full runner edge. Count shells - expect roughly 12 shells per motif edge x 4 motifs = 48 shell positions across the runner perimeter (approximate; adjust evenly if counts differ).
Info :
Work evenly at the motif joins so that scallops at seam lines receive the same stitch treatment. You may find it helpful to physically hold the seam area together and work the shell into both motif edges to anchor the border smoothly over join lines.
Round 2 :
In each 7-dc shell: *(ch1, sc in 3rd dc from shell start to create a tiny picot line), 3 tr in center dc, ch1, sl st into next dc)*; rep across shells to create high-contrast scallop tops and little picots. Sl st to join at end of row.
Info :
This decorative round is responsible for the bold orange scallop finishing the runner. Keep each shell tension even so scallops are consistently shaped and maintain a flat plane when blocked.
Round 3 :
Final edge tidy-up: With burnt orange, ch1 and work 1 sc in each stitch around the scallop perimeter, placing 3 sc evenly spaced on the face of each scallop to smooth points. At the seam where motifs meet, work an extra sc or two as needed to flatten seam and keep the scallops even. Sl st and fasten off, weave in ends thoroughly.
Info :
After finishing the border, re-block the entire runner to open the lace uniformly. Pin edges to emphasize scallop points and press or steam lightly. Allow to dry completely before removing pins.
— Optional Center Embellishment and Finishing Touches :
Info :
If you wish to add a tiny contrasting center button or a stitched French knot in the tan center, do this after blocking. Use matching or slightly darker tan yarn to embroider a small ring or a tiny knot for a finished look. Avoid oversized buttons which ruin the flatness of the runner.
Info :
Care instructions: Hand wash gently in cool water with mild detergent. Reshape and lay flat to dry. If using cotton yarn, the runner will tolerate a gentle steam press by covering with a damp cloth and using low heat; avoid high heat which can shrink or distort cotton.
Info :
Yardage check: If you have leftover yarn after making four motifs and the border, keep it for small repairs or to make coasters coordinating with the runner. This motif scales well to coaster-size with fewer rounds.
Completing this Burnt Orange Daisy Lace Table Runner is such a satisfying project—each petal and lacy arch comes together to create a cozy, sunlit accent for your table. The texture of the raised petals against the soft cream lace is lovely and tactile, and the burnt orange edging ties everything together with warm charm. Blocking and careful joining make a big visual difference; take your time and enjoy the process. 🧶🍂✨