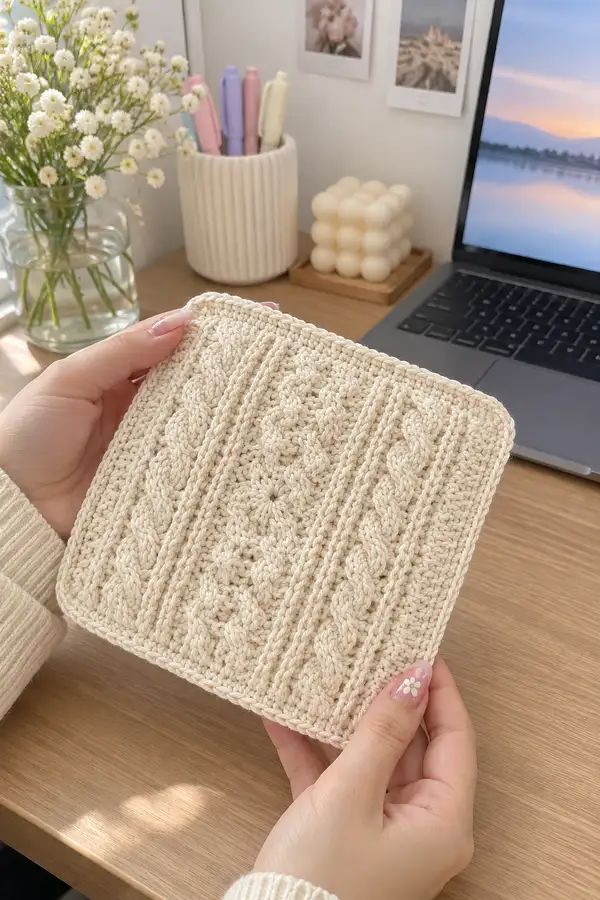
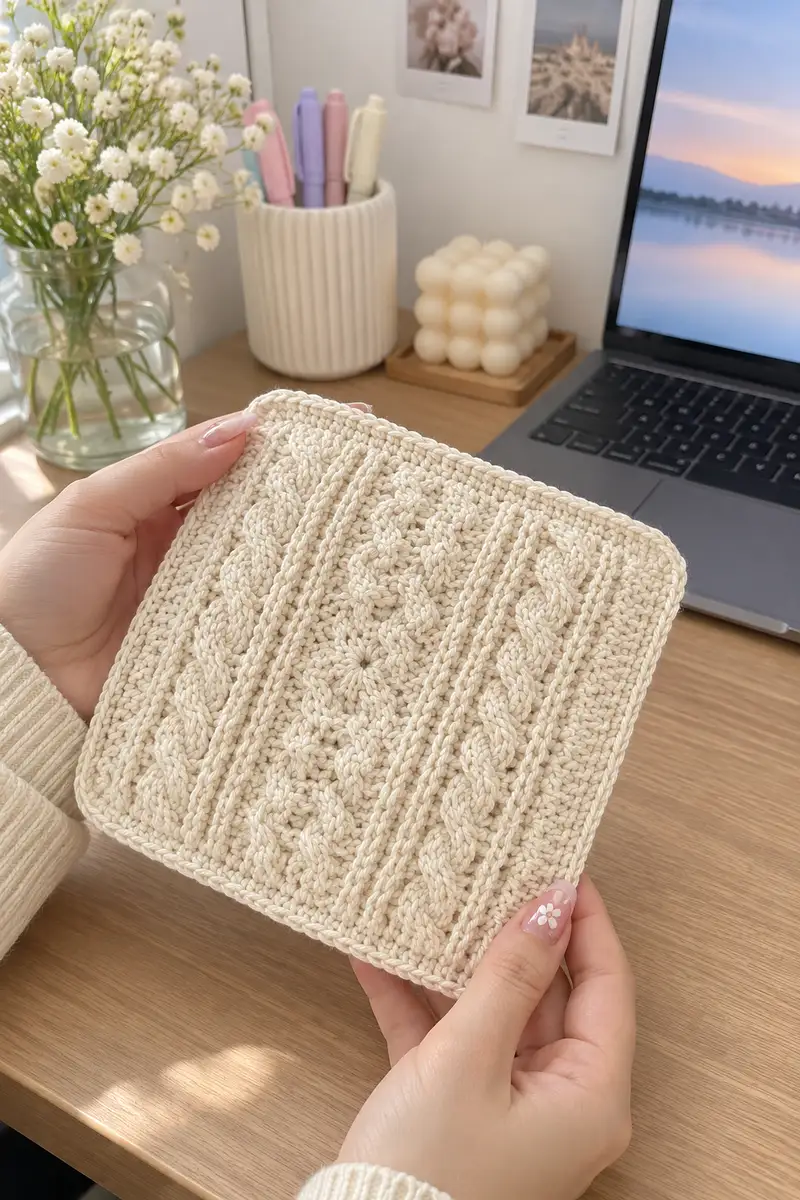
A beautifully textured granny square motif inspired by classic knit cables, arranged to make a cozy bedspread. This pattern features raised cable columns, puffed floral medallions, narrow ribbed panels, and a neat rounded square border — all worked in a soft, neutral cotton. Perfect for creating a serene, cottage-style coverlet or multiple squares for a full bedspread.
Progress Tracker
0% Complete
— Square Motif - Center Floral Medallion :
Round 1 :
Make a magic ring. Ch 2 (counts as first dc), 11 dc into ring, join with sl st to top of ch-2. (12)
Round 2 :
Ch 2, 1 dc in same st, (ch 1, skip next st, 2 dc in next st) x 5, ch 1, sl st to top of ch-2 to close round. This creates 6 small petal chain spaces around center. (12 dc made in 6 groups)
Info :
Use a stitch marker at the start of each round. Keep tension consistent for round petals. This medallion will sit in the center vertical panel of your square.
Round 3 :
Working into each ch-1 space from previous round: *Ch 1, (3 dc, ch 2, 3 dc) in ch-1 sp (petal), sl st into next dc group top;* rep across all 6 petals. Join. (6 petal clusters)
Round 4 :
Ch 1, sc evenly around the entire medallion working 2 sc in the top of each petal peak and 1 sc in sides so the medallion sits flat — you should have 42 sc around (adjust slightly if needed to make medallion lie flat). Join. (approx 42)
Info :
Block this small medallion slightly if it ruffles. Aim for a neat round before extending to a square panel.
Round 5 :
Ch 2, work 1 hdc in same st then *ch 1, sk 1 sc, 1 hdc in next sc* across to create a tight textured background. Join. (approx 42 hdc including increases placed evenly)
Round 6 :
Ch 1, sc in each st around. Place 4 small markers at 90-degree positions where you want the square corners to be — these will be the guides for converting round to square in the next section. (approx 42)
Info :
Choose the spot for your square's top (for vertical orientation). The medallion will be centered later inside the middle vertical cable section.
— Convert to Square & Establish Base Grid (Rounds 1-20) :
Round 1 :
Working from the medallion, ch 2, dc in same st, dc across until you reach first marker, at marker work: (dc, ch 2, dc) in marker space to form first corner; continue dc across to next marker, repeat corner (dc, ch 2, dc) at each of the 4 markers. Join with sl st to top of first dc. This will begin corners and make a rounded-square base. Count will be approx 48-56 depending on corner spacing. (approx 56)
Info :
Corners are ch-2 spaces (can be ch-2 or ch-3 for larger squares). Keep corners consistent each round to maintain square shape.
Round 2 :
Ch 2, dc in same st, dc around each dc until corner ch-2, then (dc, ch 2, dc) in corner ch-2. Repeat around; join. Increase by 8 sts total (2 per corner). (approx 64)
Round 3 :
Repeat Round 2. Maintain dc fabric, placing corners as (dc, ch 2, dc). (approx 72)
Info :
By Rounds 2-4 you are expanding the medallion into a round square base. Keep stitch counts consistent by adding exactly two additional dc at each corner per round.
Round 4 :
Repeat Round 2. (approx 80)
Round 5 :
Ch 1, sc in each st around placing 3 sc into each corner ch-2 to maintain corner definition. Join. (approx 80 sc)
Info :
Switch to sc for one round to tighten the base and prepare for textured panels. This creates a firm edge for the raised cables to sit against.
Round 6 :
Ch 1, *3 sc in next 3 sts (creates a tiny ridge), 1 sc in next 8 sts;* rep this small texture evenly around to mark where vertical panel divisions will sit. Join. (approx 80)
Round 7 :
Ch 2 (counts as first hdc), hdc in each st around working 3 hdc into each corner sc group. Join. (approx 80)
Round 8 :
Ch 1, sc in each st around keeping marker positions from Round 6 as guides for the vertical panel placements. Join. (approx 80)
Info :
At the end of this round place 3 additional markers to divide the square vertically into five panels: left rib, left cable, center medallion panel, right cable, right rib. Count evenly so each panel is symmetrical. This is crucial for cable placement.
Round 9 :
Ch 1, sc in each st around, place narrow markers at the start and end of each intended cable panel (you should have 10 markers: start/end for 5 panels). Join. (approx 80)
Round 10 :
Ch 1, sc in each st around; maintain corner increases as usual. This sets a neutral background before we build post stitch cables. (approx 80)
Info :
From Rounds 11 onwards we create textured vertical strips working in each column individually while still working in joined rounds. Keep markers handy to separate panels. If you prefer you can work panels as separate strips and seam them together later.
Round 11 :
Ch 2, hdc evenly around until you reach first panel marker. At this marker change to pattern instructions for that panel (see Cable Panel and Rib Panel sections). Continue around following each panel's stitch pattern; join. (st count remains approx 80)
— Cable Panel (Make 3 vertical cable panels - each panel is worked between markers; panel width = 8 sts, spacer bands between panels = 6 sts) :
Panel Setup Info :
Each cable panel occupies 8 sts. Between cable panels there will be a spacer band of 6 sc (neutral background). When working in rounds you will follow the panel instructions when your hook enters the 8 sts assigned to that panel and return to standard sc/hdc in the spacer bands.
Round 1 :
For the first round of the cable panel (in the 8 designated sts): ch 2, hdc in each of the 8 sts across. Keep the overall motif join rounds consistent. (8 hdc in panel)
Round 2 :
Ch 1, sc in each st across the 8 sts. This builds a stable background for the cable posts. (8 sc)
Round 3 :
Ch 2, *fpdc around next 4 sts, bpdc around next 4 sts.* This creates the first post distinction; work filler sc in spacer bands as before. (8 posts)
Info :
Front post double crochets (fpdc) create the raised cable appearance. Back post double crochets (bpdc) help the cable columns sit forward by recessing the background. Make fpdc/bpdc neat and tall; keep post stitches tight enough to be raised.
Round 4 :
Ch 2, fpdc around same 4 front posts as previous round (to bulk them up), then bpdc around the 4 background posts. (8 posts)
Round 5 :
Ch 2, create the first cable cross: *skip the first 2 fpdc posts, fp tr around next 4 fpdc posts (work tall front post trebles around posts 3-6), then fp tr around the skipped 2 fpdc posts (working them afterwards) to cross them over.* This is a left-leaning 8-st cable cross; finish with bpdc in the 4 background posts to maintain the background. (post counts unchanged)
Round 6 :
Ch 2, repeat Round 4 (fpdc on original positions, bpdc on background). This secures the cable cross.
Info :
For cable crosses: always work the crossing stitches in the correct order: when doing a left cross, work the right-hand posts first (fp tr around posts 3-6), then work the left-hand posts (fp tr around posts 1-2) so the cable visually crosses left-to-right. Reverse order for right-leaning crosses.
Round 7 :
Ch 2, fpdc around all 4 posts across, bpdc around 4 background posts. (8 posts)
Round 8 :
Ch 2, repeat the cable cross as in Round 5 but reverse direction to keep a natural rope twist — do a right-leaning cross: fp tr around posts 1-2 first (left side), then fp tr around posts 3-6 (right side). Then bpdc in the 4 background posts. (8 posts)
Round 9-30 :
Continue alternating 2 rounds of fpdc/bpdc to bulk up the column followed by a round that performs a cable cross (alternate left-leaning then right-leaning every 4 rounds). Always finish each round with background bpdc in the 4 background posts. Maintain the spacer bands of 6 sc between panels as 6 sc in each round so the total stitch count for the row remains 40 (2 edge sts + three 8-st cable panels + two 6-st spacers + 2 edge sts = 40).
Info :
Each cable column will therefore grow in height with visible twisted ropes. Work 24 rounds of cable height (Rounds 1-30 above across the motif's vertical space) — you can adjust for taller or shorter cables by adding or removing repeating sets of fpdc rounds and cable crossing rounds.
— Narrow Rib Panels (Make 2 - left and right outer ribs) :
Round 1 :
These panels occupy 6 sts each (spacers between cables). Ch 1, sc in each of the 6 sts across for the first round. (6 sc)
Round 2 :
Ch 1, 1 sc in each st BLO across for one round to create a slight ridge foundation. (6 sc BLO)
Round 3 :
Ch 2, hdc in each st across. (6 hdc)
Info :
Working in BLO or FLO creates narrow ridges that look like knitted ribs. For a deeper rib you can work an alternating BLO/FLO every other round.
Round 4-24 :
Repeat: Round A (BLO sc across), Round B (hdc across), Round C (BLO sc across) — alternate for texture. Maintain the stitch count for 6 sts across each round. This gives a consistent vertical rib that frames each cable panel. (6 sts per round)
Info :
If you desire a plumper rib, swap sc rounds for fp sc rounds (front post single crochet) to slightly raise ridges. Keep your tension consistent with the cable columns to prevent puckering.
— Background Spacer Bands & Edge Rounds :
Round 1 :
All spacer bands (6-st bands between panels) and the two edge sts (at each side) are worked in sc unless otherwise stated. For the round where cables are worked, maintain bpdc in these spacer sts to recess the background by doing bpdc in each spacer st (6 bpdc per band). This keeps the cable prominent. (maintain overall stitch count 40)
Round 2 :
After completing vertical textured panels, work 2 rounds of sc around the entire square (including corners: 3 sc in each ch-2 corner) to firm up and even out the edges. These two rounds flatten any uneven columns and prepare for the decorative border. (approx 80 sc around)
Info :
At this stage your square should measure approximately 6-8 inches depending on yarn and hook. If you want a larger motif, continue repeating the cable/rib vertical repeats to extend the square height and width proportionally before continuing to the border.
— Decorative Rounded Square Border (Rounds 1-16) :
Round 1 :
Ch 1, sc in each st around placing (sc, ch 1, sc) in each corner ch-2 to round the corner slightly. Join. (approx 80 sc)
Round 2 :
Ch 2, hdc in each st around; in corner ch-1 from previous round work (hdc, ch 1, hdc) to keep the corner rounded. Join. (approx 80)
Info :
Switching to hdc gives a soft raised edge that visually frames the cables. Keep counts even by working the same number of stitches into corner chains each round.
Round 3 :
Ch 1, work 1 sc in each st around. If your square starts to ripple at corners, adjust by adding or removing a sc in the center of the side to even tension. Join. (approx 80)
Round 4 :
Ch 1, sc in BLO in each st around to produce a crisp ridge that frames the surface. Join. (approx 80)
Round 5 :
Ch 2, *fpdc around next post across the side (work FPDC in every other st to create a thin rope), bpdc in the following st;* rep around the square including corners using (fpdc, ch1, fpdc) motif at corners. Join. (approx 80)
Info :
This round creates a slim raised rope around the square which complements the interior cable ropes. Keep post stitches clear — push them slightly forward with your hook when placing to pop the rope.
Round 6-8 :
Repeat Rounds 2-4 for 3 rounds total to build a thicker frame. Continue to maintain stitch counts. (approx 80 each round)
Round 9 :
For a neat finish, sl st in next st, ch 2, work crab stitch (reverse sc) evenly around the edge for a rope-like twisted finish. Work 3 sc in corner ch-1 spaces to keep corners round. Join and fasten off. (approx 80)
Info :
Crab stitch (reverse single crochet) produces a firm, slightly twisted edge that photographs beautifully and prevents curling. Alternatively use a final round of sc in BLO for a sleeker look.
— Making Multiple Squares & Joining into a Bedspread :
Info :
Decide how many squares you need for your bed size. Example grid sizes: Throw 3 x 4, Twin 6 x 6, Full/Queen 8 x 8. Each square in our sample measures ~8"; adjust your grid accordingly. I recommend blocking each square before joining (wet-block or steam) to exact measurements for uniform seams.
Round 1 - Joining Method A (Join-as-you-go single crochet) :
Lay two squares with right sides up. At the final border round, align edges and sl st through both loops across corresponding stitches to join; then work a round of sc across the seam through both loops for reinforcement. Work from one corner to the next; finish off and weave in ends. Repeat across rows and then join rows together. (join 1 seam at a time)
Info :
Join-as-you-go keeps seams flat and lets you add a decorative joining round at the same time. Use a smaller hook (3.5 mm) to make the join tight and less visible.
Round 2 - Joining Method B (Whip stitch or mattress stitch) :
Block squares to identical sizing, stack right sides together, and sew together using mattress stitch through gauntlet chains at the corners and side centers. Sew tight but not constricting so the fabric can flex. Finish ends by weaving tail along the seam interior. (join seams across the whole blanket)
Info :
For a more invisible finish choose mattress stitch; for visible hand-stitched texture choose whip stitch with matching yarn. For a sturdy join for heavy use, work a final sc round over all joined seams to unify the surface.
— Large Outer Edging and Bedspread Border (Worked after all squares joined) :
Round 1 :
Once your rectangle is assembled, work a continuous sc round around the entire perimeter through the edge stitches (pick up 2 sc per border square edge if needed) placing (sc, ch 2, sc) at each corner to maintain rounded corners. Continue around entire bedspread. (st count depends on perimeter length)
Round 2 :
Ch 2, hdc in each st around; in each corner ch-2 work (hdc, ch 2, hdc). Join. This provides a soft roll for the border. (perimeter dependent)
Round 3 :
Work 2-4 additional rounds of alternating sc and hdc (sc in BLO one round, hdc next) to reach desired border width (3-4 inches recommended for a bedspread). Keep corner increases consistent to avoid scalloping. Finish with a crab stitch round or decorative picot if desired. Fasten off and weave in ends. (perimeter dependent)
Info :
For a scalloped edge work (5 dc in one stitch, skip 2 sts, sl st) repeats for a delicate decorative finish. For masculine neutral, keep straight rounds of sc and hdc only.
— Finishing Touches & Blocking :
Info :
Block the entire bedspread for a consistent drape. Wet block flat on a blocking mat and pin to final measurements, stretching very gently to even sides. Allow to dry completely. Use steam blocking for stubborn waves but be cautious with cotton mercerized yarn which shines under heat.
Info :
Weave in all tails into the back of your cable panels so they are hidden between post stitches. Use a yarn needle to bury tails along the post direction to prevent popping out.
Info :
Optional: Add corner weights or a narrow sewn-in lining for heavier drape on bedspreads to avoid flying edges in breezy rooms.
Completing this cable-granny square motif and seeing several joined squares become a plush bedspread is so rewarding! The raised cable columns and floral medallion give each square a handcrafted, heirloom feel. Whether you make a small throw or a full bedspread, the repeatable square design makes the project manageable and meditative. Enjoy the process — every stitch adds cozy texture and charm to your home. 🧶🛏️