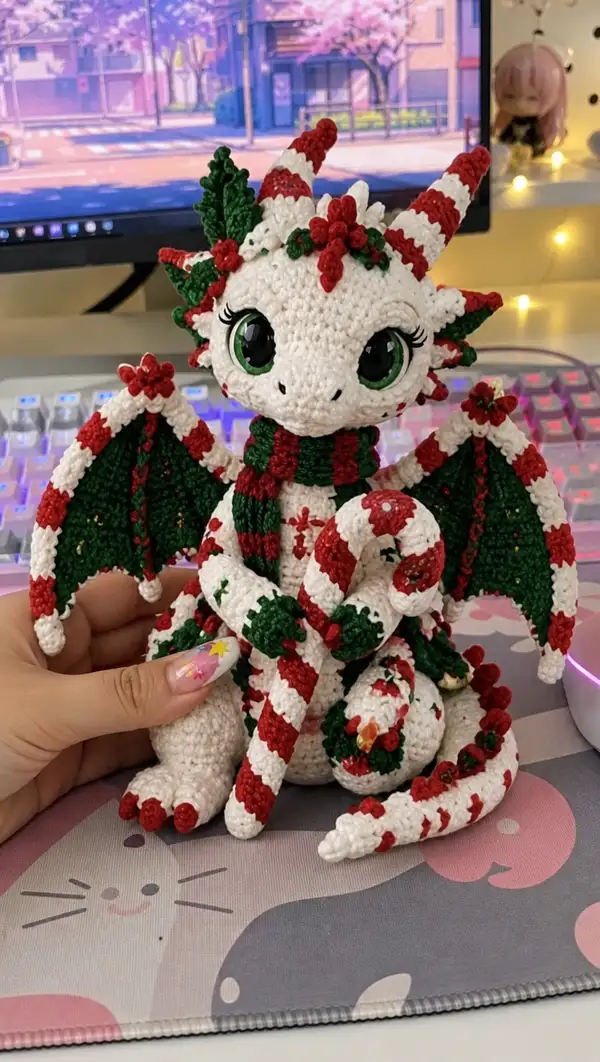
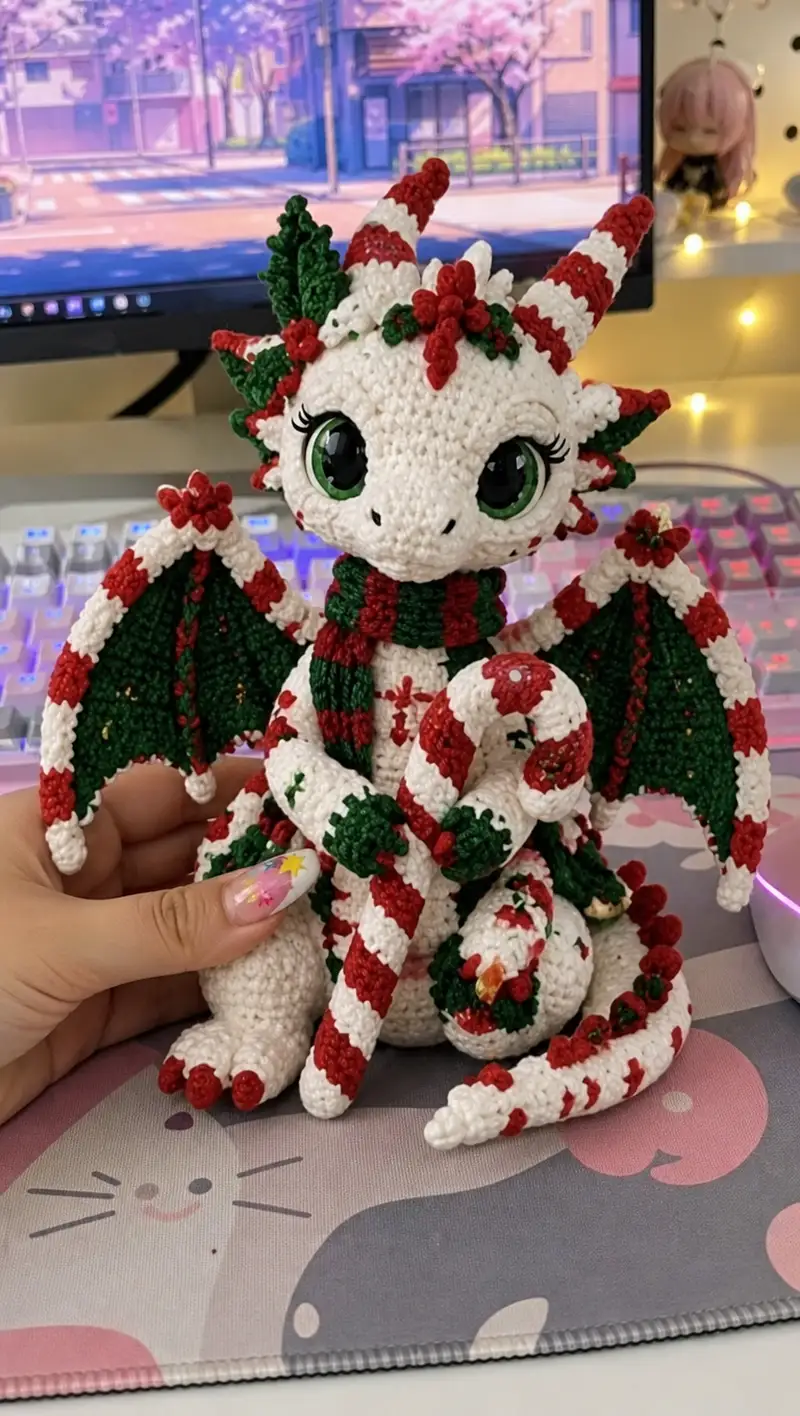
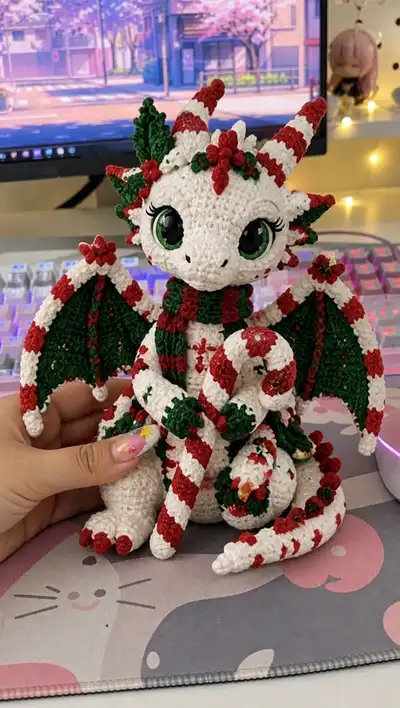
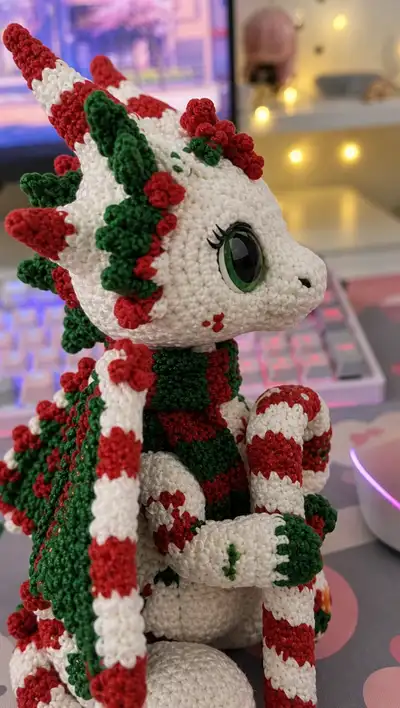
Create an adorable holiday dragon amigurumi dressed in candy-cane stripes and poinsettia accents. This plush companion features large safety eyes, striped horns and tail, textured wings, and a cozy striped scarf. Designed with festive red, green and white details, this pattern includes step-by-step round-by-round instructions and assembly tips to recreate the exact look.
Progress Tracker
0% Complete
— Head :
Round 1 :
6 sc in magic ring (6)
Round 3 :
(1 sc, 1 inc) x 6 (18)
Round 4 :
(2 sc, 1 inc) x 6 (24)
Round 5 :
(3 sc, 1 inc) x 6 (30)
Round 6 :
(4 sc, 1 inc) x 6 (36)
Round 7 :
(5 sc, 1 inc) x 6 (42)
Round 8 :
(6 sc, 1 inc) x 6 (48)
Round 9 :
1 sc in each st (48)
Round 10 :
1 sc in each st (48)
Info :
Place safety eyes between rounds 13 and 14. Measure approximately 10-12 stitches apart center-to-center for large 14–16mm eyes. Use stitch markers at the front center (between eyes) and mark left/right eye positions before proceeding.
Round 11 :
1 sc in each st (48)
Round 12 :
1 sc in each st (48)
Round 13 :
1 sc in each st (48)
Round 14 :
1 sc in each st (48)
Info :
Attach safety eyes now and ensure they sit squarely. Add a temporary eyelid marker if you plan to crochet eyelid shaping after.
Round 15 :
(6 sc, 1 inc) x 6 (54)
Round 16 :
1 sc in each st (54)
Round 17 :
1 sc in each st (54)
Round 18 :
(7 sc, 1 inc) x 6 (60)
Info :
If you want slightly rounder cheeks, add 1–2 rounds of even stitching here. Decide now where nostrils and mouth will be: nostrils will be embroidered later around round 11–13 area.
Round 19 :
1 sc in each st (60)
Round 20 :
1 sc in each st (60)
Round 21 :
(7 sc, 1 dec) x 6 (54)
Round 22 :
(6 sc, 1 dec) x 6 (48)
Info :
Begin light stuffing now. Use small amounts to keep the face soft. Stuff more firmly in brow and cheek areas and softer at the back of the head to allow neck shaping.
Round 23 :
(5 sc, 1 dec) x 6 (42)
Round 24 :
(4 sc, 1 dec) x 6 (36)
Round 25 :
(3 sc, 1 dec) x 6 (30)
Round 26 :
(2 sc, 1 dec) x 6 (24)
Round 27 :
(1 sc, 1 dec) x 6 (12)
Info :
Fasten off leaving a long tail for sewing into the neck. Finalize stuffing, ensuring eyes remain properly positioned and that the head shape is symmetrical. Weave tail through remaining sts and close. Reinforce stitches around eye bases if needed for security.
Round 29 :
Optional neck extension: join yarn at base and 6 sc around to create neck column if required for attachment (6)
Round 30 :
(1 sc, inc) x 3 (9)
Round 31 :
(2 sc, inc) x 3 (12)
Round 32 :
(3 sc, inc) x 3 (15)
Info :
These rounds form the neck stump for sewing into the body opening. Make the neck length between 2–6 rounds depending on desired lip and tilt. Fasten off leaving long tail for sewing.
— Face Details & Eyelids :
Round 1 :
Optional crocheted eyelids: With white or slightly darker off-white yarn, ch 9, sc in 2nd ch from hook and across (8), sl st across to form a small eyelid. Make 2 and shape before sewing above each eye.
Info :
Sew eyelids so they slightly overlap the top of the safety eyes. Alternatively embroider top lashes with black embroidery thread for expression. Attach extra felt eyelashes if desired.
Embroidered Nostrils & Mouth :
Use black embroidery floss and a tapestry needle. Place two small vertical nostrils at round 11, 2–3 stitches apart. Stitch a tiny smile or leave mouth minimal for the cute look. Add three little red dot accents (cheek freckles) using red yarn on rounds 12–13 as pictured.
— Horns (Make 2 Large, 2 Small) :
Note :
Horns are worked in spiral to create a tapered candy-cane striped horn. Alternate colors every 2 rounds for stripes or every round for thin stripes. Use 3.0mm hook for tight shape.
Large Horn Round 1 :
6 sc in magic ring (6)
Round 3 :
(1 sc, 1 inc) x 6 (18)
Round 4 :
1 sc in each st (18)
Round 5 :
(2 sc, 1 dec) x 6 (12)
Round 6 :
1 sc in each st (12)
Round 7 :
(1 sc, 1 dec) x 4 (8)
Round 8 :
1 sc in each st (8)
Round 9 :
Start taper: dec x 4 (4)
Round 10 :
1 sc in each st (4)
Round 11 :
Dec x 2 (2) Fasten off leaving long tail. Stuff lightly and flatten to form conical horn. Repeat for second large horn.
Small Horn Rounds :
Make two small horns: mr6, 6 inc (12), 1 sc in each (12), (1 sc, dec) x 4 (8), 1 sc x 2 rounds, dec x 4 (4). Fasten off with tail for sewing.
Info :
For the striped effect, change color every 1–2 rounds. Carry unused yarn inside horn, or fasten off and sew stripes on afterward. Sew horns to head top, using the front center marker for placement: large horns are set slightly back and angled outwards; small horns and spikes sit between and behind large horns.
— Head Spikes & Rosettes (Make 12 small spikes and 8 rosettes) :
Spike Round 1 :
mr 5 sc (5)
Round 2 :
(sc in each st) x1 round (5)
Round 3 :
sc3tog over next 3 sts to point (1) Fasten off leaving tail for sewing.
Rosette :
Ch 4, sl st into first ch to form loop. Work into loop: (sc, hdc, 3 dc, hdc, sc) repeat 3–4 times to form layered rosette, fasten off leaving long tail. Make rosettes in red and small green center leaves in green (ch5, sl st to loop, sc around to form leaf shape).
Info :
Sew spikes and rosettes along the center crest from forehead to nape and between horns to create the festive poinsettia feel. Attach each element with a few whip stitches and anchor inside with a dab of glue if needed.
— Body :
Round 1 :
6 sc in magic ring (6)
Round 3 :
(1 sc, 1 inc) x 6 (18)
Round 4 :
(2 sc, 1 inc) x 6 (24)
Round 5 :
(3 sc, 1 inc) x 6 (30)
Round 6 :
(4 sc, 1 inc) x 6 (36)
Round 7-9 :
1 sc in each st (36)
Info :
At round 7 you can change to a slightly firmer stuffing and begin alternating color for decorative belly stitches (small red/green crosses) to match the pictured motifs. Mark front center for later head attachment.
Round 10 :
(4 sc, 1 inc) x 6 (42)
Round 11 :
1 sc in each st (42)
Round 12 :
1 sc in each st (42)
Round 13 :
(5 sc, 1 inc) x 6 (48)
Round 14-16 :
1 sc in each st (48)
Info :
If adding a belly pattern in a contrasting color, change color now. Carry yarn inside or fasten off as preferred. For a striped midsection, alternate 2 rounds of white and 2 rounds of color accordingly.
Round 17 :
(6 sc, 1 dec) x 6 (42)
Round 18 :
(5 sc, 1 dec) x 6 (36)
Round 19 :
(4 sc, 1 dec) x 6 (30)
Round 20 :
(3 sc, 1 dec) x 6 (24)
Info :
Begin stuffing the body firmly but leave a wide opening for head attachment. The body should be stable to sit upright. Add extra stuffing to the bottom to create a flat base if desired.
Round 21 :
(2 sc, 1 dec) x 6 (18)
Round 22 :
(1 sc, 1 dec) x 6 (12)
Round 24 :
Fasten off leaving long tail for sewing head. Do not fully close until head is attached; use tail to whip stitch closed after sewing.
Info :
If you want a slightly elongated torso, add 2–4 even rounds between rounds 16 and 17. Adjust stuffing accordingly to keep proportions similar to the reference photo.
— Arms (Make 2) :
Round 1 :
6 sc in magic ring (6)
Round 3 :
(1 sc, 1 inc) x 6 (18)
Round 4-6 :
1 sc in each st (18)
Info :
Work color changes here if you want the mitten-like green cuffs. Carry yarn along the inside so you can change back to white for the forearm stripes.
Round 7 :
Change to green. 1 sc in each st (18)
Round 8 :
Change to white. 1 sc in each st (18)
Round 9 :
Change to red. 1 sc in each st (18)
Round 10 :
Change to white. 1 sc in each st (18)
Round 11 :
Change to green. 1 sc in each st (18)
Round 12 :
1 sc in each st (18)
Info :
Stuff hand portion firmly, but keep upper arm more flexible for sewing. If using wire for posability, insert before final stuffing. The pictured dragon has alternating stripe pattern on the arms; follow color sequence to match.
Round 13 :
(2 sc, 1 dec) x 4, 2 sc (14)
Round 14 :
1 sc in each st (14)
Round 15 :
(1 sc, 1 dec) x 4, 2 sc (10)
Round 16 :
1 sc in each st (10)
Round 17 :
Stuff lightly, shape shoulder. (1 sc, dec) x 3 (6)
Round 18 :
Fasten off leaving long tail for sewing. Slip stitch tail through remaining sts to close and secure. Repeat for second arm.
— Hands/Claws Detail :
Claw (Make 3 per hand) :
mr 4 sc (4), sl st, leave tail for sewing. Make small red picot or bobble by ch 3, sl st into base to form toe tip. Sew three to each hand, spacing evenly along the front edge.
Info :
Sew claws through a few rounds of the hand to anchor. Add a tiny white picot at each tip for candy feel if desired.
— Legs (Make 2) :
Round 1 :
6 sc in magic ring (6)
Round 3 :
(1 sc, 1 inc) x 6 (18)
Round 4 :
(2 sc, 1 inc) x 6 (24)
Round 5-7 :
1 sc in each st (24)
Round 8 :
(3 sc, 1 inc) x 6 (30)
Round 9-11 :
1 sc in each st (30)
Info :
For a sturdy base add an inner circle of felt or a small disc of dense stuffing at the sole to help the dragon sit. Make toes and small claws in red to sew to the front edge of the foot.
Round 12 :
(3 sc, 1 dec) x 6 (24)
Round 13 :
(2 sc, 1 dec) x 6 (18)
Round 14 :
(1 sc, 1 dec) x 6 (12)
Round 16 :
Fasten off leaving long tail for sewing. Stuff feet firmly, shaping toes as pictured. Repeat for second leg.
Toe/Claw Details :
Make three small picot toes per foot: ch3, sl st into base to create little bump; make in red to form candy tips and sew onto toe row. Add small green accent dots near ankle if desired.
— Tail :
Structure :
The tail is a long tapered spiral worked in stripes. Start with white and alternate red/green stripes every 2 rounds to create the candy cane spiral. Optional wire can be inserted to make tail poseable.
Round 1 :
6 sc in magic ring (6)
Round 3 :
(1 sc, 1 inc) x 6 (18)
Round 4 :
(2 sc, 1 inc) x 6 (24)
Round 5 :
(3 sc, 1 inc) x 6 (30)
Rounds 6-10 :
1 sc in each st (30) Change colors every 2 rounds: white then red, then white then green, etc., to form stripes.
Info :
If using wire: cut a length of floral wire slightly shorter than the tail length, wrap ends in a small bit of yarn to avoid poking, and insert through the center as you work the rounds, stuffing around it for support.
Round 11 :
(3 sc, 1 dec) x 6 (24)
Round 12 :
(2 sc, 1 dec) x 6 (18)
Round 13 :
(1 sc, 1 dec) x 6 (12)
Info :
Leave a long tail for sewing. Before closing completely, wrap the tail around your hand or a form to create the curled shape similar to the reference image. Sew base of tail to lower back center of the body. Add small red rosettes along the tail ridge by sewing on tiny motifs at regular intervals.
— Wings (Make 2) :
Wing Structure Overview :
Each wing is worked flat with two layers: the inner membrane (green) and outer scalloped edge (white/red alternating). The wing frame is created with increases to create a fan and finished with a scalloped edge. Use BLO for defined ridges on the wing fingers.
Wing Base Row 1 :
Ch 18, starting second ch from hook sc across (17)
Row 2 :
Ch1 turn, sc in each st (17)
Row 3 :
Ch1 turn, (sc, inc) across to end to fan (26)
Row 4 :
Ch1 turn, sc in each st (26)
Row 5 :
Ch1 turn, (2 sc, inc) across to fan more (34)
Row 6-7 :
Sc in each st (34)
Info :
Work two identical base panels in green for the wing inner membrane. Keep tension firm. After panels are complete, seam edges together with a row of sc through both layers to create a slightly stiffer wing. Add a thin wire along the top ridge if you want poseable wings.
Row 8 :
Switch to white for scalloped edge. 1 sc in each st BLO (34)
Row 9 :
*(Skip 1 st, 5 dc in next st, skip 1 st, sl st in next) repeat across to create scallops. Finish and fasten off. Add alternating red picot at tips by sewing small red bobbles in each scallop center.
Info :
Sew wings to the upper back between rounds 6–10 of the body. Slightly curve the wings forward and angle for the sitting pose. Attach small rosettes and green leaf accents to the wing base to match the image.
— Scarf :
Scarf Construction :
Worked in rows to make a long narrow scarf with alternating stripes of green and red. Use 3.0mm hook for tighter fabric.
Row 1 :
Ch 6, sc in 2nd ch from hook and across (5)
Row 2-40 :
Ch1, turn, sc in each st (5) Change color every 2 rows for crisp stripes. Work for 40 rows or desired length to wrap around neck twice as pictured.
Info :
Finish both ends with a fringe of alternating red and green mini rosettes or bobbles. Weave in ends and sew scarf around neck with a few hidden stitches so it stays in place.
— Candy Cane Prop :
Body :
Work a small tapered tube in spiral with 6–18 sts depending on desired thickness. Follow increase pattern to reach working circumference, then alternate red and white every 2 rounds. Bend into cane shape and sew base firmly into dragon's hand.
Round 1 :
6 sc in magic ring (6)
Round 3-18 :
1 sc in each st (12) Change colors every 2 rounds to form red/white stripes. After full length is worked, shape hook of cane by stuffing lightly and sewing curve in place. Fasten off leaving long tail for sewing to hand.
Info :
For extra stability, thread a length of wire through the candy cane before stuffing, bending wire into a hook and sewing ends to base of tube for secure placement.
— Belly Motifs & Embroidery :
Embellishments :
Embroider small red crosses on the chest area using surface slip stitch or small cross-stitch style. Add scattered green seed-stitches to echo holly speckles. Use photos for placement: centered on belly and a few on upper arms and thighs.
Info :
These small embroidered details are done after assembly. Use a tapestry needle and matching yarn. Keep embroidery shallow and not too bulky to preserve shape.
— Assembly & Final Touches :
Info :
Weave in all tails but leave those meant for sewing. Pin parts in place: head to body, legs to bottom, arms to sides at roughly body rounds 18–22, wings to back between body rounds 6–9. Check symmetry visually before sewing.
Final Seams :
Sew head to body with long tail and whip stitch through neck stumps and body opening. Use ladder stitch for a less visible seam. Sew arms and legs using mattress stitch or whip stitch and reinforce with several passes for durability.
Eyes & Expression :
Add eyelashes either crocheted or embroidered using black yarn. Add a tiny highlight near eye corners using white embroidery thread if safety eyes don't already have them. Add blush with pastel chalk or fabric-safe paint lightly if desired.
Info :
Add any small plastic or metallic accents on wings using fabric glue and tiny sequins. Ensure all small parts are securely attached if making this for a child; consider embroidered eyes for a toy intended for young children.
This candy-cane dragon brings holiday cheer with every stitch — from its striped horns and tail to the tiny poinsettia rosettes along its crest. Working through the detailed rounds builds a sturdy, expressive doll that's perfect for gifting or holiday display. Enjoy the meditative process of crocheting textured motifs and watching them come together into a charming companion. 🎄🧶✨