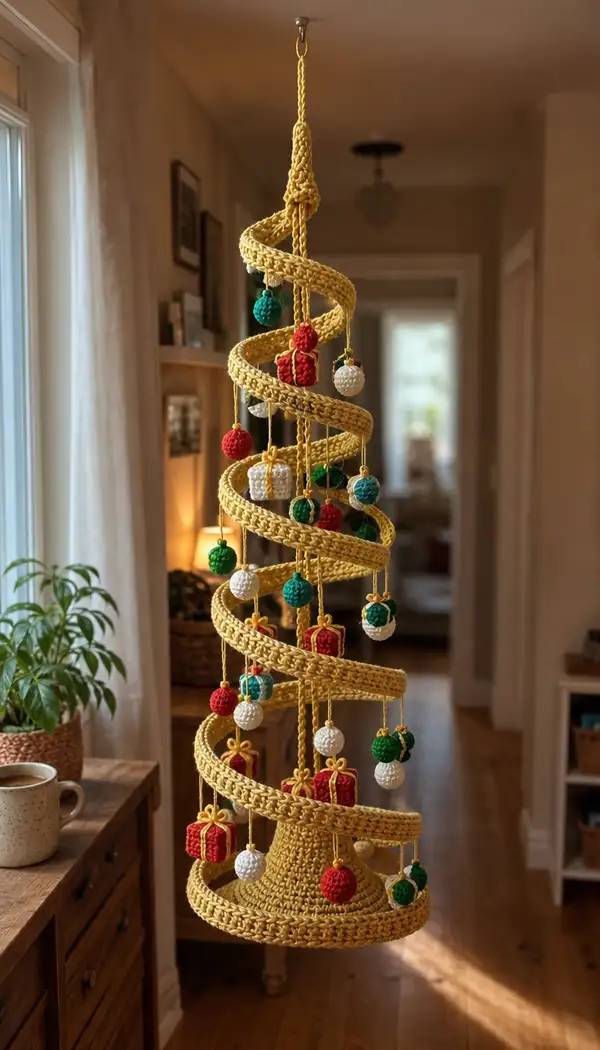
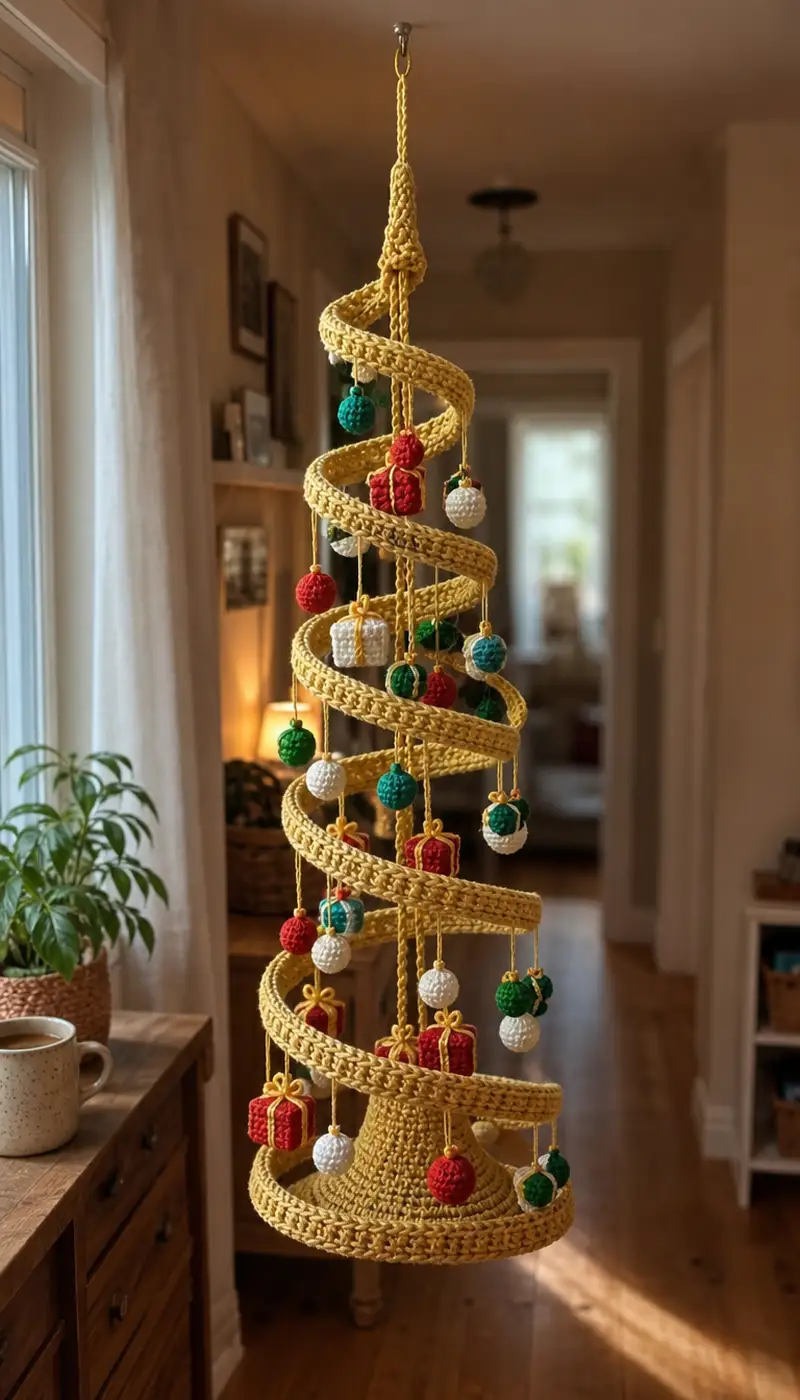
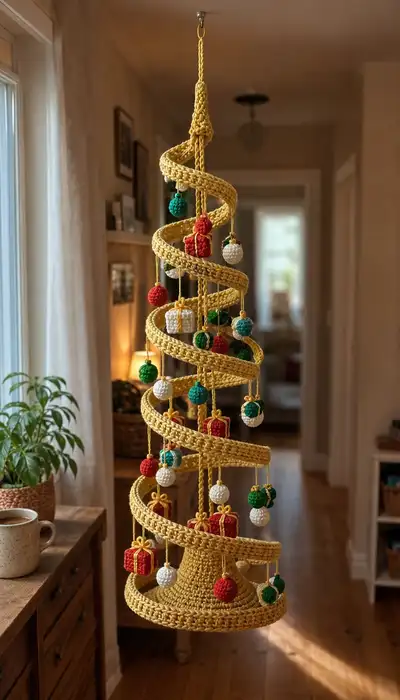
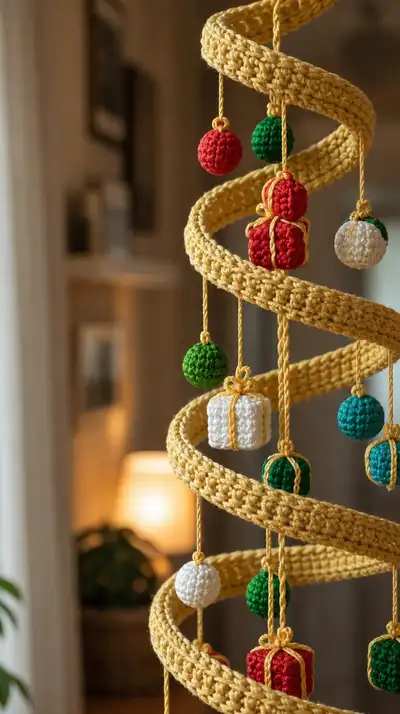
Create a whimsical hanging spiral tree mobile with chunky golden coils and tiny crocheted ornaments. This warm, homey decoration features a tall spiraling ribbon that weaves from a conical base to a pointed top with dangling baubles and tiny gift cubes in red, green and white. Perfect for a hallway, doorway, or cozy corner, this pattern walks you through building the spiral structure, the cone base, hanging cords, and multiple ornament styles.
Progress Tracker
0% Complete
— Overview :
Info :
This pattern creates a hanging spiral tree mobile with a flared base cone, a long tubular spiral coil, a pointed top cone, and multiple small ornaments (spheres and cube-style gifts) that hang from cords inside the spiral. Work the base and top cone first to get confident shaping, then crochet the long spiral tube as a continuous cylinder. Make ornaments separately and attach with short twisted cords. The spiral used here is worked in the round with 48 stitches circumference for stability; adjust if you prefer a thinner or thicker coil.
— Materials & Gauge :
Info :
Gauge is not critical, but for consistency aim for approximately 2.5-3 sc per inch when using 6.5mm hook and bulky yarn. The finished hanging spiral measures approximately 85-95 cm tall from top loop to bottom edge when hung; coil length (when unspiraled) is roughly 180-230 cm including base and cone. Adjust length by adding or removing rounds in the long even section of the coil.
— Base Cone (Flared Base) :
Round 1 :
6 sc in magic ring (6)
Round 3 :
(1 sc, inc) x 6 (18)
Round 4 :
(2 sc, inc) x 6 (24)
Round 5 :
(3 sc, inc) x 6 (30)
Round 6 :
(4 sc, inc) x 6 (36)
Info :
The first 6 rounds form the central disk that will sit at the bottom center of your hanging mobile. Work tightly so the cone can stand firm when stuffed. If you prefer a wider base, add one more increase round using (5 sc, inc) x 6 for 42 sts.
Round 7 :
1 sc in each st (36)
Round 8 :
1 sc in each st (36)
Round 9 :
(4 sc, inc) x 6 (42)
Round 10 :
1 sc in each st (42)
Round 11 :
1 sc in next 3 sts, (hdc in next st, dc in next st) repeat around for subtle flare (42)
Info :
At this point you are building out the disk and beginning to form the flared lip. Keep rounds flat by using one or two rounds of mixed hdc/dc as shown. Block lightly if needed to get a smooth flattened disk before starting the cone walls.
Round 12 :
(6 sc, inc) x 6 (48)
Round 13 :
1 sc in each st (48)
Round 14 :
1 sc in each st (48)
Info :
Now begin building the cone walls by crocheting in the round without increases for height. The flared base is complete; the cone will taper above it to create an anchor point for the spiral coil.
Round 15-18 :
1 sc in each st (48)
Round 19 :
(7 sc, dec) x 6 (42)
Round 20 :
1 sc in each st (42)
Round 21 :
(6 sc, dec) x 6 (36)
Info :
Begin stuffing the cone lightly through the opening left at the top of the base cone. Use small amounts of stuffing, pushing firmly toward the center. The goal is a stable conical support that keeps the spiral tube upright at the bottom.
Round 22 :
1 sc in each st (36)
Round 23 :
(5 sc, dec) x 6 (30)
Round 24 :
1 sc in each st (30)
Round 25 :
(4 sc, dec) x 6 (24)
Round 26 :
(3 sc, dec) x 6 (18)
Round 27 :
(2 sc, dec) x 6 (12)
Info :
Fasten off leaving a long tail for sewing. Finish stuffing and close the small opening with a running stitch, pulling taut to secure stuffing. The base cone is complete—set aside and ensure it will sit flat and stable.
— Spiral Coil (Main Tubular Spiral) :
Info :
The spiral coil is worked as a long continuous tube crocheted in the round. Start with a small center and increase to a stable circumference of 48 stitches; then work many even rounds to the length required. The tube will be softened and shaped into a helix for hanging. If you wish a thinner coil, stop increases at 36 sts instead of 48.
Round 1 :
6 sc in magic ring (6)
Round 3 :
(1 sc, inc) x 6 (18)
Round 4 :
(2 sc, inc) x 6 (24)
Round 5 :
(3 sc, inc) x 6 (30)
Round 6 :
(4 sc, inc) x 6 (36)
Round 7 :
(5 sc, inc) x 6 (42)
Round 8 :
(6 sc, inc) x 6 (48)
Info :
At 48 stitches circumference the tube has a sturdy diameter suitable for this sculptural project. From here, work even rounds to create the length of the coil. Keep the first stitch of each round marked to avoid accidental turning. If you prefer a softer, more slouchy coil, you may decrease the hook size or use a smaller yarn.
Round 9-18 :
1 sc in each st (48)
Info :
Use these early even rounds to check the tube appearance and count rounds. If your stitches are too loose, consider switching to a hook one size smaller for the remainder of the tube to maintain firmness and prevent sagging when hung.
Round 19-28 :
1 sc in each st (48)
Info :
Plan the total number of even rounds. For a spiral approximately 180-220cm long uncoiled, aim for about 120 even rounds at 48 sts each when using bulky yarn and 6.5mm hook. Adjust number of rounds to change spiral height.
Round 29-38 :
1 sc in each st (48)
Round 39-48 :
1 sc in each st (48)
Info :
Every 10 rounds, press the tube slightly flat and check overall length. If using an optional internal wire or stiff cord for structure, insert it now along the center of the tube aligning with the top-to-bottom axis and leave small gaps at both ends for sewing. Be sure wire is thin enough to fit comfortably inside the tube without bulging stitches.
Round 49-58 :
1 sc in each st (48)
Round 59-68 :
1 sc in each st (48)
Info :
Decide on ornament attachment spacing: the photo shows 6-8 ornament cords running down the spiral at even intervals. To mimic this, mark positions along the tube every 14-18 rounds (these marks become vertical points when the tube is arranged as a spiral). Use stitch markers through the tube wall to note where cords will be stitched later.
Round 69-78 :
1 sc in each st (48)
Round 79-88 :
1 sc in each st (48)
Round 89-98 :
1 sc in each st (48)
Info :
If working very long lengths you may want to break the yarn and join new skeins to avoid long ends. When joining, do a tidy invisible join at the end of a round to keep the seam minimal. Weave in ends inside the tube for neatness.
Round 99-108 :
1 sc in each st (48)
Round 109-118 :
1 sc in each st (48)
Round 119-128 :
1 sc in each st (48)
Info :
When you reach the desired uncoiled length (we used 128 rounds total including increases here), stop and fasten off leaving a long tail for joining to the top cone. If you used internal wire, make sure the wire stops below the top joining point so it won't poke through when you sew pieces together.
Round 129 :
Optional: If you want the coil to have a soft inward lip, work 1 round BLO sc (48)
Round 130 :
Fasten off leaving long tail for sewing to top cone and base cone. Block the tube gently into an open helix shape by pinning to a template (spiral spacing approximately 8-10 cm each coil) and steam lightly if yarn is suitable for steaming. Allow to cool and dry before final assembly.
Info :
To set the spiral shape, you can wrap the un-stretched tube around a cone-shaped template (similar diameter progression to your base cone) and pin in place. Another method is to hang the tube on a temporary central rod to let gravity form a loose spiral then stitch the top and bottom in place.
— Top Cone (Pointed Top and Hanging Loop) :
Round 1 :
6 sc in magic ring (6)
Round 3 :
(1 sc, inc) x 6 (18)
Round 4 :
(2 sc, inc) x 6 (24)
Round 5 :
1 sc in each st (24)
Info :
This small cone will cap the top of the spiral and incorporate a braided hanging cord. Work it closely so it forms a slim pointed cap. The hanging loop is created by a small braid or a chain of the desired hanging length attached to the cone tip.
Round 6 :
(3 sc, dec) x 6 (18)
Round 7 :
1 sc in each st (18)
Round 8 :
(2 sc, dec) x 6 (12)
Round 9 :
(1 sc, dec) x 6 (6)
Info :
Leave a long tail to create a braided hanging cord. Fasten off and weave the tail into three separate strands; braid tightly for a neat cord approximately 12-20 cm long depending on your hanging height. Fold the braid and sew back into the cone to create a secure loop for ceiling hook attachment.
Round 11 :
Sew the cone to the top edge of the long tube carefully using the long tail, aligning the first stitch of the tube to the base of the cone and distributing the joins evenly so the seam is smooth.
Round 12 :
Finish the seam and weave in ends. If desired, tie an overhand knot at the top of the braid inside the cone to prevent slipping.
— Ornament: Small Crocheted Sphere (Make multiple) :
Round 1 :
6 sc in magic ring (6)
Round 3 :
(1 sc, inc) x 6 (18)
Round 4 :
(2 sc, inc) x 6 (24)
Round 5 :
1 sc in each st (24)
Round 6 :
1 sc in each st (24)
Info :
Start stuffing the sphere lightly after round 5 and continue as you add rounds. Small beads inside are optional if you want a slightly heavier ornament so they hang straighter.
Round 7 :
(2 sc, dec) x 6 (18)
Round 8 :
(1 sc, dec) x 6 (12)
Info :
Fasten off leaving a long tail. Close the remaining hole by threading the tail through the front loops and pulling tight. Attach a short twisted cord (ch 10-20 depending on desired drop length) at the top of the sphere and secure with several stitches. Add a tiny loop or knot for hanging inside the spiral.
— Ornament: Small Gift Box (Make multiple) :
Round 1 :
6 sc in magic ring (6)
Round 3 :
(1 sc, inc) x 6 (18)
Round 4 :
(2 sc, inc) x 6 (24)
Round 5 :
1 sc in each st (24)
Round 6 :
1 sc in each st (24)
Info :
To create a box-like shape, we will flatten the tube slightly and form four distinct sides through stitch placement. Stuff lightly but more firmly than spheres to ensure box edges remain crisp.
Round 7 :
(3 sc, dec) x 6 (18)
Round 8 :
1 sc in each st (18)
Round 9 :
(2 sc, dec) x 6 (12)
Round 10 :
1 sc in each st (12)
Round 11 :
(1 sc, dec) x 6 (6)
Round 12 :
6 dec (0) - close and fasten off, leaving a long tail for sewing
Info :
Flatten box slightly into a cube-like shape. Use contrasting yarn to stitch ribbon bands around the box: run two strips across the sides and join at top creating a bow. To make the ribbon, work a chain of 20-30 and surface slip stitch or sew into place. For a neat bow, crochet a small loop bow of 6 ch loops sewn to the top.
— Assembly: Hanging Cords, Placement & Attaching Ornaments :
Info :
Decide how many vertical hanging points you want inside the spiral (we recommend 6-8 points evenly spaced around the tube). Mark these positions on the tube while it's lying flat, using stitch markers through the wall opposite the seam where you will stitch cords. Typical spacing is to create 6 vertical lines starting near the top third of the coil and running down to bottom third; pins will help to keep consistent height.
Round 1 :
For each hanging cord: cut 3 lengths of the main color yarn at desired cord length (12-20 cm). Knot at one end and fold into a small loop. Braid or twist the 3 strands tightly and secure both ends with a few tight stitches.
Round 2 :
Sew the top end of the cord into the desired tube stitch from inside the tube by using a yarn needle to pass through the tube wall and stitch several passes so cord is secure. Use a ladder stitch or several back-and-forth stitches to secure.
Info :
Attach ornaments to the other end of the cord with a small knot, and leave a decorative loop at the top of the ornament or use a small jump ring to dangle the ornament for a neater movement. For heavier ornaments like small boxes, reinforce the attachment with an additional stitch through the ornament top.
Round 3 :
Distribute ornaments among cords, arranging weight to keep coil balanced. Place heavier ornaments slightly lower so the coil hangs evenly. If the coil leans, re-distribute or add a small internal weight to the base cone.
Round 4 :
Once attachments are sewn, hang the coil temporarily from its braided top cord to check spacing and balance. Adjust the cord lengths and positions by re-sewing if necessary until you achieve the desired look.
— Final Joining & Blocking :
Info :
Sew the bottom end of the long tube to the top edge of the flared base cone using the long tail left when finishing the tube. Distribute stitches evenly around the circumference so tube sits centered on the base. Use ladder stitch and overcast seams working from inside to keep outer lines neat. After joining, check for any gaps and fill with a few extra stitches and weave in tails securely inside the base.
Round 1 :
Pin shape into desired spiral using a conical blocking form or temporary central rod. For a tighter spiral, overlap coils slightly and tack them into place with a few stitches at 3-4 discreet points so the spiral keeps its shape when moved.
Round 2 :
Allow the yarn to rest and if desired give a light steam-block for cotton blends. Do not over-wet or melt synthetic yarns. Once set, remove pins and re-hang to ensure the spiral holds its form.
Info :
For extra stability, you can sew through the overlapping wall of adjacent coil wraps at 4-6 hidden points around the spiral with clear nylon thread or matching yarn. This will keep the helix stable in transit or if placed in drafty areas.
— Decoration Variations & Tips :
Info :
You can vary ornament sizes and numbers: create larger spheres by increasing the sphere pattern to 30 sc circumference and adding extra rounds. Create small star shapes by crocheting 5-point motifs and stuffing lightly then sewing to cords. Use metallic thread for ribbon accents or beads at cord ends for extra weight and sparkle.
Info :
To make a twinkling effect, thread a small battery-operated fairy light through the inside of the coil before attaching ornaments; use thin wire lights that can be secured discreetly to the inner wall of the tube with a few stitches.
You just made a stunning hanging spiral tree that doubles as sculpture and festive decor! Each coil, ornament and bow brings personality and warmth to a room. The long process is incredibly satisfying—watch the structure emerge as you stitch, stuff and assemble. Display with pride or gift to someone who loves handmade charm. 🎄✨🧶