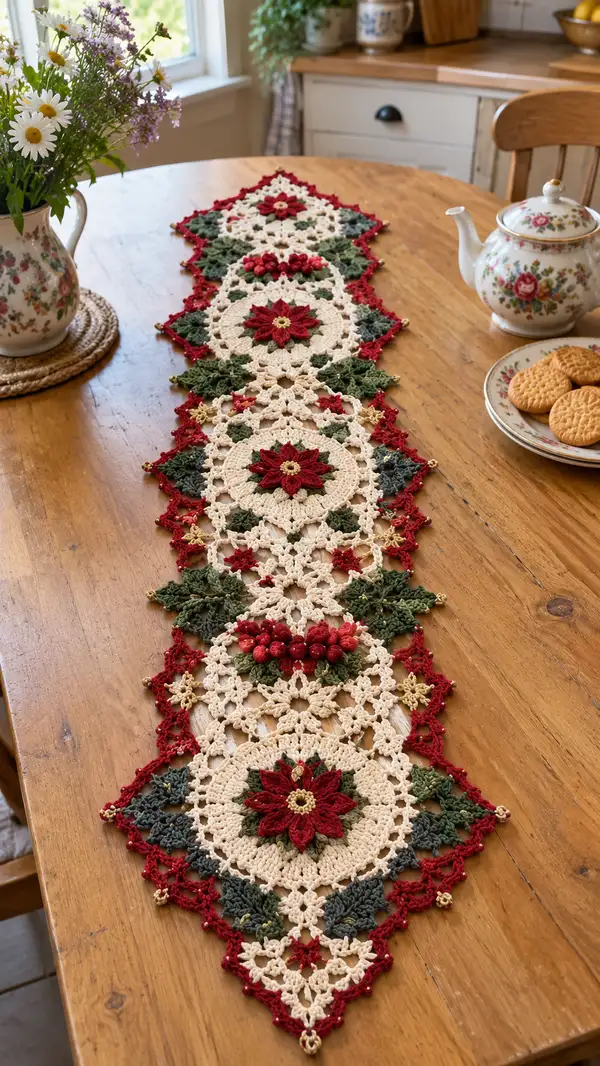
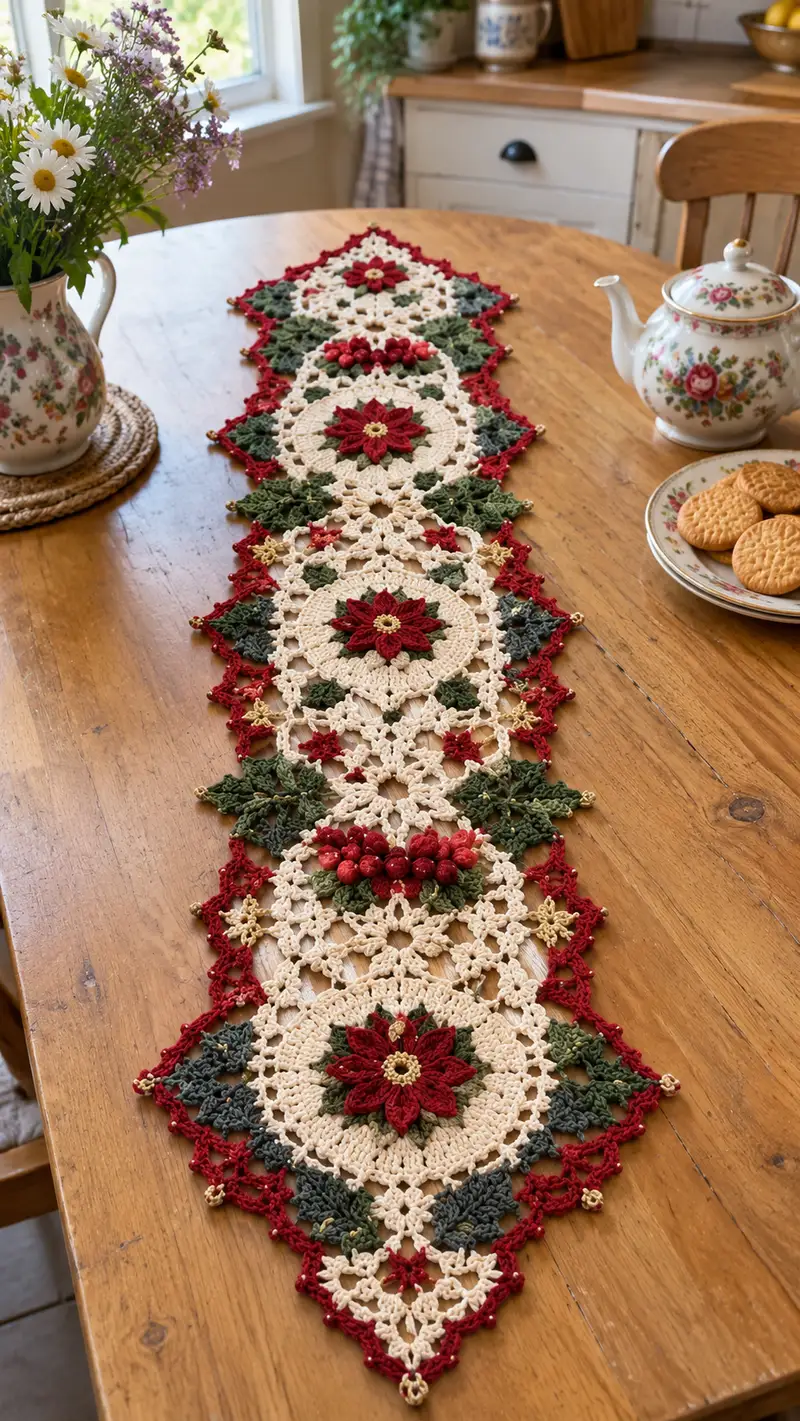
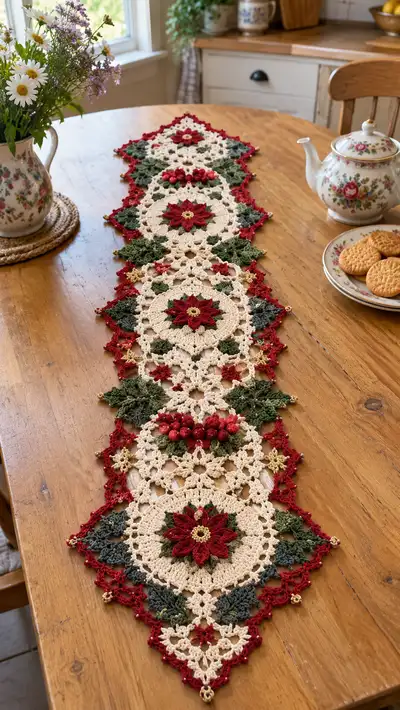
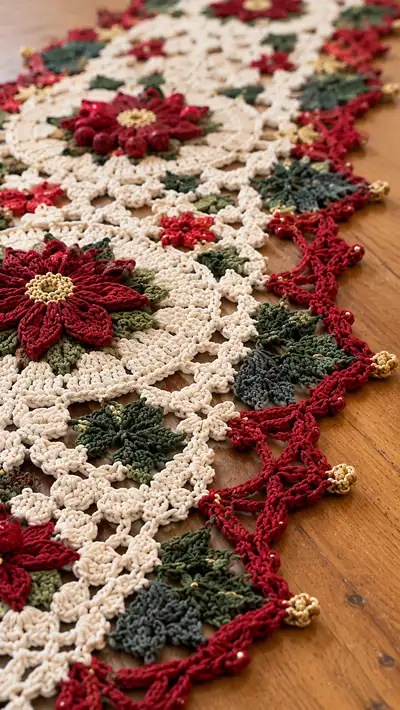
Create a long, elegant holiday table runner built from linked lace medallions featuring layered poinsettias, leafy clusters and beaded gold accents. Worked in warm cream, deep red, two shades of green and metallic gold, this runner has texture, dimensional petals and a delicate lacy border that lays beautifully on a wooden table. The pattern uses small motifs joined as you go with clear, detailed instructions and assembly tips for a professional finish.
Progress Tracker
0% Complete
— Materials & Gauge :
Info :
Gauge is not critical for this decorative runner, but to match proportions use DK cotton and hooks suggested. One finished large medallion (including petals and cream ground) measures approximately 13-14cm (5-5.5 in) across; full runner in photo is roughly 110-120cm (43-47 in) long with 5 full medallions plus triangular end motifs. Blocking will open lace and add 10-15% width to each motif.
— Poinsettia Motif (Make 5 main medallions) :
Round 1 :
With gold thread, make a magic ring, ch1, 6 sc in ring (6). Pull tight and sl st into first sc.
Round 2 :
Ch1, 6 inc (12) — work 2 sc in each st around. Sl st to join (12).
Round 3 :
Ch1, (1 sc, inc) x6 (18). Sl st to join (18).
Round 4 :
Ch1, (2 sc, inc) x6 (24). Sl st to join (24).
Round 5 :
Ch1, (3 sc, inc) x6 (30). Sl st to join (30).
Info :
This small golden disk will become the very center of the poinsettia. If you prefer a flat embroidered center instead of a raised gold round, stop here and embroider a circle of French knots with metallic thread.
Round 6 :
Change to dark green. Ch1, (4 sc, inc) x6 (36). Sl st to join (36).
Round 7 :
Ch1, (5 sc, inc) x6 (42). Sl st to join (42).
Round 8 :
Ch1, (6 sc, inc) x6 (48). Sl st to join (48).
Info :
At 48 sts this round provides perfect spacing for 8 evenly spaced petal bases (48/8=6). Place a removable stitch marker in the first stitch of this round to mark start and help counting when creating petal loops.
Round 9 :
Ch1, *(1 sc in next 5 sts, ch6, sl st in next st)* repeat from * to * around — you will create 8 ch-6 loops separated by 6 stitches each (48 accounted for). Sl st to join to first sc of this round.
Info :
These chain loops will be the anchors for the green sepals (small leaves) and later for the red petals. Ensure loops are not twisted; pin them out on blocking board later for crisp shape.
Round 10 :
Change to olive variegated green. Work petals into each ch6 loop: in ch6 loop work (sc, hdc, 2 dc, tr, 2 dc, hdc, sc). Fasten off olive after completing all 8 sepals. You now have a ring of 8 small leaf shapes around the gold center.
Round 11 :
Join deep forest green into the base of any sepal. Ch1, *sc in top of sepal (the sc that closed the last leaf), ch3, sk to mid loop base, sc in next base stitch* around to create small connecting picot loops between sepals (creates definition). Sl st to join and fasten off forest green if desired.
Info :
These first two green layers are the inner sepal/leaf layer that sits just under the red petals. Make sure petals of the Se rated leaf layer point outward and are slightly fluffed to provide depth for later red petals to overlap.
Round 12 :
Change to deep red. Join in any ch-6 loop base (from Round 9). Ch3 (counts as first dc), work 9 dc into same ch-6 loop, sl st to top of the ch-loop to close petal (10 dc per petal). Repeat in each of the 8 ch6 loops around (8 petals total). Sl st to join, do not fasten off — leave yarn attached for next shaping.
Round 13 :
Ch1, working behind the red dc petals into the foundation stitches (those between loops), sc into each foundation stitch around to create a tidy round of sc that stabilizes petals (48 sc). Sl st to join (48).
Round 14 :
Ch2, *hdc in next 2 sts, fpdc around the next dc from the petal center (this draws petal edges up), hdc in next 2 sts, ch2, sl st into ch-space between petals* repeat around to create subtle ridges behind petals. You will have 8 small ch2 spaces. Sl st to join.
Info :
Front post double crochet used here lifts the petal base for dimension. Keep post stitches snug but not too tight or they will pull the fabric inwards. If you prefer a flatter look, substitute fpdc with dc.
Round 15 :
Change to red if you used a different small tension yarn. Working in the ch2 spaces from previous round, work a layered petal: (sl st into space, ch3, (tr, dtr, tr) all in same space, ch3, sl st) to create a pointed, slightly cupped petal point that sits over the initial round of dc petals. Repeat for all 8 spaces. Sl st to join (8 layered petals).
Round 16 :
Ch1, sc in each st around the petal base to anchor layered petals (approx 48 sc). Sl st to join. Fasten off red and weave in ends on backside.
Info :
If you'd like extra height on the red petals to match the photo, consider working Round 12 with a hook one size larger, then settle back to main hook for the surrounding rounds so the petals puff slightly above the background.
Round 17 :
Join cream (main ground color) in any st on the outer round. Ch3 (counts as dc), work 2 dc in same st, *sk 2 sts, (3 dc, ch3, 3 dc) in next st (creates 8 shell points across the 48-st circle)* repeat around so you create 8 large shell groups separated by sk2 spaces. Sl st to top of starting ch3 to join. After this round you will have a clear radial star framing the poinsettia.
Round 18 :
Ch1, sc in first dc, *ch4, sk across the next 3 dc forming a ch-4 loop over each shell, sc in center stitch between shells* repeat around to create 8 open spaces. Sl st to join.
Info :
This is the start of the cream circular ground that gives the medallion its lacy halo. Keep stitch counts accurate; you should have 48 foundation stitches still accounted for even though grouping makes shells.
Round 19 :
Working into each ch4 loop: work (sc, hdc, 3 dc, hdc, sc) in each ch4 loop to make small fan motifs (8 fans). Sl st to join. Fasten off cream if you will work outer rounds separately.
Round 20 :
Rejoin cream. Ch1, sc in each st around (maintain the same number of main anchor points — you will be working 48 sc around). Sl st to join.
Round 21 :
Ch3 (counts as dc), *2 dc in next st, ch1, skip 1, dc cluster of 3 in next st, ch1* repeat around to add texture and little chain fans between the radial points. Join and fasten off.
Info :
After Round 21 your large medallion is essentially complete: a gold center, green inner sepals, red layered petals and a grounded cream lace circle. Block each medallion to 13-14cm across and pin petals and outer shells to shape before drying; use steam or spray-blocking for cotton yarn.
— Leaf Motif (Make 10-12 for connectors) :
Round 1 :
With dark forest green, ch6, sl st to first ch to form small ring or work 6 sc in magic ring (6). Join (6).
Round 2 :
Ch1, inc in each st around (12). Sl st to join (12).
Round 3 :
Ch1, (1 sc, inc) x6 (18). Sl st to join (18).
Round 4 :
Ch1, (2 sc, inc) x6 (24). Sl st to join (24).
Info :
This small disk will be the base of the leaf. We will elongate it into a pointed leaf using successive rounds of shaping and post stitches.
Round 5 :
Ch3 (counts as dc), dc in next 5 sts, ch2, turn (we will form a single elongated leaf by working back and forth across half the round) — now working back across the half, (dc in next 6 sts, ch2) fasten off other half. You have created a short tab for leaf shaping; rejoin at wide base.
Round 6 :
Rejoin at base, sc around entire small disk (24 sc) to tidy. Sl st to join.
Round 7 :
Working on the elongated tab: join lighter olive at the tip of the tab, ch1, sc along tab, hdc, dc, (tr, dtr, tr) at center point, dc, hdc, sc back down to base; fasten off. This forms a raised central vein and point.
Round 8 :
Rejoin dark green around the base and work (sc, ch3, sl st) into six evenly spaced base stitches to create small loops for joining to the cream ground later. Fasten off and weave in ends.
Info :
Leaf motifs will be worked in two tones for depth: dark base and lighter highlight for the vein. Make leaves slightly cupped by stretching them lightly while placing small pins during blocking.
— Berry Cluster (Make clusters to place between medallions) :
Round 1 :
With red, ch6, join to form ring or mr with 6 sc (6). Sl st to join (6).
Round 2 :
Ch1, inc in each st around (12). Sl st to join (12).
Round 3 :
Ch1, (1 sc, inc) x6 (18). Sl st to join (18).
Round 4 :
Ch1, sc in each st around (18). Sl st to join.
Round 5 :
Using tapestry needle and small red beads, thread 4-7 red beads onto sewing thread and attach them in a small cluster onto the top of the puffed disk by passing needle through the disk multiple times and anchoring beads with small secure knots on the back. Alternatively crochet tiny balls: make 3 small 6-sc balls and sew together as a cluster.
Info :
Berry clusters are dimensional: you can use wooden or ceramic red beads (as pictured) or crochet tiny bobble rounds. If using beads, pre-thread them on fine thread for easier sewing and secure each bead with an extra anchor stitch through the motif to prevent shifting.
— Connector / Lace Panel (Make multiple to link medallions) :
Round 1 :
With cream, ch8, sl st to form ring or mr with 8 sc (8). Join to make little wheel (8).
Round 2 :
Ch1, (sc, ch3) x8 around to create 8 ch3 loop points. Sl st to join (8 loops).
Round 3 :
Work into each ch3 loop: (sc, hdc, 3 dc, hdc, sc) to form 8 mini fans. Sl st to join.
Round 4 :
Ch1, sc in each st around to create tidy border (approx 32 sc). Sl st to join.
Round 5 :
Ch4 (counts as tr), *sk next st, (tr, ch2, tr) in next st to make small tr cluster arch* repeat as needed across to create gentle arches. Fasten off cream and weave in ends.
Info :
These connector panels are worked in sets of three between main medallions in the pictured runner: a small lace diamond, a leaf cluster and a berry cluster alternate to create visual rhythm. Block each connector flat and pin to the medallion edges when assembling.
— Small Star Accent (Make 10-12) :
Round 1 :
With red, make mr, ch1, 6 sc in ring (6). Sl st to join.
Round 2 :
Ch1, (1 sc, inc) x3 (9). Sl st to join (9).
Round 3 :
Ch1, *ch4, sl st into next sc to form 3 small loops spaced across the disk* repeat 3 times creating a 6-pointed star shape. Fasten off and lightly block into star shape. Use these as filler accents between medallions.
Info :
Small star accents give a delicate geometric contrast to the organic petal shapes. Use them in alternating spaces to maintain a balanced edge visually.
— Outer Border & Edging (Work after joining medallions) :
Round 1 :
Once five medallions are joined and leaf/connector motifs placed, join cream at any outer edge stitch. Ch1, sc evenly along the exposed perimeter working 1 sc for each visible stitch across motifs (this consolidates the perimeter for a uniform border). Exact count varies with join pattern; maintain even spacing.
Round 2 :
Ch3, *sk 2 sc, (5 dc cluster in same st), sk 2 sc, ch3, sc in next st* repeat across to create repeating scallop arches. This will create triangular scalloped points at medallion intersections. Join and fasten off cream.
Round 3 :
Change to red. At each scallop apex, join red and work (ch3, (dtr, tr, dtr) all in same apex stitch to form pointed red loops topped by small star tips). Sl st to anchor at base of next scallop. Repeat across full perimeter to echo the red edging seen in the photo.
Round 4 :
Ch1, sc around all red points to tidy edges and create small foundation loops for bead work. Fasten off red and weave in ends.
Info :
When crocheting the border, maintain consistent tension and space your scallops evenly — pin the whole runner to a blocking board in full shape and stitch the border while pinned if you like to ensure border follows the pinned silhouette.
Round 5 :
With gold metallic thread and a 2.5mm hook, work tiny beaded loops at each red apex: ch8, slide on one gold bead (or 3 small seed beads) onto thread between ch4 and ch5 using beading needle, sl st to apex. Fasten off gold and secure bead by sewing through the base 2-3 times. Repeat at every apex.
Info :
Gold bead loops create the tiny shiny beads visible at each pointed edge. Use small metal or glass seed beads; pre-thread onto the metallic thread for easier placement. Secure each bead with a hidden stitch on the back to prevent loss during cleaning or handling.
Round 6 :
Final finish: with cream, work one more sc round over the border edge if you want a stronger border, or skip to blocking for a softer look. Weave in all ends carefully and trim close to fabric once secure.
— Beaded Accents & Final Touches :
Info :
Sew the red berry clusters into junction spaces between medallions. Thread a beading needle with fine matching thread, pin the cluster in place and sew through the motif and cluster base several times. Add an occasional gold seed bead around the centers of the poinsettia for sparkle by stitching them individually onto the gold center round.
Info :
To match the picture, add three small red beads grouped together at alternate connector positions to create the clustered berry look. Use small knots and a dab of clear fabric glue if desired for extra security (test glue compatibility with yarn first).
— Blocking & Finishing :
Info :
Gently wet-block each medallion then pin them to exact shape (13-14cm diameter) with outer scallop points pinned out. Allow to dry fully. When all pieces are dry, assemble using the join-as-you-go method described in Assembly instructions below or use whip-stitch to sew motifs together through the back loops only so front joins remain invisible.
Info :
Press beads with care; do not iron over beads. If necessary press the back of the runner with a cloth and low heat to flatten any small lumps after sewing beads in place.
This festive table runner brings holiday spirit with classic poinsettias, rich greens and shimmering gold accents. Each impeccably detailed medallion and beaded edge works together to create a showpiece that makes every table feel celebratory. The layered petals and textured leaves catch the light beautifully, and the heirloom quality of the finished piece makes it a joy to display or gift. 🧶🌟 Add this runner to your holiday décor and enjoy the warm handcrafted charm it brings to your table. ✨