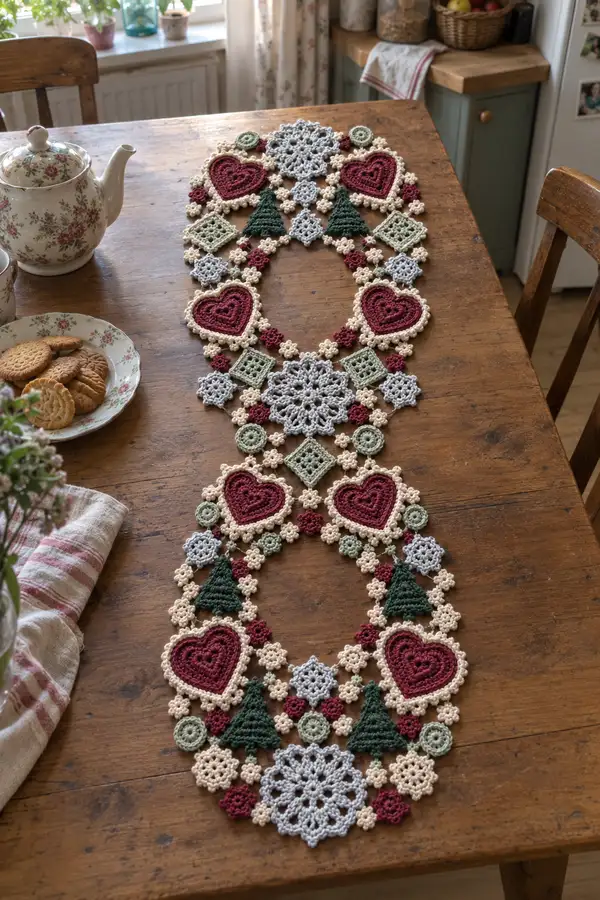
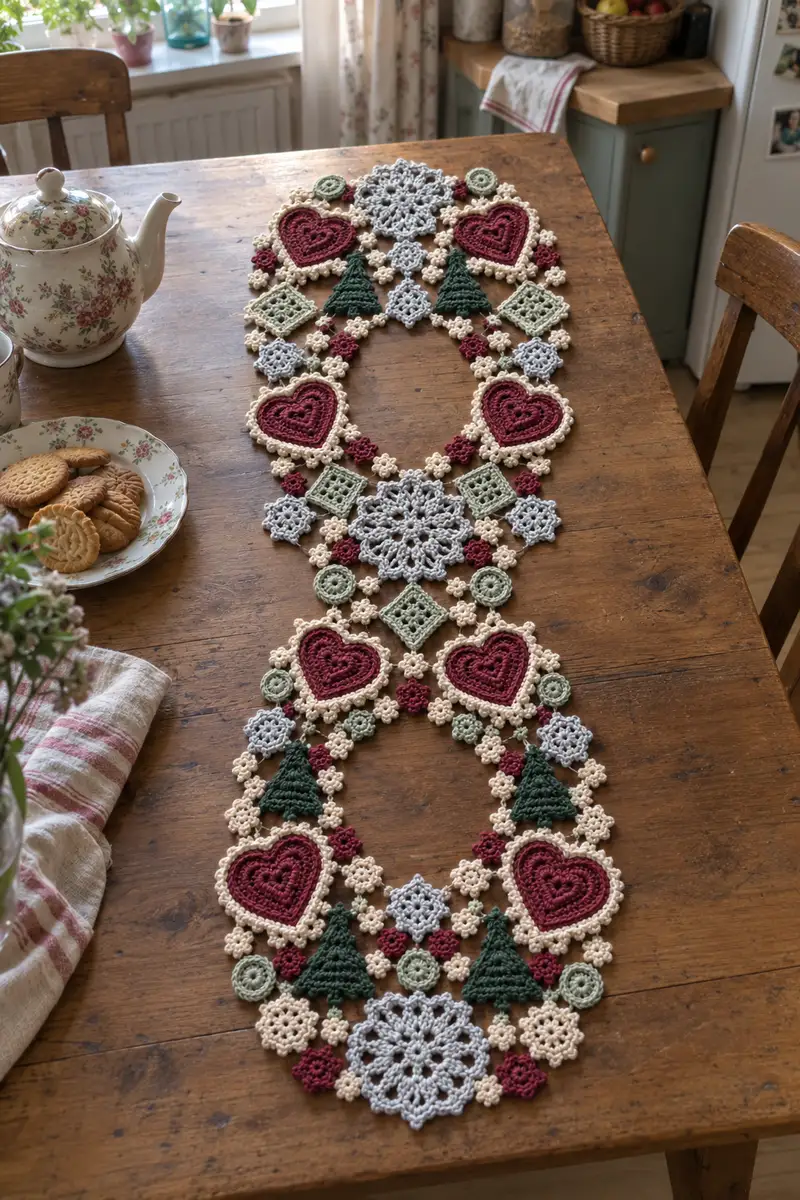
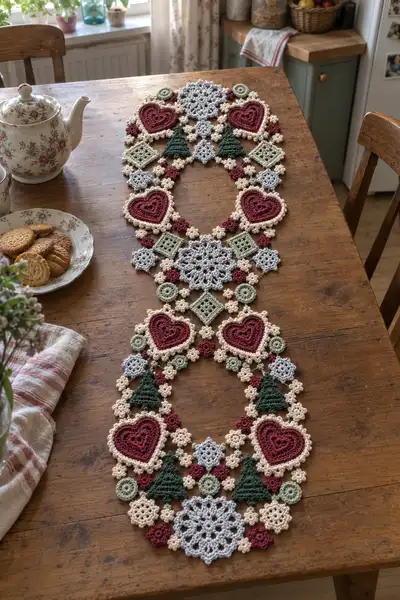
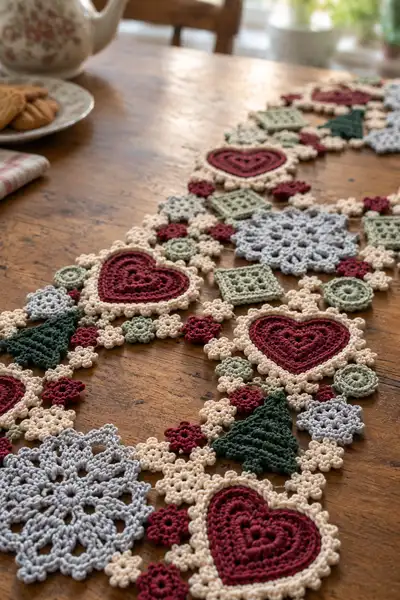
Create a charming Scandinavian-inspired Christmas table runner made from individual crocheted motifs joined into a delicate lace runner. This pattern features deep burgundy hearts, soft sage diamonds, forest green trees, pale grey snowflakes and creamy joiner flowers to create a warm, vintage holiday table centrepiece. The motifs are worked separately then crocheted together for a flexible, flat runner that lays beautifully on a wooden table. Detailed motif instructions and joining techniques included.
Progress Tracker
0% Complete
— Overview & Notes :
Info :
Make motifs slightly smaller or larger by changing hook size one step. Maintain consistent tension; weave ends as you go for neater joins. Photos show a runner with mirror symmetry: plan motif order before joining. Block motifs flat and pin carefully to match edges for best assembly.
— Materials & Gauge :
Info :
Working gauge is not critical; aim for crisp stitch definition. Using the stated DK yarn and 3.5mm hook, a large snowflake motif measures approximately 9.5 cm across; heart motif approx. 8 cm across; triangle tree approx. 6.5 cm tall. Sample and block to match these proportions if you want the same finished size.
— Large Snowflake Motif (make 4) :
Round 1 :
ch 4, join with sl st to form a ring, ch 3 (counts as first dc), work 11 dc into ring, join with sl st to top of ch-3 (12 dc)
Round 2 :
ch 3, dc in same st, ch 2, *2 dc in next st, ch 2; rep from * around, join with sl st to top of ch-3 (24 dc groups / 12 ch-2 sps)
Round 3 :
sl st into first ch-2 sp, ch 3, (2 dc, ch 2, 3 dc) into same ch-2 sp (shell made), *skip next 2 dc, (3 dc, ch 2, 3 dc) into next ch-2 sp; rep around, join with sl st to top of ch-3 (12 shells)
Info :
Ensure shells are blocked open; this round starts the lacy arms of the snowflake. Use stitch marker at the start of the round if needed.
Round 4 :
ch 1, sc in same st, *ch 5, sc in center dc of next shell; rep around to create picot-linking chains, ending ch-5, join with sl st (12 ch-5 links)
Round 5 :
Working into each ch-5: (sl st, ch 3, 2 dc, ch 3, sl st) into ch-5 (creates pointed petal), repeat for all 12 points, join with sl st (12 petals)
Round 6 :
sl st to base of a petal, ch 1, sc in same st, *ch 4, sc in base of next petal; rep around, join with sl st (12 ch-4 loops)
Round 7 :
Into each ch-4 loop: (sc, hdc, 3 dc, hdc, sc) to form raised scallop; rep around, join with sl st (12 scallops)
Round 8 :
ch 1, sc in same st, *ch 6, sc in center of next scallop; rep around, join with sl st (12 ch-6 loops)
Info :
Change to cream for outer decorative layer if you want a contrasting edge. Carry color inside if working several motifs consecutively to avoid many ends.
Round 9 :
Using cream: into each ch-6: sl st, ch 3, 4 dc, ch 3, sl st to create bold petals; rep around, join with sl st (12 larger petals)
Round 10 :
ch 1, sc in same st, *ch 3, picot (ch 3, sl st back into ch-1 loop), sc in next petal base; rep around to add picot points between petals; join with sl st
Round 11 :
sc evenly around the motif to tidy edges: work approx. 72 sc spaced evenly (final count depends on tension) to create a consistent border (approx. 72)
Round 12 :
ch 4, sl st into every 6th sc to add small chain-loops for join points; rep around creating 12 chain-loop join points; finish off and weave ends
Info :
Block flat to 9.5 cm across. Pin each petal and spray or steam lightly. These motifs are placed at the runner centre and ends, so make 4 total and block before joining.
— Heart Motif (make 8) :
Round 1 :
With burgundy, mr, ch 1, 6 sc in ring, pull tight, join with sl st (6)
Round 2 :
ch 1, 6 inc (12)
Round 3 :
(1 sc, inc) x 6 (18)
Round 4 :
(2 sc, inc) x 6 (24)
Round 5 :
(3 sc, inc) x 6 (30)
Round 6 :
ch 2, turn your work and work along one side to shape the heart top: 1 hdc in next 6 sts, 3 dc into next 2 sts to round the top of the heart, hdc next 6 sts, ch 2 and join to remaining rounds to complete curve (continue to next round) (30)
Info :
The heart shape is created by working across the flat disc then switching to curved rounds to form the lobes. Use stitch markers at the two lobe apexes to keep symmetry.
Round 7 :
Round the lobes: 3 dc in apex stitch, 2 dc in next, 1 dc next, sl st across center between lobes, repeat on opposite side to form a heart curve; maintain total approx. 30 stitches around shape
Round 8 :
ch 1, sc evenly around heart edge, increasing slightly at curves to maintain flatness (approx. 34 sc)
Round 9 :
Change to cream: ch 3, *(picot: ch 3, sl st into base), skip 1 sc, sc in next) repeat around to create a lacy picot trim (approx. 34 picots)
Round 10 :
Into each picot: sl st, ch 4, sc into picot, sl st back to motif - this creates cluster loops; finish off and weave in ends
Round 11 :
Optional: Add a final decorative round in cream using (sc, ch1, sc) in each sc to make tiny flower bumps around edge (approx. 34 tiny bumps)
Info :
Block hearts lightly, pinning outline to flatten lobes. Make 8 hearts for the runner in the order shown in the photo. Keep counts consistent so hearts mirror each other.
— Triangle Christmas Tree Motif (make 8) :
Round 1 :
With forest green, ch 6, sl st to form ring, ch 3 (counts as dc), work 5 dc into ring, ch 1, join with sl st (6 dc)
Round 2 :
ch 3, dc in same st, dc in next st, (2 dc, ch 1) in next st, dc in next, dc in next, join with sl st (9 dc including ch-3)
Round 3 :
ch 3, (2 dc) in first st, dc in next 3 sts, (2 dc, ch 1, 2 dc) in central apex st to widen triangle, dc in 3 sts, join with sl st (approx. 14 dc)
Round 4 :
ch 1, sc across base edge to tidy, ch 2, turn and work 3 rows of dc decreases to create tree tiers: Row A: ch 3, dc across 14 sts; Row B: ch 3, dc10; Row C: ch 3, dc6, finish off for point (this is worked as short rows to shape triangular tree)
Info :
If you prefer a textured tree, work Rows A-C in front loops only (FLO) to create ridges for a knitted branch look. Block flat with top point centered.
Round 5 :
Join cream to triangle base edge and work (sc, ch 2, sc) along lower edge to create little decorative loops for joining points (approx. 10 loops)
Round 6 :
Optional trunk: use sage or brown and work 3 sc into base center, fasten off and weave in ends (trunk measures approx. 1 cm)
Round 7 :
Decorative top: attach a tiny burgundy rosette (see rosette pattern) at top apex using a few sl st to sew on
Info :
Make 8 trees. Keep triangles mirror-symmetric so that paired trees face toward the centre of each runner section.
— Diamond Square Motif (make 10) :
Round 1 :
With sage, mr, ch 3 (counts as dc), work 11 dc into ring, join (12 dc)
Round 2 :
ch 3, (2 dc) in same st, *ch 1, skip next dc, 3 dc in next dc; rep around to create little clusters spaced by ch-1 sps (approx. 24 dc clustered)
Round 3 :
Turn square on point: ch 1, sc into center top of cluster, ch 4, sc into opposite cluster center; rep 4 times to create diamond points (4 ch-4 loops)
Round 4 :
Into each ch-4 loop: (sc, hdc, 3 dc, hdc, sc) to form scalloped points; finish off and weave ends (creates square-on-point motif approx. 4.5 cm diagonal)
Info :
These diamond squares fill the negative space and add geometric contrast. Make 10 squares and block them as diamonds (pin corners evenly).
— Small Circular Rosette (make 16) :
Round 1 :
mr, ch 1, 8 sc in ring, join (8)
Round 2 :
*ch 2, sl st in next st; rep around to form small chain loops (8 loops), join
Round 3 :
Into each loop: sl st, ch 3, 2 dc, ch 3, sl st; rep around to create petals (8 petals), join and fasten off
Info :
These tiny rosettes are used as accent joiners and filler motifs. Make 16, in sage and burgundy to match the layout shown.
— Tiny 5-Petal Flower Connector (make 48) :
Round 1 :
mr, ch 1, 5 sc in ring, join (5)
Round 2 :
ch 1, *ch 3, sc in next st; rep around to create 5 ch-3 loops, join
Round 3 :
Into each ch-3: sl st, ch 3, 2 dc, ch 3, sl st (create tiny puff petal), rep around, join and finish off (5 petals)
Info :
These clusters are the primary joiners which connect larger motifs via single crochet or sl st. Make many of these in cream to echo the lace effect in the photo.
— Small Rosebud (tiny 4-round rosettes) (make 24) :
Round 1 :
mr, ch 1, 6 sc in ring, join (6)
Round 2 :
*ch 2, sl st in next st; rep around to make 3 ch-2 loops, join
Round 3 :
Into each loop: sl st, ch 3, 2 dc, sl st; rep around to make tiny three-petal rosettes, join and finish off
Info :
These tiny rosebuds are worked in burgundy or cream to add color pops between motifs; make 24 to scatter symmetrically across the runner.
— Joining & Assembly (extensive step-by-step rounds) :
Info :
Before joining, block all motifs flat. Lay motifs out on a board in final layout — the photographed runner is built from two mirrored panels joined at the centre with an oval gap between paired snowflakes. Use pins to secure motif positions and confirm spacing; this avoids surprises during crocheted joining.
Round 1 :
Using cream, join at a selected join point: attach yarn with sl st to one motif chain-loop, ch 1, sc into same loop, ch 3, sc into corresponding loop on adjacent motif to create a bridge (this is the basic two-motif link)
Round 2 :
Repeat the bridge link around the motifs: work (sc in motif A loop, ch 3, sc in motif B loop) at each planned join point to create an even linkage; where motifs touch at three points, create triangular linking clusters: sc A, ch 2, sc B, ch 2, sc C to create stable triple joins
Info :
For stronger joins across table traffic zones, work a second pass of single crochet across connections: sc through both motif loops together to create a flatter seam.
Round 3 :
Where three motifs meet (for example where a heart, square and snowflake converge) work a tiny 5-petal flower connector: attach yarn in center, form mr, work 5 sc, finish off; with remaining tail sew connector into place with whip stitch through the adjacent motif loops (this hides join and adds a decorative button-like join)
Round 4 :
For long straight joins between repeats, work a row of sl st across opposing chain-loops to form a flat seam; keep tension even to avoid cinching; aim for a seam width of approx. 4-5 mm
Info :
Always pin and check runner curvature after joining every 6-8 motifs. Blocking after partial assembly helps the runner remain flat and will reveal any skewing to correct before further joining.
Round 5 :
To finish internal oval openings (the central negative spaces shown), join motifs around the oval using alternating sc and ch-3 bridges; where a wider gap occurs, add an extra chain to maintain a gentle curve and avoid pulling motifs inward
Round 6 :
Reinforce all joins by weaving in ends on the wrong side and working an optional round of slip stitches across join seams to flatten and tidy edges (work sl st through both motif loops where two motifs meet)
Round 7 :
Edge tidy: work a round of sc around the entire runner, working 2 sc in outer corners and scallop places to maintain a flat border; count and space increases evenly (estimated total sc for outer edge approx. 240-300 sc depending on final size)
Info :
This joining method intentionally uses decorative small flowers as connectors to mirror the photograph. You may sew motifs with mattress stitch if you prefer invisible seams, but the crochet joiners add vintage charm.
— Decorative Border & Final Edging (detailed rounds) :
Round 1 :
With cream, sc evenly around outermost edge of the assembled runner to create a neat foundation (see previous round for count). Work 2 sc in each point where a motif edge projects to preserve shape
Round 2 :
ch 3, skip 1 sc, sc in next sc creating a tooth-like pattern around the runner. Continue spaced evenly for entire perimeter
Round 3 :
Into each ch-3 space: (sl st, ch 4, sl st) to create tiny looped edging; these act as decorative picots and soften the outer silhouette
Round 4 :
Work a final decorative scallop: *skip next two loops, 5 dc in next loop, skip two loops, sl st in next; rep around to make gentle shell scallops (make adjustments to keep shells symmetrical)
Info :
For a crisp finish, block again after edging. Use pins spaced closely along scallops to preserve curve. Press gently if yarn allows or use spray blocking method.
— Final Assembly Checks & Finishing Touches :
Round 1 :
Weave all ends neatly on the wrong side of the runner; use a tapestry needle and weave along the join lines for 3 cm to secure tails, trim excess
Round 2 :
If any joins feel loose, reinforce by sewing through both motif layers with matching yarn, using a mattress-stitch style whip with small invisible stitches
Round 3 :
Final blocking: lay the runner flat on blocking board, pin to shape, and mist lightly. Allow to dry completely before removing pins to guarantee runner stays flat when in use
Info :
Label the underside discreetly with a small fabric tag if you plan to gift the runner. Store flat or rolled to avoid creases; if placed under heavy tableware, use a table protector underneath to avoid stretching.
Completing this runner is a delightful, hands-on way to add handmade holiday charm to your home! Each motif stitches together like a small present and the overall result reads like a cozy vintage heirloom. Blocking and careful joining bring the entire runner to life, and the finished piece makes a beautiful table centerpiece or thoughtful gift. 🧶🎁✨